This site is supported by our readers. We may earn a commission, at no cost to you, if you purchase through links.
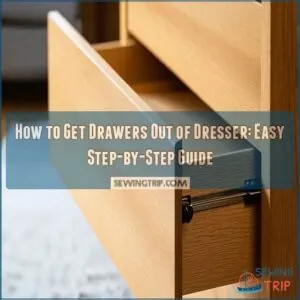
Here’s where you channel your inner weightlifter—lift slightly and give a gentle tug.
If it’s not budging, inspect for any release levers often found on metal slide drawers.
Press these while pulling out.
With wooden slides, a firm upward lift usually does the trick.
Don’t forget to empty them first!
Want to handle delicate antique drawers?
That’s another ballgame, best saved for later.
Getting these out is like coaxing a stubborn cat from under the bed—you’ll get the hang of it!
Table Of Contents
- Key Takeaways
- Drawer Mechanics and Components
- Safety Precautions for Drawer Removal
- Preparing to Remove Drawers
- Removing Standard Drawers
- Removing Drawers With Special Features
- Special Considerations for Antique and Specialty Drawers
- Removing Drawers With Metal Glides and Levers
- Removing Drawers With Center Mount Slides
- Aftercare and Maintenance for Drawers
- Troubleshooting Common Drawer Issues
- Frequently Asked Questions (FAQs)
- Conclusion
Key Takeaways
- Identify the type of slide or mechanism your drawer uses; metal slides may have release levers, while wooden slides often require a lift and tug.
- Clear your workspace of obstacles and wear protective gear like gloves to prevent injuries during the removal process.
- Gently extend each drawer fully; if there are levers or buttons, press them to release the drawer, ensuring not to force it.
- Regularly inspect and clean drawer tracks to prevent debris build-up, using lubrication for smoother sliding.
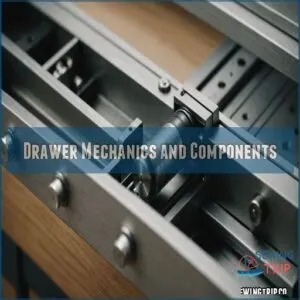
Drawer Mechanics and Components
Before you wrestle with that stubborn drawer, let’s understand how it works!
Knowing the different types of slides and components—like rails and mechanisms—will make removing your drawers a breeze.
Types of Drawer Slides
Understanding drawer slides is like reading a map to find buried treasure—essential and fascinating.
- Center slides: These hide under the drawer and stay out of sight.
- Bottom mount slides: Attached below, they’re the rock-stars of stability.
- Metal glides: Known for durability, they can handle heavy bags.
- Ball bearing slides: Smooth as butter, they’re great for hefty drawers.
Common Drawer Components
Every drawer’s got its hidden secrets—slides, rails, and release mechanisms all play a part.
Drawer types vary; center slides hide underneath, while bottom mounts stay snug on the sides.
Watch out for your drawer’s weight capacity, whether it’s heavy-duty metal or a classic wood design.
Spotting the right components can make drawer removal a breeze.
Safety Precautions for Drawer Removal
Before you start pulling out drawers, make sure you’re wearing protective gear to save your hands from any unexpected splinters.
Clear your workspace and watch out for tripping hazards, because nobody wants a surprise dance with a dresser.
Wearing Protective Gear
Before diving into drawer removal, dress the part to stay safe and comfy.
Gear up with:
- Gloves: Protect against splinters and sharp edges.
- Safety Glasses: Consider purchasing a pair from a reliable supplier like drawer removal safety glasses to keep dust and debris out of your eyes.
- Dust Masks: Prevent inhaling small particles.
- Work Boots: Shield your feet from falling objects.
Stay safe, dress smart!
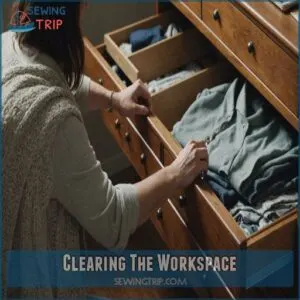
Clearing The Workspace
Start by clearing the floor space to remove obstacles.
This makes it easier to maneuver without mishaps.
Protect surfaces by laying down a soft blanket or tarp to guard against scuffs.
When dealing with specific types of furniture, such as the IKEA ALEX drawers, it’s important to follow the correct removal process, like removing IKEA ALEX drawers.
Make sure there’s adequate lighting to clearly see what you’re doing.
Remember, safety first! A tidy workspace means fewer surprises and a smoother drawer removal process overall.
Preventing Tripping Hazards
Why risk a tumble while getting those drawers out?
Make sure you’re stepping safely with these quick steps:
- Clear pathways: Move furniture and clutter to the side to create a wide, walkable space.
- Secure cords: Tuck away any loose cords that could trip you up.
- Ensure adequate lighting: Brighten the area so you can see any floor hazards.
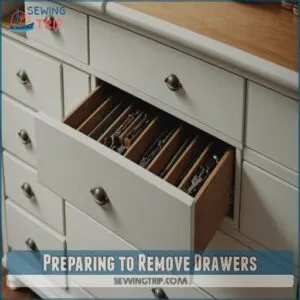
Preparing to Remove Drawers
Before you start wrestling with your dresser drawers, gather your tools—a screwdriver might be handy.
Then, take a quick peek at your drawer slides to see how they’re built; this’ll make the whole process much smoother.
Gathering Necessary Tools
Think of gathering your tools like prepping for a mini adventure. Tool selection is key.
Grab a trusty screwdriver, your choice of type, and a handy measuring tape – remember to choose a screwdriver that won’t strip screws, like a 2 Phillips screwdriver.
Don’t forget safety glasses, they’re your hero against mishaps.
Clear a work surface for efficient action.
Here’s your tool checklist:
| Tool | Purpose |
|---|---|
| Screwdriver | Unscrew mechanisms |
| Measuring Tape | Check dimensions |
| Safety Glasses | Protect your eyes |
Inspecting Drawer Slides
As you’re gearing up with tools, get ready to inspect the drawer slides.
Look for signs of wear, track debris, and alignment issues.
This helps make sure the slides move smoothly.
Check if they need lubrication—often a small, overlooked step but key for performance.
A quick glance now saves a lot of hassle later!
Identifying Locking Mechanisms
Spotting hidden mechanisms in your dresser can feel like a treasure hunt.
First, fully extend the drawer and look for release tabs or lever locations.
These might be on the sides or underneath.
Drawer types vary, so peek at potential common problems, like small plastic tabs blocking the way.
Once identified, freeing your dresser becomes a smooth task.
Removing Standard Drawers
To get standard drawers out of your dresser, start by releasing any mechanisms or levers you find along the sides.
Once released, gently pull the drawer out while maintaining pressure on the release mechanisms for a smooth removal.
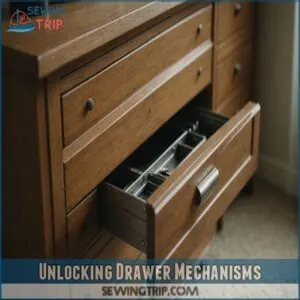
Unlocking Drawer Mechanisms
You’ve got your tools and workspace ready, so let’s tackle opening those drawer mechanisms.
Look for drawer locks or hidden levers along the slide.
Depending on slide types, press any release buttons on the sides.
With a gentle pull, you might feel it give way, allowing you to ease the drawer off smoothly without any fuss.
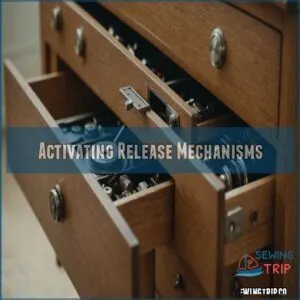
Activating Release Mechanisms
Once opened, find the release mechanism.
These handy little helpers come in various styles: levers, buttons, or even hidden catches.
For levers, press firmly; buttons usually require a push.
Sometimes, you might need a little wiggle to free the drawer.
Don’t force anything; a gentle approach works best.
If you’re stuck, a quick online search for your dresser model might offer solutions.
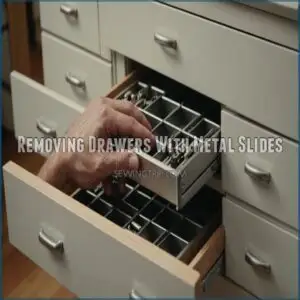
Removing Drawers With Metal Slides
Wondering how to tackle those stuck drawers? Getting them out is a cinch if you follow these steps for metal slide drawers.
- Extend the Drawer: Pull it all the way out until it stops.
- Find Release Levers: Locate them on each side of the slides.
- Press Simultaneously: Squeeze both levers together.
- Carefully Remove: Gently pull the drawer straight out.
Keep the slides aligned to prevent wear.
Removing Drawers With Special Features
When dealing with drawers featuring special mechanisms like bottom slides or full extension slides, it’s important to understand their unique removal steps.
By identifying and engaging specific release levers or tabs, you can safely and efficiently remove these drawers without a hitch.
Drawers With Bottom Slides
Bottom slides are like hidden helpers under the drawer.
Start by checking if there are any buttons or levers; these are your keys.
If you don’t see any, wriggle and lift the drawer out with care.
Listen for a "click" to know you’ve released it.
Got problems? A little pressure might help—just don’t break anything!
Drawers With Center Slides
Imagine tackling those drawers with center slides.
First, check for any locking mechanisms underneath, and consider the type of center mount slides used, such as those found at center mount slides.
Gently press down, and if stuck, give it a little wiggle—like coaxing a reluctant friend to a dance floor.
Center mount slides offer hidden hardware for a clean look, but be mindful of their weight capacity as you handle them.
Drawers With Full Extension Slides
How do you tackle full extension slides?
Start by pulling the drawer out fully; look for a lever or button on the slide.
Press it to release the drawer.
Slide weight capacity varies, so make sure it’s safe.
Troubleshoot jammed slides with gentle jiggling if needed.
Familiarize yourself with common slide brands for easy DIY slide repair.
Drawers With Stops
Here’s where things get a bit interesting. Drawers with stops need a gentle touch. Fully extend the drawer until it pauses against the stop.
Look for the slide’s button or lever, push it, and keep the drawer at an angle as you pull it out.
Slide it slowly to avoid any sudden resistance or jams.
Special Considerations for Antique and Specialty Drawers
Antique and specialty drawers can be trickier! You’ll need to pay extra attention to delicate wood-on-wood slides or any anti-tip mechanisms before you start pulling.
Wood-on-Wood Drawer Slides
Pulling antiques? Those wood-on-wood drawer slides have a mind of their own.
History reveals these vintage beauties sometimes stick.
Consider checking for friction disconnect systems that might be causing issues.
Follow these DIY repair tips to liberate them:
- Apply lubrication like candle wax for smooth sailing.
- Gently wriggle the drawer to find its groove.
- Check for wood types causing friction and sand them lightly.
There you go, slide smoothly!
Drawers With Anti-Tip Cables
As you explore the quirks of antique dressers, you might find anti-tip cables—those trusty safety lines preventing tip-overs.
Start by checking the cable type; often they’re secured with clips or screws.
Carefully unscrew or unclip them, keeping safety risks in mind.
Replace any worn cables to guarantee stability.
With these DIY steps, you’ll manage safety like a pro.
Maintaining Drawer Integrity
Keeping your antique drawers intact is like preserving treasure.
Make sure drawer alignment by checking for skewed tracks.
Use slide lubrication to maintain smooth motion.
To achieve smooth drawer motion, consider upgrading to heavy-duty silent drawer glides.
Regularly dust and polish for wood care.
Limit drawer weight to prevent damage.
Don’t forget pest control—mothballs work wonders!
These steps keep your drawers functional and aesthetically pleasing without hassle.
- Align tracks carefully
- Lubricate slides
- Dust and polish wood
- Limit weight capacity
- Use pest repellents
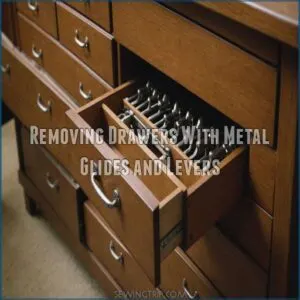
Removing Drawers With Metal Glides and Levers
Getting drawers out with metal glides and levers is simple if you know the trick. Center those track levers, press them simultaneously, and gently pull the drawer out.
Centering Track Levers
To make sure the track levers are properly centered, remove drawers with metal glides and levers.
This alignment allows easy removal.
Adjusting these makes drawer handling as smooth as sailing.
| Task | Tip |
|---|---|
| Center the levers | A little nudge goes a long way |
| Check track types | Different tracks, different tricks |
| Leverage technique | Use steady, firm motions |
| Proper alignment | Balance is key |
| Release force | Gentle pressure does wonders |
Pressing Levers Simultaneously
Imagine tackling a stubborn dresser drawer.
It’s time for some teamwork—your hands are ready.
Place them on the track levers, applying firm, simultaneous pressure.
Feel the magic as lever pressure aligns with drawer track positioning.
This drawer removal technique requires mastering the art of symmetrical action, ensuring each lever releases in perfect harmony.
You’re one step closer to drawer freedom!
Pulling Out The Drawer
With both levers firmly pressed, gently pull the drawer straight out.
It might feel a little stuck at first – that’s normal!
A smooth, steady pull usually does the trick.
If it’s really stubborn, try a slight jiggle.
You got this!
Remember drawer safety; always be gentle to avoid damage.
Once it’s free, you’ve conquered drawer removal!
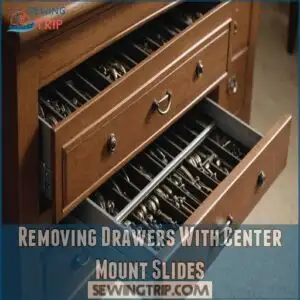
Removing Drawers With Center Mount Slides
To remove drawers with center mount slides, you’ll first need to inspect for any locking mechanisms and release them.
Gently pressing down on the drawer can help disengage it, allowing you to wiggle it free if needed.
Inspecting for Locking Mechanisms
Inspecting for locking mechanisms can seem tricky, but you’re in control!
Check these common spots:
- Side Rails: Sometimes hidden along the drawer’s sides.
- Underneath: Look underneath for center-mount styles.
- Back Edge: Feel along the back for sneaky tabs.
- Visual Cues: Identify levers or clips.
Spotting these can be your ticket to drawer freedom!
Releasing Pull-Out Guards
To tackle those tricky pull-out guards, start by gently pressing them down.
It’s like persuading a chihuahua off a comfy couch—patience and a little nudge are key.
Pull-out guard designs vary, but the trick is consistent: apply gentle force until you feel it release.
Just remember, these guards keep things safe, so handle them with care to avoid damage.
Disengaging The Drawer
Once you’ve dealt with any pull-out guards, it’s time to disengage the drawer.
Gently push down on the drawer while slightly wiggling it—like coaxing a dog reluctant to move.
If you encounter resistance, don’t force it.
Consider checking for hidden release mechanisms.
Remember, patience and careful handling help tackle common drawer problems without causing damage or frustration.
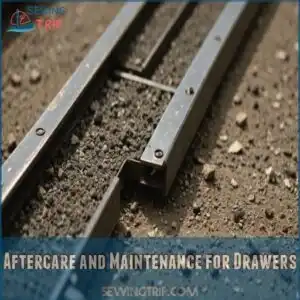
Aftercare and Maintenance for Drawers
To keep your drawers sliding smoothly, regularly inspect and clean the tracks for any debris or wear.
Use a little lubricant for easy motion.
Consider using mothballs to keep pests away.
Regularly Inspecting Drawer Tracks
Give your drawers some love by checking those tracks regularly.
Look for track wear and debris buildup, which can mess up slide alignment.
Spotted any track damage? Jump on it before it grows.
Keeping a close eye helps you catch issues early, ensuring smooth operation and avoiding pesky surprises later.
Think of it as your drawer’s maintenance date.
Cleaning and Lubricating Tracks
Regularly checking your drawer tracks is key.
Now, let’s clean them! Grab a soft brush and a slightly damp cloth. Gently wipe away dust and debris. For stubborn gunk, use a putty knife.
Then, apply a bit of lubricant—wax or silicone spray works great. This keeps things moving smoothly.
See? Maintaining your drawers is easier than you think!
Protecting Drawers From Pests
To keep pesky bugs out of your dresser drawers, think ahead! Add some cedar blocks or mothballs to naturally repel insects.
You can also repurpose fabric scraps into a creative project to use in your drawers, like a small sachet filled with lavender or cedar chips.
Here’s a handy list to keep your drawers pest-free:
- Sprinkle cedar shavings or use cedar blocks for a fresh scent that bugs hate.
- Add mothballs strategically along the edges.
- Use airtight containers for seasonal storage.
Troubleshooting Common Drawer Issues
When drawers get stuck or jammed, it can be frustrating, but don’t worry—you’re not alone.
We’ll guide you through practical steps to fix these common issues, and if you’re also experiencing problems with your sewing machine, understanding the importance of a properly functioning sewing machine shuttle hook can be essential in ensuring smooth operation, and even offer tips on reassembling any drawer parts.
Stuck or Jammed Drawers
Dealing with a stuck drawer can feel like wrestling an alligator.
First, gently wiggle the drawer back and forth to see if it loosens.
Check for obstructions—sometimes even dust can trip things up.
It’s also important to think about the ideal drawer size and height, like when choosing a crafting desk space, to ensure smooth operation.
If that doesn’t work, try drawer lubrication to coax it free.
Align the drawer properly and clean the tracks to ensure smooth operation in the future.
Drawer Reassembly Tips
Getting your drawer back in place can feel like putting a puzzle together.
Start by checking slide alignment to make sure it fits snugly.
Track cleaning is key—dust might be messing things up.
Look at the screw tightness because loose ones cause wobbles.
Finally, give it a gentle push to check drawer stability.
Voilà, you’ve got it!
Frequently Asked Questions (FAQs)
How do I remove a dresser drawer?
First, fully extend the drawer. Then, look for release levers or tabs. Press them, and gently pull the drawer out. It’s easier than you think!
How to remove drawers without a lever?
Just nudge the drawer out using a gentle wiggle and lift it slightly.
If it’s stubborn, check for hidden clips or tabs underneath.
Sometimes a little jiggle or a pull at an angle works wonders!
How to remove Dresser drawers with a bottom slide?
Check for any release buttons or levers.
If missing, gently wiggle the drawer while lifting slightly.
Listen for a click signaling release.
Make sure the drawer is completely disengaged before pulling it out.
Consider tilting if it feels stuck.
Do you need to manually remove drawers?
Removing drawers isn’t always manual—depends on the type.
Some have release levers or buttons, needing a bit of finesse.
For stubborn drawers, you might need a screwdriver or gentle wiggle to free them up.
How do I remove drawers from my Ashley dresser?
For your Ashley dresser, fully extend the drawer and find the release mechanisms—usually levers or tabs—at the side.
Press or lift them, and then gently pull the drawer straight out.
If stuck, slightly wiggle it.
How do you remove a drawer from a cabinet?
To remove a drawer from a cabinet, fully extend it and locate the release mechanism like levers or tabs.
Press these simultaneously while gently pulling the drawer out.
If it’s stuck, wiggle slightly for release.
How do you remove dresser drawers that won’t come out?
Extend the drawer fully.
Locate and press any release tabs or levers.
If stuck, jiggle gently while lifting slightly upward to bypass stops.
Use a flashlight to inspect hidden mechanisms.
Be patient; don’t force it.
How to remove dresser drawer with bottom center metal slide?
First, check for release levers or buttons on the slides.
If you find them, press them.
Then, gently pull the drawer out.
If it’s stuck, wiggle it a bit.
You got this!
How do you release a drawer slide?
Releasing drawer slides is no rocket science.
Fully extend the drawer,
find the tiny levers or tabs on each side,
squeeze or lift these tabs,
and gently pull the drawer out.
Voilà, freedom achieved!
How do you remove drawers without a lever?
Don’t stress if your drawers lack levers.
Wiggle and lift them gently once fully extended.
If stuck, try tilting the drawer slightly upwards while pulling.
For smooth removal, make sure there’s no debris blocking the slides.
How to remove drawers with broken slides?
Imagine dealing with a drawer that won’t budge because the slides are broken.
Wiggle the drawer gently while applying upward pressure.
Use a flat-head screwdriver to pry it carefully, being cautious not to damage the wood.
Can I remove drawers without tools?
Yes, you can remove drawers without tools.
Most drawers detach by fully extending them, then lifting up slightly or pressing side levers if present.
Wiggle gently if stuck.
No tools needed unless specific release mechanisms require them.
How to fix drawers that won’t budge?
When drawers won’t budge, here’s the fix: Shine a flashlight to spot any obstructing debris, tighten loose screws, or check slides for warps.
Sometimes, a gentle nudge or wiggle does the trick to set them free.
What if a drawer is stuck halfway out?
Check for something blocking the drawer, like a stray item.
Gently jiggle to free the slide.
If stuck, look for any visible levers or buttons to release.
Patience often wins over force in these situations.
Can damaged drawers be removed safely?
Damaged drawers? Proceed with caution! Gently try standard removal methods. If it’s really stuck, call a handyman; don’t force it. Prevention is key!
Conclusion
Mastering how to get drawers out of a dresser can feel like figuring out a secret club.
First, identify the type of slide or mechanism your drawer uses.
Whether it’s metal levers or classic wooden slides, a gentle lift or press could be your winning move.
Pay attention to any release levers or locking features.
Remember, patience is key—especially with antique pieces.
Keep your workspace clear, and soon, removing drawers will be as easy as pie.

