This site is supported by our readers. We may earn a commission, at no cost to you, if you purchase through links.
Greeting fellow organization-lovers! Have you ever been curious about how to remove Ikea ALEX drawers? We all know it can be a daunting task, but with the right step-by-step guide, you’ll have those drawers removed in no time.
To help streamline your next project of removing ALEX drawer sets from their frames and organizing them for storage or painting purposes, we’ve compiled this helpful set of instructions on how to do just that.
From the importance of cleaning out any items before removal and proper alignment techniques when reassembling them later on down to additional information about what makes an ALEX desk setup so unique – get ready for everything you need to know about removing Ikea Alex Drawers!
Table Of Contents
- Key Takeaways
- Step 1: Empty Drawer
- Step 2: Locate and Remove Screws
- Step 3: Clean and Organize Drawer
- Step 4: Reassemble Drawer
- Importance of Removing Items Before Removal
- Benefits of Drawer Organizers
- Proper Alignment and Gentle Screwing
- Additional Information on ALEX Desk Setup
- Importance of Removing Trapped Items in Drawers
- Frequently Asked Questions (FAQs)
- Conclusion
Key Takeaways

- Empty the drawer completely before starting the removal process.
- Remove the screws on each side of the drawer’s interior walls using an appropriately-sized screwdriver or socket wrench.
- Check stops and caster wheels for proper alignment before removing the screws and reassemble with gentle pressure and proper alignment.
- Use preventive measures like drawer organizers to organize better and prevent items from falling behind drawers.
Step 1: Empty Drawer
Before starting the process, make sure to empty out the drawer completely so that any items inside don’t get trapped during removal. Taking this precaution will ensure you’re able to properly organize your items and help reduce potential accidents.
To begin removing an IKEA ALEX drawer, locate and remove the screws on each side of its interior walls using a Phillips head screwdriver. These screws attach to metal rails, which provide an extra strong connection for reliable support in wood construction materials like those found in these drawer systems.
Once unscrewed, you can then pull or push straight outward on the drawer until it is released from its casing – just be careful not to jam any item between them while doing so!
Once removed, take time to clean up and organize all of your items, as well as inspect for damages caused by overstuffing or improper alignment with metal rail slots when reassembling earlier.
Lastly, align the rails back into the rail cavity before gently screwing in the screws with light pressure only. Otherwise, cross-threading could occur, resulting in irreparable damage and costing more money than necessary down the line when setting up the ALEX desk again after the repairs needed now due to misalignment issues previously encountered here today, sadly.
Step 2: Locate and Remove Screws
Now that the drawer has been emptied, it’s time to move on to the next step: locating and removing screws. Before starting, familiarize yourself with the type of screw used in IKEA ALEX drawers. These screws typically range from traditional Phillips head screws up to M6 metric hex bolts, depending on the age and model.
Once you’ve identified which size they are, use an appropriately-sized screwdriver or socket wrench (if applicable) to remove all of them from both sides of your drawer wall rails.
For added safety measures during removal, be sure that any stops or castor wheels are properly aligned before beginning this process too. An incorrect setup could cause damage if not taken care of first! Additionally, check out online assembly manuals or used furniture stores as additional resources if you need more help finding parts for your specific desk unit prior to installation steps here today.
Step 3: Clean and Organize Drawer
Once all screws have been loosened, it’s time to clean and organize your drawer for a neat finish. Reorganizing the contents of drawers is key to maximizing space and keeping items from getting trapped in hard-to-reach places.
It also aids drawer maintenance by preventing falls or item trapping that can occur over time with insufficient storage spaces.
When organizing your IKEA ALEX desk drawers, consider using two-column organization techniques such as bins or trays for flat materials like papers and folders. Store fabrics like clothes inside the bottom drawer set frame. Use shallow containers on top for small items so they are easily accessible yet safe from falling out when opening the drawers fully.
Finally, take advantage of any good storage space available within each individual compartment. Shelves provide great extra room while still maintaining an organized appearance overall.
Organizing your ALEX desk drawers not only keeps them tidy but also helps prevent lost items due to overstuffing, which can be difficult (if not impossible) to retrieve without removing entire sections of furniture pieces in order to do so! If you’re feeling overwhelmed at this task, then there are a variety of helpful online resources with guides specific to setting up these types of desks correctly, as well as recommended products designed specifically around their unique design features too! So don’t worry – no matter how much stuff you need stored away either temporarily or permanently – creating a functional home office setup is totally achievable with just some simple planning ahead beforehand.
Step 4: Reassemble Drawer
Reassembling the ALEX desk drawers is a breeze – you’ll be done in no time, even if it feels like an eternity! To do this properly, proper alignment of all rail components and gentle screwing are essential.
Firstly, make sure to align the rails correctly by lining up each drawer’s different length tabs with its corresponding slots in the base frame. Then match up your screws to their respective holes before tightening them lightly – over-tightening can cause cross threading which won’t hold firmly when finished.
If you need some help visualizing how everything should come together or just want a refresher on how to remove Ikea Alex drawers altogether, then head over to their website for step-by-step instructions plus video tutorials as well!
For those who may still feel overwhelmed at this task, there’s no need: online resources provide helpful guides specific for setting up these types of desks correctly along with recommended products designed around unique design features too.
This way, anyone can create a functional home office setup regardless of experience level or the amount they have stored away permanently or temporarily.
Following these steps will ensure success when reassembling IKEA ALEX desk drawers:
- Proper Alignment: Make sure all rail components line up correctly according to size
- Gentle Screwing: Use light pressure while screwing into place and avoid cross threading
- Rail Alignment: Line up each drawer tab’s slot in the base frame accordingly
- Screw Holes Match Up & Tighten Lightly: Place screws into the correct hole before tightening slightly
By following these simple guidelines, everyone is able to restore order from chaos within any IKEA ALEX Drawer system quickly without having lost items due to being trapped inside hard-to-reach places or risking misalignment during assembly.
What was once thought impossible has now become possible thanks not only to understanding but also actively utilizing organizational techniques such as two-column organization systems consisting of bins/trays, flat materials (paper/folders), shallow containers, small items, etcetera.
This creates a neat finish overall while preventing falls due to a lack of storage space available throughout compartments and shelves, further maximizing both convenience and safety.
Importance of Removing Items Before Removal
Before attempting to remove a desk drawer, it’s essential for you to take the time to clear out any items that may be trapped inside. Otherwise, you risk losing them in the process. Having extra drawers or IKEA wardrobe drawers can come in handy as they provide a safe place for storing fallen items and preventing overstuffing of one single drawer.
Not only does this reduce the likelihood of lost items, but it also prevents cross-threading when reassembling due to less weight being placed on each individual screw hole.
Organization benefits from keeping your workspace tidy are immeasurable. With proper planning techniques, such as two-column organization systems consisting of bins/trays, flat materials (paper/folders), shallow containers, small item holders, etc.
Drawer organizers help keep everything organized while simultaneously supporting heavier objects like books or files without fear of falls due to their sturdy design.
By following these simple steps prior to removal, clearing out all contents from within said space before starting work ensures safety firstly. It also ensures an easier assembly afterward since no additional heavy lifting would be required during reassembly.
This means whatever setup was initially desired remains intact throughout the entire project duration, saving both time and energy in the end results. It allows everyone involved with task satisfaction, regardless of the experience level achieved along the journey towards completion itself.
Benefits of Drawer Organizers
Using drawer organizers can help you keep your workspace neat and organized, while also allowing for heavier items to be supported without fear of falls. The right type of organization tips and tools make it much easier to stay on top of all the tasks at hand.
Drawer dividers are a great way to separate items in order to sort them into different categories, making it simpler to find things later. Many models available today allow you to adjust the widths of the front panels, so they fit into any space perfectly.
Investing in quality drawer labels or storage containers helps ensure materials don’t mix together when organizing by item type or size. This ensures that nothing gets lost along the way. This friendliness towards wood products means less time spent searching through drawers looking for specific parts, which would otherwise get mixed up within one another due to having different heights or depths.
Overall, this reduces the amount of effort put forward and saves both time and energy over long-term future projects.
Adding some extra elements such as separators or dividers keeps everything more organized than ever before, leaving room free from clutter and creating a stress-free working environment where productivity levels remain high throughout day-to-day tasks.
Ultimately, creating smarter solutions tailored specifically to your needs reduces the amount of effort put forward, thus saving both time and energy over the long term.
Proper Alignment and Gentle Screwing
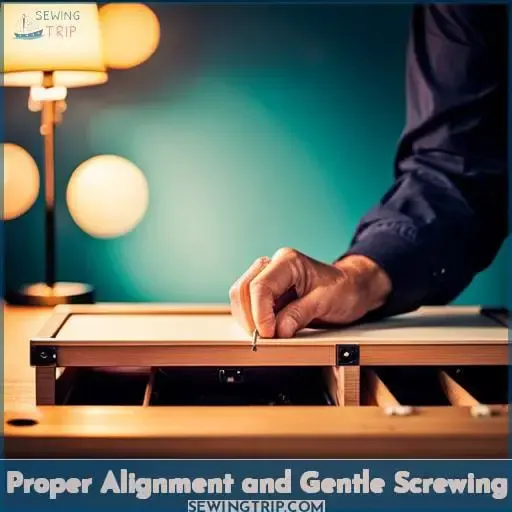
Now that you’ve got the basics of drawer organization down, it’s time to look at proper alignment and gentle screwing. While it’s important to ensure the drawers fit perfectly into their rail cavity in order to prevent items from falling behind them, it’s also essential for re-assembling ALEX desk drawers correctly.
Here are 5 steps for gauging pressure and cross threading when putting those screws back in:
- Make sure all screws line up with their respective screw holes before starting.
- When guiding rails back into the rail cavity, use your fingertips or a flat object such as a ruler on top of the front sides of each drawer so they don’t get pushed too far inward or outward. This would affect the overall height and width measurements between drawers if not properly measured beforehand.
- Insert one side first, then insert the other side second so both pieces hold firmly together without slipping out while inserting the remaining screws on both sides evenly until completely secure.
-
Align each screw hole accordingly before lightly pressing the Phillips head driver onto them. This will help avoid any cross threading issues should something shift slightly during the insertion process.
Watch a video guide for visual assistance if needed! Finally, only apply light pressure when tightening screws, otherwise, you may strip threads! This allows bigger items to be held securely but still remain removable with minimal effort should there ever be a need for removal again later down the line.
Additional Information on ALEX Desk Setup
With your ALEX desk drawers securely in place, it’s time to get organized and transform the way you work. To ensure optimal setup of your desk, there are some tips and tricks you can use for proper installation guidelines.
Firstly, make sure that all screws align with their respective screw holes before inserting them.
Secondly, when guiding rails back into the rail cavity, use a flat object such as a ruler on top of each drawer side so they don’t slip out while inserting remaining screws evenly until completely secure.
Thirdly, take an accurate measurement between drawers to prevent extra space from appearing after assembly.
Fourthly, lightly press the Phillips head driver onto screw holes, avoiding any cross-threading issues should something shift during the insertion process.
Moreover, if you plan on using different sewing accessories inside the walls of your drawer or storing items that will require more strength than what is provided by metal rails, then consider adding additional wood pieces along the edges to provide a stronger connection.
Furthermore, employing preventive measures like using drawer organizers also helps organize better while preventing items from falling behind drawers, thus making it easier for removal later down the line.
Finally, be mindful not to overstuff since this could lead to lost items even after successful reassembly – just keep these helpful hints in mind when setting up the ALEX Desk Drawer for smoother operation!
Importance of Removing Trapped Items in Drawers
It’s important to ensure that any items trapped inside drawers are removed before attempting to take them out, as this could potentially save time and hassle later on. This applies not just to removing ALEX desk drawers but also to organizing the interior of a drawer once it has been taken out.
A good idea would be to use preventive measures like drawer organizers, which can help organize better while preventing items from falling behind drawers.
When setting up your ALEX Desk Drawer, make sure all screws align perfectly with their respective screw holes before insertion. Use a flat object, such as a ruler, on top of each side while guiding rails back into the rail cavity so they don’t slip out during the assembly process.
Taking an accurate measurement between two adjacent drawers is also essential to ensure everything stays intact without extra space appearing after reassembly. However, you should only press lightly onto screw holes using a Phillips head driver to avoid cross-threading if something shifts during the insertion process.
Lastly, try not to overstuff the drawers, as it can lead to a ton of things getting lost even after successful reassembly.
With proper alignment and gentle screwing during reassembly, followed by employing preventive measures like using a drawer organizer beforehand, you will get closer to having a perfect condition every time you remove your IKEA Alex Drawer!
Frequently Asked Questions (FAQs)
What type of screwdriver do I need to remove the drawers?
You’ll need a Phillips-head screwdriver to remove the drawers. Unscrew the screws inside and slide or push them out for easy removal. Clean up, organize, and reassemble with gentle pressure – make sure everything aligns correctly! Video guides are also available if you need help.
Can I use other drawer organizers that are not ALEX-brand?
Yes, you can use other drawer organizers with ALEX drawers. Choose one that fits your needs and provides the organization and security you desire.
What is the best way to prevent items from falling behind the drawers?
The most effective way to prevent items from falling behind drawers is by using drawer organizers. These organizers assist in maintaining everything in an organized manner, ensuring that nothing falls or goes missing.
How long does it take to remove an ALEX drawer?
Removing an ALEX drawer can take as little as five minutes. With the correct tools and a bit of patience, you will have it out in no time!
What should I do if I cannot get the drawer out of the rails?
If you are unable to remove the drawer, make sure that all screws have been removed and attempt to push or pull firmly from various angles. If the drawer still does not come out, it may be advisable to seek assistance from a professional to ensure the rails are not damaged during removal.
Conclusion
Removing ALEX drawers is a breeze! With the right tools and a bit of know-how, you’ll be done in no time. Plus, it’s a great way to get rid of trapped items and any clutter that’s built up over time.
Drawer organizers are a great way to make sure everything is in its place and nothing gets lost. And with proper alignment and gentle screwing during reassembly, you can have your drawers looking like they just came out of the store.
So don’t hesitate – go ahead and give your ALEX drawers a makeover! You’ll be glad you did.

