This site is supported by our readers. We may earn a commission, at no cost to you, if you purchase through links.

Knot one end securely.
Position the fabric edges together evenly, pinning if needed.
Insert your needle through both layers about 1/4 inch from the edge.
For a simple repair, use a running stitch (in and out in a straight line).
For stronger seams, try a backstitch (go back one stitch length before moving forward).
Keep your stitches small and even—about 1/8 to 1/4 inch apart.
Pull thread firmly but not too tight.
Finish with a knot close to the fabric.
The right stitch can make even homemade repairs nearly invisible.
Table Of Contents
- Key Takeaways
- Preparing to Hand Sew a Seam
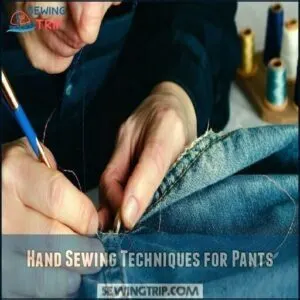
- Hand Sewing Techniques for Pants
- Threading Your Hand Sewing Needle
- Inserting The Needle Into The Fabric
- Hand Sewing a Seam on Pants
- Finishing Hand Sewing on Pants
- Common Challenges in Hand Sewing Pants
- Tips for a Professional-Looking Finish
- Troubleshooting Common Hand Sewing Mistakes
- Frequently Asked Questions (FAQs)
- Conclusion
Key Takeaways
- Keep your stitches small and even, using a backstitch for strength or a running stitch for quick fixes.
- Use matching polyester thread and the right needle type based on your fabric’s weight and material.
- Secure stitches with a double knot, trim excess thread, and press the seam for a clean, professional finish.
- Reinforce high-stress areas like crotch seams with overlapping backstitches to prevent future wear and tear.
Preparing to Hand Sew a Seam
Before you start sewing, gather the right tools like a sharp needle, matching thread, and fabric scissors.
Make sure to prepare the fabric by marking the seam line and pinning it securely for accurate stitching.
Choosing The Right Thread for Pants
Selecting the right thread for your pants repair can make or break your sewing project. Thread selection isn’t just about color—different thread fiber types offer specific benefits for various fabrics.
For daily wear pants, polyester thread is your go-to choice due to its strength and slight give that prevents breaking during movement. Cotton thread works well with natural fibers but may shrink or fade over time.
When matching pant fabric, consider both material and weight. Heavier denim requires stronger thread than lightweight slacks.
Thread weight matters—too thick can damage delicate fabrics, while too thin won’t hold heavy materials. For invisible repairs, choose a thread color slightly darker than your pants—it blends better than lighter shades.
Many specialty threads exist, but for most pants repairs, all-purpose polyester provides the perfect balance of durability and value. You can find suitable options for durable pant sewing.
Selecting a Needle for Hand Sewing
After choosing your thread, picking the right needle is your next essential step for successful pants repairs.
Choosing the proper needle makes all the difference when hand sewing pants seams:
- Match needle types to fabric – sharps for woven fabrics, ballpoint for stretchy materials to prevent snags and tears.
- Consider fabric weight – sizes 8-10 work for medium-weight pants, while denim requires sturdier 4-6 needles.
- Check the point type – sharp points pierce tightly woven fabrics, while rounded tips navigate knits without damaging fibers.
- Check compatibility with thread – your needle’s eye should accommodate your thread without fraying.
Remember, with hand sewing needles, larger numbers actually mean smaller needles!
Selecting the correct needle will depend on fabric and size.
The right needle makes your repair stronger and the process much easier—like having the perfect key for a lock.
Using a Seam Ripper for Repair
Now that you’ve got your needle ready, you’ll need a trusty seam ripper for proper repair work. This small tool makes a big difference when fixing pants seams.
Before threading any needle, use your seam ripper to carefully remove old or damaged stitches. Slide the pointed tip under each stitch, then gently pull upward to cut threads without damaging your pants fabric.
For stubborn threads or thick seams, take your time. Quick movements can lead to accidental holes – something you definitely don’t want when repairing your favorite jeans!
After ripping, always clean away loose thread bits completely. This gives you a fresh foundation for your new stitches.
Different seam ripper types work better for various fabrics, so choose one with a comfortable grip for best results when tackling pants repair projects. You can even buy a seam ripper online for convenience.
Hand Sewing Techniques for Pants
You’ll need to master three essential hand-sewing techniques for pants: the quick running stitch for simple fixes, the sturdy backstitch for high-stress areas, and the versatile whip stitch for edges.
With the right technique in your toolkit, you’ll transform from frantically searching for safety pins to confidently mending your favorite trousers in minutes.
Running Stitch for Simple Repairs
The running stitch serves as your go-to technique for simple pants repairs.
This basic stitch creates a line of small, evenly spaced stitches ideal for temporary fixes and light-duty mending.
- Push your needle up through both fabric layers from the wrong side
- Take small, consistent stitches (1/8 to 1/4 inch depending on fabric type)
- Maintain even thread tension throughout to prevent puckering
- Space stitches uniformly for a neat, professional appearance
The running stitch works best when matching thread color to your pants fabric, making it perfect for quick hem applications and temporary fixes.
Backstitch for Stronger Seams
During pants repairs, the backstitch stands out as your strongest ally for creating durable seams.
This technique creates overlapping stitches that won’t give way under daily wear and tear.
When hand sewing pants with a backstitch, maintain a consistent stitch length of 1/8 to 1/4 inch for maximum durability.
Select thread that matches your fabric type, and keep thread tension even throughout your repair.
A sharp, short needle offers better control as you work through heavier fabrics.
Take your time – proper backstitch technique isn’t about speed but precision.
For inseams, crotch seams, and seat areas where strain is greatest, nothing beats a backstitch for long-lasting repairs.
For heavy-duty projects, consider double-threading the needle to increase sewing strength.
Whip Stitch for Decorative Edges
The humble whip stitch transforms raw edges into decorative features on your pants while preventing fraying.
This beginner-friendly technique creates diagonal stitches that wrap around fabric edges for both function and style.
To master whip stitch for edge finishing:
- Insert your needle about 1/4 inch from the edge, passing it diagonally over to the opposite side
- Space stitches evenly (1/8" apart) for a professional look
- Pull with medium tension to secure without puckering
Try contrasting thread colors for visible seams or match your fabric for subtle finishing.
Works beautifully on hems, patches, and soft fabric combinations.
Threading Your Hand Sewing Needle
Threading your needle correctly is the foundation of successful hand sewing, so you’ll want to cut your thread to about twice the length of your seam plus a few extra inches for knots.
Once you’ve got your thread measured, moisten the tip slightly and guide it through the needle’s eye with a steady hand, pulling enough through to double it over for strength.
Measuring Thread Length for Pants Seam
Measuring the perfect thread length is the first step to successful hand sewing on pants. For superior results, use the Elbow-Length Method by cutting thread twice the seam length plus 3-4 inches for knotting.
This Seam Length Ratio guarantees you won’t run short mid-repair.
Seam Type Thread Length Fabric Type Notes
The Fabric Thickness Factor matters too—thicker fabrics need more thread.
Knowing how to choose the right needles and thread is also critical for achieving a seamless result.
Too short causes breaks; too long creates tangles.
Thread Waste Reduction comes with practice, improving Knot Security Impact.
Threading The Needle With Ease
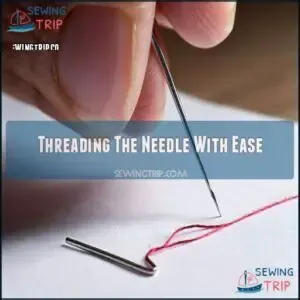
With thread in hand, it’s time to tackle the eye of the needle with ease.
Cut your thread end at a sharp angle and slightly moisten the tip to make threading smoother.
- Position your needle against a white background like paper to make the eye more visible
- Work in good lighting – natural daylight works best for needle threading
- Hold the needle steady between your thumb and forefinger to prevent wobbling
- Consider using a needle threader tool if you have difficulty with fine motor tasks
- Choose needles with appropriate eye sizes for your thread thickness
For beginners, threading tools can save frustration when your steady hands aren’t quite steady enough yet.
Tying a Knot to Secure The Thread
With the needle threaded, securing your thread with a proper knot forms the backbone of any reliable pants repair.
To tie a dependable knot: Wrap the thread end around your index finger once, then roll it with your thumb and pull tight through the created loop.
For pants seams, always use a double knot for extra security.
- Keep thread tails about ½-inch long—too short might unravel, while too long catches on fabric.
Test your knot’s hold with a gentle tug before starting to sew. Soon, creating these knots for hand sewing pants will become second nature.
Inserting The Needle Into The Fabric
You’ll want to grip the needle firmly between your thumb and index finger, then push it through the fabric at your marked starting point, coming up from the underside.
Once you’ve punctured through both layers of fabric, you’ll pull the thread until only a small tail with the knot remains on the underside, setting you up for your first proper stitch.
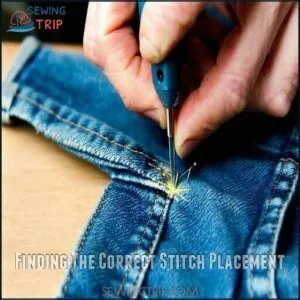
Finding The Correct Stitch Placement
Getting the stitch placement right can make or break your pants repair project.
To find the perfect spot for each stitch, mark clear guidelines along your seam allowance. This guarantees stitch consistency throughout your work.
Keep your fabric tension even while working. Regular cleaning and oiling helps prevent common machine issues by visiting common machine issues. Hold your needle at a comfortable angle (usually 90 degrees) when entering the fabric. Stay within your marked seam allowance for professional-looking hand sewn pants, ensuring a comfortable angle and maintaining even fabric tension to achieve a perfect spot.
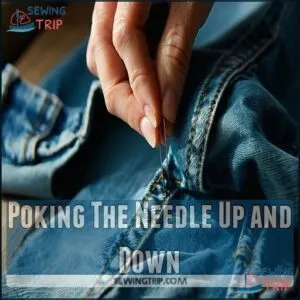
Poking The Needle Up and Down
Now that you’ve marked your stitch line, let’s master the needle movement.
Insert your needle from the underside of your fabric, pushing upward until it emerges. Your needle depth should be consistent—about 1/8 inch for most pants repairs. Pull through, leaving no slack in your thread.
Next, move forward your desired stitch length (typically 1/4 inch for hand sewing pants) and poke downward. You’ll feel some fabric resistance, especially with denim.
Maintain consistent spacing between entry points while keeping your finger placement steady to avoid pricks. As you repair pants seams, this up-and-down rhythm becomes second nature, creating strong connections that withstand daily wear.
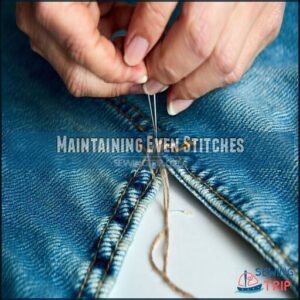
Maintaining Even Stitches
Now that you’ve got your needle rhythm going, mastering even stitches will make your repair look professional.
The key to consistent spacing lies in your technique. Keep your stitch length uniform by using your thumb as a measuring guide. For pants repair, aim for stitches about 1/8 inch apart. Control fabric tension by holding it firmly but not pulled tight.
Different pants materials affect your approach—denim requires more force and slightly longer stitches than dress slacks. Maintain a 90-degree needle angle for best penetration.
Your hand movement should be steady and deliberate. Take your time; rushing only leads to zigzags.
- When you see a row of perfectly spaced stitches on your repaired pants seam, you’ll know you’ve mastered the technique.
Hand Sewing a Seam on Pants
You’ll need to create a strong, lasting seam when your pants rip or need adjustment, and hand sewing offers precise control where machines can’t reach.
With the right technique, you can fix torn seams, adjust fit, or repair damaged areas while creating stitches that’ll hold up through regular wear and washing.
Using a Running Stitch for Quick Repairs
When you need a quick fix for your pants, the running stitch is your best friend.
This simple technique involves weaving your needle in and out of the fabric in a straight line.
| Feature | Benefits | Trade-offs |
|---|---|---|
| Stitch Length | Shorter = stronger | Longer = faster |
| Speed | Very quick to complete | Less durable than backstitch |
| Thread Tension | Easy to maintain | Must be consistent |
| Fabric Type | Works on all types | Thick fabrics need sharp needle |
| Appearance | Creates dashed pattern | Visible repair |
For temporary fixes in non-stress areas, maintain even spacing between stitches.
The running stitch won’t hold forever, but it’s perfect when you’re in a hurry.
Securing The Seam With a Backstitch
Your pants’ durability depends on proper backstitch technique. Insert your needle from below, pull through completely, then move back slightly before pushing forward 1/8" ahead.
This creates overlapping stitches that resist daily wear. Keep thread tension consistent and maintain a 45° needle angle for best results.
Your backstitch spacing should be even—about 1/8" apart—ensuring knot security when completed. This hand sewing technique transforms simple repairs into long-lasting solutions.
Reinforcing The Seam With Multiple Stitches
Your stitch-strength strategy makes all the difference when reinforcing pants seams. For maximum durability, create layered stitching patterns over high-stress areas like pocket corners and seat seams.
Simply alternate between running stitch and backstitch techniques, maintaining consistent thread tension throughout. The key to seam durability lies in proper stitch density—closely spaced stitches (about 1/8-inch apart) create a virtually indestructible bond that flexes with your movement.
For thick fabrics like denim, use shorter stitches to distribute pressure evenly.
- Mark your reinforcement path with pins beforehand to guarantee perfect alternating patterns, especially when applying extra reinforcement materials like interfacing beneath particularly vulnerable seams.
Don’t rush this final step—these reinforcement techniques transform basic hand sewing into professional-quality repairs, ensuring your work is of high quality and lasts long.
Finishing Hand Sewing on Pants
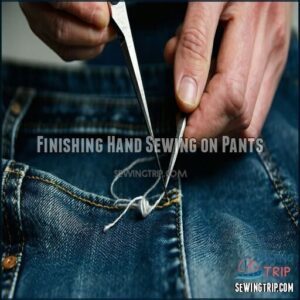
You’ll need to finish your hand-sewing work by securing the thread with a small, tight knot close to the fabric and trimming any excess thread to about ¼ inch.
Once secured, check your seam carefully for any weak spots or loose threads, ensuring the stitches lie flat and evenly spaced for both durability and a professional appearance, which is crucial for a professional look.
Trimming Excess Thread
Once your stitches are complete, the final touch awaits: properly trimming those thread tails.
For ideal length and a neat appearance, follow these simple steps:
- Choose sharp scissors or thread snips for clean cuts
- Leave 1/4 inch of thread beyond your securing knots
- Trim at a slight angle to prevent fraying
- Check both sides for any missed thread tails
This thread management technique guarantees your hand-sewn seam stays secure while looking professional.
Inspecting The Seam for Weaknesses
Now that you’ve trimmed those threads, it’s time for a quality check. Look closely at your work to verify seam integrity throughout.
| Check For | What To Look For | Fix Needed? |
|---|---|---|
| Thread Condition | Fraying or breaks | Add reinforcement stitches |
| Stitch Tension | Even spacing, no puckers | Re-stitch loose sections |
| Fabric Stress | Pulls or gaps at seam | Add backstitch reinforcement |
| Overall Strength | Holds when gently tugged | No fix if strong |
Run your fingers along the pant seam repair to feel for weak spots. A proper seam inspection now prevents future repairs.
Common Challenges in Hand Sewing Pants
You’ll often face frustrating obstacles when hand sewing pants, including managing thick denim that breaks needles and creating even stitches that don’t pucker the fabric.
Thread breakage can also occur when you’re working with old thread or applying too much tension, especially when repairing high-stress areas like crotch seams or belt loops, which can lead to thread breakage.
Dealing With Thick or Heavy Fabric
Now that you’ve secured your stitches, let’s tackle a common hurdle – working with thick fabrics.
Thick materials like denim or canvas require special attention for successful hand sewing.
Working with thick fabrics like denim demands special attention—the right needle and technique transform a challenging repair into a lasting fix.
Select the right tools to make your job easier:
- Choose a size 14/90 or 16/100 needle specifically designed for heavy-duty fabrics
- Use strong polyester thread that won’t snap under tension
- Apply a thimble to protect your fingers when pushing through multiple fabric layers
- Consider using clips instead of pins to hold thick sections together
Keep your stitch length slightly longer (3.5mm) when working with heavy materials. Take your time—rushing through thick fabrics often leads to uneven results, so it’s essential to be patient and use the right tools for a successful hand sewing experience with special attention.
Managing Uneven Stitches
While thick fabrics require muscle, uneven stitches need finesse. You’ll notice the difference between amateur and expert repairs when your stitches line up properly.
Tension control is the key to managing uneven stitches in your pants. Keep your thread at consistent tightness as you work through the fabric. For proper needle placement, position your fingers about half an inch behind where you’re sewing to stabilize the fabric guide.
Practice these techniques to improve stitch length consistency:
- Mark a straight line with washable fabric marker as your sewing guide
- Count to a steady rhythm as you place each stitch
- Use a ruler to measure and maintain 1/8-inch spaces between entry points
With consistent practice, your hand sewing techniques will improve, giving your pants repairs a professional finish that nobody will recognize as homemade. Maintaining stitch quality involves consistent tension and speed.
Overcoming Thread Breakage
During your hand sewing journey, thread breakage can turn a simple pants repair into a frustrating experience.
To prevent snapped threads, always select high-quality polyester thread that matches your fabric type and weight.
Your needle size matters too—thicker fabrics require larger needles to create a path for thread without fraying it.
Pay attention to stitch tension as you work.
Pull firmly enough to secure each stitch, but not so tight that you strain the thread.
Many sewists find that applying beeswax or thread conditioner prevents fraying and strengthens the thread.
When finishing your seam repair, secure both ends with tight knots to maintain durability.
Remember that proper knot strength is essential—your repair is only as strong as its weakest point.
Tips for a Professional-Looking Finish
You’ll transform your hand-sewn pants seam from homemade to high-end by pressing it with an iron and checking for even stitches.
Don’t skip the final inspection for loose threads or puckering, as these simple finishing touches make the difference between a repair that screams "amateur hour" and one that looks professionally crafted.
Pressing The Seam for a Crisp Fold
Your seam’s crispness can make or break your pants repair. After hand sewing, pressing transforms your work from homemade to professional-looking with just a few careful steps.
- Set your iron temperature according to fabric type – wool needs medium heat, while cotton can handle higher settings
- Use a pressing cloth to protect delicate fabrics from scorching or shine
- Apply firm downward pressure rather than sliding the iron across your seam allowance
- Press seams flat first before deciding whether to open them or direct them to one side
- Consider using light steam for stubborn fabrics, but let them cool completely before handling
This simple pressing technique reinforces your stitching while creating clean, professional lines that’ll make your hand sewing techniques virtually invisible, giving your work a finished look with crispness.
Using a Seam Roller for Smooth Edges
Now that you’ve pressed your seams flat, a seam roller will perfect your pants repair. This tool creates smooth edges without the shine marks that irons sometimes leave behind.
| Seam Roller Types | Best For |
|---|---|
| Wooden | Delicate fabrics |
| Metal | Heavy materials |
| Plastic | Everyday repairs |
| Conical | Curved seams |
Apply even pressure as you roll along your hand-sewn seam. Work from center outward for best results. Different fabrics need different pressure—lighter for silks, firmer for denim.
No seam roller? Try these alternatives: a wooden spoon handle, clean coin, or even a credit card.
This step makes your pants alteration look store-bought, eliminating bulky edges so your garment hangs naturally when worn.
Inspecting The Seam for Perfection
Now that your seam lies flat, give it a careful inspection before considering the job complete.
Hold pants up to natural light and look for these signs of a professional finish:
- Even stitch uniformity across the entire seam length
- Consistent thread tension with no puckering or looseness
- Perfect fabric alignment on both sides of the repair
Gently pull the fabric perpendicular to your seam to check for weaknesses. A properly hand-sewn pant seam repair won’t budge.
Trust your eyes and fingers—they’ll tell you if any spots need reinforcement before you wear your pants again.
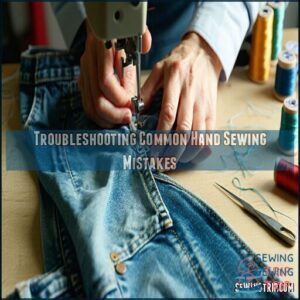
Troubleshooting Common Hand Sewing Mistakes
You’ll likely face a few hiccups when hand sewing pants, including uneven stitches, tangled threads, or weak seams that come apart with wear.
Even the most careful sewers make mistakes, but with simple fixes like removing problematic stitches and redoing sections with proper tension, you can transform your frustrating sewing mishaps into professional-looking repairs.
With simple fixes, you can improve the overall quality of your sewing.
Fixing Uneven Stitches
Spotting uneven stitches in your pants repair can feel like finding a bump in an otherwise smooth road. Don’t worry—fixing these inconsistencies is simpler than you might think.
When your hand stitching looks irregular, check your tension first. You’re likely pulling too tight in some spots and too loose in others. For better stitch consistency, work in good lighting and take your time with each needle placement.
Practice these techniques to transform wobbly stitches into professional-looking repairs:
- Tension Adjustment: Hold thread with consistent firmness throughout your sewing
- Fabric Stability: Use pins or clips to keep layers from shifting while you work
- Needle Control: Position your fingers closer to the fabric for steadier movements
- Practice Techniques: Try sewing on scrap fabric first to build muscle memory
- Stitch Marking: Draw guidelines with chalk for perfectly spaced hand stitches
If your repair still looks uneven, don’t hesitate to remove and restart—patience creates perfection in hand sewing pants.
Correcting Thread Tangles
When thread tangles pop up during your hand sewing journey, don’t panic! Thread quality plays a vital role—always use fresh thread that hasn’t been sitting in your kit for years.
Keep your tension adjustment consistent as you pull the thread through fabric. If tangles occur, stop immediately rather than continuing to sew.
For stubborn knots, use a straight pin to gently tease the tangle apart. Sometimes the issue stems from needle issues—a needle that’s too small creates friction against the thread.
Different stitch types can also impact tangling; running stitches typically create fewer tangles than complex decorative ones.
Remember that fabric friction contributes to tangles too, especially with rougher materials. This sewing tutorial tip helps beginners avoid frustration when sewing seams, and using proper techniques can make a significant difference.
Re-sewing a Weak Seam
When you notice your pants seam starting to fail, don’t panic.
First, gently remove all old stitches with a seam ripper to protect the fabric integrity.
Choose matching thread that complements your pants both in color and weight.
For proper seam reinforcement, use a backstitch technique which provides superior durability compared to basic stitches.
Maintain even stitch tension throughout your repair to prevent future weak spots.
Your hand stitch pants repair will last longer if you take your time, focusing on consistent spacing between each reinforcement stitch and using a technique that ensures superior durability.
Frequently Asked Questions (FAQs)
How do you sew a seam on pants?
Knowing hand-sewn seams can be as durable as machine-sewn ones is encouraging.
To sew a pants seam, thread a needle, pin fabric edges together, use backstitch for strength, and knot securely when finished.
How do you finish a seam on pants?
To finish a seam on pants, secure the thread with a double knot close to the fabric.
Trim excess thread to ¼ inch, then press the seam with an iron for a professional, flat finish.
How do you sew a seam?
You’ll want to bring your fabric edges together, pin them securely, thread your needle, and use a backstitch for strength.
Insert the needle front to back, then back to front, creating overlapping stitches.
What is one method to sew pants?
You’ll want to use a backstitch for pants seams.
Thread your needle, knot the end, and create small stitches that overlap slightly.
This technique provides strength in high-stress areas where pants need durability.
How do you hand sew a pant leg?
To hand sew a pant leg, thread your needle with matching thread, pin fabric edges together, use backstitch for durability, and keep stitches small and evenly spaced.
Press the seam when finished.
How do you sew a crotch seam?
Like threading a needle through a maze, sewing a crotch seam requires precision.
Turn pants inside out, pin the seam, and use a backstitch for strength.
Work slowly from front to back, securing with a knot.
How to hand sew a seam?
Thread a needle with knotted thread.
Pin fabric edges together. Use backstitch for durability—stitch backward then forward.
Continue along the seam line. Secure with a knot when finished. Trim excess thread.
How do you sew a pant leg?
Take those loose threads and make them disappear.
Fold the pant fabric right sides together, pin along the seam line, and use a backstitch for strength.
You’ll need matching thread and patience.
How to repair ripped seams in clothing by hand?
To repair ripped seams in clothing, choose a backstitch for strength.
Pin fabric edges together, thread a needle with matching thread, and sew small, even stitches.
Secure with a double knot when finished.
How do you sew a ripped seam?
Choose matching thread and needle, then turn clothing inside out.
Pin fabric edges together.
Use a backstitch for strength, working along the tear.
Knot securely when finished, and trim excess thread.
Conclusion
Did you know that knowing how to hand sew a seam on pants can extend your clothing’s life by up to 3 years?
With these simple techniques in your toolkit, you’ll never panic over a split seam again.
Just grab your needle and thread, follow these steps, and you’ll create strong, nearly invisible repairs.
Remember: practice makes perfect, and even beginners can master these essential stitches.
You’re now ready to tackle any pants repair with confidence!
- https://www.youtube.com/watch?v=Vt8vEI4izeg
- https://pinterest.com/pin/create/button/?url=https://www.allfreesewing.com/Basics-and-Tutorials/How-to-Hand-Sew-a-Seam
- https://www.facebook.com/sharer/sharer.php?u=https://www.allfreesewing.com/Basics-and-Tutorials/How-to-Hand-Sew-a-Seam
- mailto:?Subject=Check%20out%20the%20How%20to%20Hand%20Sew%20a%20Seam%20on%20AllFreeSewing.com&body=I%20thought%20you%20would%20like%20the%20How%20to%20Hand%20Sew%20a%20Seam%20on%20AllFreeSewing.com.%20Check%20it%20out%3A%20%20https://www.allfreesewing.com/Basics-and-Tutorials/How-to-Hand-Sew-a-Seam
- https://www.thesprucecrafts.com/sew-a-running-stitch-2978418

