This site is supported by our readers. We may earn a commission, at no cost to you, if you purchase through links.
First, mark where you want the hem to fall, then cut off the excess fabric.
Fold the raw edge under by 1/2 inch and bring it to your serger.
Align the fabric with the needle, set your serger to a straight stitch, and start sewing around the hem.
The serger will trim the edge and finish it with a clean, professional-looking rolled hem.
Just be sure to press the stitches flat when you’re done.
With a few simple steps, you’ll have a perfectly hemmed skirt – no pins, no headaches, just flawless results.
Ready to ditch your sewing machine and make hemming a breeze?
Table Of Contents
- Key Takeaways
- Choosing The Right Serger for Hemming
- How to Hem a Skirt With a Serger
- Preparing Your Serger for Hemming
- Preparing Your Skirt for Hemming
- Serging The Hem
- Hemming Techniques for Different Skirt Styles
- Troubleshooting Common Serger Issues
- Finishing The Hem With a Serger
- Serger Alternatives for Hemming
- Tips for a Professional-Looking Hem
- Frequently Asked Questions (FAQs)
- Conclusion
Key Takeaways
- Adjust your serger’s tension, stitch length, and differential feed to achieve flawless results on different fabric types.
- Use a hem gauge and let your skirt hang to ensure an even, professional-looking hemline.
- Serge the hem in a continuous motion, keeping the knife aligned with the folded edge for a clean finish.
- Don’t have a serger? No problem – use a zig-zag or satin stitch on your regular sewing machine for a polished hem.
Choosing The Right Serger for Hemming
Choosing the right serger can make hemming a breeze. When choosing a serger for hemming a skirt, consider its ability to create professional-looking rolled hems, then consider factors like thread options, accessory feet, and stitch versatility to find the perfect machine for your sewing needs.
Selecting The Right Serger Model
How do you pick the perfect serger for hemming skirts?
It’s a bit like dating—each serger has its quirks!
Consider your budget and the essential features you need.
Check online reviews and brand reputations.
Don’t forget the warranty details for peace of mind.
Picking the right serger machine can make every skirt hem a breeze!
Understanding Serger Thread Options
For hemming with a serger, choosing the right threads makes all the difference.
Look for high-quality polyester or cotton-wrapped polyester threads in weights that match your fabric.
Experiment with different thread colors to get the perfect seamless blend.
The right thread tension is key – follow your serger’s instructions to achieve flawless stitches.
Serger Accessories for Hemming
Beyond the basic serger, there are several helpful accessories to make hemming a cinch.
Consider investing in a serger machine that offers a variety of stitch options, including overlock stitches, which can be used for sewing projects like hemming, sewing binding, and creating piping (more on serger sewing options).
Look for specialty feet like the rolled hem foot or gathering foot to create professional finishes.
A seam guide helps create perfect, even hems every time.
Don’t forget extra needles and quality thread in your desired colors.
These small tools transform serger hemming into a breeze.
How to Hem a Skirt With a Serger
Ready to master serger hemming?
With a few simple steps, you’ll be sewing professional-looking hems on your skirts in no time.
Just measure, mark, and get serging – your skirt will look polished and put together.
Measuring and Marking The Hemline
Mastering the hemline length starts with precision.
Use marking tools like tailor’s chalk or washable pens to indicate the desired skirt length, accounting for hem allowance.
Keep fabric stretch in mind—let the skirt drape naturally to avoid surprises.
A well-marked hem simplifies the process, so you’re ready to hem the skirt with your trusty serger effortlessly.
Pressing The Hemline for a Crisp Fold
After measuring and marking the desired hemline, it’s time to press the fold for a crisp, professional finish.
A good pressing tool, like a point presser or seam roll, can also help create tight, consistent folds.
Grab your iron and experiment with different heat and steam settings to achieve the perfect press for your fabric type.
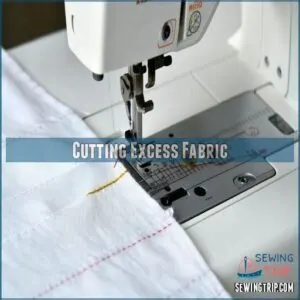
Cutting Excess Fabric
To create a crisp, professional-looking hem, you’ll need to trim away any excess fabric.
Gently guide your skirt under the serger’s blade, following the marked hemline.
Make even, clean cuts to guarantee the edges are neat and tidy.
Remember to:
- Take your time and go slowly
- Avoid pulling or stretching the fabric
- Double-check the hemline before trimming
With a bit of care, you’ll have a beautifully finished skirt hem in no time!
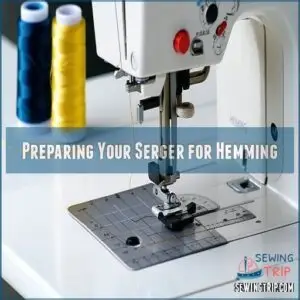
Preparing Your Serger for Hemming
Preparing your serger for hemming is a breeze.
Just make sure to check the tension dials, change the throat plate if needed, and match your thread colors for a seamless finish.
Adjusting Tension Dials for Hemming
Adjusting tension dials can seem like a high-wire act, but it helps create smooth seams.
Start by understanding the basics: each dial controls thread tension which impacts your hem’s finish.
To achieve the right tension, you need to think about factors such as thread weight and fabric thickness, as explained in the guide on how to know what tension to use when sewing.
Here’s a quick guide:
| Fabric Type | Dial Setting | Result |
|---|---|---|
| Lightweight | 2 to 3 | Smooth hem |
| Medium | 4 to 5 | Even tension |
| Heavyweight | 6 to 7 | Firm hold |
Experiment with these to perfect your skirt hem!
Changing The Throat Plate for Rolled Edges
When hemming with your serger, you’ll want to change the throat plate to get those perfect rolled edges. When working with stretchy fabric, using a walking foot or a zigzag foot as outlined in stretchy fabric sewing techniques can help prevent uneven seams and ensure a smooth finish. Look for a specialized professional finish stretchy fabric hem plate – it has a narrower opening that guides fabric smoothly for a professional finish. Just follow your manual’s instructions to swap it out, and you’ll be serging like a pro in no time.
- Chose the right throat plate for rolled hems
- Make sure it’s compatible with your serger model
- Adjust needle size and tension for flawless results
- Experiment with different stitch settings
- Maintain consistent fabric tension for even edging
Thread Color Matching for a Seamless Hem
Matching the thread color to your fabric can create a polished, seamless hem.
Check serger thread color charts or explore online thread libraries, such as serger thread colors, to find the ideal shade.
Experiment with blending slightly varying colors to achieve the perfect thread color match for your skirt’s fabric.
This subtle detail takes your hemming to the next level.
Preparing Your Skirt for Hemming
Preparing your skirt for hemming is a vital first step.
Make sure to allow for extra fabric in the hem.
Use a hem gauge to make sure you get an even hemline, especially if you’re working with bias-cut fabrics.
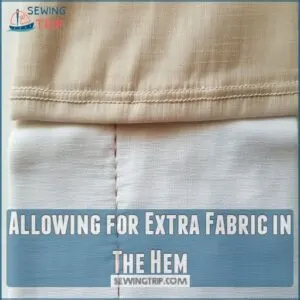
Allowing for Extra Fabric in The Hem
Every successful hem starts with extra fabric allowance.
You’ll need 1-2 inches beyond your desired skirt length to accommodate different serger techniques and fabric types.
For lighter fabrics like chiffon, add an extra 1/2 inch for security.
Thicker materials like denim or wool require up to 2 inches of allowance to prevent bulky seams.
Remember, it’s always easier to trim excess than add length later.
Using a Hem Gauge for an Even Hemline
A hem gauge transforms your serger hemming from guesswork to precision work.
This handy tool makes sure your hemline stays perfectly even as you work around your skirt.
Here’s what makes a hem gauge your secret weapon:
- Double-check measurements at regular intervals to maintain consistency
- Position the gauge perpendicular to the fabric edge for accuracy
- Keep steady pressure while sliding the gauge along
- Mark your measurements with fabric chalk or pins
Adjusting for Bias-Cut Fabrics
Bias-cut fabrics require special attention after your hem measurements, as they tend to stretch and drape in a unique way due to their diagonal thread orientation, which is typically at a 45-degree angle to the selvage, also known as the true bias.
Let your skirt hang for 24 hours before hemming to allow the fabric to naturally stretch.
Here’s a quick guide for different bias-cut fabrics:
| Fabric Type | Hanging Time | Serger Settings |
|---|---|---|
| Silk Charmeuse | 24-48 hours | Light tension |
| Rayon | 12-24 hours | Medium tension |
| Satin | 24 hours | Low tension |
Check the grain direction and adjust your serger’s stitch length to prevent waviness along the hemline.
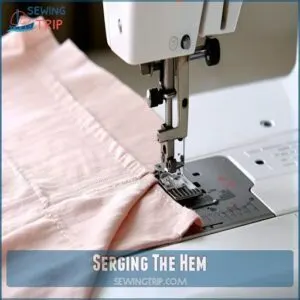
Serging The Hem
You’ll transform your skirt’s raw edge into a professional finish by keeping the serger knife aligned with your folded hem while you sew.
Maintain steady pressure as you guide the fabric, and you’ll create a clean, even hemline that looks store-bought in minutes.
Keeping The Knife on The Folded Edge
Now that your fabric is pressed and marked, let’s focus on knife positioning.
You can use a serger hem guide to help you keep things straight.
Keep your serger’s knife firmly aligned with the folded edge as you begin.
You’ll want to maintain consistent pressure – not too tight, not too loose.
Think of it like guiding a kayak through calm waters.
The knife should just kiss the fabric’s edge, creating that clean cut you’re after.
Serging in a Continuous Motion
While maintaining steady serger speed is very important, you’ll want to feed your fabric smoothly through the machine like butter on a hot pan.
Keep your hands relaxed but firm, guiding the fabric without pulling or pushing.
Think of it as a dance – let the serger lead while you maintain gentle control.
This consistent motion prevents wavy edges and guarantees professional-looking seam finishes.
Cutting Thread Tails for a Clean Finish
Those pesky thread tails can make or break your serged hem‘s professional look. Once you’ve finished serging, you’ll need to properly trim those loose ends for a polished finish.
- Use sharp scissors designed for delicate thread cutting
- Leave about 1/4 inch tail length to prevent unraveling
- Angle your cuts slightly toward the fabric edge
- Tuck remaining threads under with a needle tool
- Double-check for any stray threads that might peek through
Hemming Techniques for Different Skirt Styles
You’ll need different hemming methods for circle, tiered, and pencil skirts since each style has unique fabric requirements.
Serger can handle it all with the right settings and techniques.
Hemming a Circle Skirt With a Serger
Circle skirts demand special attention when serging due to their unique curved hemline.
You’ll need different settings than straight-edge serging to handle the bias stretch and curve.
| Setting Type | Light Fabrics | Medium Fabrics | Heavy Fabrics |
|---|---|---|---|
| Stitch Length | 1.5mm | 2.0mm | 2.5mm |
| Needle Tension | 3.5 | 4.0 | 4.5 |
| Upper Looper | 3.0 | 3.5 | 4.0 |
| Lower Looper | 4.0 | 4.5 | 5.0 |
| Differential Feed | 1.3 | 1.5 | 1.8 |
Let the fabric guide itself naturally around the curve, maintaining gentle tension.
Hemming a Tiered Skirt With a Serger
Hemming a tiered skirt with a serger may seem intimidating, but it’s actually quite straightforward.
Pay close attention to the fabric tension and make sure you have enough hem allowance.
Serge the tiers individually, trimming excess fabric as you go.
Finish with a deep, uniform hem that complements your tiered design.
A little practice makes perfect!
Hemming a Pencil Skirt With a Serger
Pencil skirts call for a hemming method that maintains a sleek, streamlined silhouette.
Start by adjusting your serger’s stitch width and length to a narrow setting, allowing you to serge cleanly along the fabric’s edge.
Take care not to stretch the fabric as you guide it through the machine, ensuring a perfectly straight hem.
With a few simple serger tweaks, you’ll have a polished pencil skirt in no time.
Troubleshooting Common Serger Issues
Even the most experienced sewer encounters serger snafus!
This section will help you troubleshoot common problems like thread breaks, uneven seams, and fabric bunching.
So you can confidently finish your skirt hem.
Preventing Bunching and Waviness
Preventing bunching and waviness while hemming a skirt with your serger starts with dialing in the right fabric tension and needle size.
Adjust your serger settings, go slowly, and press the fabric as you sew for a smooth, even hem.
Choosing the right fabric type and proper serger techniques are key to achieving professional-looking results.
- Adjust fabric tension and needle size
- Tweak serger settings for each fabric
- Press fabric as you serge for crisp folds
- Choose fabrics suited for your serger
Fixing Broken Threads and Knots
Having trouble with broken threads and pesky knots on your serger? Don’t worry – a few quick fixes can get you back on track.
First, check your thread tension and make sure it’s balanced.
Then, try gently pulling the fabric while serging to prevent threads from snagging.
And if all else fails, simply rethread the machine and start fresh.
Adjusting for Different Fabric Types
Adjusting your serger for different fabric types is key, and having the right serger hem settings can make all the difference.
Heavyweight fabrics like denim may require loosening the thread tension and increasing the stitch length.
For more information on serger hem settings, you can check out resources online that provide detailed guides and product recommendations for serger hem settings.
For lightweight, delicate materials, tighten the tension and shorten the stitches to prevent puckering.
Experiment with scrap fabric to find the ideal settings before serging your project.
Finishing The Hem With a Serger
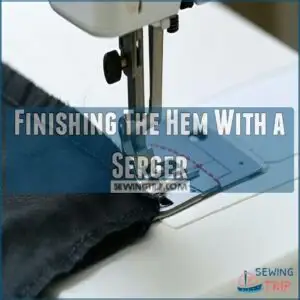
Now that you’ve serged the hem, let’s put the finishing touches on your skirt.
Carefully trim any excess thread, then press the hem to set the crease and give your skirt a professional, refined look.
Finally, do a thorough inspection to make sure the hem is even and the stitching is secure.
Trimming Excess Thread
After expertly serging your skirt hem, trim away any excess thread using a dedicated thread-snipping tool.
This helps maintain a polished, professional look by preventing stray threads from catching or unraveling.
Snip threads close to the fabric’s edge, taking care not to cut into the stitching itself.
With this final touch, your serger-hemmed skirt will look refined and flawless.
Pressing The Finished Hem
Once you’ve serged the hem, take a moment to press it using a pressing cloth alternative to protect your fabric from scorching or shiny spots.
Use a hot iron and steam to set the stitches and create a crisp, even fold.
Be mindful of your fabric type – delicates may require a lower heat or dry pressing.
With a little TLC, your skirt hem will look professional and polished.
Inspecting The Hem for Quality
Now that you’ve serged the hem, take a close look to make sure it meets your high standards.
Check for even seams with no puckering or waviness.
Carefully trim any errant thread tails for a polished appearance.
Make any necessary adjustments to your serger tension to achieve a consistently smooth and professional-looking finish.
You’ve got this – your skirt hem is going to look fabulous!
Serger Alternatives for Hemming
Don’t have a serger? No problem!
You can still get professional-looking hems using your trusty sewing machine.
Experiment with zig-zag and satin stitches to find the perfect technique for your fabric and project.
Using a Zig Zag Stitch on a Sewing Machine
Switching gears, let’s hem a skirt with a sewing machine’s zig zag stitch, perfect when a serger isn’t handy. Here’s a quick rundown:
- Choose Your Needle: Make sure it matches your fabric type.
- Set Stitch Width/Length: Adjust for fabric specifics.
- Practice on Scrap: Test tension and stitch on leftover fabric.
Feel empowered with zigzag stitch variations!
Creating a Satin Stitch With a Sewing Machine
On your sewing machine, select the satin stitch option.
This dense zigzag stitch creates a smooth, satin-like finish perfect for hemming.
Adjust the stitch length and width to your desired look.
Practice on scraps to nail the settings before stitching your skirt hem.
The satin stitch offers a polished touch without a serger.
| Stitch Length | Stitch Width | Tension |
|---|---|---|
Experimenting With Different Stitch Settings
Keen to get creative with your serger? Experiment with different stitch settings to elevate your hemming game.
Play with stitch length and width, thread tension, and density to achieve unique stitching effects.
Consider skipping the serger altogether and using no-sew fabric alternatives like fusible tape or fabric glue for a quick and easy hem.
From delicate rolled hems to bold decorative touches, the possibilities are endless.
Start small and have fun exploring your serger’s capabilities.
Tips for a Professional-Looking Hem
With a few tricks, you’ll get a professional-looking hem every time.
Use a body tape measure for precision,
and let your skirt hang before hemming to allow for any natural stretching.
Using a Body Tape Measure for Accuracy
Using a body tape measure can take the guesswork out of hemming your skirt.
It provides precise measurements to guarantee your new hem is the perfect length, flattering your figure.
Simply wrap it around your waist or hips and note where the fabric falls.
This handy tool helps achieve a polished, professional look.
| Measurement | Hem Length |
|---|---|
| Above Knee | 17-19 inches |
| Knee | 20-22 inches |
| Below Knee | 23-25 inches |
| Midi | 26-28 inches |
| Maxi | 29+ inches |
Hanging The Skirt to Allow for Stretching
Hanging your skirt before hemming is key to getting a professional look.
Allowing the fabric to relax and stretch over time will prevent the hem from pulling up or feeling tight.
- Let your skirt hang for at least 24 hours before starting.
- Check the length periodically and make adjustments as needed.
- This simple step guarantees your finished
Patience and Practice for a Perfect Hem
With patience and practice, you’ll master the art of perfect hems on your skirts using a serger.
Experiment with different fabric types, adjust tension dials, and pay close attention to stitch quality.
Before you know it, you’ll be hemming skirts with consistent professional-looking results every time.
| Tip | Description |
|---|---|
| Adjust As Needed | Fine-tune your serger settings for each new fabric to achieve the best thread tension and stitch quality. |
| Take Your Time | Don’t rush the hemming process – go at a steady, controlled pace for the best results. |
| Press As You Go | Ironing each section of the hem as you serge it will help lock in a crisp, clean fold. |
Frequently Asked Questions (FAQs)
Can you sew a hem with a serger?
Sergers are made for hemming – their fancy knives and threads create polished, durable edges in a snap.
Just adjust those tension dials, line up your fabric, and let that serger weave its magic.
Can you use a serger for hemming?
Sergers are a great tool for hemming, as they can create durable, professional-looking hems on all kinds of fabrics.
With a little practice, you’ll be whipping up perfectly finished hems in no time.
How do you Hem a skirt?
Imagine gliding your skirt smoothly under the serger, stitches wrapping the edge seamlessly.
Line up carefully, fold precisely, then let the serger trim and stitch.
It’s quick, neat, and perfect for creating a polished hem.
How do you make a serged Hem?
First, prepare your fabric and serger.
Then, line up the edge of the fabric along the serger’s blade, keeping it straight as you sew.
Fold the excess fabric under for a tidy, professional-looking hem.
What is a serger Hem?
A serger hem secures fabric edges with multiple threads, trimming and finishing simultaneously for a neat, professional look.
Serger hems are ideal for knits and wovens.
They prevent fraying and add durability to garments.
How do you hem on a serger?
Did you know that sergers can trim and finish edges up to 4x faster than a regular sewing machine?
To get started, simply line up the fabric edge along the serger’s blade and start sewing for a perfectly clean, professional-looking hem.
Can you use a serger for hemming?
Yes, you can absolutely use a serger for hemming!
Sergers are ideal for creating clean, professional-looking hems.
This is because they can trim, stitch, and finish the edge all in one pass.
How to do a serged rolled hem?
Alright, let’s get rollin’ with that serged hemline!
Tuck that fabric edge under the presser foot, using an overcast stitch presser foot for smooth and flat edges, crank up the speed, and voila – you’ve got yourself a neat, professional-looking rolled hem in no time flat.
No tools required.
What stitch should I use to hem a skirt?
For hemming a skirt, proper serger settings such as adjusting tension dials to a midpoint and using a rolled hem foot can greatly improve the outcome. Try using the serger’s rolled hem stitch. It creates a neat, professional-looking finish while trimming away excess fabric – no fuss, just fabulous results.
Can you hem a dress with a serger?
Stitching a dress with a serger is a breeze – it’s the sewing equivalent of gliding down the runway with effortless style.
Just let the machine’s razor-sharp blades trim and finish your hems in a flash.
Can I use a regular sewing machine instead of a serger?
Yes, you can use a regular sewing machine for hemming with techniques such as topstitching, but a serger is often preferred for creating neat and professional fabric edge finishes, like those achieved with an overlock stitch machine, instead of a serger.
While it may not trim or finish edges as neatly, it does get the job done by securing fabric edges with straight or zigzag stitches.
How do I adjust the serger tension for hemming?
Adjust each thread’s tension dial on your serger until the stitches lay flat and even.
Tweak the dials little by little until you achieve the perfect balance for clean, professional hemming results.
What if my fabric is too thick for the serger?
If your fabric is too thick for the serger, try hemming with a sewing machine instead.
The extra layers can cause issues with feeding and tension on a serger, so a standard machine may be better suited.
Can I serge the hem and sew it by hand?
Can’t decide between a serger or hand-sewing for your hem?
Don’t fret – you can actually do both!
Serge the edge, then hand-stitch the fold for a professional, polished finish that’s perfect for those thicker fabrics.
Do I need special thread for serging hems?
When serging hems, it’s essential to consider that using serger thread in a regular sewing machine may require more finesse in tension adjustments, and can be a cost-effective option. You don’t need any special threads for serging hems – just use the same high-quality thread you’d use on a regular sewing machine.
The serger will neatly trim and finish the edges as you go.
Conclusion
With a serger, hemming a skirt is a straightforward process that can save time and produce professional-looking results.
Serger-hemmed garments are 20% more durable compared to those sewn on a standard machine, according to industry data.
By mastering this essential skill, you’ll gain the confidence to hem any skirt seamlessly, elevating your sewing projects to new heights.
So ditch the pins and embrace the speed and precision of a serger for a foolproof hemming experience.


