This site is supported by our readers. We may earn a commission, at no cost to you, if you purchase through links.
Hand-sewing works best for thick leather—use a leather needle and heavy-duty thread, making small, even stitches along your folded hem.
For thinner leather, try fabric glue or double-sided hemming tape, which creates clean lines without puncturing the material.
Machine sewing requires a leather needle and adjusting tension settings.
The no-sew burnishing method involves folding and pressing the edge with a bone folder until it holds its shape.
Remember to measure twice and mark your hemline carefully since leather doesn’t forgive mistakes like fabric does.
Each technique has specific applications depending on your leather’s thickness and the garment’s intended use, and it’s essential to choose the right method to ensure a professional finish with heavy-duty thread.
Table Of Contents
Key Takeaways
- Choose your hemming method based on leather thickness – You’ll get the best results with hand-sewing for thick leather using leather needles and heavy-duty thread, while thinner leather works well with fabric glue or hemming tape.
- Measure twice and mark carefully since leather doesn’t forgive mistakes – You can’t easily undo errors like you can with fabric, so take precise measurements and use chalk to mark your hemline before cutting.
- Use specialized tools for professional results – You’ll need leather needles, heavy-duty polyester or nylon thread, sharp cutting tools, and consider leather cement or bone folders, depending on your chosen technique.
- Try the no-sew burnishing method for a clean finish – You can fold and press the edge with a bone folder until it holds its shape, creating a hem without puncturing the material or using adhesives.
Hemming Leather Basics
Hemming leather requires specific tools and techniques that differ from working with fabric.
You’ll need sharp cutting tools, leather cement or heavy-duty thread, and specialized needles to create clean, durable hems that won’t damage the material, using leather cement or other appropriate methods.
Materials Needed for Hemming Leather
Success in leather hemming starts with the right arsenal. You’ll need heavy-duty leather needles, polyester or nylon leather thread, and sharp fabric scissors.
Essential leather tools include an awl for piercing, edge burnisher, and bone folder. Adhesive options range from leather cement to rubber cement.
Reinforcement fabrics like interfacing prevent stretching during leather sewing projects. For accurate fabric measurements, consider using transparent acrylic rulers to ensure precise cuts.
Preparing to Hem Leather
Before jumping into leather hemming methods, you’ll need proper preparation. Start with leather selection – choose quality hides that won’t crack when folded.
Tool preparation includes sharp cutting implements, rulers, and marking tools. Measuring allowance requires precision – mark 1" to 1.5" from the garment’s edge.
Edge finishing and reinforcement options depend on your chosen hemming methods, whether sewing or adhesive techniques.
Common Hemming Techniques
Five primary methods work best for leather hemming.
Topstitching leather involves folding the hem and sewing with longer stitches, creating a flat, durable finish. Gluing leather uses cement applied when tacky, then pressed firmly.
Rolled hems work well for thin leather edges. Blind hems hide stitching completely. Double-fold hems provide extra strength for heavy-use garments.
Each leather hemming guide technique offers different advantages depending on your project’s needs.
Can Leather Be Hemmed
You might wonder if leather can actually be hemmed like regular fabric. The answer is absolutely yes, but it comes with unique considerations that’ll make or break your project.
Unlike cotton or polyester, leather won’t fray when cut, which actually works in your favor for clean edges.
**Leather’s no-fray advantage means cleaner cuts and easier finishing than fabric.
Here are 5 key factors that determine your hemming success:
- Leather Thickness Matters – Thin lambskin hems easily, while thick cowhide requires specialized tools
- Leather Type Impact – Soft garment leather responds better than stiff upholstery leather
- Hemming Tool Alternatives – Standard sewing machines may struggle; leather needles are mandatory
- Leather Hem Possibilities – You can shorten, lengthen (if there’s excess), or adjust fit
- Hemming Limitations – Some leathers crack when folded, requiring glue methods instead
Your leather sewing techniques will vary based on these factors.
Using the correct presser foot is essential for minimizing friction and ensuring smooth feeding.
Hemming leather isn’t impossible, but understanding these leather hemming guide basics prevents costly mistakes.
Hand Sewing Leather Hems
Hand sewing leather hems gives you complete control over stitch placement and tension, making it perfect for detailed work or when you don’t have access to a heavy-duty machine.
You’ll need the right thread, needles, and stitching patterns to create durable, professional-looking results that won’t unravel over time.
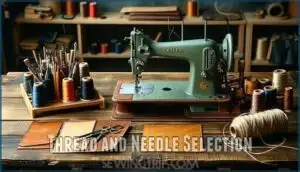
Thread and Needle Selection
Proper thread and needle selection makes leather stitching manageable rather than frustrating.
Heavy-duty polyester or nylon threads work best for leather projects, while leather needles feature triangular points that pierce cleanly without tearing.
| Leather Weight | Needle Size | Thread Type |
|---|---|---|
| Lightweight | 90/14 – 100/16 | Polyester thread |
| Medium weight | 110/18 – 120/19 | Heavy polyester |
| Heavy leather | 130/21+ | Nylon or linen |
Match your needle size to leather thickness—forcing oversized needles through thin leather creates unsightly holes.
You can find quality leather sewing thread for your project.
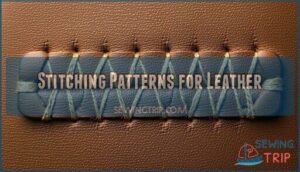
Stitching Patterns for Leather
Saddle stitch reigns supreme for leather stitching, creating unbreakable seams that won’t unravel even if damaged.
This double-needle technique passes thread through each hole from opposite sides, forming symmetrical patterns on both surfaces.
Baseball stitch and corset stitch offer decorative alternatives, while proper stitch spacing—typically 1/8" to 1/4" apart—ensures professional results in your leather sewing projects.
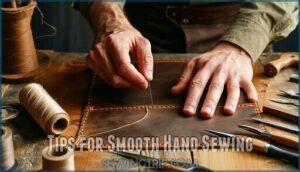
Tips for Smooth Hand Sewing
Once you’ve chosen your needle selection and thread, focus on maintaining steady thread tension throughout each stitch. Consistent pressure prevents puckering and guarantees even leather hemming techniques.
Here’s what separates amateur attempts from professional leather crafting:
- Keep your stitching rhythm steady – rushing creates uneven holes that weaken the leather
- Test thread tension on scraps first – leather thickness varies, requiring different approaches
- Mark your stitch lines clearly – crooked hems scream beginner mistake
- Practice techniques on sample pieces – hand sewing leather demands muscle memory
Stitch consistency comes from repetition, not speed when working with tough materials. Using a stitching horse can also improve comfort and consistency.
Hemming Leather Without Sewing
When you don’t want to use thread and needles, non-sewing methods offer reliable alternatives for finishing leather edges.
These techniques use adhesives and special tools to create professional-looking hems that hold up well over time.
Using Basting Tape
Basting tape offers a temporary solution for leather hemming techniques when you need flexibility.
Choose fabric-safe basting tape types that won’t damage leather surfaces during removal. Apply tape along the fold line, ensuring proper leather compatibility.
Press firmly for good adhesion, but remember tape removal ease varies by leather type. Consider purchasing tape products designed for leather.
This method works well for testing hem durability before permanent attachment, providing a flexible approach to leather hemming.
Using Glue for Hemming
Skipping messy stitching, glue offers a clean alternative for leather hemming projects.
Professional leather glues create flexible bonds that withstand daily wear, while contact cement provides instant adhesion for quick fixes.
Essential glue application methods:
- Clean leather edges first to maximize bond strength
- Apply thin, even layers and let become tacky before folding
- Press firmly for five minutes, then weight during 24-hour curing time
- Test leather compatibility on scraps to avoid discoloration, ensuring a strong and durable finish with the right leather glues.
Burnishing and Smoothing Tools
After securing your leather hem with glue, you’ll need proper burnishing techniques to achieve professional results.
These leatherworking tools create crisp edges and smooth seams perfectly.
| Tool | Purpose | Best For |
|---|---|---|
| Bone Folder | Edge creasing and leather smoothing | Delicate hems, precise folds |
| Roller Tool | Seam flattening across wider areas | Leather pants, jacket hems |
| Spoon Back | Burnishing small sections effectively | Detail work, curved edges |
| Mallet | Final leather finish compression | Heavy-duty leather crafting tools |
A bone folder’s availability makes it a readily accessible tool.
Tool maintenance guarantees consistent leather edge quality every time, which is crucial for achieving professional results with your leatherworking projects, and it highlights the importance of having the right tools for the job, such as a bone folder.
Advanced Leather Hemming Tips
Once you’ve mastered basic hemming, you’ll want to tackle specific garment types that present unique challenges.
Each leather piece requires slightly different approaches to achieve professional results without damaging the material.
Hemming Leather Pants and Shorts
Hemming leather pants and shorts requires measuring your desired length, then marking with tailor’s chalk. You’ll fold the material carefully, considering pocket considerations and hardware integration around zippers or buttons.
Different leather types affect your approach—softer hides work better with adhesive methods while thicker leather needs reinforcement. For inseam adjustments, maintain the original hem styles by matching stitch patterns.
To improve the leather hem stability, consider adding iron-on interfacing. When sewing leather, secure side seams with four stitches per pant leg to prevent unraveling and maintain the garment’s structure.
Hemming Leather Jackets and Coats
Jacket and coat hemming requires careful attention to lining considerations and hem reinforcement.
You’ll need to separate the lining from the outer leather, hem each layer individually, then reattach using precise hand stitching.
Professional alterations often handle complex weatherproofing hems that maintain the garment’s protective qualities.
Style adjustments for leather garments demand specialized leather tailoring knowledge, especially when preserving original design elements while ensuring proper fit and function.
Troubleshooting Common Hemming Issues
Even perfect leather hemming techniques can hit snags. When problems arise, you’ll need quick fixes to save your project.
Here are three common issues you’ll encounter:
- Uneven Hems and Crooked Lines – Use templates or guides to maintain consistent measurements, and mark with chalk that won’t rub off easily
- Puckering Fabric and Bulky Seams – Adjust your sewing machine’s presser foot pressure and use appropriate stitch lengths for leather thickness
- Skipped Stitches – Replace blunt needles immediately and check thread tension; leather sewing techniques require sharp, heavy-duty needles designed for leather tailoring and repair work.
Selecting the right thread avoids uneven stitching issues.
Frequently Asked Questions (FAQs)
Is it possible to hem leather?
Yes, you can hem leather using two main methods: topstitching or gluing. Topstitch by folding the hem and sewing with longer stitches, or use leather cement for a sewn-free finish.
Does leather fray if you cut it?
Unlike fabric, leather won’t fray when you cut it. The dense, tanned hide structure prevents loose threads since leather doesn’t have a woven construction that can unravel like traditional textiles.
Can you use hemming tape on leather?
Hemming tape won’t work effectively on leather because it requires heat activation, which can damage leather.
Instead, use leather-specific adhesives like contact cement or specialized leather glue for clean, durable hems.
Does leather need hemming?
Leather doesn’t always need hemming, but it’s often wise.
Raw edges can fray or look unfinished.
You’ll want to hem for durability, professional appearance, and preventing wear.
Use topstitching or leather glue methods.
Whats the best leather thickness for hemming?
Medium-weight leather around 3-4 oz works best for hemming. It’s thick enough to hold a crisp fold but flexible enough to manipulate easily without cracking or bunching up.
How do you prevent leather from cracking?
Keep your leather conditioned with quality oils or creams every few months.
Store it away from direct sunlight and heat sources.
Avoid getting it soaking wet, and let it dry naturally if dampened.
Can you hem faux leather garments?
You’ve wondered if it’s possible—and yes, you can hem faux leather garments successfully. Use topstitching or fabric glue methods, avoiding high heat which damages synthetic materials.
Whats the ideal hem width for leather?
For most leather garments, you’ll want a hem width between 1 to 5 inches.
This provides enough material for clean folding and stitching without creating bulk that’ll make your garment look awkward or feel stiff.
How do you fix uneven leather hems?
Uneven leather hems create frustration, but you can fix them with precision.
First, mark your desired hemline using a ruler and chalk.
Trim excess leather with sharp shears, then sand rough edges smooth.
Re-fold and secure with leather cement or topstitch for a professional finish.
Conclusion
Like knights of old sharpening their swords, you’ve now mastered essential techniques for how to hem leather with precision and confidence.
Whether you choose hand-sewing for thick hides, fabric glue for delicate pieces, or the no-sew burnishing method, each approach delivers professional results when executed properly.
Remember to measure twice, cut once, and select the right tools for your leather’s thickness.
With these five methods in your arsenal, you’ll tackle any leather hemming project successfully and create garments that last for years.
- https://www.doinaalexei.com/finishing-a-leather-hem.html
- https://nyhandmadecollective.org/blog/2009/04/wardrobe-refashion-how-to-hem-leather.html
- https://www.reddit.com/r/Tailors/comments/180idh8/can_you_get_leather_pants_hemmed_at_a_tailor/
- https://hejdoll.com/how-to-hem-vegan-leather-pants/
- https://www.groz-beckert.com/en/news/newsletter/sewing/2015/

