This site is supported by our readers. We may earn a commission, at no cost to you, if you purchase through links.
 Making a baby quilt starts with choosing a simple pattern like squares or strips.
You’ll need cotton fabric, batting, backing material, and basic sewing supplies.
Cut your fabric pieces according to your pattern, then sew them together to create the quilt top.
Layer the top with batting and backing, then quilt through all layers using straight lines or simple designs.
Finish by adding binding around the edges.
Cotton fabrics work best since they’re soft and washable.
A basic 36×36 inch quilt takes about 8-12 hours for beginners.
The secret lies in choosing the right techniques that transform scattered fabric pieces into heirloom magic with the right techniques.
Table Of Contents
Key Takeaways
- Choose simple patterns like squares or strips – You’ll build confidence with beginner-friendly designs that require minimal cutting precision and offer quick assembly times.
- Pre-wash all fabrics before cutting – You’ll prevent shrinkage and color bleeding that could ruin your finished quilt after the first wash.
- Use cotton fabrics and low-loft batting – You’ll ensure breathability, softness, and safety for baby’s delicate skin while making the quilt easy to wash and maintain.
- Maintain consistent quarter-inch seam allowances – You’ll create professional-looking blocks that fit together properly and avoid the frustration of uneven, wobbly results.
Baby Quilt Basics
Creating a baby quilt starts with three basic decisions that’ll set you up for success.
You’ll need to choose a beginner-friendly pattern, select soft cotton fabrics, and gather essential quilting tools like a rotary cutter and cutting mat.
This decision includes selecting a pattern, choosing fabrics, and gathering tools such as a rotary cutter.
Choosing a Pattern
Starting with the end in mind, choosing the right pattern sets your baby quilt’s foundation.
Begin with beginner quilt patterns featuring simple squares or triangles.
Easy baby quilt designs like Giant Star or Modern Triangle offer quick wins while building confidence.
Consider your skill level when browsing baby quilt patterns free online.
Many retailers offer a variety of quilt pattern products.
Simple designs require fewer fabric requirements and offer customization options through color choices, making them perfect entry points into quilting mastery with a focus on customization options.
Selecting Fabric
Choose quilting cotton fabric for its fabric breathability and durability. Organic options work well for sensitive skin.
Select three to five fabrics with varied print scaling – mix bold shades with softer tones. Consider your nursery’s color palettes when making fabric selection.
Cotton’s medium fabric weight handles washing beautifully. Colorful prints add visual interest, but balance busy patterns with solid quilting cotton.
Many parents now prefer certified organic materials for their baby’s quilt.
Essential Tools and Supplies
The right tools make crafting your baby quilt feel like a warm embrace rather than a wrestling match.
You’ll need precision instruments that work as extensions of your hands, turning fabric into love.
- Rotary cutter – Your fabric-slicing superhero that cuts through quilting cotton fabric like butter
- Cutting mat – The trusty sidekick that protects your surfaces and keeps cuts razor-sharp
- Quilting rulers – Your measuring maestros ensuring every piece fits perfectly together
- Sewing machine with quality thread – The heartbeat of your project, stitching memories into every seam
To prevent fabric fraying, consider using pinking shears.
Make a Baby Quilt
Now you’re ready to transform fabric pieces into a treasured keepsake that’ll wrap your little one in love.
Follow these clear steps to create your first baby quilt, and you’ll discover that making this special gift is easier than you might think, allowing you to create a treasured keepsake.
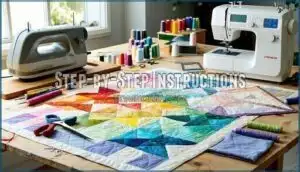
Step-by-Step Instructions
First, gather all your fabric pieces and lay them out on a flat surface. Begin cutting fabric using sharp scissors or a rotary cutter for clean edges.
Next, start assembling quilt blocks by sewing pieces together with quarter-inch seams. After completing your quilt top, create the quilt sandwich by layering quilt top, batting, and backing fabric.
Secure layers with safety pins or basting spray. Add quilting stitches using straight lines or simple patterns.
Tips for Beginners
When tackling your first baby quilt tutorial, start with easy patterns like simple squares or triangles.
These beginner quilting projects help you master basic techniques without frustration.
Pick three coordinating fabrics—one busy print, one medium pattern, one solid.
Gather tool essentials: rotary cutter, cutting mat, and quarter-inch seam guide.
Practice consistent seam allowances on scraps first.
Simple techniques like chain piecing speed up your quilting for beginners project while maintaining accuracy.
To guarantee accuracy, beginners should consider starching fabric beforehand, and use basic techniques to ensure a successful project, following quilt tutorial guidelines.
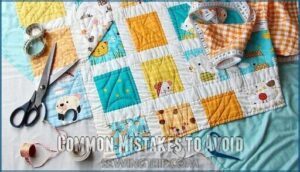
Common Mistakes to Avoid
Mistakes can turn your baby quilt project into a frustrating experience.
Fabric Shrinkage happens when you skip prewashing – always wash fabrics first.
Uneven Seams create wobbly blocks, so maintain consistent quarter-inch seam allowances.
Poor Planning leads to running out of fabric midway through your project.
Blunt Needles cause thread breaks and skipped stitches, and Crooked Binding ruins the final appearance, so take time measuring carefully.
Quilt Design Options
You’ll have countless design options when creating your baby quilt, from simple two-color patterns to complex multi-fabric arrangements.
The key is choosing a design that matches your skill level and the time you want to spend on the project, which is a complete concept in itself.
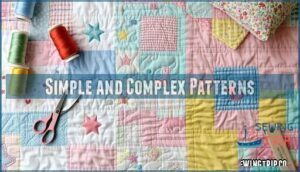
Simple and Complex Patterns
Pattern difficulty varies dramatically from simple squares to intricate geometric designs.
Your skill level and available time determine which quilting styles work best for your first baby quilt project.
- Simple Patterns – Basic squares, rectangles, and strips require minimal cutting precision and offer quick assembly for beginners with limited fabric requirements.
- Intermediate Designs – Half-square triangles, log cabin quilt blocks, and chevron patterns increase design complexity while maintaining manageable time investment.
- Advanced Patchwork – Star blocks, curved piecing, and appliqué techniques demand higher pattern difficulty with extensive fabric requirements and longer completion times.
- Modern Minimalist – Large-scale quilt design elements reduce piecing complexity while creating stunning visual impact through strategic fabric placement and negative space.
Color Schemes and Themes
When choosing colors for your baby quilt, consider nursery themes and whether you want gender neutral options or specific palettes.
Seasonal palettes work well – soft pastels for spring, bright colors for summer.
Contrasting colors create visual interest and help develop baby’s eyesight.
Mix fabric prints with solid colors to balance busy patterns, and your quilt colorful design should include at least three coordinating fabrics for the best results, using coordinating fabrics.
Adding Personalized Touches
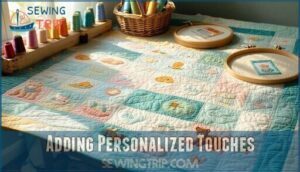
Personal touches transform your handmade baby quilt into a treasured keepsake.
Monogramming options include embroidered names or initials using colorful thread.
Custom appliqués let you add favorite animals, shapes, or symbols.
Photo transfers create unique focal points with family pictures.
Consider adding special dates like birth announcements.
Personalized labels document the quilt maker and creation date, making your baby shower gift extra meaningful for years ahead, with a personal touch that becomes a keepsake.
Fabric Selection Guide
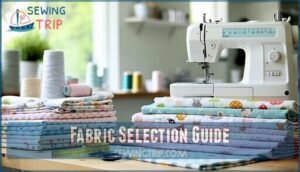
Choosing the right fabric makes all the difference in creating a soft, durable baby quilt that withstands countless washes and snuggles.
You’ll need to understand fabric types, proper preparation methods, and batting options to guarantee your finished quilt stays beautiful and safe for baby’s delicate skin.
Cotton Vs Other Fabrics
Cotton reigns supreme for your quilted baby blanket, offering unmatched fabric breathability and skin sensitivity benefits.
This quilt fabric provides superior washability factors compared to synthetic alternatives, while polyester blends cost less, cotton’s durability comparison shows better longevity through countless wash cycles.
Your baby blanket deserves cotton’s hypoallergenic properties and temperature regulation, as cost analysis reveals cotton’s long-term value outweighs initial expense, providing overall longevity.
Pre-Washing and Preparation
Before you start stitching, you’ll need to prewash your fabric, batting, and backing materials.
This step prevents shrinkage and color bleeding that could ruin your finished quilt.
Wash everything in warm water using mild detergent.
This process also removes manufacturing residues and increases fabric softness.
Don’t skip batting preparation – even batting needs prewashing to guarantee your quilt maintains its size and shape after future washes, ensuring it keeps its original size.
Choosing The Right Batting
Selecting the right quilt batting for your baby quilt determines comfort and durability.
Cotton batting offers breathability and natural softness, making it ideal for sensitive skin. Low-loft options provide easy quilting and safe handling.
Consider washability tests before choosing—cotton shrinks slightly but creates a cozy crinkled texture. For superior softness, consider Pima cotton options.
Compare costs between batting fibers to find your perfect quilt materials match.
Quilting Techniques
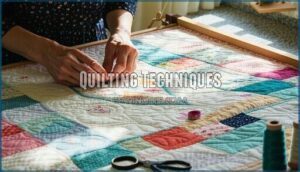
Once you’ve assembled your quilt top, you’ll need to decide how to add the quilting stitches that hold all three layers together.
You can choose between hand quilting for a traditional feel or machine quilting for speed and precision.
Hand Quilting Vs Machine Quilting
Your choice between hand and machine quilting techniques shapes your project’s outcome.
Machine quilting completes baby quilts 3-5 times faster than hand methods, while hand quilting offers superior artistic expression and texture differences.
For those seeking speed and consistency, machine quilting is often the preferred method.
- Time Investment: Hand quilting takes 20-40 hours versus machine quilting’s 3-8 hours
- Stitch Durability: Machine stitches withstand frequent washing better than hand stitches
- Quilting Complexity: Intricate patterns work better with machines; custom motifs suit hand quilting
- Texture Differences: Hand quilting creates soft, draped finishes; machine quilting delivers precise uniformity
- Handmade Gift Appeal: Hand quilting tutorials emphasize traditional craftsmanship for meaningful quilt quilting projects
Straight-Line Quilting
Straightline quilting creates clean, professional results on your diy baby quilt.
Attach a walking foot to prevent fabric bunching and maintain even fabric feeding. Set your stitch length to 8-10 stitches per inch for durability. Adjust thread tension to medium settings.
Use marking lines or quilting rulers for even spacing between rows. A specialized presser foot can further enhance precision.
This quilting tutorial technique works perfectly for any quilt for baby project, providing professional outcomes.
Free-Motion Quilting
Free-motion quilting opens up artistic possibilities beyond straight lines.
Attach a freemotion foot and drop your feed dogs to control fabric movement manually.
Choose appropriate thread and adjust tension settings for smooth stitching.
Start with simple FMQ designs like stippling or loops on practice fabric scraps.
Select sharp needles for clean penetration and master basic practice drills before attempting complex quilt patterns on your diy baby quilt project.
Finishing Touches
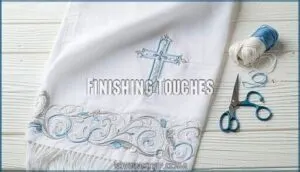
You’re almost done with your baby quilt, and these final steps will make it look professional and last for years.
The binding, labeling, and proper care instructions will transform your handmade creation into a cherished keepsake.
Binding and Edging
Perfect binding transforms your quilt from unfinished project to treasured keepsake.
Perfect binding is what separates your weekend project from a family heirloom.
Cut binding fabrics into 2¼-inch strips for standard quilt edges. Machine binding offers speed and durability for busy parents.
Create mitered corners by folding strips at 45-degree angles for professional results. Decorative stitches add charm, while scalloped edges provide unique flair.
Master these edge binding techniques for flawless quilt finishing.
Adding a Label or Embellishments
Adding personal touches transforms your baby quilt into a treasured keepsake.
Create meaningful connections through these simple additions:
- Personalized Labels – Use fabric markers to write the baby’s name, birth date, or special message on a fabric square
- Embroidered Details – Add simple stitched flowers, hearts, or the child’s initials for handmade charm
- Appliqué Designs – Attach small fabric shapes like animals or stars using fusible web for dimensional interest
These quilt personalization tips make handmade gifts and baby shower gifts extra special.
For more complex designs, consider employing advanced applique techniques for a professional finish.
Caring for and Washing The Quilt
Once your baby quilt is complete, proper quilt care guarantees it stays soft and beautiful for years.
Machine wash on gentle cycle with cold water every 1-2 weeks for daily-use quilts.
| Care Aspect | Method | Frequency |
|---|---|---|
| Washing Frequency | Gentle cycle, cold water | Every 1-2 weeks for daily use |
| Stain Removal | Pre-treat with enzyme cleaner | Immediately after spills |
| Drying Methods | Air dry flat or tumble low | After each wash |
| Storage Solutions | Breathable cotton bags | When not in use |
Pre-treat stains immediately with baby-safe enzyme cleaners.
Avoid bleach and harsh chemicals that cause quilt shrinking and fading.
Air drying prevents damage, though low-heat tumble drying works too.
Store quilts in cotton bags with cedar blocks to prevent pests.
Check binding edges regularly for repair techniques needs.
Proper quilt maintenance keeps your handmade treasure looking fresh through countless snuggles and spills.
Frequently Asked Questions (FAQs)
What is the fastest baby quilt to make?
Layer cake quilts using 10-inch precut squares are your fastest option.
You’ll skip cutting time completely and simply sew squares together in rows.
Choose the Easy Layer Cake Baby Quilt pattern for maximum speed and efficiency.
What size squares are used for a baby quilt?
Common square sizes for baby quilts include 5×5 inches for charm squares, 5×5 inches for mini squares, and 6×6 inches for medium blocks.
You’ll choose size based on your pattern’s requirements and desired finished quilt dimensions.
How long does making a baby quilt take?
Making a baby quilt typically takes 8-20 hours, depending on your experience and pattern complexity.
You’ll spend 2-4 hours cutting and piecing, 4-12 hours quilting, and 2-4 hours binding for a finished quilt.
Whats the ideal baby quilt size for cribs?
For standard cribs, you’ll want your quilt measuring 36 by 45 inches.
This size provides perfect coverage without excess fabric that could pose safety risks.
It’s roomy enough for snuggling yet compact enough to stay safely positioned in the crib during naps, ensuring a safe environment.
How much does homemade baby quilt cost?
You’ll spend $20-60 making a homemade baby quilt.
Fabric costs $15-40, batting runs $3-8, and binding fabric adds $2-
Using charm packs or fat quarters saves money compared to buying full yardage.
Can you machine wash quilted baby blankets?
Like a trusted guardian watching over precious cargo, you’ll want to handle your quilted baby blanket with care.
Yes, you can machine wash most quilted baby blankets using gentle cycle, cold water, and mild detergent for best results.
What batting weight works best for babies?
You’ll want low-loft batting for baby quilts since it’s lightweight, breathable, and safe. Thin batting won’t overheat little ones and makes washing easier while maintaining softness.
Conclusion
Making baby quilts brings unexpected joy when fabric scraps transform into treasured keepsakes.
You’ve learned how to make a baby quilt from start to finish, covering pattern selection, fabric preparation, and finishing techniques.
Your first quilt won’t be perfect, but each stitch builds confidence for future projects.
Remember to pre-wash fabrics, maintain consistent seam allowances, and take breaks when needed.
With practice, you’ll create beautiful quilts that families will cherish for generations to come.
- https://www.handmadekeeps.com/blogs/news/machine-quilting-vs-hand-quilting-which-technique-is-right-for-you
- https://leahday.com/blogs/machinequilting/longarm-ruler-quilting-on-a-baby-quilt
- https://thesewingloftblog.com/machine-quilt-binding-vs-hand/
- https://patchworkandpoodles.com/3-hand-quilting-myths-debunked/
- https://jinnybeyer.com/hand-vs-machine-theres-room-for-both/

