This site is supported by our readers. We may earn a commission, at no cost to you, if you purchase through links.
Start by gathering fabric and essential tools. Measure and cut your fabric as precision guarantees a perfect fit.
Sew the pieces, making sure to adjust for a personalized feel. Add traditional flair with tartan patterns or leather straps.
Pleating is an art, so take your time, reflecting the style that suits you best.
Table Of Contents
- Key Takeaways
- Choosing The Right Fabric for Kilt
- Kilt Pleating Techniques and Pattern
- Essential Tools and Materials for Kilt
- Step-by-Step Guide to Sewing a Kilt
- Step 1 – Choosing The Fabric
- Step 2 – Measurements
- Step 3 – Preparing The Fabric
- Step 4 – Preparing for The Outside Apron
- Step 5 – Pleating
- Step 6 – Adjustments for Hip to Waist
- Step 7 – Temporarily Fixing The Pleats
- Step 8 – Final Pleat Stitching
- Step 9 – Trimming
- Step 10 – Fringe Addition
- Step 11 – Adding a Waistband
- Step 12 – Adding Lining
- Step 13 – Adding Accessories
- Step 14 – Finishing The Kilt
- Kilt Finishing Touches and Maintenance
- Frequently Asked Questions (FAQs)
- Conclusion
Key Takeaways
- Choose fabric wisely, considering tartans that resonate with your heritage and ensuring durability and comfort for wear and care.
- Accurate measurements are crucial; measure your waist, hips, and length to ensure a well-fitted kilt that complements your body shape.
- Pleating is key to kilt-making; carefully align and stitch the pleats for a polished, traditional look.
- Finishing touches matter; adding a waistband, lining, and accessories enhances the style and comfort of your k
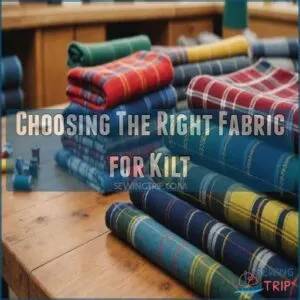
Choosing The Right Fabric for Kilt
When choosing fabric for your kilt, consider options like School Plaid or FabricLA Cotton Flannel, each offering unique benefits in durability and comfort.
Just remember, a kilt made from the right fabric looks great but can also withstand an unexpected dance-off, keeping you stylishly secure.
School Plaid Fabric
When considering school plaid fabric for your kilt, you’ll appreciate its durability and affordability, and it’s worth noting that in the US, this type of fabric is often referred to as any checked cloth.
This 100% polyester option, with its wrinkle-resistant, quick-drying nature, is like a superhero among kilt fabrics.
You won’t break the bank, and
FabricLA Cotton Flannel Plaid Fabric 60W
Choosing the FabricLA Cotton Flannel Plaid Fabric 60W for your kilt offers a snug yet affordable option.
It’s quick-drying and machine washable, making care straightforward.
The fabric’s airy nature makes it comfortable and easy to sew.
Perfect for tartan plaid projects, it opens possibilities beyond kilts, like cozy school plaid crafts or casual clothing creations.
Red Blue Green Mini Stuart Scotch Plaid Tartan Cotton Fabric
Thinking about your kilt’s fabric? The Red Blue Green Mini Stuart Scotch Plaid Tartan Cotton Fabric is a fantastic choice. This blended cotton is medium weight, reversible, and easy on the wallet.
- Fabric care: Machine washable
- Pattern variations: Classic tartan
- Color combinations: Red, blue, green
- Sewing tips: Medium weight aids pleating
- Kilt history: Traditional plaids are timeless
Textile Creations Classic Yarn-dyed Tartan Plaid
After reveling in the vibrant Red Blue Green Mini Stuart, your kilt journey calls for Textile Creations Classic Yarn-dyed Tartan Plaid.
You can find a variety of products for this fabric at Yarn-dyed Tartan options.
This lightweight cotton fabric whispers of tartan history, offering rich color options perfect for a traditional Scottish
Kilt Pleating Techniques and Pattern
Now, let’s tackle the exciting part: pleating your kilt!
You’ll learn about different pleat types, like sett and stripe pleats, and master the process, from measuring and pinning to perfectly stitching those iconic folds.
Sett Pleats
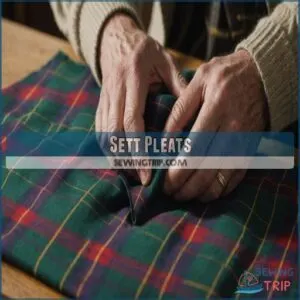
Once you’ve settled on the perfect fabric, it’s time to explore the art of sett pleats.
These pleats align the tartan plaid fabric perfectly, ensuring the pattern flows uninterrupted from front to back.
Consider sett pleat variations and tools to master this technique, adding a touch of sophistication to your kilt making journey.
It’s like weaving magic.
Stripe Pleats
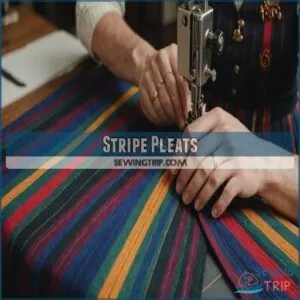
Mastering stripe pleats on a kilt involves embracing a tapestry of patterns.
First, align the stripes to make sure stunning symmetry is achieved.
Second, focus on precise pleat placement for a balanced look.
Third, explore variations by mixing colors creatively.
Finally, don’t skip the magic of pleat finishing, which adds finesse.
Remember, kilt sewing is like weaving tradition with modern flair.
Pleating Process
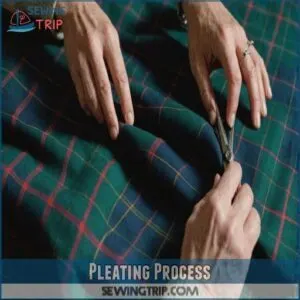
You’re ready to shape those stripe pleats into a stunning kilt.
Start by laying out the fabric smoothly, using an iron to flatten it.
Remember to use sharp scissors to cut through tartan fabric with precision as recommended in traditional kilt making guides.
Align each pleat accurately with pleating tools, ensuring they hug the kilt pattern perfectly.
The pleat depth and alignment are key in achieving a polished look.
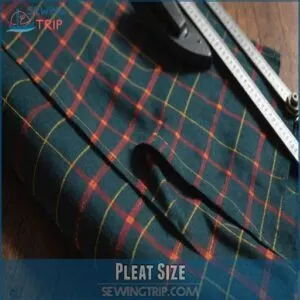
Pleat Size
When deciding on pleat size for your kilt, remember it impacts both style and function.
Aim for consistency and the ideal width to keep everything in harmony with your kilt patterns and measurements.
Keep these tips in mind:
- Vary pleat width depending on waist and length.
- Achieve uniform pleat consistency.
- Use pleating tools for precision.
- Adjust to personal style preferences.
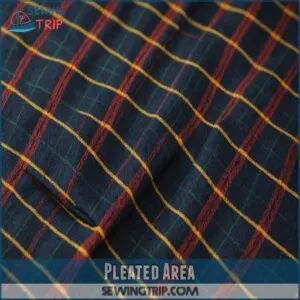
Pleated Area
After settling on pleat size, focus on crafting the pleated area.
This section spans the kilt’s entire back, showcasing your chosen tartan pattern beautifully.
Keep pleat placement and alignment neat to maintain that traditional flair.
Humor me: think of pleat stability like a house of cards—a solid foundation guarantees it won’t topple, even on windy Scottish hills!
Pleat Count
Consider the magic of pleat count in your kilt, affecting aesthetics, comfort, and traditional symbolism.
Standard count leans toward 29, but feel free to personalize, learning more about kilt pleating techniques and pattern from online resources like kilt pleating guides.
Each pleat whispers stories of history and individuality, like setting the tone for a grand symphony.
Essential Tools and Materials for Kilt
Before you start sewing, gather your essential tools: a sewing machine, sharp scissors, measuring tape, fabric chalk, an iron, interfacing, and matching thread.
These are your trusty companions on this kilting adventure!
Remember, proper preparation prevents poor performance, so double-check you have everything before you begin.
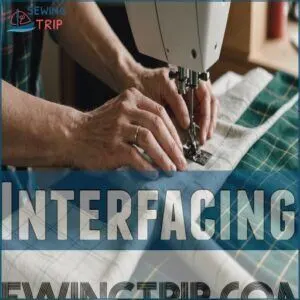
Interfacing
Interfacing is your secret weapon in kilt construction, adding structure and strength to the waistband.
Choose the right interfacing type and weight to match your fabric, ensuring a firm hold without stiffness.
Apply it carefully to avoid wrinkles, like giving your kilt a backbone.
Don’t skimp here—interfacing is as essential as the tartan itself, keeping everything in place!
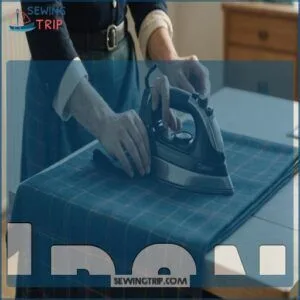
Iron
With a trusty iron in hand, you’re not just smoothing fabric; you’re perfecting the art of kilt-making.
Set the right iron temperature and use steam settings to banish wrinkles from your tartan fabric.
An ironing board offers stability, while heat protection guards delicate kilt pleats and measurements from damage.
It’s your secret weapon in mastering that traditional Scottish kilt look.
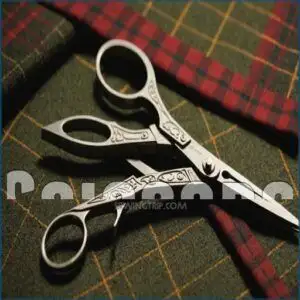
Scissors
After ironing, grab a trusty pair of scissors for kilt sewing.
You need those sharp blades to make precise cuts through fabric.
Don’t risk an irregular hemline!
- Types: Use fabric scissors—they’re key for clean slices.
- Safety Tips: Keep fingers clear!
- Storage Methods: Store in a safe, dry place, to keep them sharp.
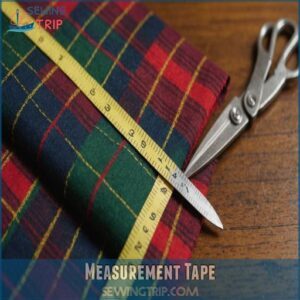
Measurement Tape
Cutting fabric to size is just the start; getting the fit right calls for accuracy.
Enter the measurement tape, your trusty sidekick for achieving precision in kilt waist size and kilt length.
With a good tape on hand, you’re ready to measure, adjust, and finesse your kilt sewing patterns for a look that’s custom-made.
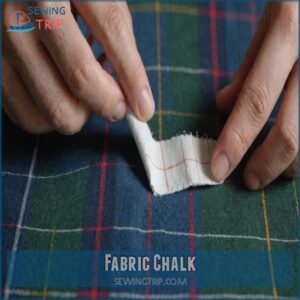
Fabric Chalk
A secret to perfectly homemade kilts lies in your fabric chalk.
It’s your guiding light, helping mark kilt measurements and tartan patterns with precision.
Skip a pencil and embrace chalk for its neat marks and easy removal.
Choose wisely, as durable brands save time and effort.
- Mark clear lines for kilt sewing.
- Easily erase mistakes.
- Avoid fabric damage.
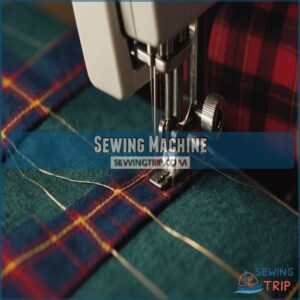
Sewing Machine
You’ve gathered your fabric and chalked your lines; now it’s time to meet your trusty sidekick: the sewing machine.
It’s not just any tool; it’s the backbone of kilt creation.
Keep it in shape with regular maintenance, and don’t forget the right needles for tartan toughness.
Here’s a quick guide:
| Part | Purpose |
|---|---|
| Needle Type | Suitable for kilt fabrics |
| Accessories | Enhance sewing precision |
| Machine Tips | Improve your sewing skills |
| Maintenance | Keeps machine operating well |
| Troubleshooting | Tackles common issues |
Matching Thread
Now that you’ve got your sewing machine humming, let’s talk thread!
Choosing the right thread is key for a professional-looking kilt.
Consider thread color, weight, and type.
High-quality thread makes all the difference.
- A subtle thread color that blends with your fabric.
- A sturdy thread weight that won’t break easily.
- A smooth thread type that glides through the fabric.
Step-by-Step Guide to Sewing a Kilt
Ready to create your own stylish kilt?
Follow these easy steps and soon you’ll have a traditional piece that’s perfect for any occasion, without needing to wrestle with too many sewing mishaps.
Step 1 – Choosing The Fabric
When choosing the fabric for your kilt, consider tartans that resonate with Scottish clans or explore Irish tartans for a cultural twist.
Factor in fabric weight and durability; lightweight cotton keeps it breezy, while heavy wool offers warmth.
Don’t forget fabric care, as machine-washable options save time.
Balancing kilt fabric cost and design makes for a stylish, budget-friendly selection.
Step 2 – Measurements
Choosing the right fabric leads you to the next task: taking accurate measurements.
Grab your tape measure and note these essentials:
- Waist: Measure around the natural waistline.
- Hip: Check the widest part of the hips.
- Length: Determine the distance from waist to knee.
- Kilt size: Calculate fabric yardage for perfect pleating.
These steps guarantee a well-fitted kilt.
Step 3 – Preparing The Fabric
You’ve got your measurements; it’s time to turn that fabric into a stylish kilt.
Start by hemming the edges to prevent fraying, then cut the cloth into two pieces and sew them together.
Ironing those creases makes all the difference, setting the stage for precision and pattern perfection.
Remember, your kilt’s journey begins with each careful stitch.
| Task | Action |
|---|---|
| Hemming | Finish top and bottom edges |
| Cutting | Divide fabric into two segments |
| Sewing | Join pieces into one |
| Ironing | Press seams and folds |
| Pattern | Align for kilt design |
Step 4 – Preparing for The Outside Apron
Begin your kilt construction adventure by folding under six inches for the outside apron.
This creates the elegant front of your kilt, setting the stage for a polished look.
Make sure the apron length is balanced and that the pleat direction enhances the fabric choice.
To achieve a professional finish on your kilt, it’s essential to understand the sewing machine parts, particularly the presser foot and throat plate, which work together to guide the fabric smoothly. As part of this kilt sewing guide, focus on hidden fabric and double-width pleats for stylish, traditional appeal.
Step 5 – Pleating
After you’ve prepped the apron, it’s time to pleat.
Grab your pleat tools and start shaping each pleat with precision.
Aim for pleat types like sett or stripe, depending on your kilt design.
Keep pleat spacing consistent, about one inch visible.
These pleat tips help create structure and flair.
Remember, pleat maintenance means ironing each fold sharp!
Step 6 – Adjustments for Hip to Waist
Now that your pleats are looking sharp, let’s tackle the hip-waist difference.
This is where your kilt truly becomes custom-made.
Account for your unique body shape; the extra fabric at the hips needs adjusting.
Here’s how:
- Assess the Hip-Waist Difference.
- Make Pleat Modifications accordingly.
- Make sure you have a comfortable, flattering fit.
These tailoring tips will make your handmade kilt truly special.
Step 7 – Temporarily Fixing The Pleats
Worried your pleats might shift? Use basting techniques like a running stitch for a temporary fix. You’ll keep those pleats stable and ready for the next step in your kilt sewing journey.
Check below for simplicity:
| Technique | Benefit |
|---|---|
| Running Stitch | Ease of removal |
| Basting Stitch | Quick temporary fix |
| Pinning Pleats | Strong hold |
| Securing Pleats | Enhanced stability |
Stay focused and keep sewing!
Step 8 – Final Pleat Stitching
Those pleats you’ve sorted with a running stitch? It’s time for a more permanent solution.
Use a blind or felling stitch to secure them.
This guarantees pleat security and gives your kilt that polished look.
These stitch types offer a seam finish that’s essential in traditional kilt making.
So, to begin, it’s essential to master some top hand sewing techniques, like proper threading and knotting, gather your kilt sewing techniques and confidently stitch away!
Step 9 – Trimming
Master the art of trimming by first spreading your kilt flat, ensuring no excess fabric interferes with the clean lines.
Use precision cutting to maintain the kilt shape and enhance its traditional design.
These trimming techniques are essential for DIY kilt making, offering you a chance to refine your kilt sewing skills and create a piece ready for the next step.
Step 10 – Fringe Addition
Imagine this: you’re nearly finished with your DIY kilt making project.
It’s time to add a bit of flair by attaching a fringe to your kilt’s apron.
Decide on the fringe type and length that suits your style.
Carefully sew it on, ensuring it’s secure.
Keep your fringe looking fresh with gentle care, and enjoy this stylish kilt accessory!
Step 11 – Adding a Waistband
Adding a waistband turns your kilt project into a traditional Scottish garment that fits perfectly.
Make sure it matches your kilt style and size.
Use interfacing for strength, sewing it securely for a comfortable closure.
For a professional finish, consider using specialized kilt waistband interfacing products available online, such as kilt waistband interfacing materials here.
Step 12 – Adding Lining
While crafting your kilt, a lining isn’t just a fancy addition—it’s comfort galore!
Use sturdy, breathable duck material for lining the waistband and inner fabric.
This makes sure your traditional Scottish garment holds its shape and feels great.
When choosing the perfect fabric for your kilt, consider looking for woven fabrics like cotton twill with added spandex for comfort and ease of movement, as recommended for sewing trousers how to sew a simple trouser. Don’t fret if alternatives like polyester intrigue you; fabric selection depends on your kilt sewing tips and needs.
Follow kilt instructions carefully!
Step 13 – Adding Accessories
Now, let’s add some flair!
Personalize your kilt with awesome accessories.
Consider these options:
- A sturdy kilt belt with a unique buckle, showcasing your style.
- Secure your kilt with stylish kilt pins, adding a touch of elegance.
- For a traditional look, add a kilt sporran, a practical and eye-catching pouch.
These additions will truly make your kilt one-of-a-kind!
Step 14 – Finishing The Kilt
To wrap up, press your kilt carefully to set the pleats neatly.
This final touch makes all the difference, elevating your kilt from good to exceptional.
Don’t skip kilt care; it preserves your custom-made kilt’s charm.
Add the right kilt accessories and embrace your Celtic heritage with pride.
Wearing a kilt is more than clothing—it’s celebrating tradition.
Kilt Finishing Touches and Maintenance
Completing your kilt with perfect finishing touches and proper maintenance guarantees it looks sharp and lasts longer.
By pressing it thoroughly, adding a few stylish buckles or straps, and wearing it proudly, you make a statement that’s both timeless and distinctly you.
Pressing The Kilt
After sewing a kilt, make sure it looks sharp with these ironing techniques.
Set the steam to the right level for your fabric type.
Here’s how you get those pleats crisp:
- Position the kilt on an ironing board.
- Use a damp cloth to cover the pleats.
- Press gently to preserve pleat shapes and remove wrinkles.
Adding Buckles or Straps
Struggling with kilt closures? Fear not! Choosing the right buckle types or strap styles can elevate your kilt from basic to custom.
Whether you prefer sleek kilt buckles, reliable kilt velcro, or classic belt alternatives, each option adds character.
For a custom-made kilt, experiment with different accessories and kilt designs, making practical choices that match your DIY skills and personal style.
Wearing The Kilt
Wearing a kilt isn’t just about donning fabric—it’s embracing a bit of history and style.
Make sure you get a proper fit by adjusting the kilt buckles, and don’t shy away from adding kilt accessories.
For occasion etiquette, a nod to traditional kilt designs can make your custom-made kilt memorable.
Remember, confidence is the best accessory, so wear it proudly!
Frequently Asked Questions (FAQs)
How do I make a Scottish kilt?
Picture yourself weaving tradition into fabric.
Choose quality tartan, measure waist and knees, then pleat precisely.
Sew with care, adding a waistband.
Finish with accessories like belts or a sporran for that classic Scottish touch.
What is the art of kiltmaking?
Kiltmaking is an intricate craft blending traditional skills with precise measurements, artistic pleating, and quality fabric selection.
You’ll explore pleat creation, fabric cutting, and sewing, all while appreciating Scotland’s rich cultural tapestry in each stitch.
Can a kilt be made quickly?
Crafting a kilt quickly is possible with practice and streamlined steps, but don’t rush.
You’ll need precision for pleats, fabric choice, and stitching.
To achieve faster results, consider simpler styles and utilizing a well-lit, clutter-free sewing space as described in Time-Saving Techniques for Sewing, for faster results, consider simpler styles and efficient sewing techniques.
How to design a kilt?
Traditional kilts can use up to nine yards of fabric.
To design one, choose your tartan, measure your waist, and skillfully pleat and sew the fabric, adding modern touches like linings and closures.
How to stitch a kilt?
Start by pleating your fabric, securing it with pins or glue, then stitch the pleats firmly.
Attach a waistband, lining, and any accessories like buckles.
Can you make a kilt out of ordinary fabric?
While traditional kilts use tartan, you can use denim, cotton, or even corduroy. It’ll be less traditional, but it’s your kilt, so personalize it! Experiment and have fun with it.
How much fabric do you need to make a kilt?
To craft a kilt, grab 5 to 5 yards of fabric, depending on your waist size and length preference.
It’s like choosing the perfect amount of frosting for your cake—too little and it won’t fit!
Are kilts hard to make?
Making a kilt isn’t rocket science, but it does require patience and basic sewing skills.
Choose the right fabric, measure accurately, and follow detailed steps for pleating and stitching.
With practice, you’ll master it!
What is proper to wear under a kilt?
While many embrace tradition by going commando under a kilt, some opt for comfort with boxers or briefs.
It’s a personal choice, varying with occasion and confidence.
Check your plans, maybe windy conditions, and plan accordingly.
Is it illegal to wear anything under a kilt?
There’s no legal requirement about what you wear under a kilt.
Traditionally, many choose to go au naturel, while others choose underwear for comfort.
It’s entirely a matter of personal preference, with humor often playing a big role in this choice!
Can I use a sewing machine?
You can use a sewing machine.
It speeds up the process and guarantees neater stitches.
Just make sure you’ve practiced on scrap fabric to avoid any "oops" moments.
Happy sewing, and watch those fingers!
How long does it take to make?
Imagine crafting a masterpiece!
It depends; a simple kilt might take a weekend, but a complex one could take weeks.
Your skill level and design choices greatly influence the time commitment.
Plan accordingly!
What type of thread should I use?
When it comes to making your kilt, choosing the right thread is essential.
Opt for a strong polyester or cotton thread.
You want something durable to withstand daily wear, as threading your kilt with flimsy thread could unravel faster than you can say "Scottish dancing.
Is a lining necessary for a kilt?
Ever wonder if a lining’s really necessary in a kilt?
It adds structure and guarantees comfort, especially if you’re using scratch fabrics.
Plus, it can give your kilt a professional touch—like a secret ingredient for success, adding a professional touch.
How do I clean my finished kilt?
To clean your finished kilt, check the care label first.
Typically, a gentle hand wash using cool water and mild detergent works best.
Lay flat to dry, reshaping pleats carefully.
Dry cleaning is a great option too.
Conclusion
Crafting a kilt is like piecing together a vibrant puzzle, where each pleat and fabric choice creates a masterpiece of tradition and style.
With the steps in hand, you’ve got the knowledge to stitch your own wearable piece of heritage.
From selecting the perfect tartan to mastering pleating techniques, making a kilt requires precision and creativity.
Embrace the art of how to make a kilt, ensuring each detail reflects your personal flair and cultural pride.

