This site is supported by our readers. We may earn a commission, at no cost to you, if you purchase through links.
Most quilts punish you for mistakes. Misaligned seams, uneven cuts, wonky corners—traditional quilting has a long list of ways to humble a beginner. Rag quilts work differently.
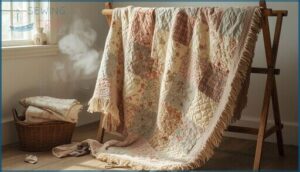
Those exposed seams you’d normally hide? They’re the whole point. They fray in the wash, softening into a texture that looks like it took years to earn. Flannel, cotton, fleece—each fabric frays at its own pace, building a lived-in look that gets better with every wash cycle.
Learning how to make a rag quilt means working with a forgiving process that turns “imperfect” into “charming,” and the steps are more straightforward than you’d expect.
Table Of Contents
Key Takeaways
- Rag quilts turn exposed, frayed seams into the actual design — so your “mistakes” don’t just disappear, they become the whole point.
- Flannel is your best friend here: it frays beautifully, washes well, and gets softer and better-looking every time it goes through the machine.
- You only need a few tools to get started — a rotary cutter, self-healing mat, sharp scissors, and a basic sewing machine that can push through several fabric layers.
- The finish line isn’t sewing the last block — it’s that first wash, where clipped seams puff into the cozy, chunky texture that makes a rag quilt feel like it’s been loved for years.
What is a Rag Quilt?
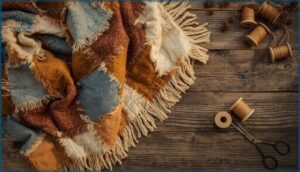
A rag quilt isn’t like a regular quilt — it’s meant to look a little rough around the edges, and that’s exactly what makes it special. The exposed seams fray over time, giving it that cozy, lived-in texture you just want to curl up under.
A rag quilt’s beauty lies in its rough edges — frayed seams that soften over time into something worth curling up under
Here’s what you need to know before you start cutting a single square.
If you’re working with old fabric, browsing sewing patterns for upcycling old clothes can spark ideas and save you a lot of guesswork.
Defining Rag Quilts and Their Unique Look
A rag quilt breaks every “neat seam” rule on purpose — and that’s exactly what makes it special. Instead of hiding the seam allowances inside, you leave them exposed on the front.
Clip them, wash the quilt, and they puff into soft, frayed edges. The result is a beautifully textured, worn-in look that defines the rag quilt style and its cozy, rustic charm.
You can learn more about the importance of exposed seams and frayed edges in creating this signature quilt style.
Benefits for Beginners and Experienced Quilters
This is honestly one of the best Beginner Projects you can start with. Rag quilts forgive wobbly seams and small cutting errors — the frayed edges hide them naturally. For the Quilting Community, that’s a huge relief.
Experienced quilters love them too, using Quilting Techniques like chain piecing to finish faster. Either way, you win.
For a quick overview, you can explore this easy rag quilt pattern method that eliminates block cutting and speeds up the process.
Popular Uses and Size Options
What you make is only half the story — who you make it for matters just as much. Baby Quilts usually run 30 by 40 inches, cozy enough for a crib or tummy time. Throw Quilts and Lap Quilts fit sofas beautifully around 50 by 65 inches.
Memory Quilts, Pet Blankets, and Home Decor pieces each call for their own Rag Quilt Sizes, so your Quilt Size shapes everything from fabric yardage to block count.
Choosing Fabrics for Rag Quilts
Fabric choice is where your rag quilt really comes to life.
The type you pick determines how much fraying you’ll get — and that changes everything about the final look and feel.
Here are the main fabric options to explore.
High-Fraying Fabrics for Maximum Texture
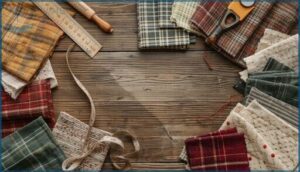
If bold texture is what you’re after, flannel and homespun cotton are your best friends. Flannel selection matters here — quilter’s flannel holds up through repeated washing while still delivering rich fabric fraying along every clipped seam.
Homespun cotton’s loose weaving makes texture creation almost easy. After seam clipping, one wash transforms those raw edges into thick, plush fringe. That’s the rag quilt magic right there.
Medium and Low-Fraying Fabric Options
Not every fabric needs to go wild at the seams. Standard quilting cotton gives your rag quilt a cleaner seam finish — enough fray for texture, but not stringy. Batiks fray even less thanks to their tight weaving.
For the backing, minky or fleece skip fraying almost entirely. These medium and low-fray material choices still work beautifully when layered with higher-fray cotton for balanced quilt texture.
Selecting Fabric Combinations for Desired Results
Fabric pairing is where your rag quilt truly comes to life. Think about color theory: grouping similar tones creates calm, while mixing warm and cool shades adds energy.
Layer a brushed flannel with quilting cotton for smart texture mixing and fray control that won’t overwhelm the design.
Good fabric selection balances weight, contrast, and quilt aesthetics — turning simple fabric crafting into something that feels intentional.
Essential Supplies and Tools for Rag Quilting
Before you cut a single square, it helps to know exactly what you’ll need. The good news is the supply list is short and straightforward — nothing fancy, nothing hard to find.
Here’s what to gather before you get started.
Fabric Amounts by Quilt Size
Getting your yardage estimation right before you cut a single square saves time and money. Here’s a quick guide to fabric requirements by size:
- Baby quilt (30×40 in.): About 6 yards total across three layers.
- Lap quilt (50×60 in.): Roughly 6¾ yards split between top and backing.
- Twin quilt (70×91 in.): Around 15 yards total.
Remember, seam allowance shrinks each block about 1 inch, so always round up.
Thread, Marking Tools, and Pins
Small choices make or break a rag quilt. For thread, 40-weight polyester holds up through heavy washing without snapping. Chalk pencils work beautifully on dark flannel; water-soluble pens suit lighter cotton. Glass-head pins glide through thick layers and survive a hot iron.
| Sewing Notions | Best Use | Why It Works |
|---|---|---|
| 40-weight polyester thread | All-layer quilting | Strong, wash-resistant |
| Water-soluble fabric markers | Light fabrics | Rinses out cleanly |
| Glass-head quilting pins | Layered sandwiches | Heat-safe, sharp |
Sewing Machine Requirements and Helpful Accessories
Your sewing machine doesn’t need to be fancy machine — it just needs to be strong machine. A basic domestic model processes rag quilts well if it can power through six to nine flannel layers.
Use a 90/14 needle, set your stitch length to 3.0 mm, and attach a walking foot for even feeding. Regular machine maintenance — clearing lint from the feed dogs — keeps everything running smoothly.
Top Tools for Making Rag Quilts
Having the right tools makes every step of rag quilting faster, cleaner, and a lot less frustrating. A few key pieces of equipment can mean the difference between smooth sailing and fighting with your fabric the whole way through.
Here are the top tools worth having before you start.
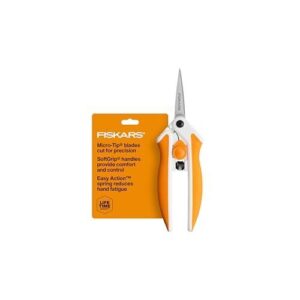
1. Fiskars Micro Tip Scissors
When you’re clipping hundreds of seam allowances on a rag quilt, your scissors matter more than you’d think. The Fiskars Micro Tip scissors make that job so much easier. Their narrow, precision-ground stainless steel blades reach right into tight corners without cutting past your mark.
The spring-assisted Easy Action design opens the blades for you after every snip, which saves your hand during long sessions. If you have arthritis or carpal tunnel, that’s a real difference-maker. Plus, they’re backed by a full lifetime warranty.
| Best For | Quilters, sewers, and crafters who do detailed work and need a lightweight scissor that’s easy on the hands during long sessions. |
|---|---|
| Brand | Fiskars |
| Material | Stainless Steel |
| Weight | 2.08 oz |
| Quilting Use | Yes |
| Beginner Friendly | Yes |
| Multi-Purpose | Yes |
| Additional Features |
|
- The micro-tip blades get into tight spots really well — great for clipping seam allowances or trimming threads close to fabric.
- Spring-assisted opening means your hand isn’t doing all the work, which is a big deal if you’re cutting for hours or dealing with arthritis.
- Backed by a full lifetime warranty, so it’s a solid long-term investment.
- The locking mechanism feels a bit fiddly to some users — not a dealbreaker, but worth knowing.
- Not built for heavy-duty cutting, so thick materials or multiple layers might be a struggle.
- The blades need a little extra care to stay sharp over time.
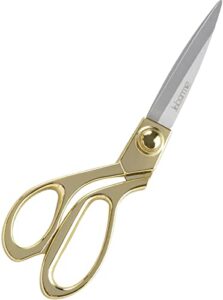
2. Sirmedal Professional Tailor Scissors
Where the Fiskars grips detail work, the Sirmedal Professional Tailor Scissors take on the heavy lifting. These 8-inch stainless steel shears are built to cut through denim, flannel, and multiple fabric layers without slowing down.
The gold-plated metal grips stay comfortable even during long cutting sessions, and the bent blade design keeps your fabric flat on the table while you cut. At just over 4 ounces, they’re sturdy without feeling heavy in your hand.
| Best For | Tailors, dressmakers, and crafters who regularly cut through heavy fabrics like denim, corduroy, and multiple layers of material. |
|---|---|
| Brand | SIRMEDAL |
| Material | Stainless Steel |
| Weight | 4.2 oz |
| Quilting Use | Yes |
| Beginner Friendly | Yes |
| Multi-Purpose | Yes |
| Additional Features |
|
- Cuts through thick, heavy fabrics with ease — denim, corduroy, carpet, and more
- Gold-plated ergonomic grips stay comfortable during long cutting sessions
- Sturdy stainless steel build at just over 4 ounces — solid but not tiring to hold
- Some users find them stiff and hard to open and close
- May not work well for all materials — a few users had trouble cutting everyday clothing
- Ergonomic handle design might not suit everyone, especially those with hand or finger limitations
3. Olfa Rotary Cutter Tool
For cutting perfectly even 8-inch squares, the OLFA 60mm Rotary Cutter is hard to beat. Its wide blade slices through up to six layers of fabric in a single pass — flannel, fleece, denim, you name it.
The blade cover slides into place automatically, so you’re not wrestling with safety caps mid-project. It works for both right- and left-handed quilters, and at just over three ounces, it won’t wear out your hand after the first dozen squares.
| Best For | Quilters, sewists, and crafters who cut fabric regularly and want a reliable, comfortable tool that works for both hands. |
|---|---|
| Brand | OLFA |
| Material | Metal |
| Weight | 3.17 oz |
| Quilting Use | Yes |
| Beginner Friendly | Yes |
| Multi-Purpose | Yes |
| Additional Features |
|
- Cuts through up to six layers at once, so you’re not making the same pass over and over
- The automatic blade cover slides into place on its own — no fumbling with a cap mid-project
- Light enough at just over three ounces that your hand won’t give out after a long cutting session
- You’ll need a cutting mat underneath, so it’s not a grab-and-go solution
- The blade dulls over time, and you may find yourself ordering replacements more often than expected
- Six layers is the limit — if you’re working with thick stacked materials, it may not get the job done
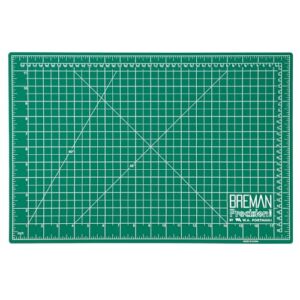
4. Breman Precision Self Healing Cutting Mat
A good rotary cutter needs an equally good surface under it. The Breman Precision Self-Healing Cutting Mat is built for exactly that. Its 5-ply PVC construction closes over cuts so the surface stays smooth session after session — no grooves dragging your blade or snagging your flannel.
The 12×18-inch size is perfect for squaring up individual blocks, and the printed grid with 1-inch squares makes measuring your 8-inch cuts straightforward. Flip it over for a green or black background, whichever contrasts best with your fabric.
| Best For | Quilters, sewers, and crafters who need a reliable, precise cutting surface for block work and detail cuts. |
|---|---|
| Brand | Unknown |
| Material | PVC |
| Weight | 1 lb |
| Quilting Use | Yes |
| Beginner Friendly | Yes |
| Multi-Purpose | Yes |
| Additional Features |
|
- Self-healing surface keeps things smooth even after heavy use — no grooves messing up your cuts
- Two-sided design (green and black) means you can pick whichever background shows your fabric best
- Grid lines and angle guides make measuring and squaring up blocks quick and easy
- At 12×18 inches, it’s great for smaller projects but won’t work for anything large-scale
- Some users feel the angle markings could be laid out better for cutting from different positions
- Long-term durability depends a lot on how it’s stored and how often it’s used
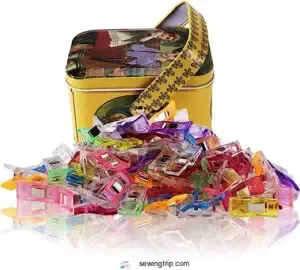
5. Premium Plastic Sewing Clips
Once your mat is set, here’s another swap worth making: ditch the pins for sewing clips. The MumCraft 100-piece set works beautifully on thick rag quilt sandwiches — flannel, batting, and backing all held firm without a single poke.
Each clip’s flat base glides right under your presser foot, and the clear plastic body lets you see your seam allowance line clearly.
With 100 clips in the pack, you’ll have plenty to keep several rows prepped and ready.
| Best For | Quilters and sewists who want a faster, pin-free way to hold multiple fabric layers in place — especially great for beginners and anyone working with thick quilt sandwiches. |
|---|---|
| Brand | MumCraft |
| Material | Plastic |
| Weight | 9.6 oz |
| Quilting Use | Yes |
| Beginner Friendly | Yes |
| Multi-Purpose | Yes |
| Additional Features |
|
- Clear plastic lets you see your seam allowance while you sew, so no guessing
- The flat base slides under your presser foot without any awkward fumbling
- 100 clips in a pack means you can prep several rows ahead and keep your momentum going
- They can feel bulky on narrow seams where precision really matters
- Push them too hard on thick layers and they may snap — they’re plastic, not indestructible
- A few users found them smaller than expected, so they may not replace pins for detailed, fiddly work
Cutting and Preparing Fabric Squares
Getting your fabric cut correctly is honestly where the whole quilt comes together. A few key decisions here will save you time and frustration later on. Here’s what you need to know before you make a single cut.
Determining Block Size for Your Quilt
Block size is where your quilt design really starts to take shape. For a throw rag quilt, 8-inch unfinished squares are a sweet spot — easy to cut and quick to stack.
Remember, seam allowances eat into your quilt dimension, so a 6-inch cut square finishes closer to 4.5 inches.
Do your block size calculation before cutting anything, and your rag quilt proportion will thank you.
Using Rotary Cutters and Mats for Precision
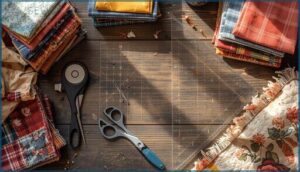
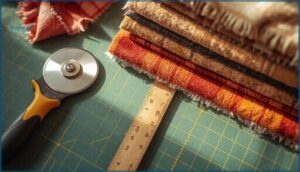
A sharp rotary cutter and a reliable cutting mat are your best friends in rag quilt making. For quilting beginners, a 45mm rotary cutter hits the sweet spot — easy to control, sharp enough to slice through multiple flannel layers cleanly.
Always practice rotary cutter safety: close the blade every time you set it down. Keep your cutting mat flat and rotate it often for precision tools that last.
Organizing and Stacking Layered Squares
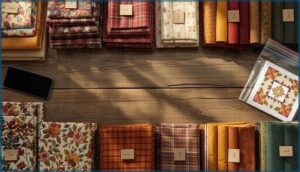
Once your squares are cut, smart stack management makes everything easier. Lay out your full quilt layout on the floor first, then photograph it — your phone becomes your map.
- Sort by fabric type and color
- Stack backing down, batting centered, top fabric face-up
- Keep each row in a labeled zip bag
- Never mix unsewn and sewn stacks
This simple layer organization keeps your rag quilt patterns consistent start to finish.
Sewing and Assembling Rag Quilt Blocks
Now comes the part where your quilt really starts to take shape. Sewing the blocks together is straightforward once you know the right order of steps.
Here’s exactly how to layer, stitch, and join everything together.
Layering and Pinning Quilt Sandwiches
Think of quilt sandwiching as building a little layered hug — backing face-down, batting centered on top, then your top fabric right side up. This fabric orientation keeps both pretty sides visible once the quilt is finished.
For pinning methods, place pins every 4 inches, staying at least ½ inch from raw edges to protect your seam allowance during assembly. Layer alignment matters — keep grain lines consistent across every block.
Sewing an “X” for Stability
Once your layers are pinned, sewing an X pattern through each block is what holds everything together. Run a straight stitch diagonally from corner to corner — then cross it.
This simple quilting technique locks the batting in place and prevents fabric shifting when the rag quilt gets washed. Keep your stitch tension balanced and your speed steady for clean, even seam security across every block.
Joining Blocks With Exposed Seams
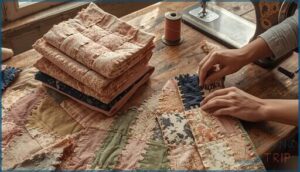
This is where your rag quilt starts to take real shape. Place two blocks wrong sides together, line up the raw edges, and sew with a ½-inch seam allowance — so that exposed seam sits right on top.
- Maintain consistent block alignment across every row
- Use a walking foot for smooth, even sewing
- Keep exposed seams facing the same direction
- Backstitch at intersections for lasting durability
That seam clipping later turns each fraying technique into soft, chunky texture.
Finishing and Washing Your Rag Quilt
You’re almost there — the hardest part is behind you. A few final steps will turn those clipped seams into the soft, fringy texture that makes rag quilts so satisfying to touch.
Here’s how to finish, wash, and care for your quilt the right way.
Clipping Seam Allowances for Fraying
Clipping is where your rag quilt truly comes alive. Using sharp rag quilt scissors, snip into each seam allowance every ¼ inch, stopping at least ⅛ inch from your stitching line — that’s your fray control sweet spot.
Clip depth matters: too shallow and fringing looks sparse; too deep and seams weaken. Good scissor selection reduces hand fatigue during this edge finishing step, making quilting for beginners far more enjoyable.
Washing and Drying Techniques for Best Results
Now that your seams are clipped, the washer does the magic. Run your rag quilt through a cold or warm cycle with mild detergent — hot water causes unwanted shrinkage.
For fabric softening without residue buildup on minky or fleece, skip liquid softener and toss in wool dryer balls instead.
Clean your lint trap mid-cycle; lint management is real with a new quilt. Medium heat drying settings work best.
Caring for and Enjoying Your Rag Quilt
Your finished rag quilt can last close to a decade with simple care. Rotate it seasonally, store it in a breathable cotton sheet away from damp spaces, and refold it every few months to prevent permanent creases.
For rag quilt maintenance and quilt repair techniques, trim loose threads regularly and hand-stitch any open seams. DIY home decor this cozy never goes out of style.
Frequently Asked Questions (FAQs)
Does a rag quilt need three layers?
No, a rag quilt doesn’t strictly need three layers. Two layers work fine and reduce quilt thickness.
Three layers just give you fuller fraying and extra warmth — a personal fabric choices call.
What do you need to make a rag quilt?
To make a rag quilt, you need fabric, thread, batting options for your inner layers, basic quilting tools like a rotary cutter, and a sewing machine.
Smart fabric selection and the right supplies make all the difference.
How to make a rag quilt for beginners?
Anyone can stitch a stunning rag quilt in a single afternoon. Layer fabric squares, sew exposed seams, clip, then wash — your Quilt Making for Beginners journey starts with just flannel and a sewing machine.
How do you know if a rag quilt will fray?
The easiest fray test method is simple: cut a small square, clip the edges, and wash it.
High fabric fray potential shows up fast — flannel unravels beautifully, while fleece stays smooth.
How do you bind a rag quilt?
Rag quilt binding has three paths: an exposed edge, a folded self-binding, or double fold strips. Each shapes your quilt’s final look differently, so pick what fits your style and time.
Does a rag quilt need 3 layers?
No, a rag quilt doesn’t need three layers. Two layers work just fine.
Three layers add quilt weight, fuller fraying effects, and warmth, but two layers keep things lighter and simpler.
Are rag quilts easy to make?
Surprisingly simple and satisfying, rag quilts stand out as one of the best beginner projects in sewing and quilting. Straight seams, forgiving fabrics, and no binding make this DIY quilt remarkably approachable.
What is the best backing for a rag quilt?
Flannel brings the best finish for a rag quilt backing—soft, warm, and frays beautifully for that signature fluff. Cotton options sew up lighter, while Minky considerations add plush coziness.
Always balance batting choices and fabric durability for lasting comfort.
What is the optimal size for a rag quilt?
The “right” size depends on who it’s for. A throw around 50 by 65 inches works for almost anyone. Babies need just 36 by King beds call for 100-plus inches square.
How many layers should I use for each square or strip?
Most rag quilts use two or three layers per square. Three layers add warmth and weight, while two keep things light. Your fabric thickness and quilt weight goals decide which works best.
Conclusion
Most crafts demand flawlessness before they reward you. Learning how to make a rag quilt flips that rule entirely—your raw edges, your clipped seams, your imperfect cuts all become the finished product.
Every wash deepens the texture. Every use adds character. What started as beginner work quietly becomes something that feels handmade in the best possible sense: worn in, not worn out.
That’s not a happy accident. That’s exactly how it was meant to work.
- https://www.instructables.com/Rag-Quilting-for-the-Beginner/
- https://www.avisiontoremember.com/2022/01/best-fabrics-for-rag-quilts.html
- https://sewcanshe.com/how-to-make-a-rag-quilt/
- https://www.quiltingboard.com/main-f1/adding-regular-quilt-cotton-flannel-rag-quilt-t316384.html
- https://quilterscandy.com/how-to-make-a-rag-quilt

