This site is supported by our readers. We may earn a commission, at no cost to you, if you purchase through links.
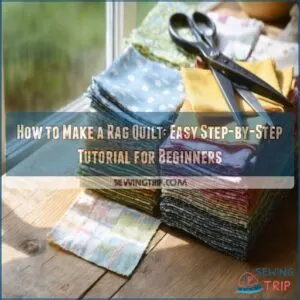 Ready to learn how to make a cozy rag quilt?
It’s a super fun and easy project, perfect for beginners.
First, choose your fabric – cotton works best.
Cut ’em into squares, layer ’em up, and sew an X across each one.
Then stitch those blocks together into rows, and voila – you’ve got yourself a quilt!
Don’t forget to clip the seams so they fray up nicely.
Once you give it a nice wash, you’ll have a one-of-a-kind rag quilt that’s perfect for snuggling.
Trust me, it’s a total game-changer!
Now, let’s get into the step-by-step details to make your dream rag quilt a reality.
Table Of Contents
- Key Takeaways
- What is a Rag Quilt
- How to Make a Rag Quilt
- Choosing Fabrics for Your Rag Quilt
- Gathering Your Supplies and Materials
- Cutting and Layering Your Quilt Blocks
- Quilting The Squares
- Planning Your Rag Quilt Design
- Sewing The Quilt Stacks Together
- Clipping The Seams for Fraying
- Washing and Enjoying Your Rag Quilt
- Frequently Asked Questions (FAQs)
- Conclusion
Key Takeaways
- You’ll need cotton or flannel fabric that frays easily, plus basic sewing supplies like scissors, a rotary cutter, and a sewing machine with a walking foot.
- Cut your fabric into 8-inch squares, layer them in stacks of three (top, middle, bottom), and sew an X pattern through each stack to secure the layers.
- Sew your quilted squares together with 1/2-inch seam allowances, then clip the exposed seams every 1/4 to 1/2 inch to encourage fraying.
- Wash your completed quilt in cold water and dry on low heat to activate the fraying process – each wash will make your quilt softer and fluffier.
What is a Rag Quilt
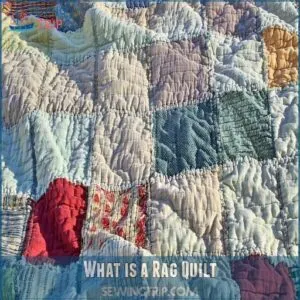
Rag quilts are the coziest quilts around!
They have exposed seams that fray into a soft, fluffy texture when washed.
These easy-to-make quilts are a great project for beginners and fabric enthusiasts alike.
Definition and Features
Imagine snuggling up in a blanket that’s your own DIY masterpiece—welcome to rag quilting!
These quilts stand out with their frayed edges offering that irresistible cozy comfort.
Picture a farmhouse style aesthetic with soft, cuddly textures; they’re beginner-friendly too!
With fabrics layered to create a unique texture, rag quilts are a delightful project.
It’s like crafting a warm hug that brings both charm and handmade beauty to your home.
Benefits of Making a Rag Quilt
Rag quilts offer a delightfully cozy and textured style that’s perfect for beginners.
They’re a fantastic way to create personalized gifts or add sentimental value to your home decor.
You can find all the necessary Rag Quilt Supplies online to get started.
Snipping the seams allows the fabric to fray, giving your quilt a totally unique look.
And the easy construction means you can whip one up in no time – no advanced quilting skills required.
Get ready to fall in love with the casual charm of a handmade rag quilt.
How to Make a Rag Quilt
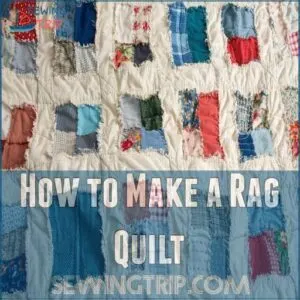
So, you’re ready to piece together your first rag quilt. It’s more manageable than it sounds, trust me! Start by gathering your fabric squares. Think of this as a puzzle, but with fabric. Each square is like a little piece of art waiting to fray into something cozy. You can find inspiration for unique rag quilt patterns and products on websites like DIY rag quilt kits.
Here’s your game plan:
- Create fabric sandwiches: Stack your squares with the top, batting, and bottom; stitch an “X” through them.
- Sew squares together: Arrange the sandwiches in pleasing rag quilt patterns. This is where DIY rag quilt kits shine!
- Nurture those seams: Snip along the exposed seams (carefully!) to encourage that signature frayed look.
Once you’ve got everything stitched, the magic begins with washing. Think of it as giving your quilt its first spa treatment, enhancing those edges beautifully. An easy rag quilt tutorial to follow, right? Happy quilting!
Choosing Fabrics for Your Rag Quilt
Choosing fabrics for your rag quilt is where the fun begins!
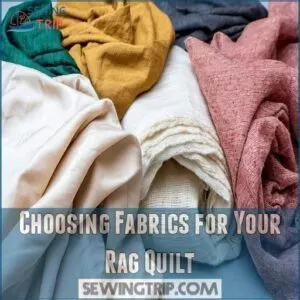
You’ll want to pick materials that fray easily, like flannel or cotton, and coordinate them in a way that suits your style.
Fabric Texture Considerations
When piecing together your rag quilt, consider the fabric texture carefully.
Flannel, denim, and velvet are prime picks as they fray beautifully, adding cozy texture.
Blend in some softer fabrics like cotton or linen to balance the look.
Pay attention to the pile height and hand feel – you want your quilt to be touchably soft.
Coordinating Color Schemes
Got a pile of fabric scraps? Let’s talk matching colors like a pro! A rag quilt thrives on brilliant color palettes. Think complementary hues or cozy analogous colors. Want a timeless look? Try monochromatic schemes. Seasonal themes work wonders, too. Trust your instinct; it’s all about finding the perfect patchwork vibe with quilting cotton that feels just right.
- Try bold or subtle combinations
- Think theme: beachy, autumnal, etc.
- Use a color wheel for ideas
- Mix patterns with solids
- Balance light and dark fabrics
Prewashing Fabric Importance
Ah, prewashing your fabric is a must for rag quilting!
You don’t want any pesky shrinkage or color bleeding ruining your masterpiece.
Plus, it helps the fabric fray up nice and cozy.
Just toss those scraps in the wash, no need to be fancy – a quick spin cycle will do the trick.
Your quilt will thank you later!
Natural Fibers Vs Synthetic Fibers
After prewashing, think about natural versus synthetic fibers.
Natural options like cotton and flannel offer softness, fraying potential, and eco-friendliness.
They’re durable, making them ideal for quilting.
To maximize fraying, choose high-fraying fabrics like cotton and flannel for the top and middle layers of the quilt, as explained in the rag quilt tutorial guide.
While synthetics mightn’t fray as charmingly, they bring unique colors and less hassle in washing.
Your rag quilt’s character depends on fabric choices—pick what suits your style and durability needs!
Gathering Your Supplies and Materials
Before you start your rag quilting adventure, gather up all the essential supplies.
You’ll need fabric, thread, and a trusty pair of scissors – trust me, you don’t want to skimp on those!
Essential Tools for Rag Quilting
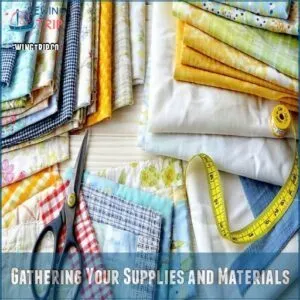
To create a charming rag quilt, you’ll need a few essential tools.
First up, grab a trusty pair of sharp fabric scissors – they’ll make quick work of snipping those frayed edges.
A good rotary cutter is also a must, along with a sturdy cutting mat and clear ruler.
Don’t forget your sewing machine and a walking foot for even stitching.
With these basics, you’ll be rag quilting like a pro in no time!
Measuring and Cutting Tools
Grab your measuring tools – a trusty ruler, rotary cutter, and cutting mat.
Fabric shears are a must too, snipping the edges for that signature frayed look.
With these by your side, you can easily mark and slice your fabric into perfect squares for your rag quilt.
Let’s get measuring and cutting!
Sewing Machine and Accessories
You’ll want a sewing machine that can easily handle multiple fabric layers.
Look for one with adjustable stitch length and tension to manage the different textures.
A walking foot is a game-changer, preventing puckering as you sew through all those thick fabrics.
Don’t forget extra bobbins and a sturdy needle – rag quilts mean serious sewing!
Rotary Cutters and Scissors
Now that your sewing machine’s warmed up, let’s talk rotary cutters and scissors—your trusty sidekicks in rag quilting.
Choosing the right size matters for precision.
Keep blades sharp for smooth cuts.
Always use a mat for safety.
While rotary cutters rule, scissors offer control for those intricate snips.
Explore these quilting supplies to tame those fabrics perfectly!
Cutting and Layering Your Quilt Blocks
Now that you’ve gathered your supplies, it’s time to start cutting and layering your quilt blocks.
Don’t worry, it’s a breeze!
Just grab your fabric, ruler, and scissors, and let’s get snipping those perfect squares.
Cutting The Fabric to Size
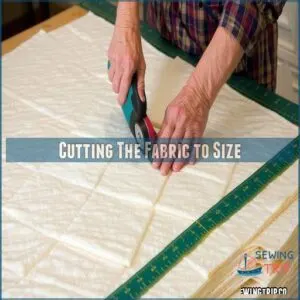
First, measure your fabric to determine the desired square size for your rag quilt.
A popular size is 8-inch squares, as they strike a nice balance between quick assembly and abundant fraying.
Using a rotary cutter and ruler, carefully cut your cotton, flannel, and backing fabrics into these even squares.
Precise cutting is key for a tidy, cohesive quilt.
Assembling The Quilt Stacks
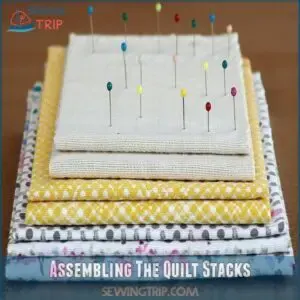
Next, it’s time to assemble your quilt stacks.
Arrange the fabric squares in the right order – back layer on the bottom, followed by the middle layer and the top layer on top.
Pin the squares together to keep the layers aligned.
This sandwich-like setup will allow the edges to fray beautifully once washed.
Layering Fabric for Natural Fraying
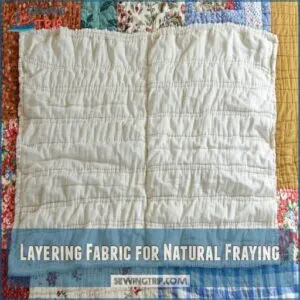
When layering the fabric for your rag quilt, look to blend the textures.
To minimize unwanted fraying in areas where you don’t want it, consider using methods to prevent fabric from fraying.
Start by placing the backing fabric – like plush flannel or cozy Minky – face down.
Next, add a layer of quilt batting or another middle fabric for warmth.
Top it off with your patterned cotton or soft flannel top.
This layering will create those perfect, fray-happy seams.
Quilting The Squares
Now, it’s time to quilt those square layers together!
Sew an ‘X’ across each stacked square to hold everything in place, using a walking foot for easy stitching or even trying your hand at free-motion quilting for a fun, creative touch.
Don’t be afraid to get a little funky – just let your rag quilt’s personality shine!
Sewing The X Pattern
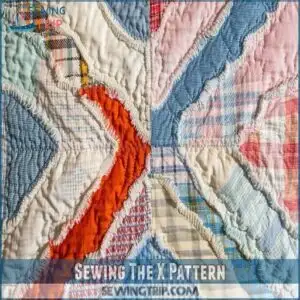
Sewing the X-pattern on your rag quilt squares is a breeze.
Simply stitch down the center of each layer, creating an intersecting X.
This basic stitching secures the layers together and kicks off the fun fraying process.
Play around with variations like parallel lines or wavy stitches for a unique look.
Just keep that thread tension tight!
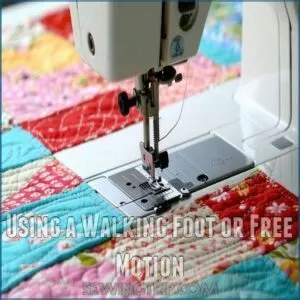
Using a Walking Foot or Free Motion
For a clean, even quilting look, use your sewing machine’s walking foot, which is especially useful for preventing fabric shifting and puckering, especially when sewing with bulky fabrics or multiple layers.
This nifty accessory grips both the top and bottom fabric layers, preventing puckering and ensuring your stitching stays straight.
Or try free motion quilting – this technique gives you total control to stitch fun, organic designs across your rag quilt top.
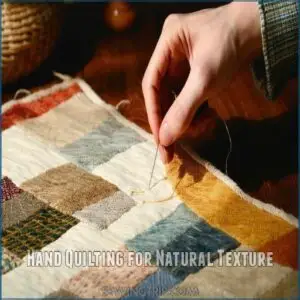
Hand Quilting for Natural Texture
If you prefer a more natural, textured look for your rag quilt, you can consider hand quilting.
This technique allows you to add unique stitching patterns and create a one-of-a-kind design.
Plus, the gentle pulling and bunching of the fabric creates an authentic, artisanal feel:
- Use a sharp, sturdy needle and waxed quilting thread.
- Experiment with different stitch lengths and patterns.
- Embrace any imperfections – they add to the quilt’s rustic charm!
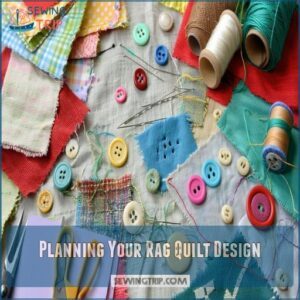
Planning Your Rag Quilt Design
Get ready to design a rag quilt that’s totally you!
Whether you prefer a planned pattern or a random, freestyle layout, the possibilities are endless.
Have fun playing with fabric combinations and get creative with borders and edging to make your quilt one-of-a-kind.
Arranging Blocks in a Pattern
Where do you begin when planning your rag quilt design?
You can find inspiration in classic quilt block patterns by exploring websites that offer a variety of quilt block designs online.
Start by laying out your quilted blocks on a flat surface, mixing and matching the fabric colors and patterns to your liking.
This pre-planning stage is key – play around with different arrangements until you find a design that makes your heart sing!
Once you’ve nailed down the layout, you’re one step closer to rag quilt bliss.
Creating a Random Layout
Mixing up your rag quilt design with a random layout is like jazz for quilting—improvise.
You can also try using free quilt design software to visualize your quilt before stitching and discover surprising color combinations.
Toss your patchwork quilt blocks into a fun, playful arrangement.
Let colors and fabric textures surprise you with unexpected harmony.
Trust your creative instincts; just watch how fabric scraps find their visual flow, creating a delightful pattern that dances across your quilt like a lively tune.
Adding Borders and Edging
Adding a border and edging can elevate your rag quilt design.
Opt for complementary fabrics that coordinate with the overall aesthetic.
Try a skinny border for a minimalist look, or go bold with a wide, fringed edging for maximum coziness.
Play around until you find the perfect frame to showcase your handiwork.
- Coordinating border fabrics
- Narrow vs. wide border styles
- Fringed edging for texture
- Placement and sizing tips
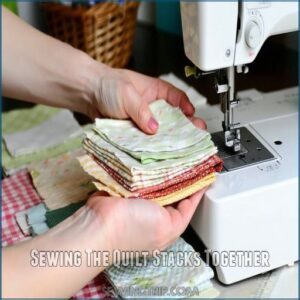
Sewing The Quilt Stacks Together
Now comes the fun part – sewing those quilted stacks together!
Get ready to show off your nifty stitching skills as you piece the rows and columns of your cozy rag quilt.
Don’t worry, this step’s a breeze – just take it one row at a time, finger-pressing those seams open as you go.
Sewing Rows Together
Sewing the rows together is a breeze! Align the rows, right sides facing, and stitch along the seam allowance with a walking foot for smooth results.
Take your time and use a shorter stitch length for better control.
Once the rows are sewn, give the seams a gentle finger press to open them up.
Now you’re ready to start adding those rows together!
Attaching Rows to Each Other
Now it’s time to stitch those rows of quilted squares together.
Take it row by row, lining up the seams and pinning them in place before sewing.
Use a 1/2-inch seam allowance and take it slow, making sure to keep the seams straight.
A walking foot can really help with this part, guiding the fabric layers smoothly.
Finger Pressing Seams Open
Once you’ve sewn the rows together, it’s time to finger press those seams open.
What’s the trick? Gently run your fingers along the seams, using a flat surface like an ironing board or table to help guide and flatten them.
This will help the seams lay nice and flat, creating a smooth rag quilt top.
Clipping The Seams for Fraying
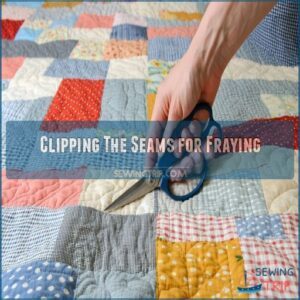
Now comes the fun part – clipping those seams!
Get ready to snip-snip-snip your way to a perfectly frayed rag quilt.
Don’t be afraid to get a little scissor-happy, just make sure to keep those trims nice and even for a polished look.
Techniques for Clipping Seam Allowance
The real magic happens when you start clipping those seam allowances.
Grab some sharp, spring-loaded scissors and get to work.
Snip the edges every 1/4 to 1/2 inch, being careful not to cut through the stitching.
This key step will create the gorgeous, natural fraying that gives rag quilts their signature cozy look.
Tips for Even Fraying
Snipping the seam allowance with even spacing is key for a beautifully frayed rag quilt.
Run your scissors along the exposed edges, cutting 1/4 to 1/2 inch sections at a time.
This consistent clipping will guarantee the fabric frays evenly, creating that cozy, textured look you’re going for.
Have a little fun with it – the more frayed, the better!
Safety Precautions for Clipping
When it’s time to clip those frayed seams, make sure to keep safety in mind.
Grab a pair of sharp scissors and don your trusty safety glasses.
Those ragged edges can be sneaky little buggers, so be extra careful when handling them.
Don’t forget to protect your hands too – a good pair of gloves can save you from any nicks or scrapes.
Safety first, friends!
Washing and Enjoying Your Rag Quilt
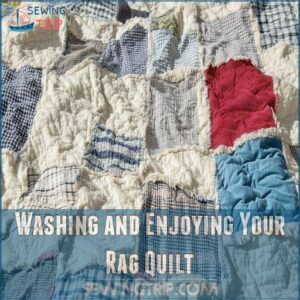
Now that your rag quilt is all sewn up, get ready for the fun part – washing it!
Toss your new cozy creation in the washing machine with some towels to catch all the delightful fuzziness,
then fluff it up in the dryer.
Your quilt will only get better with each wash, becoming beautifully soft and shaggy.
Washing and Drying Instructions
Ready to become a textile artist? Your first wash is key!
Toss your rag quilt in the washing machine on a gentle cycle with cold water.
To prevent color bleeding and shrinkage, you need to follow fabric care tips for sewing.
Use a low dryer temperature—medium heat at most—to avoid excessive shrinkage. Add a few towels to catch extra lint from those wonderfully frayed seams.
Don’t worry about over-fraying on the first wash; it’s a process!
Tips for Enhancing Fraying
To really ramp up the fraying, toss your rag quilt in the wash a few extra times.
The more it tumbles around, the fluffier and more distressed the edges will become.
Just be sure to use gentle detergent and warm water – too much agitation can damage the fabric.
With each wash, those frayed seams will get cozier and more inviting.
Ideas for Displaying Your Finished Quilt
Now that you’ve crafted your cozy rag quilt, the fun part begins – displaying it! This versatile piece can double as wall decor, a snuggly bedspread, or a thoughtful gift for loved ones. Get creative with seasonal themes like holiday motifs or soothing nature-inspired designs. Display it folded over a railing, draped on the couch, or hung as eye-catching art. Your one-of-a-kind rag quilt is sure to bring warmth and character to any space.
- Use it as a festive throw blanket during the holidays
- Hang it on the wall as rustic, farmhouse-inspired decor
- Fold it neatly at the foot of the bed for a cozy touch
Frequently Asked Questions (FAQs)
Are rag quilts easy to make?
Throw on your flannel, partner, ’cause rag quilts are a breeze!
With just some fabric scraps and a nimble needle,
you’ll be snuggling up in your handmade masterpiece before you can say "quilt bee".
How to make a rag quilt for beginners?
For the best rag quilt fabrics, 100% cotton and flannel are top choices due to their excellent fraying qualities.
Flannel offers a cozy touch, while cotton brings vibrant designs, both ideal for creating soft, fluffy edges.
Can you make a rag quilt with 10 squares?
Sure, you can absolutely make a rag quilt with just 10 squares!
It’s a fun, quick project that lets you play with different fabrics and patterns.
Get creative and make something cozy and unique.
How long does it take to make a rag quilt?
The time it takes to make a rag quilt can vary, but most folks finish one in a weekend!
Just wait ’til you see how cozy it turns out – it’ll be worth the effort.
What is the best size of squares for a rag quilt?
Looking for that perfect rag quilt size?
Aim for 8-inch squares – they strike the sweet spot between manageable and cozy.
Trust me, your fringe-loving heart will thank you for this just-right square size.
How many layers should a rag quilt be?
A rag quilt should have three layers – a top, middle batting, and bottom backing.
This simple sandwich structure is what gives rag quilts their signature soft, frayed texture when washed.
Go for it!
Do you use batting in a rag quilt?
You bet – batting is a great choice for the middle layer of a rag quilt.
It adds lovely warmth and softness,
though you’ll want to use smaller squares to prevent the batting from peeking through the seams.
What is the difference between a rag quilt and a regular quilt?
Say goodbye to the stuffiness of a traditional quilt, my friend!
Rag quilts are the life of the party – their fringy edges and cozy texture make ’em a real crowd-pleaser.
Snip, stitch, and snuggle up in style.
How do I choose the right colors and patterns for my rag quilt?
Let your creativity flow!
Mix and match colorful patterns, cozy flannel, and soft solids.
The beauty of rag quilts is that they let you experiment – have fun playing with different fabric combinations to make your quilt uniquely yours.
Can I use recycled fabrics for a rag quilt project?
Recycled fabrics work great for rag quilts.
Get creative with old clothes, linens, and scraps – the mix of textures and patterns will give your quilt tons of personality.
Just be sure the fabrics fray nicely.
How do I account for fabric shrinkage when making a rag quilt?
Cotton fabrics typically shrink 2-5% after washing.
Pre-wash your fabrics in hot water before cutting squares, then dry them completely.
You’ll want to add an extra 1/2 inch to your measurements for safety.
What are some creative rag quilt design ideas to try?
Try arranging squares in a chevron pattern, mixing denim with flannel for texture, or creating a holiday-themed design.
You can also incorporate family photos printed on fabric or use meaningful clothing pieces for sentimental value.
How do I care for and maintain my finished rag quilt?
Want your cozy rag quilt to stay snuggly?
Wash it in cold water with mild detergent.
Tumble dry on low heat.
Clip any loose threads.
Don’t forget to shake it out between washes.
Conclusion
Like a cherished family recipe passed down through generations, learning how to make a rag quilt is a skill you’ll treasure forever.
You’ve now got all the tools and knowledge to create your own cozy masterpiece.
Remember, each snip, stitch, and wash brings your quilt closer to that perfectly soft, lived-in feel.
Whether it’s for your home or a heartfelt gift, your rag quilt will tell a unique story.
So grab your fabric, fire up that sewing machine, and let’s make some magic happen!

