This site is supported by our readers. We may earn a commission, at no cost to you, if you purchase through links.
 Making a table runner is straightforward and rewarding.
Start by choosing your fabric – cotton works well for beginners.
Measure your table, then cut fabric pieces 12-18 inches wide and about 12-24 inches longer than your table.
You’ll need front fabric, backing fabric, and batting if you want extra thickness.
Pin the front and back pieces together, right sides facing each other.
Sew along the edges with a half-inch seam allowance, leaving a small opening for turning.
Flip the runner right side out through the opening, then press flat with an iron.
Finally, topstitch around the edges for a professional finish.
The beauty lies in the details that transform simple fabric into something special.
Table Of Contents
Key Takeaways
- You’ll need basic materials – Cotton fabric works best for beginners, plus batting for extra thickness, thread, and basic sewing supplies like scissors and pins.
- Measure carefully for proper fit – Add 12-24 inches to your table length for overhang and make the width about one-third of your table’s width for balanced proportions.
- Follow the simple four-step process – Cut your fabric pieces, pin them right sides together, sew around edges leaving a gap for turning, then flip right side out and press flat.
- You can customize for any skill level – Start with straight-edge cotton runners, then progress to quilted designs or decorative elements as your confidence grows.
Table Runner Basics
A table runner is a long strip of fabric that runs down the center of your table, adding both style and function to your dining space.
You can use it alone on a bare table or layer it over a tablecloth to create an elegant, finished look that’s perfect for everyday meals or special occasions, making it a great addition for any dining space.
Table Runner Definition
A table runner is a long strip of fabric that decorates the center of your dining table.
This versatile table decor piece transforms ordinary table settings into sophisticated displays. The runner purpose extends beyond mere decoration to protect surfaces and define dining spaces.
- Table runner spans the table’s length, typically extending 6-12 inches beyond each end
- Home decor element that complements existing tablecloths or stands alone on bare tables
- Design variations range from simple cotton strips to elaborate quilted masterpieces with cultural significance
Table Runner Uses
When decorating your dining space, you’ll discover that table runners serve multiple purposes beyond simple table decor.
Use your dining table runner for Everyday Decor to protect surfaces while adding style.
Transform spaces for Holiday Themes and Special Occasions with seasonal patterns.
They’re perfect for Outdoor Dining events and make thoughtful Gift Ideas for hosts seeking fresh table decor ideas.
Table Runner Benefits
Beyond their decorative appeal, table runners offer practical advantages that make them smart additions to any home.
Smart style meets practical protection—your table gets both beauty and durability in one simple addition.
You’ll protect your table surfaces from scratches and spills while adding style that’s both cost effective and easy to swap out seasonally.
- Enhance Decor – Transform any table setting with colors, patterns, and textures that match your home decor vision
- Protect Surfaces – Shield your table from hot dishes, spills, and everyday wear while maintaining easy cleanup
- Versatile Styling – Switch between table runner styles for holidays, seasons, or special occasions without buying new furniture
- Cost Effective – Achieve dramatic table decor ideas without the expense of full tablecloths or permanent table modifications
- Easy Storage – Fold and store multiple runners in minimal space, keeping various table setting ideas ready for any event
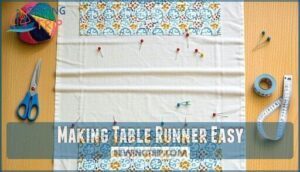
Making Table Runner Easy
Creating a table runner ranks among the most rewarding Beginner Projects you’ll tackle.
This Quick Sewing adventure transforms basic fabric into stunning Simple Designs that elevate any dining space.
Whether you’re working with Fabric Scraps or pursuing Minimalist Runners, the process remains refreshingly straightforward.
Your DIY journey requires just four essential steps and basic sewing skills.
The beauty lies in the simplicity—you’ll cut, pin, sew, and turn your fabric creation, which is an easy table runner project that builds confidence while delivering impressive results that’ll have guests asking about your newfound talents, making it a great Quick Sewing adventure.
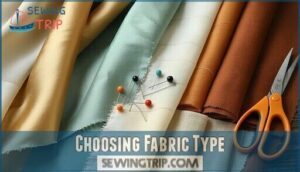
Choosing Fabric Type
You’ll need to select the right fabric to guarantee your table runner looks professional and lasts through regular use.
The fabric type you choose affects how well your runner drapes, how easy it’s to sew, and how it performs during washing and daily use, which are all complete concepts to consider for a professional finish.
Cotton Fabric
Cotton stands as the gold standard for table runner DIY projects, offering unmatched versatility and durability.
This natural fiber delivers excellent colorfastness testing results, ensuring your prints won’t fade after washing.
Cotton weaves range from lightweight quilting varieties to sturdy canvas options.
Cotton blends combine strength with softness, while organic cotton provides eco-friendly appeal for conscious crafters seeking sustainable sewing solutions.
Some crafters prefer certified materials for their projects.
Jute Fabric
Your fabric journey continues with jute, nature’s gift for rustic table runner projects.
This eco-friendly fiber brings exceptional jute durability and distinctive jute texture to your sewing adventures.
Here’s why jute weaving creates stunning rustic table runners:
- Natural strength – withstands daily use beautifully
- Earthy charm – complements farmhouse and bohemian décor perfectly
- Sustainable choice – supports environmental consciousness effortlessly
- Affordable luxury – delivers premium looks without breaking budgets
Jute plants also contribute to carbon sequestration, aiding in climate mitigation.
Jute fabric works wonderfully for beginners exploring natural fibers in their sewing projects.
Burlap Fabric
Natural jute fibers make burlap an excellent choice for rustic table runner projects.
This durable fabric brings earthy charm to your dining space while offering practical benefits for crafting enthusiasts.
Burlap’s popularity stems from its versatility, making it a great choice for weddings and parties.
| Feature | Benefit | Consideration |
|---|---|---|
| Burlap Weaving | Creates strong, tear-resistant fabric | Loose weaves may fray more easily |
| Burlap Textures | Adds rustic, natural appeal | Rough surface requires gentle handling |
| Burlap Durability | Withstands regular use and washing | Moisture exposure can weaken fibers |
| Burlap Dyeing | Accepts custom colors and patterns | Natural tan color works for most decor |
| Burlap Decor | Perfect for farmhouse and eco-friendly themes | May shed fibers during initial use |
Your burlap table runner will develop character over time, making it ideal for casual dining and seasonal decorating.
Quilting Cotton Fabric
Quilting cottons offer versatility that makes them a favorite for table runner projects.
These lightweight fabrics provide excellent print scale options and reliable colorfastness for long-lasting beauty. While they lack the natural weight of heavier fabrics, quilting weight cottons deliver exceptional fabric softness and workability for sewing enthusiasts.
Many patterns are available as pre cut fabrics for ease of use.
- Cotton weave structure creates crisp, professional-looking seams that won’t pucker
- Wide variety of prints lets you match any décor or seasonal theme perfectly
- Affordable pricing means you can experiment with bold patterns without breaking the bank
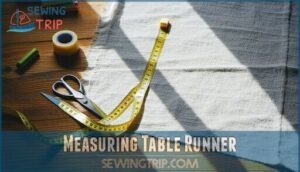
Measuring Table Runner
Before you start cutting fabric, you’ll need to measure your table and calculate the exact dimensions for your runner.
Getting these measurements right guarantees your finished runner will fit perfectly and appear professional on your table, which is crucial for the overall aesthetic and finished look.
Determining Table Size
Start by measuring your table’s dimensions to create the perfect table runner fit. You’ll need accurate measurements of table length and table width to determine proper runner placement.
Keep in mind your table shape and seating capacity when planning dimensions.
| Table Shape | Standard Dimensions |
|---|---|
| Rectangle | 30" x 72" typical |
| Square | 36" x 36" standard |
| Round | 48" diameter common |
| Oval | 42" x 72" average |
| Console | 16" x 48" narrow |
Room dimensions and occasion type influence your table runner size choices. Remember that the average length varies depending on the table size. Measure twice to guarantee your runner complements your space perfectly and has the right size for the table size.
Calculating Runner Dimensions
Once you know your table measurements, calculating runner dimensions becomes straightforward.
For ideal overhang, add 12-24 inches to your table length—this creates a 6-12 inch drape on each side.
Width ratios should equal one-third of your table width for balanced proportions.
Custom lengths work too: make runners table-length for no overhang or extend them further for dramatic draping effects to achieve the desired look with ideal overhang.
Adding Seam Allowance
Once you’ve calculated your runner dimensions, add one inch to both length and width measurements for seam allowance.
This extra fabric guarantees clean, professional edges when sewing.
The seam allowance width depends on your fabric type – heavier materials need precise cutting for corner considerations.
Mark these measurements carefully on your fabric before cutting.
Proper seam allowance prevents fraying and allows for adjustments during the sewing process.
Cutting Fabric Correctly
Once you’ve measured your table runner dimensions, you’ll need to cut your fabric pieces with precision to guarantee clean edges and proper fit.
Take your time with this step, as accurate cutting makes the sewing process much easier and gives you professional-looking results.
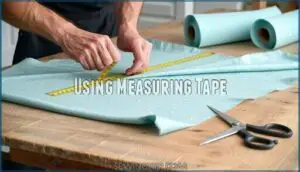
Using Measuring Tape
When using your measuring tape for table runner fabric, precise measurements prevent costly mistakes and guarantee professional results. Accurate alignment keeps your cuts straight and true.
- Accurate Alignment – Position the measuring tape parallel to fabric edges for straight cuts
- Tape Stability – Hold the tape firmly against the fabric surface to prevent shifting
- Reading Increments – Check measurements at multiple points along the length for consistency
- Consistent Tension – Apply steady pressure without stretching the tape or fabric
Error prevention starts with double-checking your measurements before cutting. Consider exploring different fabric measuring tools for superior accuracy. This careful approach guarantees your table runner dimensions match your calculations perfectly.
Marking Fabric Measurements
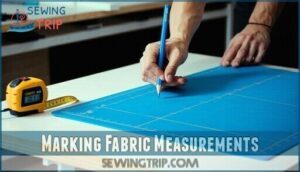
Mark your measurements with a fabric pencil to guarantee accurate cutting.
Place the fabric on a cutting mat for stability and use measurement tools to create consistent lines.
Draw light, washable marks that follow your calculated dimensions precisely.
| Tool | Purpose |
|---|---|
| Fabric Pencil | Creates washable marks on fabric |
| Measuring Tape | Verifies dimensions and spacing |
| Ruler | Draws straight, consistent lines |
| Cutting Mat | Provides stable marking surface |
| Rotary Cutter | Requires precise marked guidelines |
Double-check your marks before cutting to avoid costly mistakes and ensure you are using the right tools for the task, such as a measuring tape and a ruler.
Cutting Fabric Pieces
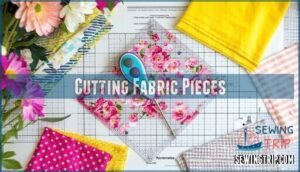
Cut carefully along marked lines with sharp fabric scissors or rotary cutter.
Smooth, straight edges matter for professional results.
Use a cutting mat to protect surfaces and guarantee accurate corner cutting.
Align fabric grain properly before cutting.
Place pattern pieces efficiently to minimize waste.
Take your time—precise cuts create beautiful runners that’ll make your table shine, with a focus on beautiful runners.
Sewing Table Runner
Now you’re ready to bring your table runner to life through the sewing process.
This step involves pinning your fabric pieces together, stitching straight seams, and leaving a small opening for turning the runner right side out.
Pinning Fabric Pieces
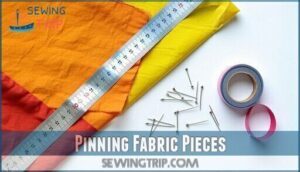
Place pins every 5-6 inches along the fabric edges with right sides facing together.
Proper Pin Placement guarantees Fabric Alignment stays true during stitching.
Start at corners and work toward the center, Preventing Slippage as you sew.
Use sharp pins perpendicular to seam lines for easy removal.
Avoid placing pins directly on Curved Edges where they might pucker the fabric during stitching.
Sewing Straight Edges
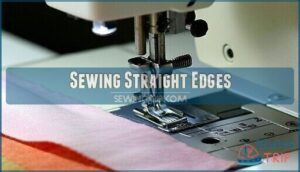
Now it’s time to guide your sewing machine along those straight edges you’ve carefully pinned. Set your stitch length to 2.5mm for ideal results and maintain consistent tension control throughout the process. Watch for fabric creep as you work, keeping your needle guidance steady to create professional-looking seams.
- Maintain consistent seam allowance – Keep your fabric edge aligned with the ¼ inch seam guide on your machine
- Control fabric tension – Don’t pull or push the fabric through, let the machine do the work
- Watch for fabric creep – Check that both fabric layers move together evenly as you sew
- Keep needle guidance steady – Maintain a consistent distance from the fabric edge for straight stitching
- Use proper stitch length – Set your sewing machine to 2.5mm for strong, consistent seams
Leaving Gap for Turning
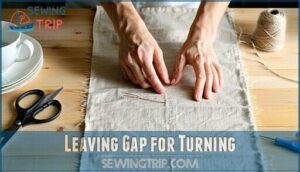
A strategic gap of 4-6 inches along one edge allows you to turn your table runner right side out after sewing.
This opening serves as your fabric’s escape route, transforming inside-out construction into a finished piece. Position the gap on a long side for easier access during turning.
| Gap Placement | Best Practice |
|---|---|
| Location | Center of long side for balance |
| Size | 4-6 inches for hand access |
| Marking | Use pins to mark start/stop points |
Choose gap placement wisely—center positioning prevents awkward corner bunching.
Mark your turning gap with pins before sewing to maintain consistent seam allowance. This invisible stitching technique guarantees clean edges while providing adequate space for corner turning tools to create crisp points.
Finishing Table Runner
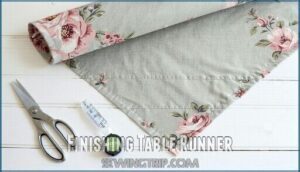
Once you’ve sewn your table runner, the finishing touches transform it from a simple fabric piece into a polished home decor item.
These final steps guarantee your runner looks professional and lasts for years of use.
Turning Fabric Right Side
Turning your table runner right side out transforms your flat fabric pieces into a polished project. This step requires patience and the right technique to achieve Corner Perfection and clean edges.
Follow these steps for smooth results:
- Gently pull fabric through the gap you left while sewing, working slowly to avoid stretching the seam allowances
- Use a pointy tool like a knitting needle or chopstick to push out each corner completely
- Check that right sides together positioning created clean edges all around your runner
- Smooth out any wrinkles before moving to the next step
Closing the Gap comes next, but first verify your corners are sharp and your fabric lies flat.
Pressing Fabric With Iron
Heat your iron to match your fabric type before pressing. Cotton handles high temperatures well, while delicate fabrics need lower settings.
Press seams flat first, then open them gently. Use smooth motions to eliminate creases without dragging the iron.
This prevents fabric damage and creates professional-looking results for your finished table runner.
Trimming Excess Fabric
Sharp scissors become your best friend when tackling corner reduction and preventing bulk.
Trim seam allowance to about 1/8 inch at corners, creating clean mitering corners without excess fabric.
Clip curves gently to eliminate puckering, and remove fabric scraps that could create lumps under your finished runner.
This edge finishing step transforms amateur-looking corners into professional results.
Table Runner Sizes
Getting the right table runner size guarantees your finished project looks professional and fits your table perfectly.
You’ll need to measure your table length and width, then add the proper overhang measurements to create a runner that drapes beautifully without overwhelming your dining space, ensuring a beautiful finish.
Standard Lengths
Table runner lengths range from 36 to 108 inches, with your table length determining the right size.
For ideal overhang, add 12 to 24 inches to your table’s measurement. A 60-inch table needs a 72-inch runner for proper runner placement.
Formal lengths create elegant drops, while casual lengths offer relaxed styling. Custom lengths accommodate unique table dimensions perfectly.
Standard Widths
Standard table runner widths range from 12 to 18 inches, with 14 to 16 inches being most common.
Your ideal width should equal one-third of your table width – so a 42-inch table needs a 14-inch runner.
Custom widths work for unique table shapes or design preferences, while width variations from 10 to 19 inches accommodate different table sizes and aesthetic goals.
For round tables, consider adjusting runner width to avoid interfering with place settings, using complete concepts and unique table shapes to guide your decision, and ensuring custom widths and aesthetic goals are considered.
Overhang Measurements
Your runner’s overhang measurements determine the final look and functionality.
Ideal overhang typically measures six inches on each side, creating elegant draping without overwhelming your table width.
For formal occasions, longer overhangs add sophistication, while casual settings work with shorter drops.
Consider practical considerations like chair clearance and cleaning ease when choosing overhang alternatives for your table runner length.
Table Runner Materials
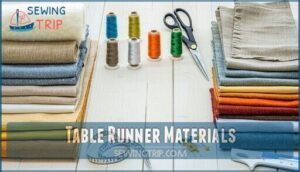
You’ll need three main materials to create your table runner: fabric, batting or interfacing, and basic sewing supplies.
The fabric choice determines your runner’s look and durability, while batting adds structure and sewing notions complete the project.
Fabric Selection
Your fabric choice sets the foundation for your table runner’s success.
Cotton offers excellent absorbency needs and easy care, while linen provides elegant drape.
Consider fabric weight – heavier materials lay flatter and offer better stain resistance.
For print versatility, choose reversible designs with seasonal fabrics on opposite sides.
Home decor weight fabrics work best for structure and durability.
Batting or Interfacing
Adding batting or interfacing isn’t always necessary, but it can transform your table runner from basic to brilliant.
Your fabric choice determines whether you’ll need these extras for structure and durability.
Consider these batting types and interfacing weights:
- Low-loft batting creates soft quilting density without bulk
- Fusible interfacing bonds easily to lightweight fabrics for stability
- Fusible fleece adds gentle layering effects while maintaining flexibility
Quilting cotton benefits most from interfacing, while heavier fabrics like canvas stand strong on their own.
Thread and Notions
You’ll need quality thread that matches your fabric color for clean seams.
Choose all-purpose polyester thread for durability.
Select universal needles for most fabrics or heavy-duty needles for thick materials.
Keep seam rippers handy for mistakes.
Use fabric marking tools like washable pencils.
Don’t forget measuring tape, sharp scissors, and pins as essential fasteners for your sewing machine project.
Stiffen fabric using starch for easier handling to ensure easier handling and a successful project with clean seams.
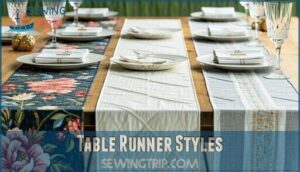
Table Runner Styles
You can create three main table runner styles to match your home’s decor and personal taste.
Each style offers unique benefits, from versatile reversible options to elegant quilted designs that add texture and warmth to your table setting, with elegant quilted designs being a notable example.
Reversible Table Runners
You’ll love creating a reversible table runner that offers twice the style with dual fabrics.
Choose complementary pattern combinations like florals paired with stripes, or mix seasonal themes by using fall leaves on one side and winter snowflakes on the other.
This DIY approach maximizes your sewing investment while providing versatile decor options.
For a perfect finish, consider straight stitching edges.
Focus on careful edge finishing to guarantee both sides look polished and professional, ensuring a perfect finish with your DIY project.
Quilted Table Runners
Creativity meets structure when you craft a quilted table runner. Choose batting types like cotton or polyester for your project’s foundation.
Modern quilting techniques let you experiment with geometric quilting patterns while quilt-as-you-go methods simplify the process.
Select coordinating fabric pieces, then layer with batting before sewing. Finish edges using binding techniques for a professional look that transforms your dining space.
Decorative Table Runners
Decorative table runners transform ordinary tables into stunning focal points through creative fabric selection and design variations.
You can explore seasonal designs like autumn leaves or winter snowflakes, plus embellishment options including beading, embroidery, and metallic accents.
Color palettes range from bold statement hues to subtle neutrals, while pattern choices span geometric prints to floral motifs.
Unique materials like velvet or sequined fabrics create eye-catching decorative elements that enhance any table setting, making them a great option for those looking to add a stunning touch.
Frequently Asked Questions (FAQs)
How do you make a table runner?
Think it’s too complicated? You’ll be surprised how simple it actually is! Just cut two fabric pieces, sew three sides together, turn right-side out, and press flat.
How to use a table runner in a room decor?
Place your table runner down the table’s center, letting it hang 6-12 inches over each end.
Layer it over tablecloths for depth, or use alone on bare wood.
Switch seasonal patterns to refresh your dining room’s look effortlessly.
Can a beginner sew a table runner?
You’ll master this beginner-friendly project in just four simple steps.
Table runners require only straight stitching through four seams, making them perfect for building your sewing confidence while creating something beautiful.
They are ideal for beginner-friendly projects that help you develop your skills.
What are the dimensions of a table runner?
Table runners typically measure 10-15 inches wide and span your table’s length plus 12 inches for overhang.
Width should equal one-third of your table’s width, while length allows six-inch drops on each end, which is a complete concept for determining the size of table runners.
How to make a table runner step by step?
Carefully crafting cloth creations brings beautiful benefits to your table.
Cut fabric 1 inch longer and wider than measurements.
Pin pieces right-sides together, sew edges with ¼-inch seams, leave turning gap, trim corners, flip right-side out, and press flat to ensure a professional finish.
Do you put batting in a table runner?
You don’t need batting in most table runners, but it’s optional.
Batting adds softness and structure to lightweight fabrics like quilting cotton, making them drape better and feel more substantial on your table.
What can be used instead of a table runner?
You can use placemats, a long piece of fabric, scarves, decorative towels, or even fresh greenery and flowers arranged down your table’s center instead.
How many yards of fabric do you need for a table runner?
Like a fabric compass guiding your sewing journey, you’ll typically need 2 yards of fabric for most table runners.
This standard amount covers tables up to 8 feet long with proper overhang, seam allowances, and potential shrinkage after washing.
Can you machine wash table runners?
Most table runners can be machine washed, but check the fabric care label first.
Cotton and linen runners typically handle machine washing well, while delicate fabrics may need gentle cycles or hand washing.
How do you store table runners properly?
Roll your table runners loosely around cardboard tubes or fold them neatly in tissue paper.
Store them flat in drawers or hanging in closets to prevent wrinkles and creases from forming, which can be considered a complete concept for storage.
Conclusion
Don’t worry if you’re new to sewing – learning how to make a table runner is perfect for beginners.
You’ve just created a beautiful, functional piece that’ll transform your dining space. Your handmade runner adds warmth and personality that store-bought options can’t match.
Each stitch represents time well spent, and you’ll feel proud every time guests admire your work. With basic materials and simple techniques, you’ve proven that impressive home décor doesn’t require advanced skills or expensive tools, making it a great way to add personality to your space.

