This site is supported by our readers. We may earn a commission, at no cost to you, if you purchase through links.

Next, mark both dart legs’ endpoints along the fabric edge. This triangular roadmap guarantees your darts hit their target every time, creating the three-dimensional shaping that transforms flat fabric into fitted garments.
Think of it as connect-the-dots for seamsters—miss a mark, and your fit goes sideways. The secret lies in understanding how different fabric weights and weaves respond to various marking techniques, which is crucial for achieving the desired fitted garments.
Table Of Contents
- Key Takeaways
- Understanding Darts in Sewing
- Steps to Sewing Darts
- Creating Double Darts and Diamond Darts
- Proper Techniques for Pressing Darts
- Progressing Your Sewing Skills
- Expert Insights From Judith Neukam
- Achieving Precision: Marking Darts on Different Fabrics
- Frequently Asked Questions (FAQs)
- Conclusion
Key Takeaways
- Start with precision placement – Pin your pattern’s dart apex through all fabric layers, then mark the point with tailor’s chalk or a water-soluble pen before folding the pattern back.
- Mark all three dart points – You’ll need to mark both dart leg endpoints along the fabric edge, plus the apex, to create your triangular roadmap for accurate sewing.
- Test your marking tools first – Different fabrics require different techniques, so test chalk, tracing wheels, or fabric markers on scraps to ensure they will work and disappear properly.
- Always mark on the wrong side – This prevents visible marks on your finished garment and gives you the accuracy you need without compromising the final appearance.
Understanding Darts in Sewing
You’ll encounter darts in nearly every fitted garment you sew, as they’re essential triangular folds that transform flat fabric into three-dimensional shapes.
Understanding how to properly mark and sew these geometric elements will dramatically improve your garment’s fit and professional appearance.
What Are Darts?
When you’re sewing garments, darts are triangular folds that transform flat fabric into three-dimensional shapes that hug your body’s curves.
These fundamental fabric shaping techniques are the secret behind well-fitted clothing that doesn’t look like a potato sack.
Whether you’re tackling dart basics in pattern making or mastering garment fitting, understanding sewing terms like dart marking becomes vital.
Marking darts accurately determines whether your finished piece will flatter or frustrate, making these sewing darts essential elements in any darts sewing pattern for professional-looking results.
Importance of Darts in Garment Construction
Darts create the foundation for professional garment shaping, transforming flat fabric into three-dimensional forms that follow your body’s natural curves.
Darts are the secret to transforming flat fabric into figure-flattering, three-dimensional garments that actually fit.
These triangular folds control fabric draping while ensuring sewing accuracy throughout pattern making and construction phases.
- Transform flat patterns into body-hugging masterpieces with precise dart functions
- Eliminate baggy, unflattering fits through strategic fabric manipulation techniques
- Achieve couture-level results using proper marking darts sewing methods
- Master professional tailoring skills with accurate darts sewing pattern placement
- Create custom-fitted garments following detailed sewing darts tutorial guidance
Steps to Sewing Darts
Once you’ve transferred your dart markings to the fabric, you’re ready to begin the actual sewing process.
The key to professional-looking darts lies in following a systematic approach that guarantees accuracy and prevents common mistakes like puckering or misalignment.
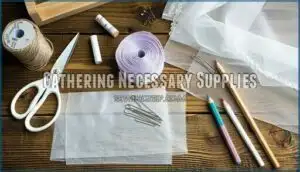
Gathering Necessary Supplies
Gathering your marking tools sets the foundation for precise dart construction. You’ll need tailor chalk for delicate fabrics and fabric markers or fabric pencils for sturdier materials.
Tracing wheels paired with carbon paper create efficient dart marking methods when transferring multiple lines simultaneously. For sheer fabrics, silk pins and regular tailor tacks work best with gentle pressure application.
Essential sewing notions include sharp scissors for notching dart legs, awls for creating precise holes at dart points, and hera markers for temporary crease lines. Test your marking darts technique on fabric scraps first—you’ll avoid surprises later.
Keep a seam ripper handy to eliminate tracing wheel indentations if needed. Remember, quality fabric marking methods start with the right tools, so don’t skimp on these fundamentals. Accurate measurements rely on using tailor chalk tools to achieve professional results with the help of tailor chalk and other essential tools for a successful outcome, ensuring the best dart construction techniques are applied.
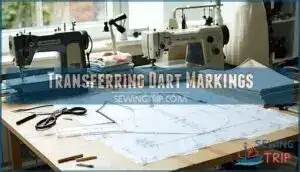
Transferring Dart Markings
Precise transfer techniques separate amateur seamstresses from skilled craftspeople. You’ll need reliable marking tools like tracing wheels, dart pins, and tailors chalk for accurate fabric marking.
Position tracing paper beneath your pattern, then use firm pressure with the tracing wheel to transfer dart legs and fold lines. For delicate fabrics, simplified tailor tacks work better than aggressive chalk methods.
Dark fabrics require contrasting marking tools for visibility. Always mark the wrong side to keep transfer techniques invisible on finished garments.
Test your chosen dart marking methods on fabric scraps first—some marking darts disappear faster than expected, while others prove stubborn to remove. Understanding sewing darts is essential for achieving perfect garment fit.
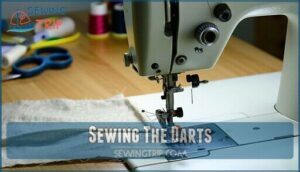
Sewing The Darts
Once your markings are in place, it’s time to bring your darts to life through careful stitching. Start with proper dart folding along the center line, ensuring fabric layers align perfectly before securing with pins.
- Begin stitching from the wide end using a medium stitch length (2.5), maintaining steady pressure while guiding fabric smoothly through your machine for ideal stitch control.
- Reduce stitch length to 1.0-1.5 for the final inch before reaching the dart point, creating secure anchoring without adding bulk to this delicate area.
- Finish with knotted thread tails at the apex instead of backstitching, preventing unsightly puckering that can compromise your garment’s professional appearance and fit.
Understanding dart sewing techniques is essential for achieving a polished look in your garments.
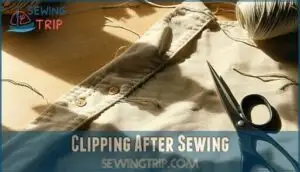
Clipping After Sewing
After securing your dart stitches, you’ll want to reduce bulk for professional results.
Clipping techniques involve making strategic cuts to help your fabric lie flat and create smooth contours.
Key Clipping Techniques for Dart Shaping:
- Make angled cuts toward the dart point, maintaining 1/8-inch distance from stitching
- Test fabric cutting on scraps first to prevent over-clipping disasters
- Check pattern instructions – some designs specify no clipping required
- Use sharp fabric scissors for clean cuts that won’t fray edges
- Focus on deep darts where bulk creates visible bumps or pulling
Proper dart clipping transforms stiff, bulky seams into elegant curves.
This sewing accuracy step guarantees your garment moves naturally with your body.
Remember, seam finishing depends on your fabric type – delicate materials need gentler treatment than sturdy cottons.
Creating Double Darts and Diamond Darts
Double darts and diamond darts take your garment shaping to the next level, creating sophisticated curves that single darts simply can’t achieve.
You’ll master these advanced techniques by understanding how to mark multiple dart legs and manage the increased fabric manipulation they require, which will help you achieve advanced techniques.
Making Double Dart Markings
Double darts require precision that’ll make your garment fit like it was custom-made just for you. Start your Fabric Preparation by transferring all pattern markings to the wrong side using water-soluble markers or chalk—this prevents visible lines on your finished piece.
Your Marking Tools arsenal should include curved rulers for smooth dart lines connecting both tips. Thread tracing works brilliantly on textured fabrics where chalk might disappear. Mark both dart points and legs completely before removing your pattern.
| Marking Method | Best For | Key Benefit |
|---|---|---|
| Water-soluble pen | Light fabrics | Clean removal |
| Chalk | Dark materials | High visibility |
| Thread tracing | Textured weaves | Permanent marks |
| Curved ruler | Contoured darts | Smooth lines |
| Pin marking | All fabrics | Quick transfer |
Double Dart placement creates that coveted hourglass silhouette by contouring both bust and waist areas. Check your dart symmetry by folding along the center line—both legs should align perfectly. This accuracy prevents the dreaded puckering that screams "homemade" instead of "handcrafted." Understanding sewing dart types is essential for achieving a professional finish.
Your Sewing Techniques start with these precise markings, so take your time here.
Folding and Pinning The Darts
Once you’ve marked your double darts, dart folding becomes your next critical step. Fold each dart along its center line, bringing the dart legs together with precision. This stage demands careful fabric control to maintain dart symmetry throughout the process.
- Align dart legs perfectly – Match the marked lines exactly, ensuring dart alignment remains consistent from base to apex point.
- Pin placement at key points – Insert pins perpendicular to the dart line, starting at the widest section and working toward the point.
- Maintain fabric manipulation control – Keep fabric smooth and unwrinkled while folding to prevent distortion in your final seam.
- Check sewing accuracy before stitching – Verify both dart legs align properly and the fold creates the intended shape for your garment.
Clipping Double Darts
Through careful dart clipping, you’ll transform bulky double darts into sleek, professional-looking seams. After completing your double dart stitching, examine the fabric’s wrong side where excess material creates unwanted thickness. Using sharp fabric cutting scissors, make precise clips perpendicular to the dart’s center fold, stopping approximately 1/8 inch from your stitching line.
These strategic cuts in your sewing techniques release fabric tension without compromising seam integrity. Focus on dart precision by spacing clips evenly along curved areas where fabric naturally wants to pucker. Each snip should feel deliberate—think of it as giving your fabric permission to breathe and lay flat.
Your clipping darts technique directly impacts the garment’s final appearance, so take your time with this vital step. Mastering dart sewing techniques is essential for achieving a polished finish.
These dart marking and cutting methods guarantee your double darts achieve that coveted couture finish every seamstress dreams of mastering.
Proper Techniques for Pressing Darts
After successfully marking and sewing your darts, proper dart pressing transforms your work from amateur to professional. This step determines whether your garment looks homemade or haute couture.
Pressing Techniques for Professional Results
Start by pressing your sewn dart flat from both sides before shaping. This sets the stitches and prevents them from loosening during wear. Your fabric finishing depends on this foundation step.
Position your dart over a tailor’s ham – this curved tool mimics body contours and prevents flattening. For dart shaping, press horizontal darts downward and vertical darts toward the center. The seam management here is critical for achieving smooth lines.
Consider dart balancing for bulky seams by trimming excess fabric to reduce bulk. Some sewers prefer pressing darts open for dart bulk reduction, though this technique varies by garment style.
Key Pressing Guidelines:
- Test heat settings on fabric scraps first
- Use steam judiciously to avoid water spots
- Press in the direction specified by your pattern
- Allow darts to cool completely before handling
- Keep iron moving to prevent shine or scorching
Mastering proper pressing techniques is essential for achieving professional-looking results. Master these dart pressing fundamentals, and you’ll see immediate improvement in your sewing darts quality.
Progressing Your Sewing Skills
Mastering dart marking requires consistent practice with basic techniques before advancing to complex variations.
You’ll build confidence by starting with simple vertical darts on stable fabrics, then progressing to curved darts and delicate materials as your skills develop, which will help in mastering dart marking.
Starting With The Basics
Anyone can master dart marking with the right approach.
Start with Fabric Preparation using quality Marking Tools like tailor’s chalk or removable pens. These Sewing Fundamentals form your foundation for Dart Techniques success.
| Dart Basics | Essential Tools | First Steps |
|---|---|---|
| Single bust dart | Tailor’s chalk | Test on scraps |
| Waist dart | Tracing wheel | Mark wrong side |
| Back shoulder dart | Fabric pencil | Check visibility |
| Hip dart | Removable pen | Practice precision |
Remember: marking darts accurately determines your garment’s fit—it’s worth taking time to get right.
Advancing Your Techniques
Once you’ve mastered basic dart marking, it’s time to elevate your sewing mastery with advanced dart precision techniques.
Expert sewers know that fabric handling becomes second nature through practice and technique refining.
Here are five advanced methods for superior dart marking:
- Carbon paper layering – Mark multiple pattern pieces simultaneously for consistent dart sewing method results
- Awl point marking – Create precise holes at dart tips using advanced tools for exact placement
- Template creation – Design reusable guides for marking darts on repeat projects
- Contrast thread basting – Use bright colors for complex curved dart patterns
- Double-check measurements – Always verify dart angles match your sewing darts instructions before cutting
These techniques transform your sewing darts technique from basic to professional-grade precision. Mastering advanced sewing techniques is essential for achieving professional results in various sewing projects.
Expert Insights From Judith Neukam
Professional sewing instructors like Judith Neukam transform dart marking from guesswork into precise craftsmanship. Her approach emphasizes selecting proper dart tools before making your first mark.
When marking darts on striped fabrics, she recommends using tailors tacks rather than a tracing wheel to maintain pattern alignment. This marking technique prevents the frustration of mismatched stripes that plague many sewers.
Neukam’s precision methods focus on fabric choices first. She suggests testing your marking tools on scraps before transferring dart lines to your main fabric.
Her sewing tips include using different techniques for various materials – chalk for dark fabrics, water-soluble markers for light ones. This systematic approach eliminates the trial-and-error method that wastes time and fabric, giving you confidence in every project.
Achieving Precision: Marking Darts on Different Fabrics
Different fabrics demand specific fabric marking approaches for dart precision.
Test your dart tools on fabric scraps first—chalk works best on textured materials, while tracing methods like wheels suit smooth surfaces.
For delicate fabrics, use tailor’s tacks instead of harsh marking tools.
Always mark on the wrong side to prevent visible errors.
Pin placement at dart points requires accuracy—misaligned marks create marking errors that affect fit.
Master these precision techniques by understanding fabric compatibility before marking darts on your actual garment pieces.
Utilizing proper dart marking tools is essential for achieving professional results.
Frequently Asked Questions (FAQs)
How do I learn to sew darts?
Perfect practice produces precise, professional dart placement.
Start by marking dart lines using tailor’s chalk or pins, then fold fabric along the center line.
Sew from wide end to point using small stitches, knotting threads at the apex instead of backstitching to prevent puckering.
How do you mark a dart on fabric?
Place your pattern on fabric, then use tailor’s chalk or fabric-safe pens to mark dart legs and point.
Pin through pattern layers, marking both sides.
Tracing wheels with carbon paper transfer all markings efficiently.
How do you mark a dart?
Eighty percent of sewing mistakes stem from inaccurate dart marking.
You’ll mark darts by pinning through pattern points, using tailor’s chalk on fabric’s wrong side, then connecting lines with a tracing wheel for precision.
How do you transfer darts from a pattern to a fabric?
Use tracing paper with a wheel to transfer dart lines efficiently, or place pins through pattern points and mark fabric with chalk at each pin location.
Do you like sewing darts?
I find sewing darts technically satisfying—there’s something rewarding about transforming flat fabric into three-dimensional shapes. You’ll discover that precise marking and stitching creates perfectly fashioned garments with professional results.
What are double darts & how do you sew them?
Like sculpting fabric into perfect form, double darts create superior shaping through two parallel dart legs.
You’ll sew each dart separately from wide end to point, knotting threads at tips instead of backstitching to prevent puckering.
How to mark darts scores?
Dart scores require precise marking for professional results.
Pin through dart point and legs, then mark with chalk or washable markers on fabric’s wrong side.
Test marking tools first to verify they’ll disappear completely after construction.
How to mark darts on very stretchy knit fabrics?
When working with stretchy knits, you’ll need to stabilize the fabric first.
Place tissue paper underneath before marking with washable markers or chalk.
Pin carefully without stretching, then remove tissue after transferring dart markings to prevent distortion, using washable markers or chalk.
What marking tools work best for leather or vinyl?
Working with leather’s unforgiving nature requires precision tools that won’t damage its surface.
Use an awl or leather punch for dart points, chalk or silver pencil for lines.
Always test on scraps first to avoid permanent marks, ensuring that your work is accurate and unforgiving nature of leather is respected.
Can you mark darts without cutting the pattern?
You can absolutely mark darts without cutting your pattern.
Pin through pattern and fabric layers, then mark with chalk or erasable pen at pin points.
Tracing wheels with carbon paper also transfer markings while keeping patterns intact, which is a method that helps in preserving the original pattern.
Conclusion
Practice makes perfect when mastering how to mark darts sewing.
You’ve learned the essential techniques for precise dart placement, from transferring markings to pressing finished seams.
Remember that accurate marking creates the foundation for professional-looking garments.
Start with simple darts on forgiving fabrics, then progress to complex designs as your confidence grows.
Each dart you mark brings you closer to creating perfectly fitted garments that showcase your developing skills.
- https://threadistry.com/blog/fabric-marking-tools/
- https://www.threadsmagazine.com/project-guides/learn-to-sew/video-how-to-mark-a-dart
- https://www.youtube.com/watch?v=AKrGZqOCh4c
- https://camimade.com/how-to-make-beautiful-darts-my-5-top-tips/
- https://siemachtsewingblog.com/2023/05/types-of-darts-in-sewing/


