This site is supported by our readers. We may earn a commission, at no cost to you, if you purchase through links.
 You’ll need to oil your Singer sewing machine every 8-10 hours of use to keep it running smoothly.
Start by unplugging the machine and removing all thread and attachments. Place newspaper underneath to catch drips.
Clean the oil ports with a small brush, then apply Singer-specific oil to each port. Don’t skip the bobbin case area – it’s essential for preventing thread tangles.
Wipe away excess oil with a clean cloth, then run the machine briefly on scrap fabric. Once you’ve mastered these basics, you’ll discover how proper oiling transforms your machine’s performance and longevity.
Table Of Contents
Key Takeaways
- Clean your machine thoroughly before oiling by removing lint, thread, and debris from key areas like the bobbin case and needle plate.
- Use Singer-specific sewing machine oil and apply 1-2 drops to metal friction points, avoiding plastic parts and the needle area.
- Follow your manual’s guidance to locate exact oiling points and avoid over-oiling, which can cause damage or stains.
- Oil your machine every 8-10 hours of use or monthly for infrequent use to maintain smooth operation and extend its lifespan.
How to Oil a Singer Sewing Machine
Your Singer sewing machine needs regular oiling to stay in top shape.
Apply 1-2 drops of specialized Singer sewing machine oil to metal friction points every 8-10 hours of use.
For detailed instructions and tips, review this sewing machine oiling guide.
Check your machine’s manual for specific lubrication points, avoiding plastic components, and focus on moving parts where metal meets metal.
Keep oil away from the needle and bobbin areas to prevent fabric stains.
Understanding Your Singer Sewing Machine
You’ll need to know your Singer sewing machine’s specific model to find the right oiling points and maintenance requirements.
Your machine’s user manual will show you exactly where to oil and how often you should do it, ensuring your Singer keeps running smoothly for years to come.
Identifying Your Machine Type
Getting your sewing project right starts with knowing your machine inside and out.
Model numbers tell an important story about your Singer’s needs and quirks.
Regular sewing machine maintenance is critical for ideal performance.
Here’s what you need to check:
- Find the serial code on your machine’s body – usually near the power switch on newer models or front panel on classics
- Look up your model’s details in the ISMACS database to verify its age and type
- Check if you have a mechanical or computerized machine, as each needs different care
- Download your user manual from Singer’s website for exact specs
- Match your visual guides with the machine’s parts for proper ID
Your machine’s serial number is like its birth certificate – it reveals age, model type, and maintenance needs.
Keep these details handy for future reference.
The Role of Oiling
While proper lubrication serves as the lifeblood of your sewing machine, understanding its role helps you maintain peak performance.
Regular oiling reduces friction between metal parts and prevents costly repairs. Your Singer requires specific oil designed for superior protection. Using the correct sewing machine oil is essential for its longevity.
Here are the key benefits of proper lubrication:
- Extended Lifespan: Regular maintenance with singer sewing machine oil can double your machine’s working life
- Smoother Operation: Proper oiling eliminates grinding sounds and guarantees fluid movement
- Lower Maintenance Costs: Consistent lubrication prevents wear that leads to expensive repairs
- Better Stitch Quality: Well-oiled machines produce more consistent, professional results
Follow the manufacturer’s oiling frequency guidelines – typically every 8-10 hours of use. This simple maintenance step protects your investment and keeps your creative projects running smoothly.
Preparing for Oiling
You’ll need to unplug your Singer sewing machine and remove all thread, bobbins, and attachments before starting the oiling process.
Next, you’ll want to gather your supplies, including sewing machine oil and a clean cloth, while placing newspaper under your machine to catch any drips.
Gathering Necessary Supplies
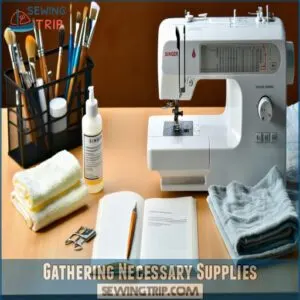
Now that you know your Singer’s ins and outs, let’s gather your sewing tools for perfect machine maintenance. A well-stocked toolkit makes oiling your machine quick and hassle-free.
- Quality sewing machine oil (look for Singer-approved lubricant types)
- Clean microfiber cloths or lint-free rags
- Small precision oiler or applicator brush
- Machine manuals for your specific Singer model
Keep your supplies organized in a dedicated container near your workspace. You’ll want easy access to these items every time you maintain your machine.
Remember, using the right oil for Singer sewing machines prevents damage and keeps parts running smoothly. It’s also essential to check the sewing machine oil compatibility before making a purchase, ensuring smooth operation and long machine life with proper maintenance.
Cleaning Before Oiling
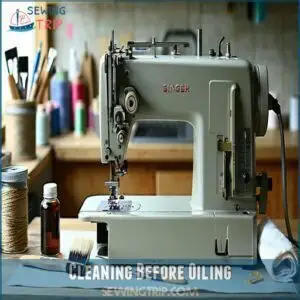
Now that you’ve gathered your supplies, let’s prepare your machine for peak performance. A clean Singer is a happy Singer, and proper lint removal sets the stage for effective oiling.
- Remove all thread, bobbins, and needle from your machine
- Open the needle plate to access hidden debris spots
- Clean every oil port you can find with a small brush
Take your lint brush and methodically sweep through the bobbin area. Pay special attention to the feed dogs and hook race – these spots love to collect thread bits and dust. A clean mascara brush works wonders for tight spaces where regular cleaning tools can’t reach.
Use compressed air (held 4 inches away) to blast stubborn lint from oil ports. Always work in a well-lit area so you can spot every speck of debris. Your sewing machine maintenance routine should include cleaning the bobbin case thoroughly – it’s where most thread tangles start.
Remember to wipe down all moving parts with a soft, lint-free cloth before proceeding to oiling. This step is crucial for maintaining your machine’s smooth operation and ensuring it remains in good working condition. Proper maintenance is key to a long-lasting and efficient sewing machine.
Oiling Process
You’ll need to apply 1-2 drops of sewing machine oil to each marked point on your Singer machine, starting with the bobbin case and hook race.
To get the best results, you’ll want to rotate the handwheel slowly while oiling to help distribute the lubricant evenly throughout the moving parts.
Step-by-Step Guide
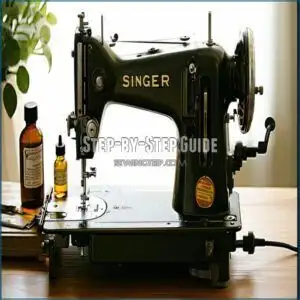
Once you’ve thoroughly cleaned your Singer sewing machine, locate the key lubrication points where metal meets metal. Apply 1-2 drops of specialized sewing machine oil to each spot, focusing on the bobbin area and moving parts.
Remember to wipe away excess oil with a clean cloth. The right sewing machine oil is essential for maintaining your machine’s performance.
- Your machine deserves the same care as a cherished family heirloom
- Each drop of oil protects years of future stitching memories
- Perfect maintenance today means flawless projects tomorrow
Follow your machine’s manual for exact oiling spots. Test the movement after oiling by turning the handwheel slowly. The motion should feel smooth and quiet, ensuring future stitching memories and flawless projects with the right maintenance, which is a key part of machine maintenance.
Avoiding Common Mistakes
Seasoned sewists know that oiling a Singer sewing machine requires precision and care. When maintaining your machine, avoid these critical mistakes that can lead to costly repairs.
- Over lubrication causes oil spills and machine damage, potentially ruining your fabric with stubborn stains. Use just one drop of Singer sewing machine oil per lubrication point.
- Incorrect oiling with automotive or household oils damages delicate mechanisms. Always use specialized sewing machine oil recommended in your Singer oiling instructions.
- Thread breakage often results from missed oiling spots, especially in the bobbin area and hook race. Follow your manual’s diagrams carefully.
Keep a maintenance log to track your Singer sewing machine maintenance schedule. Clean before oiling, and wipe away excess oil immediately. Test the machine on scrap fabric before starting your project.
Remember that regular, proper oiling prevents wear and extends your machine’s life, but too much oil is worse than too little. This balance is crucial for the longevity and performance of your Singer sewing machine.
Post-Oiling Maintenance
You’ll need to maintain proper oiling intervals to keep your Singer sewing machine running smoothly after its initial lubrication.
After oiling your machine, you should test it on scrap fabric and plan to repeat the oiling process every 8-10 hours of use or at least monthly for machines used less frequently.
Regular Maintenance Schedule
Now that you’ve oiled your Singer, let’s set up a solid maintenance routine.
Mark your calendar for oil changes every 8-10 hours of sewing time, or monthly if you’re a casual user.
Your schedule should include regular machine cleaning, performance tests, and part replacement checks.
Use only Singer-approved sewing machine oil for lubrication.
Keep a simple log to track maintenance – it’ll help extend your machine’s life and keep it running smoothly.
Regular sewing machine maintenance is essential for preventing mechanical issues and ensuring effective performance.
Frequently Asked Questions (FAQs)
How do you oil a sewing machine?
A well-oiled machine runs like a dream.
Unplug your machine, clean it thoroughly, and apply 1 drop of sewing machine oil to designated spots.
Test on scrap fabric afterward to confirm smooth operation.
How to open a Singer sewing machine for cleaning and oiling?
Unplug your Singer machine, remove the needle, presser foot, stitch plate, and bobbin case.
Unscrew necessary panels as specified in your manual.
Use a brush or cloth to clean lint before oiling the machine.
How do you oil a Singer sewing machine?
Spark smooth stitching by cleaning lint first.
Use 1-2 drops of sewing machine oil on the bobbin case, hook race, and moving parts.
Avoid over-oiling and follow the manual.
Test to guarantee perfect precision.
How do you care for a Singer sewing machine?
To care for your Singer sewing machine, clean it regularly, remove lint, use a proper sewing machine oil, and check for wear on needles and parts.
Follow the manual’s maintenance schedule for smooth performance, which is a complete concept to ensure your sewing machine operates at its best.
Where do I put oil in my Singer sewing machine?
Think of your Singer sewing machine as thirsty for precision.
Apply 1-2 drops of sewing machine oil to the bobbin case, hook race, and moving metal parts.
Avoid the needle, presser foot, and plastic components.
What parts of a sewing machine do you oil?
You oil the bobbin case, shuttle hook, hook race, and moving metal parts under the stitch plate.
Apply 1-2 drops of sewing machine oil where metal rubs metal.
Always consult your machine’s manual for exact locations, to ensure you are applying the oil in the correct areas.
How do I know if my sewing machine needs oiling?
You’ll notice your sewing machine needs oiling when it sounds louder, stitches unevenly, resists moving parts, or feels sluggish.
Regular oiling after every 8-10 hours of use keeps it running smoothly and prevents wear.
How to oil a Singer start sewing machine?
Unplug your machine, remove thread and dust, then locate oiling points in the manual.
Apply 1-2 drops of sewing machine oil to bobbins case, hook race, and moving parts.
Wipe excess oil.
How do you remove a bobbin holder from a Singer sewing machine?
To remove a bobbin holder, unplug the machine, open the bobbin area, and release the latch holding it.
Gently lift the holder out.
Refer to your manual if the mechanism differs based on your model.
How to oil a sewing machine?
Think of your sewing machine as a loyal friend needing care.
Unplug it, clean lint with a soft brush, and apply 1-2 drops of sewing machine oil to designated points per the manual’s guidance.
Conclusion
Properly oiling your Singer sewing machine isn’t just maintenance—it’s a game-changer.
Without it, parts wear quickly, stitches falter, and projects stall.
By cleaning thoroughly and using Singer-specific oil, you guarantee smooth sewing and longer machine life.
Don’t overlook key areas like oil ports and the bobbin case; these keep the machine running at peak performance.
Stick to an 8-10 hour oiling schedule, and you’ll master how to oil a Singer sewing machine like a pro.
- https://www.wikihow.com/Oil-a-Sewing-Machine
- https://thisguysews.com/how-to-oil-a-sewing-machine/
- https://www.youtube.com/watch?v=P-xzmK3PS40
- https://singeroutlet.co.uk/pages/singer-sewing-machine-historic-age-guide
- https://beautifulthings-photography.com/2020/05/10/servicing-a-vintage-singer-sewing-machine/


