This site is supported by our readers. We may earn a commission, at no cost to you, if you purchase through links.
 Like a magician’s deft sleight of hand, sewing a hidden seam with a sewing machine is about precision and finesse.
You’re about to master the blind hem stitch, a technique that grants your garments a clean, professional edge, invisible to the untrained eye.
With the right presser foot and a bit of practice, you’ll wield the power to create seamless hems that speak volumes of your sewing prowess.
Embrace this innovative skill and watch as your projects transform with every stitch.
Table Of Contents
Key Takeaways
- Use a blind hem presser foot and adjust the machine to the blind hem stitch setting for a professional-looking invisible seam.
- Overcast or zigzag the raw edges before folding and pressing the hem to prevent fraying and achieve a clean finish.
- Align the folded fabric with the flange on the blind hem foot to ensure the stitches catch only a small portion of the fabric, making the seam nearly invisible.
- After sewing, press the hem to smooth out any ridges and inspect the stitches, correcting any that may have missed the fold for a polished appearance.
Understanding the Blind Hem Stitch
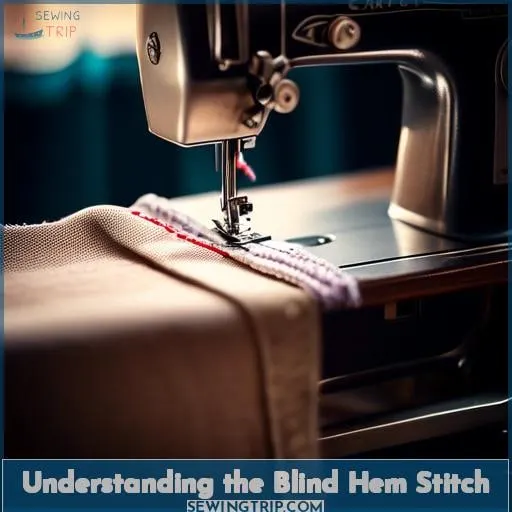
You’ll appreciate the blind hem stitch for its ability to create seams that are virtually invisible on the finished garment.
It’s a technique that offers a clean, professional look, especially useful for hems on pants and skirts.
Definition and Uses
To master the art of sewing a hidden seam, you’ll need to understand the blind stitch, also known as the blind hem stitch. This technique is your secret weapon for creating hems that are virtually invisible, giving your projects a clean, professional look.
The blind stitch is perfect for hemming variations on a range of fabric compatibility, ensuring that your garments hang beautifully without any visible stitching.
When you’re sewing, the blind hem foot is your ally, guiding your machine with precision. If you encounter any hiccups, troubleshooting tips are at hand to ensure your success. Compared to other stitches, the blind stitch offers a discreet finish that’s ideal for the main fabric of skirts, trousers, and curtains.
Benefits for Invisible Seams
When you master the blind hem stitch, you’re unlocking the power to create hidden seams that blend seamlessly with your fabric.
This stitch is a game-changer, especially when you’re working with medium to heavy fabrics like twill or denim. By adjusting your stitch length and thread tension to suit the fabric weight, you ensure that the seam allowance is neatly tucked away, out of sight.
The blind hem presser foot is your ally here, guiding you along the hem’s edge for precision. Remember, achieving that invisible seam may take some practice, but once you’ve got it down, the results are incredibly satisfying.
With each hidden seam, you’re not just sewing—you’re crafting a piece of art that stands the test of time.
Preparing the Fabric
- Overcast or zigzag the raw edge to prevent fraying. For knits, you can skip this step or use a wide 3-thread overlock stitch.
- Press the hem allowance up by folding and pressing the desired hem width. A blind hem works best with a wider hem, like 1 inch or more.
- Fold the hem allowance back down, enclosing the raw edge. Ensure about 1/4 inch of the folded hem allowance is visible.
By overcasting the raw edge, pressing a deep hem allowance, and folding it precisely, you prepare the fabric for sewing an invisible blind hem stitch. The small visible portion of the folded hem will be caught by the wide zig-zag of the blind hem stitch, securing the hem invisibly from the right side.
Overcasting the Edges
To seamlessly transition from understanding the blind hem stitch to preparing your fabric, let’s focus on overcasting the edges. This step is crucial for preventing fraying and ensuring a clean finish. Begin by selecting a thread color that blends well with your fabric to maintain the seam’s invisibility.
Adjust your sewing machine’s tension to suit the fabric type you’re working with, which will help avoid puckering or loose stitches.
For the hem width, aim for a generous allowance to facilitate the blind hemming process. Use an edge treatment like zig-zag stitching or a serger if available. A magnifying lamp can be a game-changer, allowing you to see every stitch up close, ensuring precision.
Choose the right needle for your fabric, and set the stitch length and width appropriately. If you have a universal blind hem foot, attach it to your machine to guide your fabric as you sew. This attention to detail will set you up for a hidden seam that’s nothing short of professional.
Pressing the Hem
After overcasting the edges of your fabric, it’s time to press the hem to ensure a crisp finish.
- Set your iron to the appropriate heat for your fabric type.
- Lay the fabric flat, wrong side up, and fold the hem allowance to the desired width, pressing firmly to create a sharp crease.
- Ensure the fold aligns evenly along the length of the hem for a uniform look.
- Use steam and a pressing cloth if necessary to avoid any sheen or damage to the fabric.
Folding for Blind Hemming
To prepare your fabric for blind hemming, you’ll need to fold it with precision. Start by overcasting the edges to prevent fraying.
| Step | Action | Result |
|---|---|---|
| 1 | Fold the hem allowance up, wrong sides together, and press. | Creates the base of the hem. |
| 2 | Fold the fabric back on itself, right sides together, leaving a small portion of the hem allowance exposed. | Sets up the blind hem stitch area. |
| 3 | Press lightly to set this temporary fold in place. | Prepares for the sewing machine. |
Ensure your presser foot adjustment is set to accommodate the fabric thickness. Adjust the stitch tension as needed for a secure, yet flexible blind hem stitch. The folded edge should align with the guide on your blind hem presser foot for precision sewing.
Setting Up the Sewing Machine
To set up your sewing machine for a hidden seam, you’ll need to select the appropriate blind hem presser foot. This specialized foot has a guide that ensures your fabric is perfectly aligned for nearly invisible stitches.
Adjust your machine’s stitch settings to the blind hem stitch, which alternates between straight and zig-zag stitches to discreetly secure the hem.
Choosing the Right Presser Foot
Choosing the right presser foot for your sewing machine is like picking the perfect spice for your dish—it can make all the difference in the world.
-
Identify Your Presser Foot Needs: Not all presser feet are created equal. For a blind hem or invisible hem, you’ll specifically want a blind hem foot or an invisible hem presser foot. These specialized feet have a guide that helps you maintain the perfect edge for your hidden seam.
-
Maintenance Matters: Keep your presser foot in top shape by regularly cleaning and oiling it, as per your machine’s manual. A well-maintained presser foot ensures smoother sewing and better results.
-
Storage Solutions: Organize your presser feet with a clear, labeled storage solution. This not only keeps them protected but also makes it easy to find the right foot when you need it. Consider a storage box with compartments for each foot, ensuring they’re always ready for your next project.
By paying attention to these details, you’re setting yourself up for sewing success.
Adjusting Stitch Settings
Once you’ve selected the right presser foot, it’s time to fine-tune your machine for that impeccable blind hem stitch.
Begin by adjusting the stitch length and width to suit your fabric’s weight and type. A general rule of thumb is a stitch length of 2-3 and a similar width, but always do a test run on scrap fabric first.
Ensure your needle size is appropriate for the thread quality you’re using; a mismatch can lead to snags or weak seams.
Balance the tension so that the stitches lie flat without puckering. Remember, the devil’s in the details, and patience is your ally as you calibrate your machine for that machine-stitched hem that rivals any Bernina blind hem foot’s precision.
Sewing the Blind Hem
Position the folded fabric so the flange on the blind hem foot aligns with the fold.
Stitch at a steady pace, allowing the foot to guide the fabric as the straight stitches alternate with the zigzag bites.
Aligning the Fabric With the Presser Foot Guide
Now that your sewing machine is set up with the blind hem presser foot and the stitch settings are adjusted, it’s time to align the fabric properly. You’ll want to pay close attention here, as getting this step right is crucial for an invisible hem.
First, take the folded fabric and position it under the presser foot, with the wrong side facing up. The vertical guide on the presser foot should sit right along the folded edge. This guide will help catch just a tiny bit of the fabric fold with each zigzag stitch.
As you’re aligning the fabric, make sure there’s no gap between the fold and the presser foot guide. It should lay flush against it. You may need to adjust the stitch width or needle position slightly to get that perfect alignment.
Once aligned, gently lower the presser foot, keeping the fabric taut but not stretched. The flat portion of the foot should tuck neatly between the two folded layers of fabric.
With the fabric properly positioned, you’re ready to start stitching. Go slowly and keep that folded edge hugging the vertical guide as you sew. This will ensure the zigzag catches just a thread or two of the fold with each stitch, creating that invisible hem.
Stitching Technique and Pace
Once you’ve aligned the fabric with the presser foot guide, it’s time to dive into the stitching technique and pace.
- Choose the Right Needle and Thread: Opt for a needle that suits your fabric thickness and a thread that matches in color. This ensures your stitches are practically invisible.
- Adjust the Presser Foot Pressure: Depending on your fabric’s weight, adjust the presser foot pressure. A lighter touch for delicate fabrics and a firmer one for thicker materials like a deep hem on a skirt ensures smooth sewing.
- Maintain a Steady Pace: Sew at a consistent speed. Rushing can lead to uneven stitches, while too slow can make the fabric bunch. Find a rhythm that allows the machine to catch just the edge of the fold.
- Regular Machine Maintenance: Ensure your sewing machine is well-maintained. A clean and oiled machine prevents snagging and ensures the blind hem stitch is flawless.
By focusing on these details, you’ll create hidden seams that not only look professional but also feel empowering as you master this innovative technique.
Finishing Touches
After sewing your blind hem, it’s crucial to give your work a thorough inspection. Look for any stitches that may have missed the mark or areas that could be improved.
If you find any, carefully remove the problematic stitches and re-sew as needed. This step ensures your seam remains invisible and your garment looks professionally made.
Once satisfied, press the hem to give your project a polished and refined appearance. This final touch makes all the difference, transforming your sewing project from homemade to handmade with a luxurious finish.
Inspecting and Correcting Stitches
After you’ve sewn your blind hem, it’s crucial to inspect your stitches closely. If you spot any tacks of thread peeking out, don’t fret! Gently pull the fabric to coax those stitches back into hiding.
If your seam isn’t as invisible as you’d hoped, check your needle placement and thread tension. A stitch length that’s too long or fabric that’s too thick can also be culprits.
Use a water-soluble pen to mark your straight seam hem and pin generously before sewing.
Pressing the Hem for a Polished Look
Once you’ve stitched your hidden seam, it’s time to give your project that crisp, professional finish.
Grab your iron and let’s press that hem into submission. If you’re working with a delicate fabric, consider using hem tape to secure the fold before you apply heat.
Keep your hem width consistent for a clean look, and don’t rush—patience is your ally here.
Frequently Asked Questions (FAQs)
Can I sew a hidden seam on stretchy fabrics?
Yes, you can sew a hidden seam on stretchy fabrics using a sewing machine equipped with the right tools and techniques.
Opt for a stretch or ballpoint needle and a stretch blind hem stitch or narrow zigzag stitch to maintain the fabric’s elasticity.
Adjust your sewing machine settings to accommodate the stretch, ensuring the seam remains invisible and the fabric doesn’t pucker or stretch out of shape.
What alternatives exist for a blind hem presser foot?
You don’t need a blind hem presser foot; a zigzag foot works too.
Just fold your fabric correctly, use a magnetic seam guide or painter’s tape for precision, and practice your stitches for invisible hems.
How do I fix a hidden seam that’s come undone?
A stitch in time saves nine, so let’s mend that hidden seam with precision and patience.
First, turn your garment inside out and pin the seam allowance to secure it. Using a blind hem stitch on your sewing machine, carefully sew along the edge of the fold, ensuring the stitches catch both the fold and the main fabric.
Is it possible to create a hidden seam on very thin fabrics?
Yes, creating a hidden seam on very thin fabrics is possible, but it requires careful handling and the right techniques.
You’ll need to adjust your sewing machine settings and possibly use stabilizers to prevent the fabric from puckering or tearing.
Practice and patience are key to mastering this delicate task.
How do I adjust tension for sewing a hidden seam?
To adjust tension for a hidden seam, start by setting your machine’s tension dial to a mid-range value, typically around 4 or
Test on scrap fabric, aiming for even stitches. Adjust the dial up if stitches are loose, down if too tight.
Conclusion
Stepping into the world of sewing is akin to embarking on a journey through a forest filled with hidden treasures, and mastering how to sew a hidden seam with a sewing machine is one of those prized discoveries.
By now, you’ve been equipped with the knowledge to execute the blind hem stitch, transforming your projects with seams that whisper their presence rather than shout. Remember, the beauty of your work lies in the precision of your stitches and the patience with which you handle your fabric.
As you press the final hem, admire the seamless finish you’ve achieved. This skill is a testament to your dedication and finesse in sewing. Keep practicing, for each stitch is a step towards perfection in the art of invisible seams.


