This site is supported by our readers. We may earn a commission, at no cost to you, if you purchase through links.
 Sewing stitches are like the building blocks of fabric art, from making simple repairs to crafting elaborate designs.
You’ve got hand stitches, like the running stitch, which works great for beginners.
Or tackle those raw edges with a zigzag stitch using a sewing machine—it’s a real lifesaver.
Stitches aren’t just functional; they give your projects character and polish.
Think of topstitches that make hems neat and tidy or decorative cross-stitches that showcase creativity.
Each stitch serves a purpose and has its charm.
Ready to explore the world of stitches? Keep reading for tips to up your sewing game!
Table Of Contents
- Key Takeaways
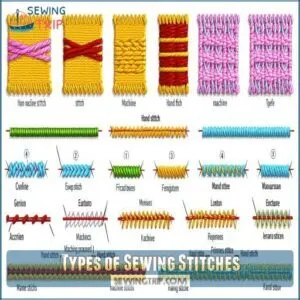
- Types of Sewing Stitches
- What Are Sewing Stitches Used For
- Essential Hand Sewing Stitches
- Basic Machine Sewing Stitches
- Hand Sewing Stitches for Mending Clothes
- Mastering Hemming Stitches
- Choosing The Right Sewing Stitches
- Tips for Improving Sewing Stitch Techniques
- Advanced Hand Sewing Stitches
- Seam Finishes for a Professional Look
- Frequently Asked Questions (FAQs)
- Conclusion
Key Takeaways
- You’re entering a world where sewing stitches are essential not just for holding your projects together, but also for adding unique artistic touches and finishing techniques.
- Mastering basic stitches like the running, backstitch, and zigzag stitches will empower you to tackle both hand and machine sewing tasks effectively.
- Choosing the right stitch for your fabric and project needs will enhance durability and aesthetics, making your creations look polished and professional.
- Regular practice and using the right tools are crucial for improving your sewing skills, allowing you to troubleshoot problems like uneven tension and fabric puckering with ease.
Types of Sewing Stitches
You’re about to discover the wonderful world of sewing stitches, where each type adds its own magic to your sewing projects.
From handy hand stitches to mighty machine ones, you’ll soon know which stitch to pick, whether you’re fixing frayed edges or creating a masterpiece!
Hand Sewing Stitches
Hand sewing stitches open a whole new world of creativity and precision.
As you sew, keep these handy tips in mind: When starting out, you need to master basic stitches and learn how to do sewing stitches, including the straight stitch, which maintains even thread tension and works on most woven fabrics.
- Running Stitch: Great for beginners to practice and essential for basic sewing tasks.
- Backstitch: Tough and reliable for securing seams.
- Basting Stitch: Perfect for temporarily holding patterns.
- Cross-Stitch: Add decorative designs.
Machine Sewing Stitches
Let’s explore the world of machine sewing stitches! They’re your secret weapons for creating strong and beautiful seams. You’ll need to master a few basic machine stitches to become a sewing whiz. Getting the right stitch length and tension is key – it’s like finding the perfect recipe!
Here’s a quick guide:
| Stitch Type | Description | Use Cases |
|---|---|---|
| Straight Stitch | Basic, versatile stitch | Seams, topstitching |
| Zigzag Stitch | Creates a zig-zag pattern | Finishing raw edges, decorative stitching |
| Buttonhole Stitch | Creates buttonholes | Attaching buttons |
Choosing the right needle and understanding stitch tension control is important for success.
Don’t worry; practice makes perfect, and troubleshooting is part of the fun!
Hemming Stitches
Hemming stitches are your secret weapon for a polished look.
Perfect for fixing those wobbly hems with ease, here’s a quick guide:
- Flat Catchstitch: Ideal for pinked hems; almost invisible.
- Blind Hemming Stitch: Quick, simple, and disappears in your fabric.
- Blind Catchstitch: Sturdy, handles heavy fabrics.
- Overcast Stitch: Stops fraying instantly.
- Blanket Stitch: Adds flair while securing edges.
Quick fixes never looked so neat!
Seam Finishes
Think of seam finishes like the cherry on top of a sundae; they make your sewing projects look polished.
Whether you’re into zigzag, turn and stitch, or bias tape, pick what’s best for your fabric and project.
Trying different methods will help you find your perfect finish.
Here’s a quick comparison:
| Technique | Best For |
|---|---|
| Zigzag | Raw edges |
| Turn and Stitch | Enclosed seams |
| Bias Tape | Unlined garments |
Embrace the fun of experimenting!
What Are Sewing Stitches Used For
Sewing stitches are the magic thread that holds your projects together, whether you’re patching up a favorite shirt or crafting something completely new. They’re the unsung heroes of garment construction, built to withstand wear and tear.
Here’s what you can do with them:
- Join Fabric Pieces: Stitches like the running or backstitch securely connect fabric parts, ensuring they stay in place.
- Finish Edges: Use variations like zigzag or overcast stitches to prevent fraying, keeping your creations neat and polished.
- Add Creative Touches: Decorative stitches such as cross-stitches express your artistic side, adding flair to any piece.
Mastering these builds confidence and empowers you to take on diverse projects with ease.
Essential Hand Sewing Stitches
Hand sewing is a fantastic skill to master, letting you add personal touches and fix clothes without a machine.
From the trusty running stitch to the strong backstitch, these techniques are your new best friends in DIY projects and repairs.
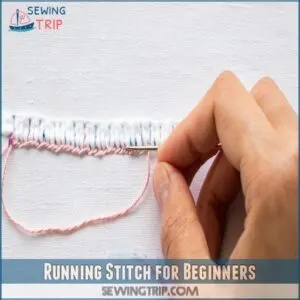
Running Stitch for Beginners
Learning the running stitch is like opening the first level in your sewing adventure.
It’s simple but powerful for beginners, letting you join fabrics with ease.
To master this basic hand embroidery technique, choose a needle that matches your fabric, and practice adjusting your stitch length.
A few different running stitch variations and you’ll be ready to tackle more complex hand sewing stitches!
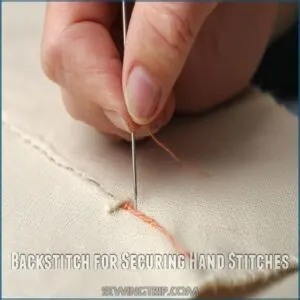
Backstitch for Securing Hand Stitches
Backstitch is like the trusty sidekick to your sewing prowess, offering strength and reliability when it counts.
It’s tougher than the running stitch, making it perfect for securing your work.
To master this essential stitch, it’s important to understand various backstitch techniques step by step.
Use it when you need added durability.
Handy alternatives and variations exist, but nothing quite beats backstitch’s dependability.
- Perfect for seams
- Guarantees tight stitching
- Ideal for mending
- Superior to running stitch
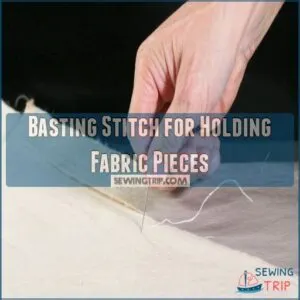
Basting Stitch for Holding Fabric Pieces
Mastering the basting stitch is like giving your fabric a gentle hug before the big sew.
It’s a temporary stitching technique, perfect for holding fabric pieces together before you sew for real.
Think of it as your pre-game prep – it helps you get everything lined up perfectly.
Use long, loose stitches (about ½ inch apart).
When working with different fabric weights, it’s important to choose the right thread type, like lightweight threads for delicate fabrics, as explained in the basting techniques guide.
There are basting stitch variations, but this basic method works wonders.
Need to hold your fabric? Basting stitch!
It’s a fundamental stitch for learn sewing techniques now, a key hand sewing stitch, especially for beginners learning sewing techniques.
You’ll find tons of basting stitch uses!
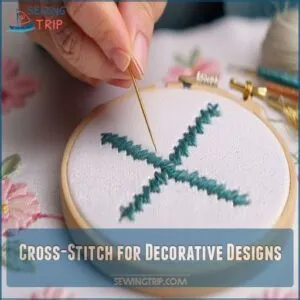
Cross-Stitch for Decorative Designs
Cross-stitch opens up a world of creativity for decorative designs.
Whether you’re diving into counted cross-stitch or sampler projects, the key is in those little "X" shapes.
To get started, familiarize yourself with basic materials like Aida cloth and embroidery floss by learning how to cross stitch for beginners.
Grab your embroidery floss and starting exploring stitch patterns!
Cross-stitch patterns add charm to any fabric, and with countless stitch variations, you’ll become a master of embroidery stitches in no time!
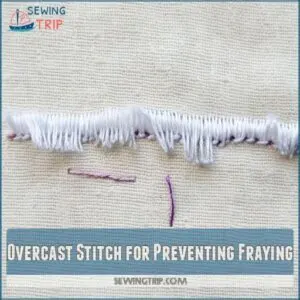
Overcast Stitch for Preventing Fraying
When tackling fraying edges, the overcast stitch is your trusty sidekick, swooping in like a superhero for your fabric.
This stitch covers raw edges with tight loops, keeping them tidy and unravel-free.
Whether you’re sewing lightweight cotton or heavyweight denim, play around with stitch tension for best results.
Don’t stress—it’s your secret weapon against pesky fraying.
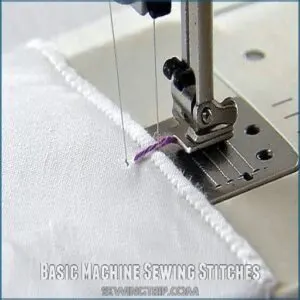
Basic Machine Sewing Stitches
Discovering basic machine sewing stitches is like learning a secret code for crafting with fabric.
You’ll master essentials like the trusty forward/backward stitch and the versatile zigzag,
turning your sewing projects into masterpieces with ease!
Standard Forward/Backward Stitch
You’ve nailed the basics of hand sewing, so let’s shift gears to the standard forward/backward stitch on machines. This trusty stitch is your bread and butter, perfect for seams and hems. It’s straightforward, like drawing a line with a pencil.
- Smooth the fabric troubles away
- Avoid the tangled mess
- Conquer stitch length adjustments
- Unleash your inner sewing pro
Zigzag Stitch for Finishing Raw Edges
Zigzag stitch variations add flair to any sewing project while taming those pesky raw edges.
It’s like having a little sewing superhero in your toolkit, swooping in to prevent fraying.
Perfect if you’ve got no serger!
Adjust the stitch width to fit the seam allowance and consider it your go-to for neat, polished edges.
A must-learn for beginners!
Blind Hem Stitch for Invisible Hems
Picture yourself sewing a pair of curtains and wanting the hem to vanish like magic.
The blind hem stitch is your secret weapon for invisible hemming techniques.
This trick uses special hem stitch tools and fabrics to hide stitches.
Even beginners love this method for its sleek finish.
Remember, practice makes perfect.
Troubleshoot those stubborn stitches, and you’ll master the art!
Buttonholes
Okay, invisible hems are neat, but let’s talk buttonholes!
Your machine probably has a buttonhole stitch – it’s like magic for adding buttons.
Most machines even have automatic settings.
You’ll need the right foot and maybe a bit of practice, but soon you’ll be whipping up buttonholes like a pro.
Different buttonhole styles exist, from basic to fancy, so choose one that fits your project.
Proper buttonhole placement is key for a polished look, so measure twice!
Hand Sewing Stitches for Mending Clothes
Mending clothes by hand is like having a secret weapon in your wardrobe arsenal; it’s simple, portable, and doesn’t require fancy equipment.
With just a needle and thread, you can fix ripped seams, reinforce weak spots, and even handle those pesky buttonholes, keeping your outfits looking sharp and well-loved.
Running Stitch for Mending Ripped Seams
When you face a ripped seam, reach for the trusty running stitch—it’s your go-to for quick, effective mending.
This stitch offers flexibility with fabric choices, letting you tackle anything from jeans to silk.
You can easily find a suitable mending needle for your project at a top mending needle shop.
Simply weave the needle in and out, creating stitch variations that hold strong.
No fancy hand sewing tools needed—just a needle, thread, and some patience!
Even Backstitch for Reinforcing Seams
Got pesky seams that won’t stay in place? Let the even backstitch be your hero.
This stitch gives seam strength and durability, whether you’re fixing a tear or reinforcing seams.
Here’s how:
- Insert the needle at the end of the previous stitch.
- Pull the thread taut.
- Overlap slightly.
- Repeat for sturdy seams.
Buttonhole Stitch for Fixing Buttonholes
Ever struggled with fixing buttonholes?
The buttonhole stitch is your ticket to success.
It reinforces edges, keeping them neat and tidy.
Try these tools and tips for mastery:
| Tool | Purpose | Tip |
|---|---|---|
| Needle | Precision | Choose the right size |
| Thread | Durability | Match fabric color |
| Thimble | Protection | Prevent finger pricks |
| Sewing Gauge | Accuracy | Measure accurately |
| Marker | Visibility | Highlight areas to stitch |
Master these variations and troubleshoot common hiccups.
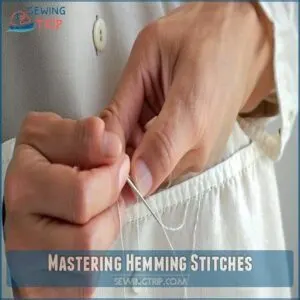
Mastering Hemming Stitches
When you’re delving into hemming stitches, you’ll discover they’re essential for giving your projects a polished finish.
From the invisible magic of the blind hemming stitch to the sturdy hold of the flat catchstitch, mastering these techniques will have your clothes looking store-bought without the price tag.
Flat Catchstitch for Finishing Pinked Hems
You’ve tackled mending seams, but let’s explore the flat catchstitch for finishing pinked hems.
This stitch works like magic to secure the zigzag edges, also known as pinked seams, without showing up on the front.
Just take your needle, make sure you have good stitch tension, and work along the hem allowance.
It’s perfect for controlling frays on various fabric types.
Blind Hemming Stitch for Invisible Hems
Want invisible hems? A blind hemming stitch is your secret weapon!
It’s super easy – you’ll be amazed.
The running stitch is typically used for this purpose, especially when working with hand sewing essentials. This hand sewing stitch is perfect for lightweight fabrics.
Fold your hem, take tiny stitches along the folded edge, catching just a thread or two of the fabric below.
It’s like magic!
Practice makes perfect – soon, you’ll be creating professional-looking invisible hems.
This handy technique is a must-know for sewing for beginners.
Blind Catchstitch for Heavy Fabrics
When tackling heavy fabrics, the blind catchstitch is your secret weapon.
It’s like giving your hem an invisible but super-strong handshake.
With this stitch, you’ve got:
- Seam Strength: No more unraveling nightmares.
- Durable Hemming: Great for those winter coats.
- Catchstitch Variations: Perfect for every project.
Say goodbye to loose hems and hello to professional finishes!
Overcast Stitch for Finishing Raw Edges
Finishing raw edges with an overcast stitch is like adding a guardrail to your sewing project.
This nifty stitch keeps fabric from fraying, making it perfect for edges that need a tidy finish.
Use it on a variety of fabric types with basic sewing tools.
Think of it as the Swiss Army knife of sewing stitches—a versatile ally in your toolkit!
Choosing The Right Sewing Stitches
Choosing the right sewing stitch can feel a bit like picking the perfect ice cream flavor—there are plenty of options, and each has its moment to shine.
Matching your stitch to the fabric and your desired look is your ticket to sewing success.
Whether you want strength, style, or a bit of both, matching your stitch to the fabric and your desired look is your ticket to sewing success.
Matching Stitch Types to Fabric
Finding the right stitch for your fabric can feel like discovering a hidden treasure! Here’s what you need to know:
- Fabric weight dictates stitch length—heavier fabrics need longer stitches.
- Use the correct needle size; delicate fabrics prefer smaller needles.
- When selecting thread, consider factors such as fabric thickness and stretch to ensure the right thread for your project. Choose thread type wisely, ensuring it matches the fabric’s demands.
Explore your sewing stitch chart for a detailed stitch guide!
Considering The Desired Aesthetic
Choosing stitch types for your project involves considering fabric texture and color impact.
It’s like picking the right spices for a dish; each stitch or decorative stitch brings a unique design element to the table.
Using a stitch guide or a stitch dictionary can help understand sewing stitch names and techniques, enhancing pattern complexity and overall style.
Experimenting With Different Stitches
Exploring stitch combinations is like adding your own flair to a canvas.
Jump from stitch textures to stitch patterns and see what makes your project pop.
Try mixing basic sewing stitches with unexpected stitch variations for unique effects.
Learning the difference between quilting stitches and sewing stitches can clarify key techniques. If you’re new, a sewing stitch guide can ease you into it.
Remember, with hand sewing, practice makes perfect.
Tips for Improving Sewing Stitch Techniques
Ready to take your sewing skills to the next level?
We’ll show you some simple tricks to improve your stitchwork.
You can create projects that’ll make even your grandma jealous!
Practicing Regularly
You’re all set with your stitch selection, so let’s talk about practice.
Consistency is key.
Set aside a bit of time each week in a dedicated practice space.
Tackle "stitch challenges" by experimenting with hand sewing stitches or following tutorials for beginners.
Treat it as a fun puzzle, boosting your skills one thread at a time.
Using The Right Tools and Equipment
Wondering if you’ve got the right tools in your sewing kit?
Picking the right needle for fabric weight is a game-changer.
Use sturdy threads matched to your project—light or heavy, choose wisely.
Keep your sewing machine and supplies, like scissors and rulers, in tip-top shape.
Count on quality sewing tools to make those hand sewing stitches shine!
Common Mistakes to Avoid
Imagine this: your fabric puckers because you skipped backstitching or your seams unravel due to incorrect needle size.
Oops, fixing machine tension issues is also important.
Uneven tension and skipping the press can also ruin a project.
Plus, choosing mismatched thread? A rookie mistake!
Mastering common sewing stitches is key. Explore sewing tutorials for beginners—nail those essential sewing stitches and make magic happen!
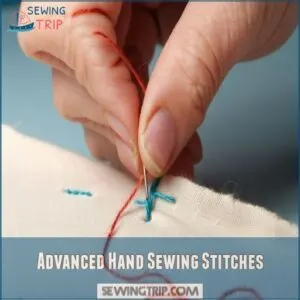
Advanced Hand Sewing Stitches
So, you’ve mastered the basics of hand sewing by learning techniques such as the running stitch tutorial, and you’re ready to tackle advanced hand sewing stitches that bring a touch of finesse to your projects!
From the trusty blanket stitch to the precise tailor’s tack, these techniques will make you feel like a sewing superstar in no time.
Blanket Stitch for Finishing Raw Edges
Master the timeless blanket stitch to add flair and finish those raw edges beautifully.
Going beyond simple sewing stitches, this technique creates a decorative edge, perfect for projects like quilts and blankets.
Grab your blanket stitch tools—needle and thread—and start practicing.
Don’t sweat it if it feels tricky at first; even sewing basics sometimes need a little patience and practice!
Tailor’s Tack for Transferring Darts
Use tailor’s tack to nail those precise dart placements like a pro!
With a simple needle and thread, you’ll mark your fabric clearly without leaving a trace.
Simply stitch loose loops through the pattern lines, ensuring easy removal later.
It’s like leaving breadcrumbs for your sewing adventure.
Remember, a little practice goes a long way in ensuring tacking accuracy.
French Tack for Connecting Lining
The elegance of a French tack lies in its simplicity—a temporary stitch connecting lining to outer fabric.
It’s like a secret handshake between layers, but it’s notoriously fickle.
For more reliable results, consider alternatives like a slipstitch or machine stitching.
Experiment to find what works best for your project and fabric type!
For beginners, practice makes perfect; don’t get discouraged.
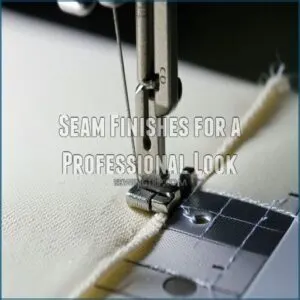
Seam Finishes for a Professional Look
Want your sewing projects to look like they walked out of a high-end boutique?
Mastering seam finishes like the zigzag stitch, turn and stitch, and bias tape makes all the difference, giving your garments that professional flair without any of the drama.
Zigzag Stitch for Raw Edges
When tackling raw edges, the zigzag stitch is your go-to ally. It’s versatile and perfect for various fabrics and projects.
- Adjust stitch width and length to suit different fabrics.
- Keep fabric moving smoothly to prevent puckering.
- Experiment with zigzag variations for creative finishes.
- Consider zigzag alternatives like overlock stitches for extra durability.
Happy sewing!
Turn and Stitch for Enclosed Seams
Turning raw fabric edges into something neat? That’s where the turn and stitch technique comes in handy.
First, fold the seam allowance in on itself, then run a straight stitch along the edge.
It creates a tidy, enclosed seam that’s perfect for fabrics like cotton or linen.
Simple, clean, and it keeps everything looking polished and professional—like tying a nice bow!
Bias Tape for Unlined Garments
Imagine you’ve got a gorgeous unlined jacket ready for a finishing touch.
Using bias tape seals the deal, hiding those raw edges with style.
Choose fabrics that match or contrast for a pop.
DIY bias tape adds a personal flair to sewing projects, while tutorials make sewing stitches easy to master.
Transform unlined garments with this simple technique!
Frequently Asked Questions (FAQs)
What are the different types of sewing stitches?
Explore the realm of stitches!
You’ll find basic ones like running and backstitches,
strong options for mending,
and decorative stitches that add flair.
Mastering these opens up a whole new level of sewing superpowers!
What is a decorative stitch in a sewing machine?
A decorative stitch on a sewing machine adds flair to your projects.
You can choose from various patterns like zigzags or scallops, turning plain fabric into a design masterpiece.
It’s a fun way to personalize your creations!
What stitch is used in a sewing machine?
Think of a sewing machine like a trusty steed, always ready to tackle that straight stitch for joining fabrics.
You’ll also use zigzag stitches to prevent fraying or buttonhole stitches for—you guessed it—creating buttonholes!
What is the most basic stitch in hand sewing?
The running stitch is the most basic in hand sewing.
It’s like the sewing world’s bread and butter, used to join fabric pieces easily with small, even stitches.
Simple and versatile, it’s a must-learn.
What stitches do you need to learn to sew?
Learning to sew can be a vital step in providing additional income for families, as it empowers women through sewing, is like building a toolkit for creativity.
Start with running stitch, backstitch, and ladder stitch.
Add blanket stitch, cross-stitch, and basting stitch.
These basics give you control and precision in your projects.
What is a lock stitch on a sewing machine?
You know that lock stitch your sewing machine uses?
It’s like a trusty handshake between the top and bottom threads, coming together to create a strong, secure stitch.
Perfect for seams that need durability and precision.
What are stitches in sewing?
Think of sewing stitches as the building blocks of fabric artistry.
They connect, repair, and create with threads.
From simple running stitches to intricate cross-stitches, each technique offers unique control and detail for your projects.
What are the 7 type of stitch?
Seven stitches? That’s a lot!
There’s the running stitch, backstitch, and slipstitch for starters.
Then you’ve got basting, cross-stitch, blanket stitch, and buttonhole stitch.
Mastering these will make you a sewing superstar!
What are the five basic stitches?
Wondering which basic stitches to master?
Start with the running, backstitch, ladder, basting, and cross-stitch.
These are your trusty Swiss Army knives in sewing, each with its own flair for stitching pieces together or adding decorative touches.
What is the most basic sewing stitch?
The running stitch holds the title as the most basic sewing stitch.
It’s simple: thread goes in and out like a dash through your fabric.
Perfect for holding things together temporarily—like a needle’s version of duct tape!
How do you care for sewing tools?
Keep sewing tools in top shape by storing them in a dry place.
Sharpen scissors regularly and dust your machine.
Clean needles after use and oil the machine occasionally to make sure everything runs smoothly and lasts longer.
What materials are best for beginners?
Picture yourself at Hogwarts picking your first wand—choose fabrics like cotton, linen, or flannel.
These materials are user-friendly, forgiving, and great for practice.
Letting you focus on honing your skills without too much fuss.
How do you determine stitch length?
Determining stitch length depends on fabric thickness and your project’s purpose.
For delicate fabric, use shorter stitches;
for thicker materials, longer stitches work best.
Experiment on scrap fabric first to get the right tension and appearance.
What are common sewing machine problems?
When your sewing machine’s got a mind of its own, you might face skipped stitches, tension troubles, thread jams, or noisy operations.
Routine maintenance, checking tensions, and regular cleaning can keep your projects smooth and stress-free.
How can you prevent fabric puckering?
Want to tame that pesky puckering?
Use a smaller stitch length, check your tension, and pre-wash your fabric.
It’s like magic, but with needles!
A walking foot helps too, especially with tricky fabrics.
Conclusion
Did you know nearly 90% of sewing projects start with basic stitches?
Sewing stitches, whether hand or machine, are your tools for creativity and function.
Mastering them—from simple running to complex zigzag stitches—unlocks endless design possibilities.
Don’t hesitate to experiment, practice, and match stitch types to fabrics for professional results.
With patience, you’ll find sewing stitches aren’t just functional, they’re the secret sauce to polished, beautiful creations that tell your unique story.

