This site is supported by our readers. We may earn a commission, at no cost to you, if you purchase through links.
This guide will walk you through the restoration process, from assessing the wear to reassembling the rejuvenated piece. Embrace the art of renewal and let’s breathe fresh beauty into your beloved sewing companion.
Yes, you can recover a sewing basket by removing the old fabric, sanding the frame, and reupholstering with new fabric using techniques like stapling, gluing, or hand sewing.
Table Of Contents
Key Takeaways
- Assessing and preparing the sewing basket involves identifying damage, cleaning gently with a mild detergent, examining structural integrity, and noting any vintage or sentimental value. Special care is required for fabric-covered cardboard boxes to avoid loss of value.
- Gathering materials for the project includes choosing coordinating or contrasting fabrics, selecting foam and batting for comfort and shape, and preparing essential tools such as a staple gun, screwdrivers, and pliers. Proper maintenance and safety guidelines for the staple gun are crucial.
- Removing the old cushion requires detaching the seat top, removing the old fabric cover and staples carefully to avoid damage, and ensuring all metal residues are removed to prepare for the new fabric.
- The reassembly process involves sanding the wooden base, applying primer and sealer for durability, securing the new cushion with an even fabric stretch and symmetry, and reattaching hardware to maintain the basket’s charm and functionality.
Assessing the Basket
When assessing a sewing basket for recovery, it’s crucial to first identify any damage and determine the cleaning requirements.
If the basket is vintage or has sentimental value, like an antique tapestry wicker sewing basket mentioned on Reddit, special care must be taken to avoid damaging delicate materials such as wicker or silk lining.
For fabric-covered cardboard sewing boxes, concerns about stains penetrating the cardboard and the potential for diminishing value through improper cleaning are valid.
Therefore, a gentle approach, possibly using specialized cleaning products or techniques suitable for the specific materials involved, is recommended to preserve the integrity and appearance of the sewing basket.
Identifying Damage
Assessment of your sewing basket’s condition is crucial before beginning any restoration work. Start by examining the basket for any visible damage, such as tears in the fabric, loose or missing upholstery pins, and general wear and tear.
Utilize gentle cleaning methods, perhaps with a mild dishwashing detergent, to reveal issues hidden beneath dirt and grime. This initial cleaning can also help in identifying stains that have penetrated deeper into the material.
Pay close attention to the structural integrity of the basket, checking for any weaknesses in the wooden base or legs that may require sanding or refinishing. Identifying these issues early on will guide your restoration efforts, ensuring that you address both aesthetic and functional damages.
Cleaning Requirements
Moving on from identifying any damage, you’ll want to clean up your sewing basket before making any repairs or updates. If the fabric is stained or dusty, gently go over it with a cloth dampened with a mild detergent like Dawn, which is known for its cleaning prowess.
However, be cautious with vintage or delicate materials, as aggressive cleaning can cause damage. It’s wise to test any cleaning method on a small, inconspicuous area first to ensure it doesn’t harm the fabric.
Gathering Materials
When embarking on the journey to recover a sewing basket, selecting the right materials is crucial for achieving a professional and durable finish.
You’ll need to choose a fabric that not only complements your style but also has the necessary weight and durability for upholstery.
Pairing this with a 1-inch thick foam will ensure comfort and shape, while a thin layer of batting or fleece adds a soft touch and smooths out any potential foam imperfections.
Securely fastening these layers with staples will create a cushion that’s both inviting and resilient.
This combination of materials will breathe new life into your sewing basket, transforming it into a piece that’s both functional and stylish.
Fabric Selection
Once you’ve assessed the condition of your sewing basket, you’ll need to choose a fabric that not only matches your aesthetic but also has the durability to withstand regular use.
- Color coordination: Ensure your fabric complements the existing colors of your sewing tools and room decor.
- Pattern mixing: Select patterns that add visual interest without overwhelming.
- Fabric durability: Opt for upholstery-grade materials that resist wear and tear, ensuring your vintage sewing box remains both functional and stylish.
Foam and Batting
Why not complement your chosen fabric with the right foam and batting to ensure your sewing basket cushion is both comfortable and durable? Consider various foam alternatives and batting techniques to stay on top of current upholstery trends.
Proper cushion padding and fabric layering are essential for a successful sewing box or chair recovery project.
| Foam Alternatives | Batting Techniques |
|---|---|
| Memory Foam | Quilting Method |
| High-Density Foam | Layered Batting |
| Latex Foam | Polyester Batting |
| Egg Crate Foam | Hand-Tufting |
Preparing Tools
Before you start recovering your sewing basket, ensure you have your tools ready. You’ll need a staple gun for securing the new fabric, and it’s crucial to set it up correctly for efficient use.
Keep your screwdrivers and pliers at hand as well, as they’ll be essential for removing old staples and any hardware.
Staple Gun Setup
Before diving into your sewing basket makeover, it’s crucial to set up your staple gun properly, ensuring you’re ready to tackle the reupholstery with confidence.
- Check for staple gun maintenance needs
- Practice proper stapling technique
- Review staple gun safety guidelines
- Explore staple gun alternatives for delicate fabrics
Pliers and Screwdrivers
In preparing your tools for recovering a sewing basket, you’ll need both pliers and screwdrivers. These tools are essential for efficiently handling the removal and reattachment of various components.
They are also essential for DIY repairs and facilitate crafting techniques. These techniques include distressing painted furniture or achieving a chippy paint finish.
Such tools can enhance your sewing table or box redo project.
Removing Old Cushion
To begin removing the old cushion from your sewing basket, you’ll first need to detach the seat top. Use a Phillips head screwdriver to unscrew the hinges, carefully keeping track of all the hardware and labeling the parts for easy reassembly.
Next, employ a flat head screwdriver and pliers to methodically remove the staples that are securing the old fabric cover in place.
Unscrewing Hinges
Once you’ve set up your staple gun and gathered your pliers and screwdrivers, you’re ready to start removing the old cushion from the sewing basket by unscrewing the hinges.
Here are three steps to make this process smoother:
- Identify the type of screws to select the right screwdriver.
- Gently unscrew each hinge, keeping track of all hardware for reassembly.
- Lift the seat off, preparing for the next phase of your sewing box makeover.
Staple Removal
You’ll need to remove the old staples from the cushion using a staple remover or a flathead screwdriver and pliers, ensuring you don’t damage the wooden base beneath. This step is crucial in preserving the historical significance of your sewing tote during the basket restoration process.
| Step | Tool | Tips |
|---|---|---|
| Locate Staples | Staple Remover | Gently slide under staple |
| Pry Staples | Flathead Screwdriver | Use leverage carefully |
| Remove Staples | Pliers | Grip and pull steadily |
| Check for Residue | Eyes | Ensure all metal is gone |
| Prepare for New Fabric | Hands | Clean base for next steps |
Sanding Wooden Base
After removing the old cushion and hardware from your sewing basket, you’ll need to sand the wooden base to create a smooth surface for the new fabric and foam.
- Surface Preparation: Begin with a medium-grit sandpaper to remove old finishes or paint, ensuring you work along the grain to prevent scratches. Gradually move to finer grit for a polished look.
- Refinishing Techniques: Wipe away the dust with a tack cloth. If you’re planning a bright yellow or white stripes design, apply a primer to prevent bleedthrough.
- Wood Restoration: Seal the wood with a clear sealer, especially if using sealing milk paint, to enhance durability and prepare for the new cushion.
Cutting New Foam
Your sewing basket’s new cushion will require precise foam cutting, so it’s essential to measure the wooden base and mark the foam accordingly before making any cuts.
Selecting the right foam thickness is crucial for ergonomic support, ensuring the cushion is comfortable for extended periods of sewing. Opt for a density that balances softness with support, considering the various density options available.
Precision cutting ensures the foam fits perfectly within the basket, avoiding any gaps that could detract from the cushion’s effectiveness. Custom shapes can be achieved by carefully tracing the wooden base onto the foam, then using a sharp tool for cutting.
This step is vital for creating a cushion that not only looks professional but also provides the necessary support for your sewing endeavors. Remember, the goal is to enhance your sewing basket with a cushion that offers both comfort and style, using prestigious textiles to complement the cube collection or any fabric choice that reflects your personal taste.
Attaching Batting
After shaping your foam padding to fit the wooden base, it’s time to add a layer of comfort and smoothness. Batting, a thin layer of fiber, is essential for softening the edges and corners of your cushion, ensuring a plush, professional finish.
Lay the batting over the foam, ensuring it covers all sides evenly, contributing to the cushion’s thickness and comfort. Employ your stapling techniques to secure the batting to the underside of the base.
Pull it taut to avoid wrinkles and staple it firmly in place, working your way around the perimeter.
This step is crucial in upholstery tips, as it prevents the fabric from wearing against the foam and creates a more polished look. With the batting attached, you’re ready to proceed to the next phase: covering with fabric, where your fabric selection will bring personality to your project.
Covering With Fabric
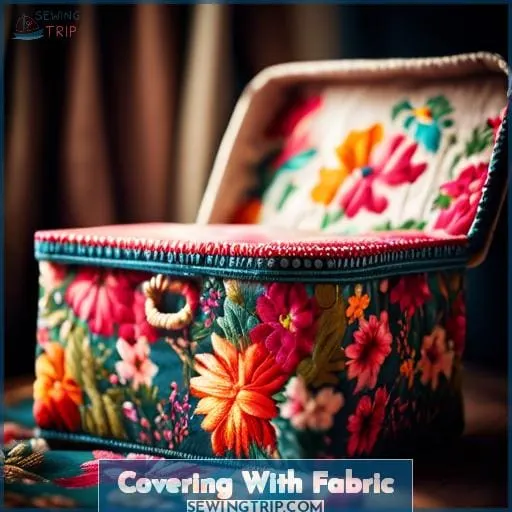
With the batting now securely in place, you’re ready to cover it with your chosen fabric. Pull it snugly over the cushion to eliminate any wrinkles or puckers. This step is where your creativity shines through, as you select fabric patterns and color combinations that reflect the latest textile trends or your personal style.
Consider incorporating DIY embellishments or unique sewing techniques to add a personal touch to your project. Whether you opt for bold prints or subtle textures, ensure the fabric complements the overall design of your sewing basket.
This process not only revitalizes the appearance of your basket but also allows you to practice and showcase your sewing skills.
Finishing Bottom Cover
Once you’ve secured the main fabric, it’s time to give your sewing basket a polished finish by attaching the bottom cover. This final touch not only conceals the inner workings of your cushion but also adds a professional flair to your DIY project.
- Cut a piece of fabric slightly larger than the base of your basket, allowing for enough material to fold under and create a neat edge.
- Turn the edges of the fabric under and press with an iron to ensure sharp lines and a flat surface.
- Position the fabric over the bottom of the cushion, ensuring the folded edges are aligned and the fabric is smooth.
- Using your staple gun, secure the fabric to the underside of the basket, pulling it taut as you go to prevent any wrinkles or sagging.
These steps incorporate sewing techniques that reflect current fabric trends, offering upholstery tips that can be applied to various vintage finds and DIY projects. The result is a beautifully finished sewing basket that showcases your craftsmanship and attention to detail.
Reassembling Basket
When it comes to reassembling your sewing basket, the final steps are crucial for ensuring a polished and functional finish.
First, you’ll need to reattach any hardware that was removed during the disassembly process, ensuring everything is securely in place.
Next, carefully position your new cushion onto the basket, aligning it properly before screwing it back into position.
This careful attention to detail will not only enhance the appearance of your sewing basket but also ensure its durability and functionality for future use.
Reattaching Hardware
You’ll need to carefully reattach any hardware you removed during the disassembly process, ensuring each piece is securely fastened.
Choosing alternatives can offer customization.
Explore options for customizing attachments, maximizing durability.
This step is crucial for a restoration that blends tradition with personal innovation.
Securing New Cushion
After attaching the new cushion to the basket’s base, you’re ready to reassemble the pieces and enjoy your refreshed sewing accessory.
- Check Foam Alignment: Ensure the foam is perfectly aligned with the basket’s base. Misalignment can lead to uneven cushion surfaces and discomfort during use.
- Adjust Staple Tension: Apply consistent tension when stapling the fabric to avoid puckering or loose areas. This step is crucial for maintaining the fabric’s integrity and appearance.
- Stretch Fabric Evenly: Fabric stretching is key to achieving a smooth, taut surface. Work your way around the cushion, pulling the fabric tight and checking for uniform tension before securing it with staples.
- Verify Cushion Symmetry: Before finalizing the attachment, inspect the cushion from multiple angles to ensure symmetry. Adjust as necessary to avoid a lopsided appearance, focusing on staple placement for corrections.
These steps will help you secure the new cushion effectively, ensuring both aesthetic appeal and functional durability.
Frequently Asked Questions (FAQs)
Can I use a different type of adhesive instead of staples for attaching the fabric and batting to the sewing basket?
Yes, you can use fabric glue as an alternative to staples for attaching fabric and batting to your sewing basket.
Fabric glues like Dritz Unique Stitch and Dritz Liquid Stitch offer a permanent bond.
They are non-toxic, clear when dry, and machine washable and dryable, making them suitable for such projects.
How do I choose the right type of foam for my sewing basket cushion to ensure it’s comfortable and durable?
Opt for high-density polyurethane foam with a density of 5 pounds or higher per cubic foot for a blend of comfort and durability.
What are some creative ways to personalize the exterior of the sewing basket beyond just changing the fabric?
Transform your sewing basket into a treasure trove of creativity!
Embellish with stencils, paint, or even decoupage for a truly unique masterpiece that screams innovation and style.
How can I ensure the new fabric cover is resistant to stains and easy to clean, especially if the sewing basket will be used frequently?
To ensure your new fabric cover is stain-resistant and easy to clean, opt for materials like microfiber or vinyl.
Additionally, treat the fabric with a waterproofing and stain-repellent spray to repel spills and stains.
What are the best practices for maintaining the wooden legs of the sewing basket to prevent damage and wear over time?
Nearly 80% of furniture damage is preventable with proper care.
To maintain your sewing basket’s wooden legs, regularly clean them with a soft cloth and mild cleaner.
Protect them with beeswax or furniture polish to prevent wear.
Conclusion
Just as a phoenix emerges anew, so too will your sewing basket, now a testament to your craftsmanship. You’ve assessed, dismantled, and lovingly restored each piece. With your chosen fabrics and tools, you’ve breathed new life into a cherished item.
It’s more than a container; it’s a symbol of your dedication to the craft. Now, as you place your tools in the recovered sewing basket, feel the pride of rejuvenation and the joy of creation.

