This site is supported by our readers. We may earn a commission, at no cost to you, if you purchase through links.
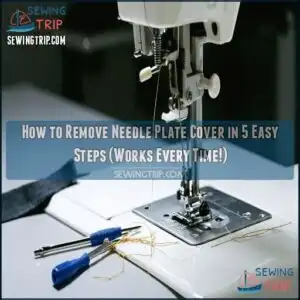
You’ll need to remove the needle for safety—even sewing veterans have battle scars from skipping this step. Locate the small screws holding the plate in place; they’re usually near the corners.
Use the proper screwdriver (typically flathead or Phillips) and turn counterclockwise with steady pressure. Once loosened, gently lift the plate straight up—no need to force it like you’re opening a stubborn jar.
Regular cleaning under this plate prevents thread jams that can turn a simple project into a test of patience.
Table Of Contents
- Key Takeaways
- Tools Needed to Remove Needle Plate Cover
- Locating The Needle Plate Cover Screws
- Preparing Your Sewing Machine for Disassembly
- Step-by-Step Guide to Removing Screws
- Lifting and Removing The Needle Plate Cover
- Cleaning Under The Needle Plate Cover
- Reinstalling The Needle Plate Cover
- Troubleshooting Common Removal Issues
- Maintenance Tips for Needle Plate Covers
- When to Seek Professional Help
- Frequently Asked Questions (FAQs)
- Conclusion
Key Takeaways
Here are 4 key takeaways from the article on removing needle plate covers:
- Always unplug your machine and remove the needle before attempting to access the needle plate cover, as this prevents accidental injury and damage to your sewing machine.
- Use the correct size screwdriver (typically Phillips #2 or flathead 1/8" to 3/16") and store removed screws in a magnetic tray or small container to avoid losing these tiny components.
- When lifting the cover, apply gentle pressure and avoid forcing it – if you encounter resistance, check for hidden screws or use techniques like the "forward push approach" to release catches.
- Clean under the needle plate regularly by removing lint with a small brush and applying 1-2 drops of sewing machine oil to key lubrication points, which prevents thread jams and extends your machine’s life.
Tools Needed to Remove Needle Plate Cover
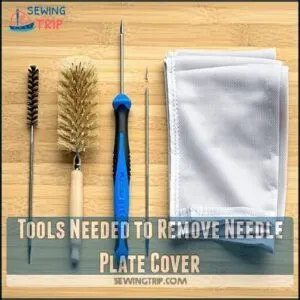
You’ll need a screwdriver that matches your machine’s screws, typically a Phillips #2 or flathead (1/8" to 3/16"), along with a lint brush and microfiber cloth for cleaning once the cover is removed.
Having these tools ready before you start will make the needle plate removal process quick and frustration-free.
Screwdriver Types and Sizes
Choosing the right screwdriver for needle plate cover removal can make all the difference between a smooth job and stripped screws.
For successful removal, you’ll need these essential tools:
- Flathead screwdriver: 1/8" to 3/16" size provides perfect fit for most sewing machine covers
- Phillips head screwdriver: Standard size #2 tip handles cross-head screws effectively
- Torx drivers: Required for newer machine models with star-shaped heads
- Precision screwdrivers: Perfect for tiny, recessed screws in tight spaces
- Magnetic tips: Help prevent lost screws during removal
Consider using a specifically sized tool for ideal results.
Always select a screwdriver with comfortable grip that fits snugly in the screw head.
Optional Cleaning Tools
While the right screwdriver gets you started, proper cleaning tools make needle plate cover removal truly effective.
When preparing to remove needle plate cover, these cleaning allies will be your best friends:
- Lint brush – Perfect for sweeping away thread bits and dust hiding under your needle plate cover
- Microfiber cloth – Wipes surfaces without scratching your machine’s delicate parts
- Compressed air – Blasts stubborn lint from tight corners unreachable by brushes
- Spudger tools – Plastic pry tools that help lift the cover without damaging components
- Dental floss – The "floss method" works wonders for gently separating stuck covers
For stubborn grime, a slightly damp cloth works well. Consider using a specialized sewing lint for superior cleaning. Special solvents should be your last resort, as they might damage plastic components.
Safety Equipment
Safety equipment shouldn’t be overlooked when removing a needle plate cover. Before you start, always power off your machine and gather proper protection for a safe workspace.
- Eye protection shields your vision from flying metal fragments that could cause permanent damage
- Hand protection prevents painful cuts from sharp edges around the needle plate cover
- Respiratory safety masks keep harmful lint and dust particles from entering your lungs
- Workspace safety includes proper lighting to see tiny screws and components clearly
- Electrical safety means unplugging your machine completely, not just switching it off
Once you’ve suited up with these essentials, you’re ready to remove the needle plate cover without risking injury.
Locating The Needle Plate Cover Screws
The first step in removing your needle plate cover is finding those essential screws. Most sewing machines have 2-4 screws positioned at the corners of the needle plate. Screw identification is vital – you’ll typically find Phillips head types, but some models require Torx drivers instead.
Don’t miss those hidden screws! Look carefully near the feed dogs, as manufacturers often tuck an extra screw in this area. What’s your machine’s model? Screw types and orientation can vary between different models.
Look around those feed dogs! Manufacturers love hiding that sneaky extra screw where you least expect it.
If you’ve lost your manual, check for small dimples or indentations around the plate’s edge. These usually indicate screw locations. Why not take a photo before you start? This helps track screw removal and makes reassembly much simpler.
For smooth needle plate cover removal, mark each screw’s position with a sticky note as you locate it. This small step saves frustration later.
Preparing Your Sewing Machine for Disassembly
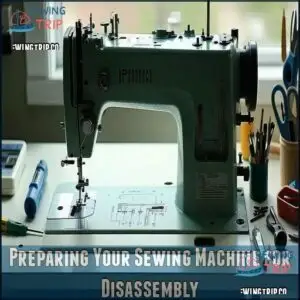
You’ll need to properly prepare your sewing machine before accessing the needle plate cover by unplugging it from the power source, raising the presser foot, removing the needle, and clearing your workspace.
Make sure you’ve gathered all necessary tools, especially the correct screwdriver, as proper preparation prevents frustration and potential damage to your machine.
Unplugging The Machine
Before touching any screws, electrical safety must be your first priority. Unplugging your machine prevents potential power surges and static discharge.
- Turn off the power switch completely
- Grasp the plug (not the cord) and disconnect from the outlet
- Allow 30 seconds for residual voltage to dissipate
Always inspect your power cord for fraying or damage before each session. Regular maintenance can prevent costly future repairs. This simple habit protects both you and your valuable sewing machine.
Regular maintenance is key to preventing costly issues and ensuring your safety. By following these simple steps, you can protect yourself and your equipment from potential harm.
Raising The Presser Foot
Now you’ve unplugged your machine, let’s raise the presser foot – a critical step before attempting to remove your needle plate cover.
Locate the presser foot lever at the back of your machine and push it upward until you hear a click. This creates necessary clearance for smooth needle plate cover removal.
| Presser Foot Position | Impact on Fabric | Effect on Removal |
|---|---|---|
| Lowered | Grips fabric firmly | Blocks access completely |
| Half-raised | Moderate pressure | Partial obstruction |
| Fully raised | No contact | Perfect for plate removal |
The position of the presser foot is crucial, as it affects the removal process: when the presser foot is fully raised, it allows for easy access to the needle plate cover.
Removing The Needle
With your presser foot raised, it’s time to remove the needle before tackling the needle plate cover removal. This step prevents accidental damage to both you and your machine.
To safely remove your needle:
- Turn off and unplug your machine – this simple step prevents scary accidental starts
- Keep your presser foot raised for proper needle alignment
- Loosen the needle clamp screw with a gentle turn counterclockwise
- Pull the needle straight down to avoid bending or breaking it
- Store the needle in a pincushion or needle case – never on your work surface!
Different needle types and sizes require the same careful removal process. Even bent needles should be handled with caution during disposal to maintain needle safety.
Clearing The Workspace
Now that your needle is safely tucked away, let’s set up your workspace for success. You’ll need a stable surface with adequate lighting to avoid squinting at tiny screws.
Power off your machine completely and remove any obstructions around it. Place a small container nearby to catch those easy-to-lose screws. Wipe everything down with a lint-free cloth—you don’t want dust getting into your machine during needle plate cover removal.
Your manual consultation might also reveal specific workspace requirements for your model.
Step-by-Step Guide to Removing Screws
You’ll need to locate the screws on your needle plate cover and remove them using the correct size screwdriver, turning counterclockwise with steady pressure.
Place these tiny screws in a small container or magnetic tray so you don’t lose them during the cleaning process.
Identifying Screw Placement
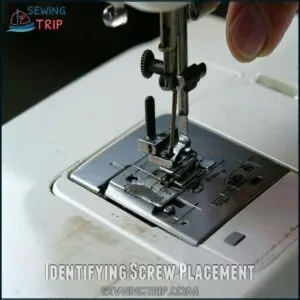
Locating screws is your first detective work. Take a careful look at your needle plate cover to find all screw heads.
- Check corners and edges for Phillips or Torx screw head types
- Note the angle of screws and whether screw length matters
- Search for hidden screw locations under attachments or behind labels
Count all screws (typically 2-4) and consider using a screw organizer system to keep track during removal. This step is crucial for efficient reassembly.
Proper Screwdriver Technique
Now that you’ve located your screws, let’s focus on handling your screwdriver correctly.
Using the right technique prevents those frustrating stripped screws!
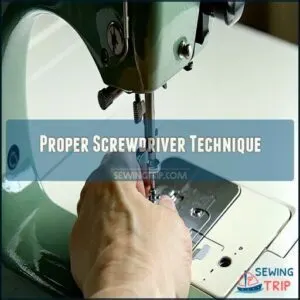
- Match the screwdriver size perfectly to your needle plate screws—too large or small will damage screw heads
- Position your hand with fingers wrapped around the handle and thumb along the shaft for maximum torque control
- Hold the driver at a 90-degree angle to prevent slipping and maintain proper driver angle
- Apply steady, even pressure downward while turning counterclockwise to remove needle plate cover
If you encounter stuck screws, don’t force them! Try a gentle tap on the handle or apply penetrating oil and wait five minutes before trying again.
Storing Removed Screws Safely
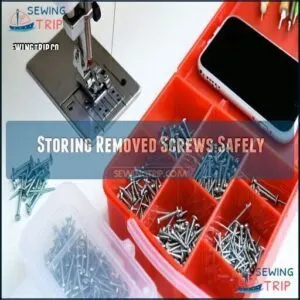
Don’t let those tiny screws slip through your fingers! After removing needle plate cover screws, immediately place them in a magnetic tray or small labeled container.
You’ll thank yourself later during reassembly. Magnetic screwdriver tips can hold screws temporarily, while screw organizer systems with separate compartments prevent mixing up different sizes.
For the truly fastidious, snap a quick photo of screw orientation before removal. If you’re working in a carpeted area, spread a light-colored cloth beneath your machine to catch any escapees.
Remember: the few seconds you spend organizing screws now saves frustrating minutes hunting for them later.
Lifting and Removing The Needle Plate Cover
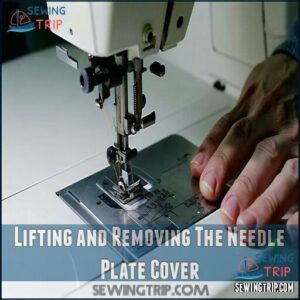
With the screws removed, you’ll need to gently lift the needle plate cover away from the machine base.
Place your fingers at the edge of the cover and carefully slide it toward you, making sure not to force it if you feel resistance.
Gentle Prying Techniques
The gentle art of removing a needle plate cover requires finesse rather than force.
When standard methods fall short, try these proven prying techniques:
- Spudger Leverage – Position a plastic spudger at the cover edges and apply controlled pressure, rocking gently forward instead of pulling back
- Floss Technique – Work dental floss beneath the cover in a sawing motion to break tension points
- Praying Hands Method – Place thumbs under opposite edges and press upward with even pressure
- Forward Push Approach – Instead of lifting up, push slightly forward first to release hidden catches
Remember, gentle care prevents scratches and damage during needle plate removal.
Avoiding Damage to Surrounding Parts
Protecting surrounding parts during needle plate removal requires precision and awareness. When you’re working with your machine, always use proper tools like plastic spudgers instead of metal screwdrivers to avoid scratches on delicate surfaces. Apply gentle force—just enough to lift the cover without stressing connecting components.
Before removing completely, check for component alignment and note how parts fit together. You’ll thank yourself during reassembly! Careful handling prevents damage to nearby feed dogs and bobbin mechanisms that could affect stitch quality. To prevent issues, consider regular needle plate inspection.
Keep these tips in mind:
- Work slowly and deliberately
- Watch for unexpected resistance
- Place a soft cloth underneath to catch screws
- Never force parts that won’t budge easily
If the needle plate cover resists removal after screws are gone, double-check for hidden fasteners. Machine damage often occurs when hurrying through this critical step—patience saves repair costs!
Handling Delicate Components
While removing the needle plate cover, you’re handling some of the most fragile parts of your sewing machine. Think of it as defusing a tiny bomb – one wrong move could damage essential components.
Here’s how to manage delicate components:
- Use targeted force calibration – apply pressure evenly, never forcefully
- Consider material sensitivity – plastic parts scratch easily
- Practice gentle prying with appropriate tools
- Keep fingers away from feed dogs to avoid bending them
Remember: patience prevents problems when dealing with component fragility. This is crucial because delicate components require careful handling to avoid damage.
Cleaning Under The Needle Plate Cover
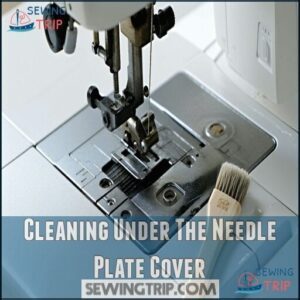
You’ll need to clean under the needle plate cover to remove lint and thread bits that can affect your machine’s performance.
Use a small brush to gently sweep away debris from the feed dogs and bobbin area, checking for any signs of wear or damage while you’re there, to ensure your machine operates smoothly with proper maintenance.
Removing Lint and Debris
Your sewing machine’s performance depends heavily on keeping the bobbins area free from lint buildup.
A clean bobbin area is the secret heartbeat of every high-performing sewing machine.
After needle plate removal, thorough feed dog cleaning becomes possible.
Use these techniques for effective debris removal:
- Sweep all lint from the bobbin area with a small brush, focusing on corners where thread bits hide.
- Direct compressed air in short, controlled bursts to dislodge stubborn debris.
- Use a cotton swab to reach tight spaces where your brush can’t access.
- Wipe metal surfaces with a dry microfiber cloth to collect remaining dust.
Regular cleaning prevents thread jams and keeps your machine running smoothly.
How often should you clean? Check after every major project for best results to ensure your machine continues to perform optimally, maintaining a smooth operation and preventing unnecessary downtime.
Lubricating Moving Parts
Now that you’ve cleared away the lint, it’s time for some proper oiling. Apply 2-3 drops of sewing machine oil to the inner workings exposed after removing the needle plate cover. Focus on these key lubrication points: put 1-2 drops in the bobbins area and hook race, and 1-3 drops on the needle bar top and bottom.
Frequency matters! Check your manual for the recommended schedule. When applying, less is more—over-oiling can attract more dust and lint.
Use only proper sewing machine oil types, never household oils. Think of it as giving your machine a rejuvenating drink that keeps all moving parts happy and friction-free.
Inspecting for Wear and Damage
Now that you’ve lubricated the moving parts, it’s time to inspect what’s underneath.
Take a close look at these critical components:
- Needle plate – Check for scratches, dents, or plate cracks that could snag threads
- Feed dog condition – Verify teeth aren’t worn down or bent, affecting fabric movement
- Bobbin wear – Examine the hook inspection area for rough spots or damage
Don’t skip this step! Spotting alignment issues early prevents frustrating problems later when you remove needle plate cover again for repairs.
Reinstalling The Needle Plate Cover
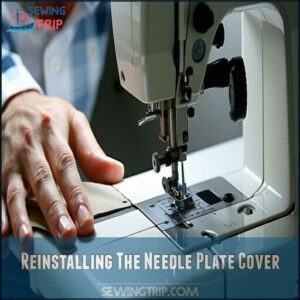
You’ll need to align the needle plate cover properly with the machine bed, making sure all screw holes match up before pressing it into place.
Once aligned, insert and gently tighten each screw in a cross-pattern until the cover sits flush against the machine surface.
But don’t overtighten as this can damage the threading.
Aligning The Cover Correctly
Perfect alignment of your needle plate cover guarantees smooth operation and prevents future headaches.
When reattaching the cover:
- Position the needle plate cover so all screw holes align perfectly with the machine base
- Lower the cover gently until you feel proper seating against the machine surface
- Verify the needle hole is centered and feed dogs move freely through their slots
| Step | Action | Tip |
|---|---|---|
| 1 | Align screw holes | Match holes precisely |
| 2 | Lower plate carefully | Avoid pressing too firmly |
| 3 | Check for flush fitting | Make sure the plate sits evenly |
Run your finger around the edges to confirm flush mounting. Can you see any gaps? If so, lift and realign. The cover should sit flat like a puzzle piece – not forced or crooked.
Regular plate inspection helps prevent wear and tear. Proper alignment now prevents thread snags and uneven stitches later, ensuring a smooth sewing experience with proper seating and smooth operation.
Tightening Screws Properly
How do you properly tighten screws when reinstalling your needle plate cover? Getting this right prevents damage and guarantees smooth operation.
Start by hand-positioning each screw before using your screwdriver. Apply gentle torque in a cross-pattern for even pressure distribution.
Remember these key points:
- Match your screwdriver size to the screw head for perfect driver fit and to avoid stripping
- Turn screws clockwise until you feel resistance, then add just a quarter turn more
- Pay attention to thread engagement – screws should turn smoothly without forcing
Maintain consistent pressure across all screws to prevent warping. When you remove needle plate cover components and reinstall them, proper screw tightening technique extends your machine’s life and prevents overtightening risks, ensuring a longer machine’s life.
Testing for Secure Attachment
After tightening the screws, you’ll need to verify the secure attachment of your needle plate cover.
Gently wiggle the cover to check for any movement—it should feel rock-solid.
Confirm perfect plate alignment by running your finger along the edges.
Test for movement smoothness by turning the handwheel.
If you notice vibration or poor stitch quality during operation, you may need to adjust screw tightness.
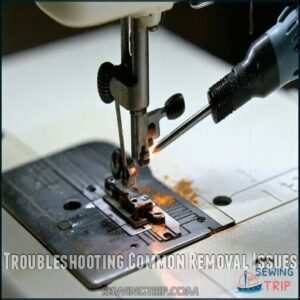
Troubleshooting Common Removal Issues
You’ll face some challenges when removing your needle plate cover, including stripped screws, stuck parts, or misaligned components.
Use a stripped screw extractor for damaged screws, apply gentle heat to loosen rusted covers, and slightly loosen surrounding screws to realign components that won’t sit properly, which can help with misaligned components.
Dealing With Stripped Screws
Encountering stripped screws when trying to remove needle plate cover can be frustrating.
Don’t worry! There are several effective solutions to this common problem:
- Use a rubber band between your screwdriver and the stripped screw to provide extra grip
- Try an impact driver with a hammer for stubborn screws that won’t budge
- Create a new groove across the screw head with a Dremel tool, then use a flathead screwdriver
Handling Stuck or Rusted Covers
Many stuck needle plate covers can be freed with simple techniques.
Apply Rust Removal methods like WD-40 on a Q-tip to loosen corroded screws. Gently tap around the plate with a small hammer to break the rust seal.
A key step involves preparing your machine by unplugging it for safety.
| Method | Application | Best For |
|---|---|---|
| Penetrating Oils | Apply with Q-tip | Stubborn screws |
| Aluminum Foil | Scuff over rust | Surface corrosion |
| Gentle Tapping | Small hammer | Breaking rust seal |
Place your left thumb at the front and slide the needle plate cover toward you.
Addressing Misaligned Components
Mechanics often find misaligned components lurking beneath needle plate covers.
When your parts aren’t sitting flush, follow these simple fixes:
- Loosen all screws completely before attempting realignment
- Inspect feed dogs and surrounding areas for thread debris causing obstruction
- Carefully check screw hole alignment before reinserting screws
Don’t force components together during reassembly challenges. Instead, gently wiggle the needle plate while tightening to confirm proper seating. This approach helps avoid damage and ensures that the parts are correctly aligned, making the process smoother and more efficient.
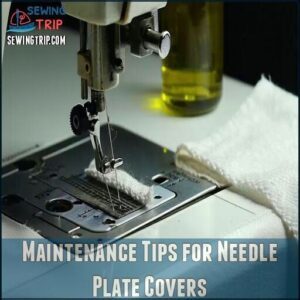
Maintenance Tips for Needle Plate Covers
You’ll extend your needle plate cover’s life by cleaning it regularly and storing it properly after each use.
Protect it from rust by wiping it with a soft cloth and applying a thin coat of sewing machine oil to prevent damage from moisture and dust, which will help to prevent damage.
Regular Cleaning Schedule
A dust-free needle plate is the heartbeat of your sewing machine. Establish a regular cleaning schedule to prevent lint buildup and maintain peak performance.
Keeping your machine clean requires a specialized cleaning tool.
The following schedule outlines the necessary tasks for maintaining your sewing machine:
| Cleaning Period | Task | Benefit | Tools | Time Required |
|---|---|---|---|---|
| Daily | Quick brush | Prevents lint | Lint brush | 5 minutes |
| Weekly | Remove needle plate cover | Eliminates fabric residue | Screwdriver | 15 minutes |
| Monthly | Deep clean | Guarantees smooth operation | Cleaning kit | 30 minutes |
| Quarterly | Check tension | Improves stitch quality | None | 10 minutes |
| Yearly | Professional servicing | Extends machine life | Service center | 1-2 days |
By following this schedule, you can ensure your sewing machine operates at its best, providing you with high-quality results and extending its lifespan.
Proper Storage Practices
Now that you’ve established a cleaning routine, let’s talk about keeping your needle plate cover and screws safe between maintenance sessions.
Proper storage practices prevent lost parts and protect your sewing machine components.
- Store screws in small magnetic containers to prevent them from rolling away
- Use clear plastic organizers labeled with masking tape for easy identification
- Keep the needle plate cover with its matching screws in a dedicated compartment
This workspace tidiness saves time during your next maintenance session, which is an important part of maintaining your sewing machine.
Preventing Corrosion and Wear
Now that you’ve mastered proper storage, let’s shield your needle plate cover from the elements.
Regular maintenance prevents costly replacements down the road.
| Protection Method | Frequency | Benefits |
|---|---|---|
| Material Selection | Once | Stainless steel lasts longer |
| Lubrication Types | Monthly | Prevents metal-on-metal friction |
| Humidity Control | Ongoing | Stops moisture damage |
| Protective Coatings | Quarterly | Creates rust barrier |
| Regular Usage | Weekly | Prevents seizing |
Remember, a drop of sewing machine oil works wonders for wear prevention! It is also important to consider proper storage to ensure the longevity of your needle plate cover.
When to Seek Professional Help
You’ll need to call a professional if you notice broken parts inside your machine.
Or if complex disassembly goes beyond removing the basic needle plate cover.
Don’t risk your warranty or cause further damage when you encounter stripped screws, unusual resistance, or electronic components that require specialized knowledge to access.
Signs of Serious Machine Damage
Now that you’ve established a good maintenance routine, let’s recognize when professional help is needed for serious machine damage.
Watch for these warning signs during needle plate removal:
- Excessive Noise – Grinding, rattling, or clicking sounds indicate timing issues or bent components
- Feed Dog Issues – Dogs that don’t move properly or appear damaged
- Motor Problems – Machine struggling to run or making burning smells
These symptoms often accompany bent needles and require expert repair before they cause permanent damage.
Complex Disassembly Requirements
Some machines hide their secrets behind complex disassembly requirements.
When you’re facing hidden fasteners or specialized component sequencing, it’s time to seek professional help. Different models (like Innov-is NS1750D or LB5500) require specific advanced techniques to remove needle plate covers without risking screw loss.
Don’t force what won’t budge—specialized tools and expertise prevent damage during complex disassembly procedures that exceed typical maintenance.
Warranty Considerations
While DIY repairs can save money, they might leave you in a sticky situation with your warranty.
Before removing that needle plate cover, consider:
- Warranty voiding happens with unauthorized repairs
- New machines often have covered damages under warranty
- Service contracts may exclude physical damage
Check your warranty terms first, as many manufacturers won’t honor claims if you’ve opened the machine yourself, which could lead to a voided warranty.
When in doubt, contact authorized service centers to maintain your sewing machine’s warranty protection.
Frequently Asked Questions (FAQs)
How to remove a needle plate cover on a sewing machine?
To remove your needle plate cover, unplug the machine, raise the presser foot, then slide the bobbin cover latch right.
Insert your finger into the rear notch and slide the cover toward you.
How do I remove the needle plate?
Safety first, maintenance second.
First, unplug your machine and raise the presser foot.
Locate the needle plate screws, use an appropriate screwdriver to loosen them counterclockwise, then gently lift the plate away from the machine, following safety procedures to avoid accidents, and remember maintenance is crucial for the longevity of your device.
How do you remove a needle from a sewing machine?
First, turn off your machine.
Loosen the needle clamp screw with a screwdriver, hold the needle, and pull it straight down to remove.
Keep your fingers away from the sharp point.
Can you replace a needle plate on a sewing machine?
After Sarah’s machine jammed last week, she replaced her needle plate in minutes.
Yes, you can replace your needle plate by removing screws, lifting the old plate out, positioning the new one, and securing it tight.
This process is straightforward and can be completed quickly, allowing you to get back to your work without significant delay.
Are needle plate covers universal?
Needle plate covers aren’t universal. You’ll need to match them to your specific machine model, though some have wider compatibility across certain brands. Always check your manual before purchasing replacements.
How to open a needle plate?
Tackling that stubborn needle plate is easier than you think.
First, unplug your machine, slide the bobbin cover latch right, remove the cover.
Then, place your fingers correctly and slide the plate toward yourself.
How to remove throat plate?
To remove the throat plate, first unplug your machine.
Locate the screws holding it in place, use the proper screwdriver to remove them, then gently lift the plate upward and away from the machine.
How to remove needle plate bernina?
Like a well-choreographed dance, you’ll gently lift the front corner of your Bernina’s needle plate.
Then, use your thumb and index finger to grab the other corner and simply pull it out.
How to remove needle plate janome?
For newer Janome models, you’ll find a one-touch needle plate removal system.
Simply unscrew the flathead screws (front and back) with an offset screwdriver, and lift the plate carefully from your machine.
How do you open the needle plate?
You’ll need to first unplug your machine for safety.
To open the needle plate, slide the bobbin cover latch to the right, remove the bobbin cover, then carefully slide the needle plate toward yourself.
Conclusion
Remember, removing your needle plate cover is as easy as pie once you know the proper steps.
By following this guide, you’ll confidently tackle this maintenance task without frustration.
Regular cleaning under the plate prevents thread jams and extends your machine’s life.
Don’t forget to store those tiny screws safely, and with practice, you’ll be able to remove the needle plate cover quickly whenever needed, keeping your sewing projects running smoothly for years to come, which is key to maintaining your machine and ensuring it lasts, making it a worthwhile investment.

