This site is supported by our readers. We may earn a commission, at no cost to you, if you purchase through links.
 Got a screen print you want to say goodbye to?
Start with nail polish remover, a surprisingly powerful tool in your DIY locker for how to remove screen printing from fabric.
Just dab a bit on the ink, and watch it vanish faster than leftover pizza at a party.
But, before you try it, test it on a hidden fabric spot; you don’t want any ugly surprises, right?
Alternative methods like baking soda paste or gentle vinegar soaks can also do the trick if you’re all about eco-friendly solutions.
Stay tuned to discover more clever hacks—your fabric’s freedom awaits!
Table Of Contents
- Key Takeaways
- Screen Printing Basics
- Reasons to Remove Screen Printing
- Assessing the Ink and Fabric Type
- Chemical-Based Removal Methods
- Non-Chemical and Gentle Removal Methods
- Safe Removal Techniques for Different Fabrics
- Risks and Precautions in Screen Printing Removal
- Additional Removal Methods and Techniques
- Aftercare and Maintenance
- Troubleshooting and Common Issues
- Frequently Asked Questions (FAQs)
- Conclusion
Key Takeaways
- Try using common household products like nail polish remover or baking soda paste to tackle screen prints. They’re like having a Swiss Army knife in your cleaning arsenal. Just remember to test a small hidden spot first, so you don’t end up with an unwanted surprise.
- Understand your fabric before you dive in—it’s like knowing if your friend prefers tea or coffee. Cotton is different from polyester, and each fabric needs its own little bit of love. Tailor your method to the fabric type to avoid any mishaps.
- Proper ventilation and protective gear are your secret weapons. Think of them as your trusty sidekick in this mission. Keep the space airy and shield yourself from any harsh chemicals that might come your way.
- Sometimes, that screen print is as stubborn as a mule. If your usual tricks aren’t working, don’t hesitate to call in a professional. It’s like asking for directions when lost—totally okay and can save you loads of time!
Screen Printing Basics
Screen printing is a popular method for applying vibrant, durable designs onto fabric using a mesh stencil.
Understanding the basics of this printing process and the different types of ink used can help you choose the right removal technique for your needs.
Definition and Process of Screen Printing
When it comes to fabric decorating, screen printing is your go-to magic trick.
You start with a mesh stencil, which acts like a cookie cutter for ink. Push ink through, and voila, your masterpiece appears!
Whether you’re jazzing up cotton tees or polyester jerseys, this printing process offers vibrant colors that can outlast many washes.
Perfect for savvy, cost-conscious creators.
Common Types of Ink Used in Screen Printing
Let’s chat about the inks of screen printing. There are several types, including Plastisol, Water-based, Discharge, Pigment, and Eco-friendly.
Plastisol ink is like peanut butter, sticking to fabric with tenacity.
For water lovers, water-based ink soaks into fabric.
Discharge is the sneaky ninja, replacing color.
Pigment ink is the artist’s palette.
Eco-friendly ink appeals to conscience.
Removing them is a blend of art and science.
Why Screen Printing is a Popular Fabric Printing Method
Screen printing’s charm lies in its cost-effective magic – it turns a blank fabric into a canvas for durable prints.
Whether you’re running large-scale production or crafting unique designs, screen printing is your trusty paintbrush.
And guess what? It’s versatile. Need eco-friendly options? You’re covered.
Embrace the screen printing wonders, but don’t worry; we’ll explore removal methods elsewhere.
Reasons to Remove Screen Printing
There are several common reasons why you might want to remove screen printing from your clothing.
Maybe the design has faded and cracked over time, making your favorite shirt look worn out. Or perhaps you’ve simply outgrown the style and want a fresh new look.
Whatever the reason, we can help you with easy DIY techniques to remove that pesky screen print.
Common Reasons to Remove Screen Printing From Clothing
You might need to remove screen printing from your clothing over time for various reasons.
There are several reasons why you might want to remove screen printing. Here are a few examples:
- Brand updates: Out with the old, in with the new!
- Style changes: Fashion is a fickle friend, isn’t it?
- Secondhand finds: Unwanted designs begone!
- DIY projects: Bring your creative dreams to life!
Embracing your clothing’s fresh start can be a great way to give new life to old items.
Fading and Discoloration of Screen Prints Over Time
Sometimes designs age like milk instead of wine. Over time, screen prints face fading and discoloration because of frequent washes, UV exposure, and the fabric type. It’s like your shirt decided to go vintage, only without the charm.
Understanding these factors can save your print from an untimely demise.
Here’s a handy table to help with ink longevity:
| Ink Longevity | UV Damage | Wash Care |
|---|---|---|
| High | Low | Gentle wash |
| Medium | Medium | Cold water only |
| Low | High | Avoid machines |
Design Mistakes or Printing Errors
Even fresh designs can suffer from various issues over time. Color mismatches, incorrect placement, or flawed alignment may leave you wanting a redesign.
Maybe that trendy graphic resembles more of a blobfish due to image distortion or bleed issues.
But fear not; with screen printing mistakes, there’s always a screen printing remover to tackle these pesky blunders.
Assessing the Ink and Fabric Type
Before you start removing that screen print, it’s essential to assess the fabric type and ink used.
Understanding the characteristics of your fabric and the screen printing process will help you choose the most effective removal method without damaging your garment.
Common Fabric Types and Their Characteristics
Fabric types are like ice cream flavors—each has its quirks!
Understanding your fabric’s composition, whether natural fibers, synthetic materials, or blends, is really important for maintaining its integrity when removing screen printing.
Know the blend ratios and fabric weight, as delicate fabrics like silk need extra care, while cotton and polyester blends demand different approaches.
Let the fabric guide your method!
Factors Affecting the Choice of Removal Method
Choosing the right removal method for screen printing can feel like figuring out a fabric maze.
Consider factors like ink type, fabric blend, and print age.
A durable cotton tee with an aging, simple design might handle acetone well.
Yet a delicate silk scarf demands gentler tactics.
Evaluate design complexity and removal risks to find best practices that save your favorite garments from disaster!
Chemical-Based Removal Methods
If you need to remove screen printing from fabric, sometimes you need a little chemical magic.
Don’t worry, it’s not as scary as it sounds—you won’t be joining a mad scientist’s lab!
Using Solvent-Based Methods for Removing Screen Printing
Solvent-based methods are a powerful way to tackle stubborn screen printing.
Acetone is a go-to choice, as it can dissolve plastisol ink with ease.
But be cautious – acetone can be harsh on fabrics, so test on a small, inconspicuous area first.
For gentler options, look for specialized polyester-safe removers designed to lift ink without damaging delicate fibers.
How to Use Acetone to Dissolve Screen Printing Ink
Acetone, a common paint remover, is your secret weapon for screen print removal. But remember, it’s not just magic—there’s an art to it.
Acetone is a powerful solvent that can effectively remove screen prints from various surfaces.
Here’s how to use it:
- Soak a cloth in acetone and gently rub the print.
- Check ink type compatibility to avoid fabric damage.
- Make sure to use acetone safely with gloves and good ventilation.
With patience, you’ll master the technique!
Alternative Solvent-Based Removal Methods
Looking for alternatives to acetone?
Try using isopropyl or rubbing alcohol as safer solvents!
These eco-friendly removal options tackle ink while minimizing risks.
Hydrogen peroxide can also lend a hand, dissolving stubborn prints with gentle methods.
Add a touch of heat using a heat gun, but don’t overdo it – moderation is key!
Embrace your inner fabric master and watch prints vanish!
Non-Chemical and Gentle Removal Methods
Why break the bank or bombard your nostrils with fumes when you can try gentle, non-chemical methods to remove screen prints?
These simple household tricks won’t make your fabric sing, but they’ll save your nose and the planet while keeping your shirts looking sharp!
Gentle Treatments for Removing Screen Printing Ink
Looking for a way to remove a screen print without harsh chemicals?
You can try some gentle, natural methods.
Here are a few ideas:
- Whip up a vinegar solution.
- Make a baking soda paste.
- Give a salt scrub a shot.
Just be sure to go easy and avoid excessive scrubbing that could damage the fabric.
These home remedies can work wonders without the harsh fumes.
How to Use Nail Polish Remover to Dissolve Ink
Got a tough screen printing design you’d like to tackle?
Grab nail polish remover, preferably one with acetone.
Gently dab it on the ink, watching it fade like magic.
Think of it as a rescue mission for your fabric.
Be cautious though; test a hidden area first to make sure the fabric is safe.
Your shirt? Back in action without a hitch!
Non-Chemical Methods for Removing Screen Printing
Shelve those chemicals and try a salt scrub, baking soda, or vinegar soak! These quick tricks can peel those prints right off.
Tape’s not just for wrapping presents; it’s perfect for adhesive removal.
Or, pop your garment in the freezer – who knew the best way to chill out could also help with how to remove screen printing from fabric?
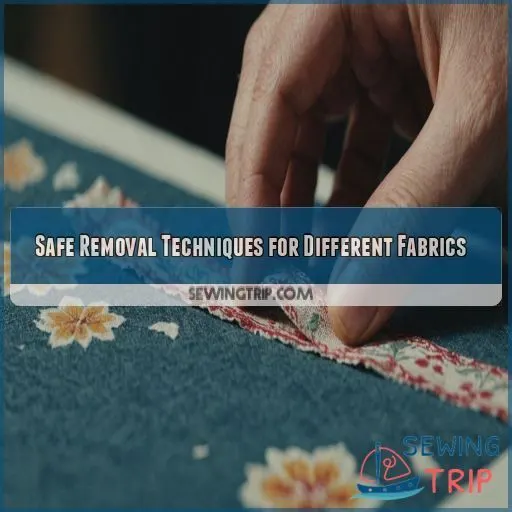
Safe Removal Techniques for Different Fabrics
Knowing your fabric type is like knowing your friend’s coffee order—critical to getting it right when you’re removing screen printing.
Whether it’s a cozy cotton tee or a stylish polyester blend, choosing the right method helps your fabric stay in top shape while saying goodbye to outdated designs.
Removing Screen Printing From Cotton Fabric
When removing screen printing from cotton fabric, you have several options, like using a sugar scrub.
Acetone and nail polish remover can dissolve the ink, but use caution as they can damage the fabric.
For a gentler approach, try a salt and vinegar solution or baking soda paste.
Always test on a small, inconspicuous area first. Rinse thoroughly after removal to prevent residue.
Removing Screen Printing From Polyester Fabric
Polyester fabric removal can be a piece of cake if you know what you’re doing. Start by figuring out the ink type; it impacts which method’s best.
The best methods for removing polyester fabric involve using acetone or polyester-safe removers. These are your go-to options for effective removal.
It’s essential to avoid heat-based methods, as they might cause environmental concerns. Instead, focus on using the recommended methods to ensure safe and successful removal.
Whether you’re going DIY or professional, follow best practices to remove screen prints without damaging your beloved shirt.
Removing Screen Printing From Delicate or Blended Fabrics
Handling delicate or blended fabrics feels like wrangling a herd of cats—it requires finesse.
Avoid harsh chemicals.
Stick with fabric-safe solutions instead.
Here’s a handy list:
- Steam Removal: A gentle, warming technique.
- Heat Transfer Removal: Carefully peel away.
- Mild Detergents: Rub gently with care.
- Best Practices: Test in a hidden spot first.
Keep your shirts safe!
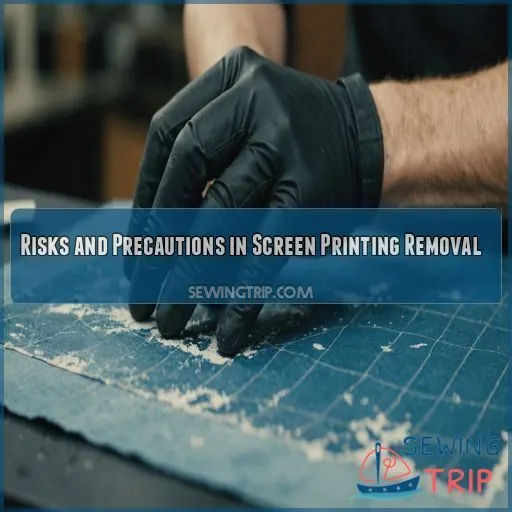
Risks and Precautions in Screen Printing Removal
Even though removing screen printing from fabric can be a fun DIY project, it’s really important to be aware of the potential risks to both your health and your clothes.
Always work in a well-ventilated area, wear protective gear, and be like a detective keeping an eye out for any signs that your favorite shirt mightn’t like its spa treatment!
Potential Risks of Damage to Fabric or Health
Removing screen printing can be tricky – you don’t want to end up with a ruined shirt or breathing in nasty fumes! The chemicals used can be harsh on delicate fabrics, and improper handling could even pose health risks. But don’t worry, with the right precautions, you can safely remove that old design without any drama.
Potential Risks
| Potential Risks | Fabric Damage | Chemical Exposure | Environmental Impact |
|---|---|---|---|
| Scrubbing too hard | Weakening or tearing | Inhaling solvent fumes | Improper disposal of chemicals |
| Using the wrong remover | Discoloration or staining | Skin irritation | Polluting waterways |
| Leaving residue behind | Fraying or pilling | Respiratory issues | Harming wildlife |
Precautionary Measures for Safe Removal
Understanding the potential risks of fabric damage or skin contact is key to safe screen print removal. Don’t jump headfirst without a plan!
- Protective gear is your best friend, like a superhero cape, it’ll shield you from harm.
- Ventilation helps whisk away pesky fumes.
- Consider the environmental impact by opting for eco-friendly solutions.
Importance of Ventilation and Protective Gear
When dealing with chemical exposure from screen printing, it’s crucial to take necessary precautions to avoid health risks. Proper ventilation is essential to prevent the inhalation of harmful fumes.
Protective Gear is a Must
Imagine yourself clad in protective gear like a modern-day superhero. Respiratory and eye protection are your shields against harmful fumes. These protective measures are not just a suggestion, but a necessity.
Eco-Friendly Screen Printing
In the realm of vinyl print and eco-friendly screen printing, safeguarding yourself isn’t just smart, it’s essential. By taking the necessary precautions, you can ensure a safe working environment and protect your health.
Additional Removal Methods and Techniques
When you’re ready to tackle that unwanted screen print, these easy methods make it a breeze using heat and peel, or even a sugar scrub for a sweet way to solve your problem.
Don’t stress over designs that won’t budge; instead, treat them like a stubborn sticker on your favorite album but with a touch of creativity.
Using Heat and Peel to Remove Screen Printing
A heat gun can be used to remove screen printing.
Simply hold the heat gun a few inches from the fabric and move it around to warm up the ink.
Once the ink is softened, carefully peel it off.
This works best for plastisol inks on cotton or polyester.
Just be sure to let the fabric cool down before handling.
Sugar Scrub and Other Non-Chemical Removal Methods
Want to try a sugar scrub to remove screen prints?
Here are some eco-friendly options:
- Mix sugar and water into a paste for a gentle scrub.
- Add a dash of vinegar for extra ink-lifting power.
- Rub gently to preserve fabric safety while tackling the ink.
Iron-on Transfer Removal Techniques
When tackling stubborn screen prints, think of your iron as a superhero’s gadget.
While heat gun removal sounds intense, using an iron-on transfer technique might be your ticket.
Carefully, without fabric damage, apply heat.
The transfer adhesive will surrender, peeling away effortlessly.
It’s an effective, simple, and easy way—far quicker than you’d think.
For pro tips, practice makes perfect!
Aftercare and Maintenance
After removing screen printing from your fabric, it’s important to give your garment a good wash.
This is crucial to prevent any leftover ink from making a comeback.
Think of it like washing away evidence from a crime scene, ensuring no sneaky residue sticks around to haunt your freshly cleaned shirt.
How to Care for Fabric After Removing Screen Printing
After removing screen printing, proper aftercare is important to preserve your fabric.
Start by gently brushing away any residual ink or chemicals.
Consider re-dyeing the fabric if the original color has faded.
Avoid ironing the area until you’ve thoroughly washed and rinsed the garment to prevent re-depositing of ink.
- Brush away residual ink or chemicals
- Re-dye fabric if original color has faded
- Avoid ironing until thoroughly washed and rinsed
Importance of Washing and Rinsing
Congrats on removing the screen printing! Now, don’t let ink residue crash your party.
Time to wash and rinse the fabric thoroughly.
Use the right water temperature to avoid fabric damage—think Goldilocks: not too hot, not too cold.
Drying techniques matter too; air-dry gently.
Following the latest trends in removal success can make your fabric feel brand new!
Preventing Re-Depositing of Ink Residue
You’ve washed and rinsed your fabric, but let’s talk about preventing ink transfer from coming back to haunt you.
Think of it like finding glitter after a party—frustrating, right?
Use cleaning tools with finesse to prevent staining.
Expert tips:
- Check for hidden residue.
- Fully rinse the fabric for fabric protection.
Your shirt (or work order) deserves a clean slate!
Troubleshooting and Common Issues
You’re ready to remove that screen printing, but pesky issues like stubborn ink or unexpected fabric changes might arise.
Don’t worry, we’ve got troubleshooting tips that’ll help you tackle these challenges head-on, ensuring your fabric gets a fresh new start without a hitch!
Common Problems Encountered During Removal
Oops, looks like you hit a snag! Don’t worry, we’ve got your back.
Common issues include ink bleeding through the fabric, accidental damage from too much scrubbing, and stubborn residue that just won’t budge.
Stay calm, take a deep breath, and let’s troubleshoot this together. We’ll get that screen print removed in no time!
Troubleshooting Tips for Removing Screen Printing
Encounter stubborn ink? You’ve got this! Identifying the ink type is key to success.
Avoid fabric damage with these troubleshooting tips:
- Test a small area: Prevent color bleeding by dabbing in a hidden spot first.
- Add heat gently: Use a low iron setting to loosen prints.
- Use an updated expert guide: Master current trends for effective techniques.
What to Do When Removal Methods Don’t Work
Don’t give up if your usual removal methods aren’t working.
Consider seeking professional advice or cleaning services.
Identifying the ink type can help you understand the problem.
Not all inks behave the same way.
Fabric damage is a possibility, but modern textile care trends offer hope.
Sometimes a little expertise goes a long way.
Frequently Asked Questions (FAQs)
What takes off screen print?
To remove screen print, try acetone or nail polish remover for stubborn ink.
Specialized removers for polyester or gentle scrubbing with baking soda offer alternatives.
Always rinse thoroughly, ventilate your space, and don’t forget protective gloves.
How to remove logo from clothing?
Picture a blank canvas yearning for art.
Removing a logo is like giving your clothing a fresh start.
Use acetone or polyester-safe removers carefully, rinse thoroughly, and voila – your fabrics are ready for its new look!
How do you remove heat print from fabric?
Got a pesky heat print you want gone?
Dab some rubbing alcohol or acetone on it.
Gently scrub with care like a pro artist restoring a lost masterpiece.
Voila! Your fabrics ready to strut its stuff again.
How do you remove screen printing from cotton polyester?
You can easily remove screen printing from cotton polyester fabrics using acetone, polyester-safe removers, or gentle scrubbing with a mild detergent.
Just be sure to rinse thoroughly afterwards to remove any leftover chemicals.
Can screen printing be removed from all fabric types?
Not all fabrics surrender their screen printing easily.
While cotton and polyester often cooperate with acetone or removers, delicate and blended fabrics may resist, requiring softer methods.
Always test a small area first—nobody wants an irreversible oops!
How long does the screen printing removal process typically take?
The time needed to remove screen printing varies.
You might spend 15 minutes to an hour, depending on the method and fabric.
Think of it as doing laundry’s rebellious cousin—requiring more patience but totally worth the effort!
What are the most effective methods for removing stubborn screen prints?
Got a stubborn screen print? Consider acetone or polyester-safe removers for a quick fix.
Non-chemical options like adhesive tape or baking soda offer gentler alternatives.
Always protect your hands and ventilate the area—your fabric and health matter!
Can screen printing be removed without damaging the underlying fabric?
You can absolutely remove screen prints without damaging the fabric!
Try using a polyester-safe remover or gentle nail polish remover.
Just be sure to rinse thoroughly afterwards.
It’s a breeze when you know the right techniques.
How can I ensure a successful screen printing removal outcome?
Isn’t it delightful when a shirt’s destined for a makeover?
Make sure a successful screen printing removal by choosing the right method for your fabric type.
Treating the fabric gently is crucial for a successful removal.
Using ventilation is also important to ensure a safe working environment.
Additionally, don’t forget to don protective gloves to protect your skin from any harsh chemicals.
Now that you’re prepared, keep calm, scrub on!
Conclusion
Wave goodbye to unwanted designs with these screen printing removal tactics. Whether you’re working with a splash of solvents, a dab of DIY tricks, or the gentle touch of home remedies, you can successfully learn how to remove screen printing from fabric.
Just remember, every fabric holds its secrets, so test techniques and treat your textiles with love.
Enjoy freeing your fabric and flaunting a fresh slate. It’s easier than tackling that forgotten New Years resolution, right?

