This site is supported by our readers. We may earn a commission, at no cost to you, if you purchase through links.
 You’ve seen it happen—a perfect seam splits at the worst possible moment, leaving an ugly gap that screams "homemade." That telltale ridge where fabric joins can ruin an otherwise beautiful project.
But here’s the thing: professional seamstresses have a trick that makes repairs, pillow closures, and garment finishes completely invisible. The ladder stitch (also called the slip stitch) creates connections so clean that even you won’t be able to find where the opening was.
Once you master this technique, you’ll fix torn seams, close stuffed toys, and finish projects with the kind of polish that makes people ask, "Did you buy that?" Learning to sew invisibly takes just a few tools and about ten minutes of practice to transform how your handmade items look.
Table Of Contents
Key Takeaways
- The ladder stitch (also called slip stitch) creates completely invisible seams by alternating small stitches on folded fabric edges, then pulling the thread tight to make the connection disappear—perfect for repairs, pillow closures, and finishing handmade items.
- Success depends on three habits: matching thread color precisely to your fabric, keeping stitches small and evenly spaced (about quarter-inch), and maintaining proper tension without puckering the material.
- This technique works across diverse projects including stuffed toys, cushion covers, garment alterations, and bag linings—anywhere you need a professional finish without visible stitching.
- Seamless construction methods (including hand-sewn invisible stitches and industrial fusion techniques) reduce fabric waste significantly, improve durability by distributing tension evenly, and align with growing market demand for comfort-focused, sustainable garment production.
What is Seamless Sewing Used For?
You might be surprised by how often the invisible stitch comes in handy. Whether you’re rescuing a favorite shirt, finishing a handmade gift, or simply want a cleaner look, this technique works like magic.
Here are the situations where you’ll use it most:
Repairing Tears and Mending Clothing
When a favorite shirt tears or a seam splits at the worst possible moment, you don’t have to toss it—the invisible stitch can mend it so well that no one will spot the repair. Hand sewing stitches like these work wonders for mending clothing when you match thread color to fabric and use proper stitch selection for the tear.
Here’s what makes invisible seam mending work:
- Tear assessment – Check the fabric type and damage size before choosing your approach
- Color matching – Select thread that blends perfectly with your garment’s shade
- Fabric reinforcement – Strengthen weak areas around the tear to prevent future splits
- Patch application – Use backing fabric for larger tears that need extra support
- Stitch selection – Pick the ladder stitch for clean, nearly invisible repairs
Finishing Pillows, Toys, and Garments
After fixing tears, you’ll find the invisible stitch just as handy for closing up pillows, stuffed animals, and handmade garments that need a clean, professional finish.
When you’re sewing soft toys, closing turning gaps with hand sewing stitches keeps stuffing secure and creates toy safety seams kids can tug without worry.
Pillows get pillow edge finishes that look store-bought, while garment hem options stay hidden and durable—perfect for sewing an invisible seam.
Achieving Professional, Invisible Seams
The secret to making your stitches disappear lies in three simple habits: matching your thread color perfectly, keeping your stitches small and even, and pulling the thread just tight enough to close the gap without puckering the fabric. Perfecting tension takes practice, but you’ll notice the difference immediately.
Smart needle choice and proper fabric control make hand stitching easier, while pressing techniques help fold edges cleanly before closing turning gaps with your invisible stitch.
Essential Tools and Preparation Steps
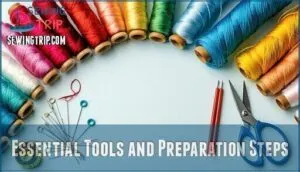
Before you can create that perfect invisible seam, you’ll need a few simple tools and a bit of prep work. The right needle, thread, and fabric setup make all the difference between a stitch that vanishes and one that stands out.
Here’s what to gather and how to prep your project.
Choosing The Right Needle and Thread
Before you thread that needle, think of it like choosing the right key for a lock. Your needle and thread combo needs to match your fabric’s weight and weave to create stitches that simply vanish into place.
For lightweight fabrics, grab a fine needle (size 9 or 10) with thin thread material. Heavier fabric types need stronger needles and sturdier thread for proper stitch strength. This pairing ensures your hand sewing techniques produce truly invisible stitches.
Matching Thread Color to Fabric
If your thread doesn’t blend with your fabric, you might as well hang a sign on your seam that says "look at me!" Color Matching Theory teaches us to think about undertones when selecting thread—a warm beige fabric needs warm thread, not cool gray.
Lighting Influence matters too, so check your match in natural daylight. For invisible stitch success, thread should disappear into the weave.
Blending Techniques and Thread Material Impact both affect how well your handsewing vanishes, making blind stitch truly undetectable.
Threading and Knotting Techniques
Once you’ve got your color-matched thread ready, it’s time to load up your needle and tie a knot that won’t slip through the fabric at the worst possible moment. Here’s how to set yourself up for success:
- Thread length: Cut about 1.5 times the seam length—longer makes handsewing frustrating and tangled.
- Needle size: Match it to your fabric weight so the thread glides smoothly without resistance.
- Double threading: Pull thread through the needle eye, then bring ends together for extra knot security.
- Overhand knot: Tie two overhand knots at the tail end to create a bump that won’t pull through during weaving.
Preparing The Fabric and Seam Allowance
With your thread secured and needle ready, the next move is prepping your fabric edges so they fold cleanly and hide that seam allowance like a pro. Press the seam allowance toward the wrong side of your fabric, creating crisp folds that make the invisible stitch easier to execute.
If your project doesn’t allow pressing—like stuffed toys—finger-press the folds firmly instead, then hold them in place as you work each stitch.
| Preparation Step | Method |
|---|---|
| Fabric Pre-Treatment | Iron fabric flat, removing wrinkles before folding |
| Seam Allowance Width | Fold edges inward, usually ¼ to ½ inch |
| Edge Finishing | Pin or baste fabric folds to hold alignment |
| Pressing Techniques | Use steam and firm pressure for sharp creases |
| Marking Methods | Chalk or disappearing pen marks guide stitch lines |
Step-by-Step Guide to Sewing an Invisible Seam
Now that you’ve got your tools ready and your fabric prepped, it’s time to work through the actual stitching process. The invisible stitch might sound tricky, but once you break it down into clear steps, you’ll see it’s actually pretty straightforward.
I’ll show you each step—starting with that hidden knot and ending with a seam so tight it vanishes into the fabric.
Folding Fabric Edges and Hiding The Knot
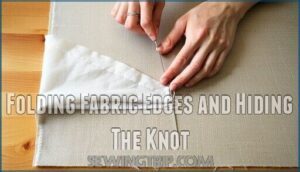
The first stitch matters most when you need to tuck that knot where no one will ever see it. Fold both fabric edges inward along the seam allowance, pressing them flat for proper edge alignment. Insert your threaded needle from inside one fold to hide the knot between layers—this knot concealment keeps your invisible stitch truly invisible.
Key preparation steps:
- Press curved edges or mitered corners flat before starting your ladder stitch
- Check that both folded edges meet evenly for clean hemming techniques
- Position the hidden knot so it won’t show through thin fabrics during handsewing
Starting The Ladder (invisible) Stitch
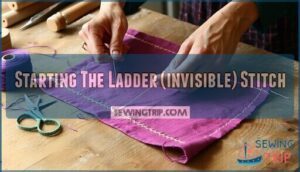
Now you’ll slide your needle through one folded edge, catching just a small bite of fabric right at the fold line to start your ladder stitch journey.
This first needle placement sets your rhythm—aim for about a quarter-inch of fabric in each stitch for a proper securing start.
Keep your thread length manageable (remember that 1.5 times rule) while maintaining good knot concealment inside the hem folding for clean, professional handsewing results.
Alternating Stitches on Both Fabric Sides
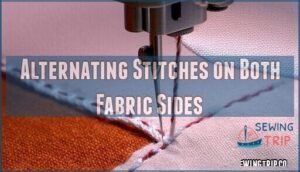
Your needle becomes a little shuttle, moving back and forth between fabric edges like a weaver building a bridge one thread at a time.
Take a stitch on one side, then cross over and catch the opposite fold—keeping your stitch length consistent at about a quarter-inch. This alternating handsewing pattern creates the signature ladder stitch rungs while maintaining proper fabric alignment and thread tension for strong seam security.
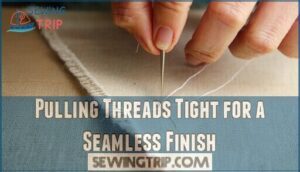
Pulling Threads Tight for a Seamless Finish
After you’ve sewn those ladder rungs back and forth a few times, gently tug the thread to watch the magic happen—the stitches vanish, and the fabric edges draw together like they were never apart.
Pull every few stitches to maintain even tension techniques and proper stitch spacing. This handsewing method preserves fabric integrity while the invisible stitch disappears completely.
Don’t yank too hard—steady thread strength and careful knot security create a durable, professional blind stitch without puckering.
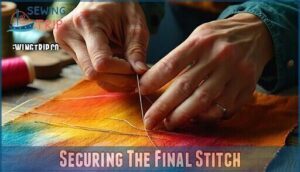
Securing The Final Stitch
When you reach the end of your opening, it’s time to lock everything in place so your invisible seam stays put for years to come. Take a few tiny reinforcement stitches in the same spot, weaving the needle back through the fabric fold.
Secure your finishing knots with a simple overhand knot pulled tight against the fabric. Then bury the thread by running your needle through the fold before snipping it close—this knotting technique ensures your ladder stitch won’t unravel, giving you lasting seam durability.
Top Projects for Seamless Sewing Techniques
Now that you’ve mastered the invisible stitch, you’re probably wondering where to put your new skills to work.
The ladder stitch isn’t just for one type of project—it’s your go-to technique for anything that needs a neat, professional finish.
Here are four common places where invisible sewing really shines.
Soft Toys and Stuffed Animals
Stuffed animals and plushies need invisible stitches to keep their charm intact—no one wants to see thread lines running across a teddy bear’s belly after you’ve lovingly hand-stitched it closed.
Use the ladder stitch to close seams after stuffing, attach joints, or repair worn soft toys. This sewing technique keeps embroidered details looking professional while meeting toy safety standards, whether you’re working with cotton, polyester, or other stuffing material options.
Pillows and Cushion Covers
Pillows work the same way—you’ll use the ladder stitch to close the opening after you’ve inserted the stuffing or pillow form, leaving zero trace of your handiwork.
This invisible stitch technique works beautifully for pillowcase closures and cushion covers, whether you’re working with cotton, linen, or velvet fabric choices.
It’s especially useful for decorative edges where zipper insertion isn’t practical, giving you that clean, professional finish every time.
Garments and Alterations
Hemming a skirt or fixing a split seam doesn’t have to mean visible stitches—the ladder stitch lets you make alterations that look factory-made. You can use this invisible stitch for hemming tutorial projects, mending tears in seams, or even installing invisible zippers.
Different seam types and fabric choice matter, but the slip stitch works across cotton, wool, and silk. Master these alteration techniques for hem finishes that disappear completely into your garment.
Bags and Accessories
Tote bags, clutches, and zippered pouches come alive when you close their linings with an invisible stitch that hides every last thread. Perfect your bag lining closures and zipper installation openings with this ladder stitch.
You can also use these sewing techniques for strap attachment and grip reinforcement, keeping decorative elements intact.
These sewing projects demand precision—your sewing tutorial skills will shine when seams vanish completely.
Seamless Vs. Seamed: Which is Better?
When you’re choosing between no-sew and seamed techniques, it helps to know what each method brings to the table.
Both approaches have their place in sewing, depending on what you’re making and what matters most to you.
Here are the main differences to help you decide which works best for your project.
Benefits of Seamless Sewing for Durability
Invisible sewing doesn’t just hide your stitches—it actually makes your projects last longer and hold up better over time. When you use the invisible stitch, you’re creating a stronger connection between fabric edges. The ladder stitch technique locks fibers together more securely than regular seams, giving you better durability where it counts.
| Durability Factor | Invisible Sewing | Traditional Seams |
|---|---|---|
| Seam Strength | High tension distribution | Concentrated stress points |
| Reduced Wear | Less fraying over time | Threads exposed to friction |
| Enhanced Comfort | No bulky ridges | Raised seam lines |
| Flexible Movement | Moves with fabric naturally | Can restrict stretch |
This sewing technique reduces stress on individual threads by distributing tension evenly across the seam. You’ll notice a longevity boost in stuffed toys, pillows, and garments when you master this approach.
Sustainability and Material Efficiency
Think of fusion sewing as fashion’s quiet revolution for the planet. Traditional cut-and-sew methods waste up to 15% of fabric as offcuts, but fusion technology flips that script. By knitting garments in one piece, you eliminate trimming waste entirely. Energy savings reach 30–40% compared to conventional methods, and fewer finishing steps mean less chemical use and water pollution. The ladder stitch you’re mastering reflects this efficiency mindset—precise material use, minimal waste. Fusion garments also offer unparalleled comfort to the wearer due to the absence of seams.
Let’s break down the numbers:
| Sustainability Factor | Fusion Production | Traditional Cut-and-Sew |
|---|---|---|
| Fabric Waste | Nearly 0% with circular knitting | Up to 15% discarded as offcuts |
| Energy Use | 30–40% lower consumption | Higher due to multiple steps |
| Water & Chemicals | Reduced finishing processes | Heavy dye and wash cycles |
| Material Optimization | 100% fabric utilization | Seam allowance creates excess |
| Circular Economy | 30% more durable, easier recycling | Shorter lifespan, complex disassembly |
When you practice invisible stitches on your projects, you’re joining a larger movement toward material optimization and waste reduction that’s reshaping how we think about fabric and longevity.
Market Trends in Seamless Garment Production
While you’re perfecting those hand stitches, the industry has already moved into overdrive. The seam-free garment market is on track to double from $6.47 billion this year to $13.89 billion by 2034—that’s 8.5% growth annually, powered by circular knitting tech and 3D fabric advances.
Giants like Hanes, Nike, and Adidas have locked down over 60% of the market, banking on what consumers actually want: comfort. In fact, 62% now choose seam-free activewear in 2025.
Here’s the interesting part—your careful invisible stitching? That same precision is exactly what these factories have automated at industrial scale.
The market’s expansion is fueled by the demand for seamless clothing, driven by consumers seeking both comfort and style.
| Trend | 2025 Data | Growth Driver |
|---|---|---|
| Market Growth | $6.47B globally | 8.5% CAGR to 2034 |
| Tech Adoption | 40% faster production | Circular & 3D knitting |
| Consumer Preferences | 62% prefer seam-free activewear | Comfort & durability focus |
| Regional Analysis | Asia-Pacific leads at 45% share | Cost efficiency & manufacturing scale |
Online channels now capture 41% of sales, up from 29% in 2022, proving digital sewing seams matter as much as physical ones.
Choosing The Right Method for Your Project
The right technique depends on what you’re working with and how much time you have.
For delicate fabrics or small fixes where you want invisible stitches—think stuffed animals or pillow closures—hand ladder stitch is your best bet.
Need something strong and fast? Machine seams handle that better, especially for garments or bags.
Pick the approach that fits your fabric and your schedule.
| Factor | Hand Ladder Stitch | Machine Seam |
|---|---|---|
| Project Complexity | Small repairs, toys, pillows | Garments, bags, production runs |
| Timeline Considerations | Slower, precise work | Fast, efficient assembly |
| Fabric Type | Delicate fabrics, tight curves | Sturdy materials, straight seams |
Frequently Asked Questions (FAQs)
How do you fix broken stitches mid-seam?
To fix broken stitches mid-seam, thread your needle and secure it with knotting techniques just behind the break.
Weave the needle through the fabric fold using a ladder stitch, catching both sides to prevent unraveling and create reinforcement stitching that secures loose ends invisibly.
Can seamless sewing work on thick fabrics?
Yes, you can use the ladder stitch on thick fabric, but needle size matters—choose a sturdy needle to pierce dense weaving.
Thread strength is critical for durability, and longer stitch length adjustments help the seam stay hidden without puckering.
What causes thread to show after finishing?
Thread becomes visible because of tension issues or mismatched thread thickness. Poor stitch spacing, knot visibility near the seam edge, and fabric type also matter.
The ladder stitch or slip stitch requires careful weaving to stay hidden.
How do you remove visible ladder stitches?
Everyone’s heart sinks when those ladder stitches peek through like uninvited guests at a dinner party.
Carefully snip visible threads with a seam ripper, gently pull them free, then re-stitch using matching thread and proper tension. Keep your stitch length small and your seam allowance folded precisely for invisible results.
Should you backstitch when ending invisible seams?
Backstitching isn’t necessary. Instead, weave your needle back through the seam allowance two or three times for stitch reinforcement.
This secures the thread without bulk, keeping your step-by-step sewing tutorial clean and your sewing project’s seam longevity strong.
Conclusion
Don’t worry if your first few stitches look wonky—every seamstress started exactly where you’re. The beauty of the ladder stitch is that even imperfect attempts disappear once you pull the thread tight.
Even imperfect ladder stitches vanish when you pull the thread tight—every seamstress started exactly where you are
With just a few practice runs on scrap fabric, you’ll develop the rhythm that makes how to sew invisibly feel natural.
Soon, you’ll spot opportunities everywhere: that stuffed bear with a split seam, throw pillows that need finishing, garments waiting for invisible hems. Your projects will finally look as polished as they deserve.
- https://www.linkedin.com/pulse/seamless-garments-market-comprehensive-analysis-bzgse
- https://www.360iresearch.com/library/intelligence/seamless-clothing
- https://www.wiseguyreports.com/reports/seamless-textile-market
- https://www.businessresearchinsights.com/market-reports/seamless-garments-market-120083
- https://www.datainsightsmarket.com/reports/seamless-garment-technology-1414237

