This site is supported by our readers. We may earn a commission, at no cost to you, if you purchase through links.
You’re about to change that. This guide will show you how to sew a 4-hole button, a fundamental skill that’s surprisingly simple yet incredibly useful.
By mastering this technique, you’ll not only save your favorite garments but also add a touch of personal craftsmanship to your wardrobe.
Let’s dive into the art of sewing a 4-hole button.
Table Of Contents
- Key Takeaways
- How to Sew a 4 Hole Button
- Why Learn to Sew a Button
- Types of Buttons
- Gathering Your Materials
- Choosing the right thread is a crucial step in any sewing project. It’s like picking the perfect sidekick for your sewing adventure. Here are some factors to consider: Thread Thickness
- Consider thread thickness for durability. A thicker thread can provide extra strength, making it ideal for heavy-duty projects or areas that will experience a lot of wear and tear. Color
- The color of your thread is also important. Choosing a thread that matches the color of your fabric will result in a seamless finish, making your project look more professional. Material
- The material of your thread should be chosen based on the task at hand. For example, polyester offers strength and durability, making it a good choice for heavy-duty projects. On the other hand, cotton gives a soft finish, making it ideal for projects where a softer touch is desired. Quality Matters
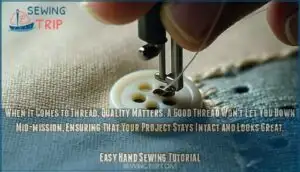
- When it comes to thread, quality matters. A good thread won’t let you down mid-mission, ensuring that your project stays intact and looks great. Easy Hand Sewing Tutorial
- Preparing to Sew
- Sewing the 4-Hole Button
- Finishing Touches
- Troubleshooting Common Issues
- Expanding Your Skills
- Frequently Asked Questions (FAQs)
- Conclusion
Key Takeaways
- Button repair is an essential life skill that can prevent wardrobe malfunctions, add a personal touch to clothing, and is easy to learn without the need for a sewing machine.
- When choosing buttons, consider the material, size, shape, and color, as well as any embellishments to ensure they match the garment and personal preference.
- Gather the right materials for the job, including thread that is durable, matches the fabric color, and is made of the appropriate material for strength or softness; needles that are the correct size for the buttonholes, sharp for easy fabric penetration, and sturdy; and scissors that are sharp, durable, and comfortable for extended use.
- The sewing process for a 4-hole button includes proper placement on a sturdy spot of fabric, using a needle and thread that match in size, sewing in a crisscross pattern like lacing sneakers, pulling the thread snug without strangling the fabric, securing the button with a tight knot and adjusting the thread shank thickness, and finishing with a lock stitch and trimming excess thread.
How to Sew a 4 Hole Button
To sew a 4 hole button, thread a needle, secure the button in place, and stitch diagonally across the holes several times for stability.
Why Learn to Sew a Button
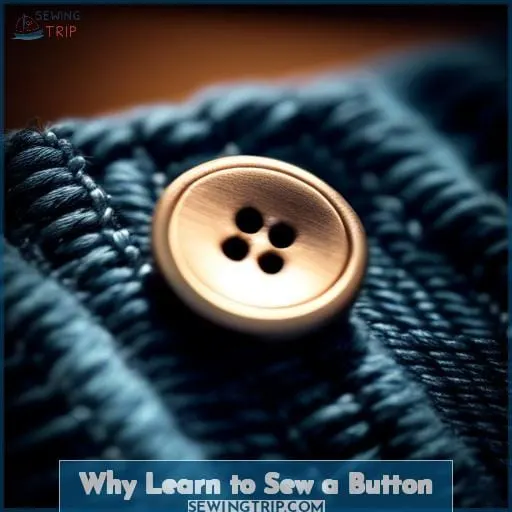
Ever popped a button right before a big meeting? You’re not alone. Mastering the art of button repair is a nifty life skill that saves you from last-minute wardrobe malfunctions.
Whether it’s a classic 4-hole button or a fancy one with unique embellishments, knowing how to sew it back on can be a real shirt-saver. Plus, it’s a chance to add a personal touch to your clothes with stylish button styles and placement.
No need for a sewing machine; just a needle, thread, and a bit of know-how. So, let’s get stitching and turn that oops moment into a no sweat fix!
Types of Buttons
Transitioning from the why to the what, let’s dive into the diverse world of buttons. Understanding the variety at your fingertips is crucial before you thread that needle. Buttons aren’t just fasteners; they’re tiny canvases of creativity on your fabric.
- Button Materials: From classic wood to chic metal, the material sets the mood.
- Button Sizes: Whether it’s a subtle shirt button or a statement piece on a coat, size matters.
- Button Shapes: Round, square, or novelty – the shape can complement or contrast your garment.
- Button Colors and Embellishments: A splash of color or a dash of sparkle can transform the mundane into the magnificent.
Now, armed with this knowledge, let’s tackle how to sew a four-hole button by hand, ensuring your creations aren’t just held together but stand out.
Gathering Your Materials
Before you start sewing a 4-hole button, you’ll need to gather the right materials.
Choosing the correct thread, needles, and scissors is crucial for a successful sewing project.
Selecting the Right Thread
Choosing the right thread is a crucial step in any sewing project. It’s like picking the perfect sidekick for your sewing adventure. Here are some factors to consider: Thread Thickness
Consider thread thickness for durability. A thicker thread can provide extra strength, making it ideal for heavy-duty projects or areas that will experience a lot of wear and tear. Color
The color of your thread is also important. Choosing a thread that matches the color of your fabric will result in a seamless finish, making your project look more professional. Material
The material of your thread should be chosen based on the task at hand. For example, polyester offers strength and durability, making it a good choice for heavy-duty projects. On the other hand, cotton gives a soft finish, making it ideal for projects where a softer touch is desired. Quality Matters
When it comes to thread, quality matters. A good thread won’t let you down mid-mission, ensuring that your project stays intact and looks great. Easy Hand Sewing Tutorial
This easy hand sewing tutorial will ensure that your button stays put, making sewing a breeze. With the right thread and a little practice, you’ll be sewing like a pro in no time.
Choosing Needles
When selecting the ideal needle for button sewing, consider the following factors:
Size: Choose a needle that is neither too big nor too small for your button’s holes.
Sharpness: Opt for a sharp needle that can pierce fabric effortlessly.
Sturdiness: Ensure the needle is sturdy enough to withstand the pressures of sewing.
Durability: Select a needle that can endure beyond a single button sewing session.
The needle should be appropriately sized to match the button’s holes, sharp enough to penetrate the fabric without resistance, robust to handle the rigors of sewing, and durable enough to last beyond a single button sewing task.
Importance of Scissors
After selecting your needle, it’s time to grab your scissors. These are not just any scissors; they are your trusty sidekick in ensuring your thread is cut with precision. A sharp pair guarantees a clean cut, preventing fraying and making it easier to tie a knot.
Durable and comfortable scissors are key to locking the thread and anchoring stitches securely. This helps avoid the hassle of re-sewing buttons or other attachments. Remember, the process of sewing a 4-hole button starts with the right cut.
- Choose sharp scissors for a clean cut and easy knot tying.
- Opt for durable and comfortable scissors to securely anchor stitches.
- The quality of your scissors can significantly impact the success of your sewing project.
Preparing to Sew
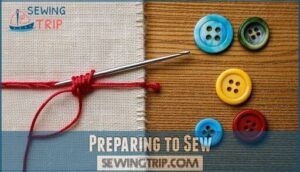
Before you start sewing your 4-hole button, you’ll need to get your needle and thread ready.
First, thread your needle and secure the end with a knot to ensure it doesn’t slip through the fabric.
Threading the Needle
Once you’ve picked the perfect thread thickness and color for your fabric, it’s time to tackle the needle.
Cut a length of thread—about 18 inches should do.
Now, grab your needle threader; this nifty little helper will save you from squinting and fumbling.
Slide the thread through the needle’s eye, and you’re set to start sewing those 4-hole buttons back on like a pro.
Knotting the Thread
Once you’ve got your needle threaded, it’s time to secure your efforts with a sturdy knot.
Don’t skimp on the tail end; a longer piece makes for easier knotting.
For finger protection, a thimble’s your best pal.
Match the thread to your garment for a seamless fix, whether you’re tackling a two-hole button or reattaching a coat’s lifeline.
Sewing the 4-Hole Button
Now that you’ve got your button and materials ready, it’s time to focus on sewing the 4-hole button onto your fabric.
Follow the sewing pattern carefully and ensure the button is securely fastened for a neat finish.
Button Placement
After threading your needle and tying off the end, it’s time to focus on button placement.
- Button placement: Ensure it aligns with other buttons for a uniform look.
- Fabric choice: Pick a sturdy spot that can support the button.
- Thread color: Match it closely with your fabric for a seamless appearance.
- Needle and button hole size: Choose a needle that easily passes through the button holes.
The Sewing Pattern
Alright, let’s dive into the nitty-gritty of sewing that 4-hole button.
Choose a needle size that’s comfy for your fabric type, and a thread thickness that won’t bully the buttonholes.
Start with a sturdy knot method, then crisscross the thread like you’re lacing up sneakers.
Keep it snug, but don’t strangle your fabric.
Button style matters, so make it match!
Securing the Button
Securing your button is like locking in victory. Here’s how:
- Secure Knot: After your last pass, pull the thread tight and tie a secure knot on the backside. This is your safety net.
- Thread Wrapping: Wrap the thread around the shank you’ve created to adjust its thickness. It’s like giving your button a snug blanket.
- Needle Size Matters: Use a needle that complements your thread and button placement for a seamless finish.
Finishing Touches
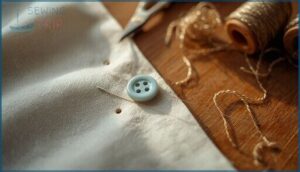
Once you’ve secured the button, it’s time to lock the stitch in place. Trim any excess thread to maintain a neat finish.
Locking the Stitch
After securing your button, it’s time to lock in your hard work. Think of needle positioning as your compass; guide it back through the fabric near the base of your stitches. Adjust thread thickness and knot tightness to ensure your stitch pattern holds firm.
Keep fabric tension consistent to avoid puckering. A few final stitches, and voilà, your masterpiece is secure!
Trimming Excess Thread
Once your button’s snug as a bug, grab your trusty scissors—sharpness is key—and snip the thread close to the knot.
Ensure knot security; you don’t want your handiwork unraveling! Dispose of the leftover thread responsibly; no need for a tangled mess later.
Troubleshooting Common Issues
If you’re finding your thread tension is off, it might be too tight or too loose, affecting the button’s security.
For buttons that seem misaligned, double-check their placement against the corresponding buttonholes before sewing.
Thread Tension
- Thread Strength: Opt for a durable thread material to avoid breakage.
- Needle Size: Match it with your thread to prevent hand fatigue.
- Knotting Technique: Secure your start and finish to keep stitches in place.
Misaligned Buttons
After mastering thread tension, let’s tackle misaligned buttons. Often, the culprit is uneven spacing or incorrect placement.
To prevent this, use a ruler for precise spacing and mark positions lightly with chalk. For all button types, ensure your tools—needle, thread, and scissors—are in top condition.
If misalignment happens, don’t fret. Simply remove and resew, applying these tips for a flawless finish.
Expanding Your Skills
Once you’ve mastered sewing a 4-hole button, you’re ready to enhance your sewing repertoire.
Explore advanced techniques and new projects to further develop your skills.
Advanced Button Sewing Techniques
After mastering the basics, you’re ready to jazz up your skills with advanced button sewing techniques.
Try the loop technique for a chic, secure hold, and experiment with thread wrapping for a sturdy shank length.
Add flair with decorative stitching that turns a simple fix into a style statement.
Exploring Sewing Projects
Once you’ve mastered sewing a button, you’re ready to dive into the fabric of sewing history and expand your skills.
- Explore different fabric types for varied projects.
- Get a feel for various needle sizes and their uses.
- Experiment with thread spools in a rainbow of colors.
- Play with button shapes to add flair to your creations.
Frequently Asked Questions (FAQs)
Can I use embroidery floss for buttons?
It is indeed possible to use embroidery floss for button sewing tasks. Here’s how:
Thinning the Floss: If the embroidery floss is too thick for your button sewing needs, simply split it into thinner strands.
Strength and Color: By using embroidery floss, you can add strength to your button sewing, as well as a pop of color, making your button sewing game stand out.
In conclusion, embroidery floss can be a great choice for button sewing. Its strength and color options make it a versatile and interesting choice for this task.
How do I prevent thread tangling?
A stitch in time saves nine – a well-known adage. To avoid thread tangles, consider these two effective methods:
Wax your thread: By applying a thin layer of beeswax to your thread, you can create a smoother path for your needle, making sewing a knot-free and enjoyable experience.
Use a dryer sheet: Before you start sewing, gently run a dryer sheet along the length of your thread. This simple step can help prevent tangles and ensure a seamless sewing journey.
In conclusion, taking the time to prepare your thread using these methods can significantly improve your sewing experience, saving you time and frustration in the long run.
Are beeswax-coated threads more durable?
Beeswax-coated threads possess enhanced durability. The application of wax to threads provides additional strength, which prevents fraying and wear, even when subjected to repeated stress. This reinforcement is particularly beneficial in tasks such as attaching buttons, where threads are often put under significant strain.
In essence, beeswax coating serves as armor for your thread, safeguarding it against the rigors of various applications.
What’s the best way to store buttons?
Store your buttons in a plastic organizer box; it’s like a treasure chest for your tiny, colorful gems.
Sort them by color for easy access, ensuring your crafting voyage is smooth sailing.
How do I align multiple buttons evenly?
To evenly align multiple buttons, measure and mark equal distances on your fabric.
This ensures each button sits perfectly in line, like soldiers on parade.
Conclusion
Just like threading a needle through the fabric of history, you’ve woven a new skill into your repertoire.
Now that you know how to sew a 4-hole button, you’re equipped to tackle those unexpected wardrobe malfunctions with confidence.
Keep practicing, and soon, button repairs will be second nature.
So go ahead, secure your buttons, and wear your clothes with pride, knowing you’ve mastered a timeless, essential skill.

