This site is supported by our readers. We may earn a commission, at no cost to you, if you purchase through links.
Pick up a wisp of wool and a single barbed needle, and within twenty minutes you’ll have something that actually holds its shape. No glue, no sewing machine, no loom. Just repeated poking that tangles fibers into a dense, sculptable little animal or blob of texture, and that simplicity is exactly why so many crafters get hooked fast.
These tutorials build your skills layer by layer, starting with wool types like merino and Corriedale, moving through needle gauges, mats, and finger guards, then landing you squarely in hands-on projects. You’ll shape a hedgehog, felt a fluffy chick, and eventually tackle wire armatures and realistic fur layering.
Grab your starter kit, because you’re about to turn loose fiber into something you’d proudly display on a shelf.
Table Of Contents
Key Takeaways
- Needle felting only requires wool, a barbed needle, and a foam mat, making it an affordable and accessible hobby for beginners to start within an hour.
- Success depends on choosing the right materials, using dense core wool for structure and matching needle gauge to the task.
- Building skills progresses from simple rolled shapes to advanced techniques like wire armatures and layered fur coloring.
- Common mistakes like lumps, holes, and uneven surfaces can be fixed through gradual wool layering and consistent poke angles.
Essential Needle Felting Tools
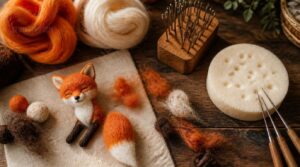
Before you shape your first felted fox or hedgehog, you need the right gear on hand. Every beloved project starts with a handful of essentials, from wool to needles to the pad underneath your work. Let’s walk through what belongs in your felting toolkit.
Once you’ve picked your wool, spend a few minutes trying out simple techniques for needle felting beginners so your first shapes hold together nicely.
Choosing Beginner-friendly Wool
Since your finished sculpture is only as good as the wool you start with, pick fibers that forgive mistakes. Merino wool offers great softness and manageable itchiness, while:
- Romney and Corriedale felt quickly
- Shetland stays elastic and forgiving
- Bluefaced Leicester balances softness with spring
- Pre-carded roving works easier than raw fleece
- Colorfast, natural colors keep shaping simple
Core Wool Versus Roving
Once you’ve picked your wool type, think about which part of it goes where. Base wool gives your sculpture structural integrity, a dense, coarse base that resists sagging. Roving comes next, adding surface texture and color layering on top.
Think of base as the skeleton and roving as the skin. This pairing builds sculpting stability beginners can trust from their very first project. Its stiff foundation for wet felting also makes it ideal for flat wet‑felting projects.
Needle Gauges and Shapes
Now that your skeleton and skin are sorted, let’s talk about the needles themselves. Gauge numbers work on an inverse scale—higher numbers mean thinner needles, so a 36 poses coarse and fast while 38-40 refines details.
Barbed needles snag fibers for tangling; reverse needles pull fluff outward for fur texture. Stainless steel resists rust—wipe needles clean after each session to keep points sharp.
Felting Mats and Cushions
Sharp needles deserve a surface that won’t fight back. A good mat resists disintegration through thousands of pokes, so medium density aids 38-42 gauge without dulling tips.
Underneath, foam cushions (1-3 cm) absorb impact and reduce hand fatigue on tall sculptures. Wipe down after sessions, store flat away from sunlight—foam hardens otherwise, and grooved mats mean it’s replacement time.
Finger Guards and Storage
Because your needle spends hours darting toward your hand, a leather guard on your thumb and index finger isn’t optional—it’s smart insurance against jabs.
Storage matters too:
- Polypropylene tubes protect needle tips
- Labeled containers organize felting tools by gauge
- Cushioned pouches keep supplies together
Good storage habits make every needle felting kit last longer, keeping your step-by-step projects running smoothly session after session.
Step-by-Step Needle Felting Tutorial
Now that your tools and wool are sorted, it’s time to actually put a needle in your hand. Every felted animal, from your first hedgehog to something more ambitious, follows the same basic path from fluff to finished shape. Here’s how that journey breaks down, one step at a time.
Prepare Your Wool Fibers
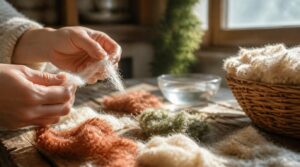
Good felting starts before you ever pick up a tool. Loosen your wool by gently pulling fibers apart, checking that scales lay flat for even felting results.
| Step | Why It Matters | Quick Tip |
|---|---|---|
| Scour raw fleece | Removes grease | Use warm water |
| Check moisture | Boosts strength | Keep fibers dry |
| Store properly | Prevents matting | Bag loosely |
Form The Core Shape
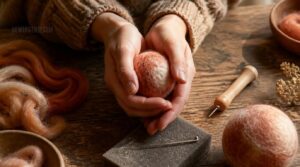
Grab a handful of wool and start rolling it between your palms into a tight ball; this becomes your central shape.
Build gradually, adding thin layers to avoid lumps while preventing hollow gaps that collapse later. Rotate often for visual symmetry, checking angles as you go. Keep the central slightly larger than needed; you’ll trim it down once felting begins.
Felt With Controlled Pokes
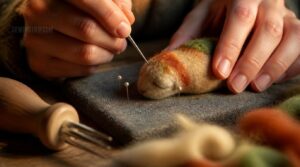
Now comes the fun part: short, deliberate pokes instead of long jabs. Anchor joints and curves first to lock in symmetry, then work outward gradually.
Keep pressure control steady, checking both sides often. Consistent depth prevents fraying and builds that coveted velvety texture beginners chase in every needle felting tutorial worth following.
Smooth Uneven Surfaces
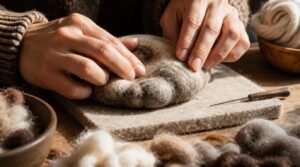
Bumpy patches happen to everyone, and that’s perfectly fine. Run your fingertips across the sculpture, identifying high-spots and hollow dips through touch alone.
For stubborn unevenness, layer thin wool like a gentle skim coat, then felt it flat. This texture manipulation step, paired with steady poking, keeps your surface smooth, crack-free, and ready for the next stage of your needle felting tutorial.
Add Colors and Details
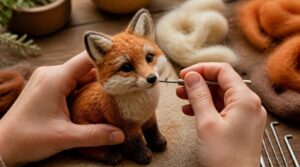
Now for the fun part: bringing your sculpture to life with color. Pick two or three main colors plus a neutral, then layer thin wisps gradually, blending edges with short pokes for smooth transitions.
Shade undercuts darker for depth, add lighter highlights near eyes, and keep tools clean between hues—this prevents color contamination and keeps your needle felting tutorial results looking crisp and realistic.
Beginner Felted Animal Projects
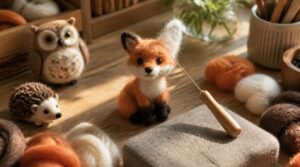
Once you’ve got your tools sorted and your basic technique down, it’s time for the fun part: bringing an actual animal to life.
These beginner projects build your confidence one poke at a time, starting simple and adding new skills as you go. Here’s where to start, plus a few fixes for the little mistakes almost everyone makes along the way.
Easy Hedgehog Tutorial
A hedgehog is the perfect first project, small enough to finish in a sitting yet forgiving for beginners.
Start with a 4cm brown wool piece, tapering a neck, then attach a 1.5cm snout sphere. Mix a cream belly accent for a realistic color palette, add quill pokes with your 38 gauge needle, and let it rest overnight to stabilize its shape.
Simple Chick Project
Once your hedgehog’s quills settle overnight, a chick offers a gentler challenge, softer shaping, no quill texture needed.
Roll a 2.5cm yellow wool ball for the torso, taper a short neck, then combine a smaller head ball with gentle pokes for smooth body shaping. Add an orange beak triangle and tiny feet. Keep the surface firm but pliable, and always check surface firmness before proceeding.
Beginner Bunny Shape
From chick to bunny, you’ll shift toward rounder, plumper proportions. Roll a body oval, then a head about half its size, keeping proportional head sizing intact for that classic charm.
Shape a short muzzle projection, then smooth the neck seamlessly for soft silhouettes. This step-by-step approach suits beginner felting techniques perfectly, whether you’re using a needle felting kit or loose supplies from earlier bunny tutorials.
Adding Eyes and Ears
Once your bunny’s body takes shape, eyes and ears bring it to life. Keep symmetry and balance by placing eyeballs—tight wool balls—evenly on the head, securing each with short stabbing pokes.
Layer dark wool for realistic pupils against a lighter iris. Shape ears separately, then attach with overlapping stitches for smooth ear attachment, angling them to give your handmade animal real character and expression.
Fixing Common Mistakes
Every felter hits snags — that lumpy hedgehog or lopsided bunny ear is just part of learning.
Check Main Structural Integrity first: weak internal layering causes collapse. Fix flat spots by adding more main wool before detailing.
Sloppy Poke Technique creates seams — rotate your piece often. For Detailing Flaws like harsh color lines, mix fibers gradually. Dull needles? That’s a Needle Maintenance issue — clean and store them properly.
Advanced Needle Felting Techniques
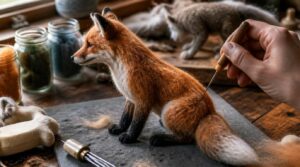
Once you’ve mastered the basics, it’s time to push your skills further and bring your animals to life. You’ll start working with sturdier structures, richer colors, and textures that feel almost real to the touch. Here are five techniques that will take your felting from beginner-friendly to genuinely impressive.
Building Wire Armatures
Skeletons matter just as much as fibers when you’re building animals that need to hold a pose. Wire armature basics: pick 14-16 gauge aluminum for small sculptures, twist joints for pivotable connections, and keep proportions matching your sketch.
- Aluminum for easy bending
- Steel for heavier builds
- Compact twists for lasting joints
Always finish sharp ends with soft clay for safety.
Layering Realistic Fur Colors
Getting fur to look believable comes down to color, not just texture. Building underfur depth means starting with darker browns and grays underneath, then adding amber midtones, then whisper-light tips for highlights.
| Layer | Purpose |
|---|---|
| Base | Shadow depth |
| Midtone | Smooth transitions |
| Glaze | Harmonize tone |
| Highlight | Catch light |
Transparent glazes with burnt umber tie everything together beautifully.
Using Reverse Felting Needles
Here’s where needle felting turns sculptural: a reverse felting needle has barbs facing backward, so instead of packing wool in, it pulls fibers outward as you withdraw it.
Use gentle plucking motions, not stabs, to lift surface color for natural highlights or whiskers. Watch your depth to avoid inner thinning, and work in light passes for believable fur effects.
Creating Fluffy Animal Textures
Fluff isn’t magic—it’s fiber layering depth done right. Build light undercoats first, then add darker guard hairs on top, leaving tiny gaps for air.
- Vary fiber lengths for natural fur variation
- Use micro fuzz techniques with light needle taps
- Finish with gentle surface smoothing methods
This layered approach is what separates believable handmade animals from stiff, uniform shapes.
Adding Fine Facial Details
A single white dot on the eye can turn a blank stare into a soul. That’s realistic eye highlights for you, paired with sculpting nose depth through soft midline shadows. Add lip texture techniques, cheekbone shadowing, and hairline shading methods for balance.
A single white dot on the eye can turn a blank stare into a soul
| Detail | Effect |
|---|---|
| Eye highlight | Lifelike gaze |
| Nose shadow | Depth |
| Lip texture | Warmth |
| Cheek shading | Structure |
Top 3 Needle Felting Supplies
Now that you’ve got the techniques down, let’s talk about the supplies that make them work. Having the right kit, pad, and wool on hand saves you time and frustration on every project. Here are three favorites worth adding to your felting basket.
1. Mayboos Complete Needle Felting Kit
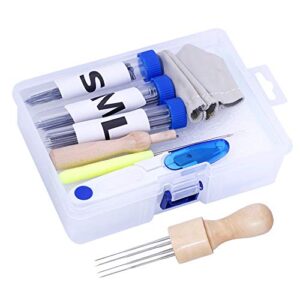
Mayboos Complete Needle Felting Kit packs 40 color wool roving packs, each a tidy 3-gram bundle perfect for small projects and quick color mixing.
You’ll also get four felting needles, a dual foam pad, and finger guards, plus a clear storage case that keeps everything organized. The instruction guide walks you through each step with pictures, so complete beginners won’t feel lost.
Since colors are bagged separately and labeled, planning gradients or fur textures becomes simple, practical work rather than guesswork.
| Best For | This kit is best for beginners and hobbyists who want an easy, well-organized introduction to needle felting projects. |
|---|---|
| Material | Wool needles |
| Craft Type | Needle felting |
| Skill Level | Beginner |
| Portability | Portable case |
| Color | Multicolor |
| Gift Suitability | Kids 8+ |
| Additional Features |
|
- Includes 40 pre-portioned 3-gram wool roving packs, making color mixing and gradient work simple
- Comes with a clear, beginner-friendly picture guide that walks through each step
- Clear storage case and finger guards keep tools organized and use comfortable
- Only four felting needles are included, which may limit larger or faster projects
- Foam pad and needles may wear down with frequent, heavy use
- Manual felting takes practice, so results may be slow for those wanting quick, detailed work
2. Towashine Foam Needle Felting Pad
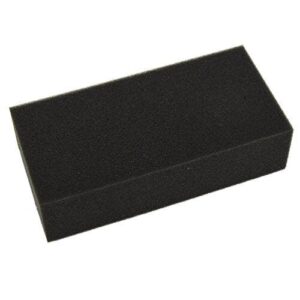
Once your kit’s roving is organized, your work surface deserves the same care. The Towashine Foam Needle Felting Pad uses dense, open-cell foam that resists tearing, holding a consistent 2-inch thickness so needle depth stays uniform every poke.
That firm support cuts down on flexing, protecting both needle tips and your fingers during long sessions. It cleans up easily with a damp cloth, resists moisture, and pairs beautifully with gauge 36-40 needles, giving you a stable, lasting base for detailed felted animal sculptures.
| Best For | This pad is best for needle-felting hobbyists who want a stable, compact surface that protects their needles from breaking during detailed craft projects. |
|---|---|
| Material | Foam |
| Craft Type | Needle felting |
| Skill Level | All levels |
| Portability | Compact size |
| Color | Black |
| Gift Suitability | General crafters |
| Additional Features |
|
- Soft, resilient foam construction cushions needle impact and helps prevent breakage
- Compact, lightweight design (0.704 oz) makes it easy to store or take on the go
- Neutral black color fits in well with most craft setups
- Foam may compress and lose firmness after extended heavy use
- Manual measurement can lead to slight size variance (0.2–0.3 cm)
- Color may look a bit different depending on lighting or screen display
3. MOMODA Rainbow Wool Roving
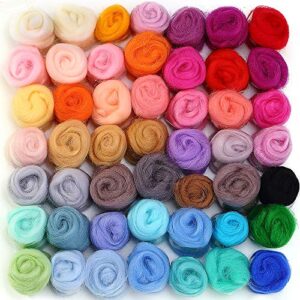
Color planning gets messy fast when you’re pulling from one giant wool bag. MOMODA’s Rainbow Wool Roving solves that with 50 individual zippered pouches, each holding about 3 grams of soft, 100% wool roving.
That’s perfect for beginners building small figures, felted jewelry, or ornaments who want vibrant color without guessing at blends. The organized pouches prevent color transfer, keep dust out between sessions, and make gradient work simple. At 3.2 oz total, it’s a budget-friendly way to test colors before committing to bigger projects.
| Best For | Beginners and hobbyists who want an easy, low-mess way to felt jewelry, ornaments, and small decorative crafts in a wide range of colors. |
|---|---|
| Material | Wool roving |
| Craft Type | Needle & wet felting |
| Skill Level | Beginner |
| Portability | Zippered pouches |
| Color | Rainbow (50 colors) |
| Gift Suitability | Child-friendly |
| Additional Features |
|
- Individually zippered pouches keep colors organized and prevent fiber transfer or dust exposure
- 50 vivid rainbow shades take the guesswork out of color planning and blending
- Soft 100% wool roving works well for both needle and wet felting techniques
- Each pouch holds only about 3 grams, so larger projects may need several pouches, raising the overall cost
- Repeated opening and closing can wear down the zip pouches over time
- No neutral or specialty colors included, just the rainbow palette
Frequently Asked Questions (FAQs)
Is needle felting easy for beginners?
Picture a lump of clay slowly finding its shape under patient hands—that’s needle felting. Yes, it’s beginner-friendly: with basic wool roving, a foam pad, and one needle, you’ll shape your first simple project within an hour.
Is it better to felt wet or dry?
Neither wins outright—it depends on your goal. Wet felting builds dense, durable shapes fast using water and soap, while dry felting with barbed needles gives you precise control for sculptural details like fur or tiny facial features.
How to do needle felting for beginners?
You don’t need fancy skills to start. Just roll carded wool into a ball, poke with short controlled strokes using a 38 gauge needle, rotate often, and watch your shape form on a foam mat.
Is needle felting easy?
Yes, needle felting is beginner-friendly. With basic roving wool, a soft foam pad, and short controlled stabbing motions, you’ll form simple shapes fast—rolling wool into a tight center reduces pokes and builds confidence quickly.
Is needle felting a cheap hobby?
Good news: your wallet won’t take much of a hit. Most beginners start for under $40, with basic kits running $20–$ Reusable needles and pads keep costs low over time, making this a genuinely budget-friendly craft.
How to avoid holes in needle felting?
Keep your wool evenly dense, work with a diagonal stabbing angle instead of straight jabs, and build layers gradually. Switch to finer needles for finishing, and fill gaps early with small tuft patches before they widen.
How do I connect different parts of a needle felted project?
Tease fluffy fibers at each seam, press pieces together, then stab through both shapes in alternating directions. Wrap thin fiber over the join, sew with a finishing needle, and check for loosened spots before adding final details.
What is the difference between needle felting and wet felting?
Dry sculpting with barbed needles builds 3D shapes and details, while wet felting uses soap, water, and agitation to fuse fibers into flat, sturdy fabric—think animal figurines versus scarves and coasters.
How many types of felting needles are commonly used?
Three main shapes cover most projects: triangular needles for general work, star needles for faster felting with more contact points, and spiral/twisted needles that spread barbs wider for smoother, hole-free finishing.
How do I achieve a smooth finish on my needle felted creations?
Switch to a higher gauge needle for final passes, using shallow, angled pokes around 45 degrees. Mix surface fibers frequently, then finish with gentle hand rubs and light brushing to erase any leftover net-like marks.
Conclusion
Picture a beginner poking her first hedgehog at the kitchen table, wool scraps scattered everywhere, and twenty minutes later holding a shape she actually made herself. That’s exactly what these tutorialsneedle felting guide you toward: real skill, earned one careful poke at a time.
Wire armatures and layered fur will come later. For now, trust your hands, your needle, your wool. You’re not just crafting animals—you’re building a beloved lifelong habit worth keeping on the shelf.
- https://thefelthub.com/complete-guide-to-needle-felting-wool
- https://fittobeloved.com/2021/10/23/needle-felting-wool-a-guide
- https://www.stephaniemetz.com/in-the-studio/2022/1/24/needle-felting-the-one-thing-nobody-teachesnbsp
- https://feltingsupplies.livingfelt.com/needle-felting-tools
- https://bearcreekfelting.com/product-category/bear-creek-felting/needlefeltingsupplies/felting-needle-holders