This site is supported by our readers. We may earn a commission, at no cost to you, if you purchase through links.
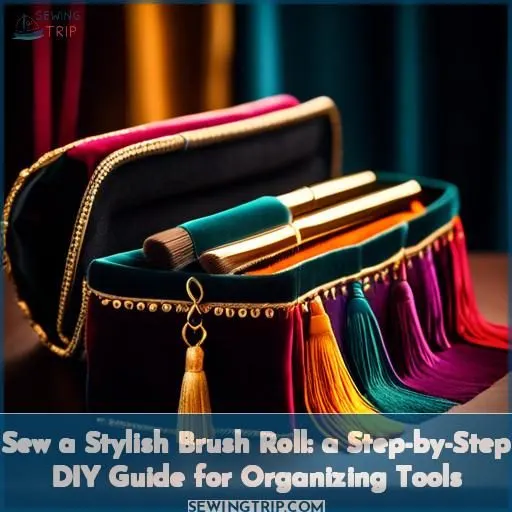
To sew a stylish brush roll, start by selecting canvas, denim, or sailcloth fabric. Cut the fabric to your desired dimensions and iron it before assembling.
Align the lining and outer fabric with right sides touching, then pin them together around the edge. Insert ties midway up to secure your brushes.
Mark pocket dividers on the fabric, then sew the pocket down along the edges and dividers. Top stitch around the outer edge and sew on decorative elastic for closure.
Adjust the thread tension for a perfect finish. By following these steps, you’ll create a personalized brush roll to keep your tools organized and accessible.
Table Of Contents
Key Takeaways
- Choose sturdy fabrics like canvas, denim, or sailcloth for the brush roll.
- Use interfacing and ties to provide structure and secure brushes.
- Consider the thickness, texture, and rolling properties of the fabric.
- Press fabric pieces before sewing for a crisp, professional finish.
How to Sew a Brush Roll?
To sew a brush roll, you’ll need to select fabrics, cut them to size, and stitch them together with spaces for brushes, as detailed in various DIY guides. This project is a creative way to organize and protect your brushes or pencils.
Choosing Your Materials
When sewing a brush roll, you’ll want to choose from several fabric options like canvas, denim, or sailcloth. Don’t forget to include interfacing and ties – these materials will provide structure and a way to secure your brushes.
Fabric Options
Regarding the selection of the ideal fabric for your brush roll, there are various choices to ponder. For a robust and long-lasting choice, consider canvas or denim. If you seek a less weighty fabric, sailcloth may be the preferred option.
Bear in mind to reflect on the thickness, texture, and hue of your fabric. Furthermore, don’t overlook the factor of rolling up! Opt for a fabric that can withstand the task while remaining manageable.
Interfacing and Ties
Regarding the creation of a brush roll, multiple interfacing options and tie materials are available for consideration. Interfacing is a fabric used on the reverse side of fabrics to enhance rigidity. It can be employed to stiffen or increase the body of fabric, such as in shirt collars. For the brush roll, various materials can be used for the ties, including narrow twill tape, ribbon, cord, or other materials that align with your preferences.
Tie placement and length are crucial factors to take into account. Ties can be positioned halfway up the brush roll and should be of sufficient length to secure the roll when tied. The width of the ties must also be considered to avoid excessive bulkiness and interference with the brush slots. Additionally, elastic can be used, which can be folded and sewn into the lining to achieve a snug fit.
For the brush roll itself, various fabrics can be used, such as canvas, denim, or sail cloth, depending on your preference and the desired weight and texture. You may also opt to use interfacing to increase the body of the fabric.
Cutting and Preparing Fabric
To create the brush roll, start by cutting the fabric to the specified dimensions. Be sure to iron the fabric before assembling to guarantee crisp edges and a professional finish.
Dimensions and Shapes
To craft an elegant brush roll, it’s crucial to ponder the proportions and contours of your fabric cuts. For the primary framework, you’ll require two oblongs: one measuring 40 inches by 23 inches, and the other 14 inches by 23 inches. These dimensions will guarantee that your brush roll has ample space to hold multiple brushes, instruments, and other slender, upright items. Additionally, you’ll need fabric for the pouch, which should measure 5.5 inches by 17 inches.
When selecting your material, contemplate employing canvas, denim, or sailcloth for the outer layer. These fabrics offer resilience and can endure the rigors of transporting brushes and various tools. For the lining, a more lightweight fabric such as cotton is suitable.
The design of the pouch is equally important. You’ll strive to create a capacious pouch segmented into six smaller compartments to facilitate finding and organizing your brushes. To achieve this, you’ll need to delineate the pocket partitions and stitch the pouch along its edges and dividers.
Never neglect to iron your fabric pieces prior to sewing to achieve a crisp, professional-looking finish. This meticulous step will culminate in a stylish and functional brush roll that can accommodate a diverse array of creative implements.
Pressing Fabric
Pressing fabric is a key step in sewing, and it’s important to grasp the process for a successful brush roll project. Here’s a step-by-step guide on how to press your fabric:
- Press the seam flat: Begin by pressing the seam flat with a hot iron. This step fixes the stitches in place and helps prevent distortion.
- Finger press: Next, gently open up the seam and press it back to create a crease. This step creases the fabric in the right direction without applying heat or steam, which can cause stretching.
- Press with the iron: Depending on your pattern, you may need to press the seam in a specific direction. For instance, when pressing a seam, the seam allowance might point toward the dark fabric to prevent shading.
- Pressing corners: To press corners, fold the fabric to the desired angle and press with the iron. Be cautious not to burn the fabric.
- Pressing darts: When pressing darts, they’re usually pressed upwards to make them less noticeable from the outside.
- Pressing pleats: For pleats, press them open to create a crease in the fabric.
Sewing the Main Structure
Line up the lining and outer fabric with their right sides touching. Carefully pin the layers together around the edge, making sure to sandwich the ties midway up.
Aligning Fabrics
Once you’ve picked your fabric, it’s like choosing a dance partner for the grand ball. Make sure your fabric alignment is perfect, like two peas in a pod. If you’re using interfacing, it’s the magic ingredient that gives your project the support it needs. Remember, the fabric choice sets the scene, but it’s the harmony between layers that truly sings.
Inserting Ties
To insert ties into your sewing project, follow these steps:
- Tie Placement: Decide where you want the ties to be placed. They’re typically placed at the halfway point of the roll.
- Tie Length: Measure the length of the ties you want. They should be long enough to wrap around the roll and secure it.
- Tie Width: Determine the width of the ties. They should be narrow enough to not interfere with the brushes or other items stored in the roll.
- Tie Material: Choose the material for your ties. They can be made from ribbon, cord, or other suitable materials.
To insert the ties, follow these steps:
- Fold the Ties: Fold the ties in half lengthwise, wrong sides together. Press to crease.
- Unfold the Ties: Unfold the ties and fold the edges in so they meet in the center. Press again.
- Fold the Ties: Fold the tie strip in half; press.
- Stitch the Ties: Stitch close to the open edge of each tie strip.
Remember to pin the ties in place before sewing them onto the roll. This will make sure that they’re securely attached and won’t move around during the sewing process.
Creating and Attaching the Pocket
Once you’ve sewn the main structure, it’s time to create the pocket dividers and attach them to the base. Mark the pocket dividers on the fabric, then sew the pocket down along the edges and dividers to secure it in place.
Marking Dividers
To mark the dividers for your brush roll, you’ll first need to decide on the placement and spacing of your pockets. Consider the size of the brushes you want to store and the overall design of your roll. For example, you might choose to have two larger pockets for larger brushes, eight smaller pockets for smaller brushes, and two pockets for a small mirror and products.
Once you’ve determined the pocket placement, you can use a fabric marking pen to draw vertical lines on the fabric, indicating where the pockets will be sewn. These lines should be evenly spaced to create a balanced and organized design.
For a more personalized touch, you can also consider adding an applique design to the fabric before marking the dividers. This could involve cutting fabric shapes or using printed fabric scraps, which can be fused to the fabric using Heat-n-Bond.
Remember to choose a fabric that contrasts well with the background color for better visibility of the pocket lines. This will help make sure that your brush roll is both functional and visually appealing.
Sewing Pocket to Base
To sew the pocket to the base, you’ll need to follow these steps:
- Pin the Pocket to the Base: Line up the pocket with the base, making sure the pocket depth, height, and spacing are correct. Pin the pocket to the base, making sure the pocket shape aligns with the desired design.
- Sew the Pocket to the Base: Using a 1/4 inch seam allowance, sew around the pocket, leaving the top open. Be careful not to sew the top of the pocket. Backstitch at the corners to reinforce the pocket.
- Press the Pocket: Press the pocket to make sure the seams are flat and the pocket lies smoothly against the base.
- Add Decorative Elements: If desired, add decorative elements such as applique, embroidery, or stamping to the pocket.
- Finish the Pocket: Fold the top edge of the pocket down and sew it to the base, creating a neat finish.
Remember to adjust the pocket dimensions and shape to suit your specific project requirements.
Adding Decorative Elements
You can add a decorative element to your brush roll by using applique techniques or trying other decoration options. Fuse a printed fabric scrap or cut fabric shapes to the exterior using Heat-n-Bond, or explore embroidery, stamping, stenciling, and trims to personalize your creation.
Applique Techniques
Applique is a fun and creative way to add personalization to your brush roll. Here are three techniques to get you started:
- Applique Placement: Choose where you want your applique to go. Consider the size and shape of your design, as well as the placement on the brush roll.
- Heat-n-Bond Alternatives: If you don’t have Heat-n-Bond, you can use other adhesives or even hand-stitch your applique in place.
- Fabric Scraps and Decorative Embellishments: Use scraps of fabric or other decorative embellishments to create your applique. Be creative and let your personal style shine through.
Other Decoration Options
After mastering applique with Heat’n’Bond, why limit yourself? Explore the wealth of your fabric collection. Printed fabric isn’t solely for quilts; it can inject a touch of individuality into your brush roll.
Cut fabric pieces, from stars to spirals, adhere them, and witness your project transform. It’s akin to providing your tools with a chic abode that they never realized they required.
Finishing Touches
Finally, you’ll top stitch around the entire outer edge to give your brush roll a polished look. Then, sew on some decorative elastic to create a handy closure for your newly crafted organizational tool.
Top Stitching
To achieve a perfect top stitch, consider the following tips:
- Needle Size: Choose a needle size that suits your fabric and thread. A larger needle may be necessary for thicker threads or heavier fabrics.
- Top Thread Tension: Adjust the top thread tension to balance the tug of war between the top and bottom threads. A higher tension will result in tighter stitches, while a lower tension will produce looser stitches.
- Stitch Length: The length of your stitches can affect the overall appearance of your topstitch. Shorter stitches may be more visible, while longer stitches may blend in better with your fabric.
- Bobbin Thread Type: Use a bobbin thread that complements your topstitch thread. A smooth bobbin thread can help prevent tension issues and create a more balanced stitch.
- Top Stitch Color: Match the color of your topstitch thread to your project for a cohesive look. If you’re using a contrasting color, consider the effect it will have on your finished piece.
Adding Elastic Closure
To add elastic closure to your brush roll, follow these steps:
- Choose the right needle: Use a ballpoint needle for knits to avoid damaging the fabric.
- Adjust lower thread tension: Decrease the tension of the lower thread to make your seams more elastic.
- Reduce foot pressure: Lower the foot pressure if your machine allows it to prevent the fabric from stretching and warping.
- Wind elastic thread on the bobbin: Hand wind the elastic thread on the bobbin with tension to guarantee proper elasticity.
- Sew the elastic: Sew the elastic to the fabric using a 3-step zigzag seam or a narrow zigzag stitch.
Remember to match the elastic tension, placement, type, width, and color to your project for the best results.
Frequently Asked Questions (FAQs)
What type of fabric is best for a brush roll?
For a brush roll, sturdy fabrics like canvas, denim, or sailcloth work best. They’re durable, can hold their shape, and won’t sag under the weight of your paintbrushes. Pick the material that fits your aesthetic and budget.
Can I use a different pattern for the brush roll pocket?
The beauty of sewing is its flexibility. Feel free to experiment with different pocket patterns that suit your needs and preferences. The possibilities are endless, so have fun with it!
How do I attach the pocket to the brush roll?
Once you have the pocket fabric all prepped, simply place it onto the interior fabric, aligning the raw edges. Stitch it in place along the top to secure the pocket. Easy peasy!
What type of batting should I use for the brush roll?
For a plush, supportive brush roll, opt for cotton batting. Its soft, cloud-like texture will cradle your brushes snugly, ensuring their tips stay pristine. Trust me, this extra touch makes all the difference.
Can I add additional pockets or compartments to the brush roll?
You can easily add more pockets or compartments to your brush roll to suit your specific needs. Just adjust the dimensions and sewing lines to accommodate the extra storage space. Get creative and make it your own!
Conclusion
With your new brush roll, you’ll be the envy of all your crafting friends. Simply grab your essential brushes and go, thanks to the custom storage pockets and secure closure.
By following this step-by-step guide, you’ve created a personalized brush roll that keeps your tools organized and accessible, making your artistic process a breeze.
Now that you know how to sew a brush roll, you can store your brushes and accessories in style.

