This site is supported by our readers. We may earn a commission, at no cost to you, if you purchase through links.

Start by cutting your vinyl pieces and zipper to size. Use a walking foot on your sewing machine to prevent the vinyl from sticking.
Pin the zipper face-down on your vinyl’s right side, then stitch close to the zipper teeth. Attach the second vinyl piece the same way.
Sew the sides together with a 1/4-inch seam allowance, keeping the zipper partially open for turning. Trim corners and turn right side out.
The trick is working slowly and using the right needle. Your choice of vinyl weight makes all the difference.
Table Of Contents
- Key Takeaways
- Sewing a Clear Vinyl Pouch: Step-by-Step Guide
- Supplies Needed for Sewing a Clear Vinyl Pouch
- Choosing The Right Weight of Vinyl for Your Pouch
- Where to Find Clear Vinyl for Sewing Pouches
- Tips for Storing Clear Vinyl to Prevent Creases
- Can You Iron Clear Vinyl? Best Practices for Pressing
- How to Sew a Zipper Onto The Clear Vinyl Pouch
- Sewing The Sides of The Clear Vinyl Pouch
- Adding Decorative Elements: Glitter or Confetti
- Finishing Touches: Turning The Pouch Right Side Out
- Frequently Asked Questions (FAQs)
- Conclusion
Key Takeaways
- You’ll need a walking foot or Teflon foot on your sewing machine to prevent vinyl from sticking, and use wonder clips instead of pins to avoid permanent holes in the material.
- Choose 8-12 gauge vinyl for the best balance of durability and sewing ease – it’s thick enough for protection but won’t fight your machine like heavier weights.
- Keep your zipper partially open while sewing the side seams so you can turn the pouch right side out, and use a 3/8-inch seam allowance for strong, lasting seams.
- Store your vinyl rolled around cardboard tubes in a cool, dry place between 59-95°F to prevent creases and warping that’ll ruin your project before you start.
Sewing a Clear Vinyl Pouch: Step-by-Step Guide
Creating your own clear vinyl pouch opens up endless vinyl pouch uses, from organizing makeup to storing craft supplies.
This vinyl pouch tutorial will guide you through each step, making the clear pouch diy process surprisingly simple. You’ll learn how to sew vinyl effectively, master essential vinyl sewing tips, and discover seam finishing options that guarantee durability.
Remember to evaluate appropriate thread choices for lasting seams.
We’ll explore alternative closures beyond basic zippers, handle/strap additions for portability, and custom size variations to fit your needs perfectly. Ready to transform ordinary materials into something extraordinary?
Supplies Needed for Sewing a Clear Vinyl Pouch
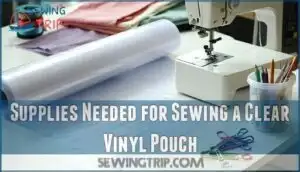
Your sewing supplies arsenal makes all the difference when crafting a vinyl pouch. Getting the right materials sets you up for success from the start.
Success starts with smart supply choices—gather the right tools and watch your vinyl pouch dreams come to life.
Here’s what you’ll need to sew clear vinyl like a pro:
- Clear vinyl (10-gauge works great for beginners)
- Zipper that’s 3 inches longer than your pouch width
- Sewing machine with a Teflon or walking foot
- Wonder clips instead of pins to avoid holes
Don’t forget cotton fabric for backing and basic sewing supplies.
Proper storage involves rolling vinyl prevents creases. Your presser foot choices matter too – vinyl can stick without the right one.
Choosing The Right Weight of Vinyl for Your Pouch
Now that you’ve gathered your supplies, selecting the right vinyl weight makes all the difference in your pouch’s success. Think of vinyl thickness like choosing between a flimsy plastic bag and a sturdy lunch box – each serves its purpose.
Gauge vs. Thickness works backwards: lower numbers mean thinner material. Here’s your breakdown:
- Light Weight (4-6 gauge) – Perfect for beginners learning to sew clear vinyl. These thin sheets glide through your machine easily but offer basic protection.
- Medium Weight (8-12 gauge) – The sweet spot for most projects. This vinyl thickness balances durability needs with sewing ease, making it ideal for cosmetic pouches and everyday storage.
- Heavy Weight (16-20 gauge) – Choose this when your project type demands serious protection. Though tougher to sew, it creates professional-grade pouches.
Consider cost comparison too – heavier vinyl costs more but lasts longer. For ideal results, consider using a Teflon sewing foot to reduce friction when sewing vinyl. Match your vinyl weight to your intended use for best results.
Where to Find Clear Vinyl for Sewing Pouches
You’ll find clear vinyl at local fabric stores like Joann’s, where you can feel the material before buying.
Online vinyl retailers offer wider gauge availability and color variations, perfect for specific project needs. Craft stores stock vinyl pouch supplies alongside other materials you’ll need.
Many vinyl fabric suppliers provide bulk purchasing options if you’re planning multiple projects. Amazon and Etsy feature specialized vendors selling pre-cut vinyl specifically for sewing.
For heavy-duty applications, consider using 12 gauge vinyl. To prevent permanent holes, use clips instead.
Check both physical and online stores to compare prices and find the perfect vinyl fabric for your pouch project, ensuring you have the right material for your specific project needs.
Tips for Storing Clear Vinyl to Prevent Creases
Beyond the excitement of starting your vinyl pouch project, proper storage keeps your clear vinyl smooth and ready for crafting.
Temperature control matters—store your material between 59-95°F away from heating vents and avoid sunlight exposure to prevent warping.
Here’s your vinyl storage game plan:
- Rolling vs. Folding: Always roll your vinyl around cardboard tubes instead of folding to prevent permanent creases
- Support Structures: Use poster tubes or paper cores to maintain shape during long-term storage
- Vertical Position: Store rolled vinyl upright like wrapping paper to minimize pressure
- Climate Control: Keep humidity between 40-50% in well-ventilated areas
- Regular Inspection: Unroll periodically to check for damage and let material relax
To further protect your vinyl, consider using acid-free tissue paper when rolling it for storage.
Can You Iron Clear Vinyl? Best Practices for Pressing
Your vinyl’s looking a bit wrinkled after storage? You can iron clear vinyl, but it’s like handling a delicate flower.
Set your iron to its lowest heat setting and grab a pressing cloth – this protective barrier prevents direct contact that could melt or warp your material. Heat sensitivity makes vinyl tricky, so keep that iron moving and apply gentle pressure.
Skip the steam setting entirely. For stubborn wrinkles, try hanging your vinyl in a steamy bathroom or using a hairdryer on low heat instead.
To prevent future creases, consider proper storage techniques, and always handle your vinyl with care to avoid wrinkles.
How to Sew a Zipper Onto The Clear Vinyl Pouch
Attaching the zipper to your clear vinyl pouch requires precision and the right technique. You’ll want to position the zipper face-down against the vinyl’s right side, maintaining proper vinyl zipper alignment from edge to edge.
The key is preventing vinyl puckering while maintaining smooth, even stitches.
Here’s your essential checklist for zipper sewing success:
- Use a zipper foot – This specialized foot lets you stitch close to the zipper teeth without hitting them, guaranteeing professional results every time.
- Select proper zipper length – Choose a zipper that’s 3 inches longer than your pouch width to allow for easy handling and trimming.
- Secure zipper ends – Use clips or tape to hold everything in place since pins will leave permanent holes in your vinyl.
Keep your zipper partially open while sewing to navigate around the pull tab smoothly.
For more complex projects, consider exploring zipper installation techniques to guarantee a professional finish.
Sewing The Sides of The Clear Vinyl Pouch
Once you’ve attached the zipper, it’s time to tackle the side seams of your clear vinyl pouch. Start by aligning your vinyl pieces with right sides together, ensuring the zipper stays partially open – this prevents you from sewing yourself into a corner later.
Use a 3/8-inch seam allowance for durable seams that won’t pull apart with use. Here’s where things get tricky: avoiding sticking becomes vital when your sewing machine vinyl starts grabbing the presser foot.
Place tissue paper between the vinyl and foot, or use a Teflon foot to glide smoothly. Sew slowly and steadily, backstitching at the beginning and end for strength.
The real magic happens with corner boxing – align the bottom seam with the side seam, creating a triangle. Sew across this triangle about 1.5 inches from the point. This transforms your flat pouch into a three-dimensional wonder with proper edge finishing.
For smoother results, consider specialized presser feet.
Adding Decorative Elements: Glitter or Confetti
Adding sparkle to your clear vinyl pouch transforms it from ordinary to extraordinary.
Before closing that final corner, you’ll want to sprinkle your chosen decorative elements between the vinyl layers. Lighter-weight vinyl (8-12 gauge) works best for this technique, creating stunning layering effects without bulk. A good choice is PVA glue dries clear, making it suitable for various fabrics and forgiving of mistakes.
Here’s what makes hearts flutter when adding these magical touches:
- Confetti types like stars, hearts, or geometric shapes create personalized themes
- Glitter adhesion stays put when you seal edges properly during construction
- Color combinations can match seasons, holidays, or your favorite aesthetic
- Secure closure prevents spillage while showcasing your creative flair
- Clear bag making becomes addictive once you master this sparkling technique
Finishing Touches: Turning The Pouch Right Side Out
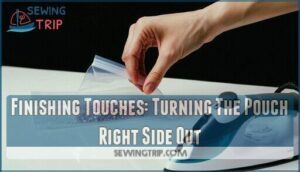
After securing your glitter or confetti, it’s time to complete the final corner and flip your vinyl pouch to reveal the finished product. This step transforms your inside-out creation into a professional-looking accessory.
Transform your inside-out creation into a stunning, professional-grade accessory with this magical final step.
Start by creating the last boxed corner using the same technique as before. Align the seam to the center and sew with a 3/8" seam allowance. Once all corners are secured, carefully turn your pouch right-side out through the zipper opening. An essential step involves using safety pins to aid in turning the fabric.
| Step | Tool Selection | Technique |
|---|---|---|
| Corner Shaping | Turning tool or chopstick | Gentle pressure outward |
| Seam Pressing | Low-heat iron with cloth | Light, even strokes |
| Vinyl Care | Soft brush | Remove dust particles |
| Final Check | Good lighting | Inspect all seams |
Use a turning tool to push out each corner completely. The clear vinyl will show every detail, so take your time with seam pressing for that crisp, professional finish. It is crucial to be meticulous in this step to achieve a high-quality result, ensuring your pouch looks like a professional-looking accessory with finished product quality.
Frequently Asked Questions (FAQs)
What needle type works best for vinyl sewing?
Don’t worry about regular needles failing—they actually work fine for lighter vinyl.
Use a heavy-duty or leather needle for thick vinyl to prevent skipped stitches and punctures that’ll ruin your project.
How do you prevent vinyl from sticking while sewing?
You’ll want to use a Teflon or walking foot on your machine.
Alternatively, tape the presser foot, place tissue paper between layers, or apply a drop of sewing oil to prevent that frustrating sticking.
Can you wash a clear vinyl pouch safely?
Like caring for a treasured keepsake, you can gently hand-wash your clear vinyl pouch with mild soap and lukewarm water.
Don’t use hot water or harsh chemicals—they’ll damage the vinyl and make it cloudy or brittle.
What stitch length should you use for vinyl?
Use a 0mm stitch length when sewing vinyl to prevent tearing and guarantee smooth stitching.
This longer stitch accommodates vinyl’s thickness better than standard settings, creating stronger, more durable seams that won’t pull apart.
How do you repair tears in vinyl pouches?
Apply clear vinyl patches or fabric glue over small tears.
For larger rips, sew a decorative fabric patch over the damaged area.
You can also use iron-on vinyl repair tape for quick fixes.
Conclusion
Mastering the art of creating transparent storage solutions transforms simple materials into practical treasures.
You’ve conquered the challenging dance between vinyl and machine, learned to tame stubborn zippers, and discovered the secrets of professional-looking seams.
Your newfound skills in how to sew a clear vinyl pouch will serve you well for organizing makeup, travel essentials, or craft supplies.
With practice, you’ll craft pouches that rival store-bought versions while saving money and expressing your creativity.
You will be able to make pouches that are useful for various purposes, such as organizing makeup, travel essentials, or craft supplies, and this will help you to save money.


