This site is supported by our readers. We may earn a commission, at no cost to you, if you purchase through links.

To sew a delightful felt chocolate chip cookie, start by gathering your materials – soft felt, scissors, needles, thread, and stuffing. Design your cookie by choosing vibrant colors for the base and realistic-looking chocolate chips.
Create circle patterns, then cut out the shapes, layering the felt for depth. Use overcast stitching and varied thread colors to add texture and visual interest to your chocolate chips. Arrange the chips artfully, then sew the cookie halves together.
Finish with plush stuffing for a delightfully dimensional result. Showcase your handcrafted cookie with creative display ideas – the possibilities for your homemade creation are endless.
Table Of Contents
Key Takeaways
- Choose felt or fabric for your cookie project, considering their durability, resistance to tearing, and anti-fraying properties.
- Use scissors and pins for cutting and pinning your patterns, ensuring precision and alignment.
- Select the appropriate needle and thread for your fabric weight and stitch style, considering factors like stitch size, density, and thread thickness.
- Stuff your cookie with soft and flexible filling materials, distributing them evenly for a harmonious appearance and desired firmness.
How to Sew a Cookie?
To sew a cookie, you can follow these steps:
- Choose your felt colors and gather your supplies, including thread, scissors, and a needle.
- Trace a cookie shape onto the felt using a permanent marker or freezer paper.
- Cut out the felt pieces, including a front panel and a back panel that’s larger than the front.
- Decorate the front panel with felt pieces for details like chocolate chips or sprinkles.
- Sew the front and back panels together using a blanket stitch around two-thirds of the cookie, leaving one side open for stuffing.
- Add polyfil stuffing to the cookie and sew the remaining side closed.
Remember to use a soft, flexible felt for your cookie, and consider using a sewing machine for larger cookies or a hand-sewing needle for smaller ones.
Gathering Materials
To create your own felt chocolate chip cookies, you’ll need a few essential materials. Choose from felt or fabric in your desired colors, along with scissors, pins, needles, thread, and stuffing for volume and shape.
Felt or Fabric Choices
Regarding the production of your chocolate chip cookie sewing project, you have various alternatives for your fundamental material. Felt and fabric are both widely used options, each offering distinct qualities and advantages.
Felt, a natural fiber, undergoes felting to form a non-woven fabric. Its durability, resistance to tearing, and anti-fraying properties make it suitable for sewing endeavors. Felt can originate from diverse materials like wool, fur, and synthetic fibers, and is available in an array of colors and thicknesses. For your cookie project, you may opt for a thicker felt to provide a solid foundation for your cookies.
Conversely, fabric, a woven material, can be composed of various fibers such as cotton, linen, or silk. Generally, it exhibits greater flexibility and breathability than felt, but it may unravel when cut or sewn. For your cookie project, you might choose a lightweight, breathable fabric to establish a softer, more malleable base.
Both felt and fabric possess their own characteristic textures and can be employed to craft a diverse range of patterns and designs. In selecting your fundamental material, take into account the desired appearance and texture for your chocolate chip cookies. Do you seek a more customary, felted aesthetic, or a lighter, more fluid fabric? The choice lies with you!
Scissors and Pins
When it comes to sewing, having the necessary tools is vital for achieving precise and efficient outcomes. Scissors and pins are two indispensable items that every sewer should possess in their kit. Let’s delve into the realm of cutting techniques and pinning strategies for your sewing endeavor.
Scissors
Scissors are your ally in terms of cutting out patterns and fabrics. Here are three suggestions to assist you in selecting the appropriate pair for your project:
- Type: Straight pins are the standard type of pin employed in sewing. They possess a diminutive head that can be readily extracted from the fabric and a keen point that can effortlessly pierce the fabric.
- Placement: Invariably pin through both layers of fabric to guarantee that they’re aligned correctly. This will aid in preventing puckering and non-uniform seams.
- Removal: Exercise caution when removing pins from the fabric to avert harm to the fabric or yourself. Invariably remove pins from the fabric prior to washing or ironing.
By bearing these tips in mind, you’ll be well on your way to mastering the craft of sewing. Happy crafting!
Needle and Thread Selection
Essential to sewing chocolate chip cookies are the appropriate needle and thread. The needle gauge must correspond to the fabric weight, using a finer needle for delicate fabrics and a coarser one for sturdier ones.
The thread hue should harmonize with the cookie’s design, while the stitch size and density should suit the fabric and stitch style. For instance, a compact stitch size is advised for st■ toys to avoid seam ruptures.
Furthermore, the thread thickness should align with the sewn material, with heavier fabrics requiring thicker threads.
Stuffing for Volume
In the realm of crafting felt chocolate chip cookies, the appropriate filling materials and methods are essential for attaining the intended volume and texture. Here are four key elements that deserve attention:
- Filling Materials: Opt for soft and flexible filling materials that can be easily handled and maintain their form. Polyester fiber fill is a widely used choice due to its lightness and ability to provide a pleasant cushioning effect for felt creations.
- Filling Techniques: To incorporate filling into your felt cookie, begin by partially sewing around its edges using an edge stitch such as blanket stitch, which helps confine the filling. Subsequently, gently insert small amounts of filling into the cookie, avoiding any damage to the stitching.
- Filling Placement: Distribute the filling evenly throughout the cookie, ensuring that all nooks and crannies are filled for a harmonious and consistent appearance.
- Filling Firmness: The firmness of the filling should be determined based on the desired consistency of the cookie. Softer filling will yield a more pliable cookie, while firmer filling will create a more rigid texture.
Regarding aesthetics, the selection of filling materials can also impact the overall look of your felt chocolate chip cookies. For instance, employing natural fibers such as cotton or wool can impart a more organic and earthy ambiance to your cookies, while synthetic fibers may provide a smoother and more uniform appearance.
Designing Your Cookie
Decide on the color palette for your cookie and chocolate chips. Choose felt or fabric hues that complement each other and create a visually appealing design.
Once you’ve picked your colors, sketch out a simple pattern to guide your cutting and assembly process. Keep the design uncomplicated to showcase the textures and stitching.
Choosing Cookie and Chip Colors
Immerse yourself in your fabric stash with an artist’s perspective, seeking color inspiration that’ll enchant your felt cookies into edible masterpieces. Combine and contrast hues for authentic shading, and embrace vibrant color combinations. Explore fabric textures for an enchanting touch. Seasonal themes? Embrace them—transform those chips into autumn’s hues or spring’s blossoming pastels!
Pattern Creation Tips
Designing your chocolate chip cookie pattern is a critical step to achieving a flawless and aesthetically pleasing final product. Here are three tips to help you create an ideal pattern:
- Choose the appropriate pattern size: Make sure your pattern is large enough to fit the desired number of chocolate chips without reducing the overall size of the cookie.
- Select the ideal pattern shape: Opt for a basic, round shape for the cookie base and smaller circles for the chocolate chips. This will simplify and enhance the sewing process.
- Transfer and trace the pattern: Use pins to secure the pattern onto your felt or fabric, then carefully cut around the edges to minimize material waste. Cut small circles into halves or thirds for added realism.
Preparing the Pattern
Start by printing out circle patterns for the cookie base and chocolate chips. Then, use efficient cutting techniques to maximize the amount of felt or fabric you can use when crafting your delightful treats.
Printing Circle Patterns
Printing circle patterns is a key step in creating your felt chocolate chip cookies. It’s important to make sure pattern accuracy, efficiency, and customization for the best results. Here’s a 3×3 table to guide you through the process:
| Step | Description | Tips |
|---|---|---|
| 1 | Choose a pattern or create your own | Use a circle cutter for precise circles |
| 2 | Print the pattern on freezer paper or cardstock | Iron it onto the felt for better accuracy |
| 3 | Cut along the template lines | Be careful not to cut too close to the edge |
| 4 | Trace the pattern onto the felt | Use a permanent marker or tailor’s pencil |
| 5 | Cut out the felt circles | Pin patterns onto the felt before cutting |
| 6 | Print multiple patterns for each color | This will save time in the long run |
| 7 | Store patterns in a protective album | This will keep them organized and safe |
| 8 | Share patterns with others | You can share your patterns with friends or online |
| 9 | Trace patterns onto freezer paper | This can be a quicker alternative to printing |
| 10 | Edit the horizontal and vertical heights | Adjust the dimensions based on your usage |
Cutting Techniques for Efficiency
To efficiently cut patterns for your felt chocolate chip cookies, there are several time-saving tips you can follow. First, use a rotary cutter for a cleaner cut edge and to save time. For curves, try a small rotary cutter with a 28mm blade for smooth curves and no jagged edges.
Additionally, stack your main and lining fabrics and cut them both out at once to halve the time taken. If you’re making more than one garment, cut two at once to double your work done in one cut.
Finally, plan your seams and mark your stitch lines while laying out your pattern to guarantee accurate stitching. These tips will help you cut patterns quickly and efficiently, allowing you to focus more on the sewing process.
Cutting Out Shapes
Begin by cutting out your large cookie base circles from the felt or fabric. Once you have the main cookie pieces, move on to cutting the smaller circles that will become the chocolate chips.
Large Circles for Cookie Base
When creating a felt chocolate chip cookie, the size of the cookie base is vital for a realistic appearance. The base shape should be large enough to accommodate the sewn-on chocolate chips, which are typically cut into halves or thirds for added realism. To achieve this, you can use a large circle template or pattern, ensuring that it’s the desired size for your cookie.
Here are some tips for creating a large circle for your cookie base:
- Felt selection: Choose a soft and pliable felt that will allow for easy sewing and shaping. You can use a variety of colors for your cookie base, but a neutral color like brown or beige is often recommended for a classic look.
- Base shape: To create a large circle, you can use a circular template or pattern, such as a plate or a round object with a diameter of the desired size. Trace the circle onto the felt using a permanent marker or tailor’s pencil.
- Layering techniques: If you want to add more depth and dimension to your cookie, you can layer the felt by cutting out two large circles and sewing them together. This will create a thicker base for your chocolate chips to adhere to.
- Realistic chips: When cutting out the chocolate chips, you can cut them into halves or thirds to make them look more realistic. This will give the appearance of smaller, more irregularly shaped chocolate pieces.
Small Circles for Chocolate Chips
Once you’ve got your cookie base cut out, it’s time to give life to those chocolate chips. Think about chip size and shape—halves or thirds of small circles add that bite of realism. As for chip color, pick a hue that screams chocolatey goodness.
Get creative with chip placement; scatter them like stars in a cookie galaxy, ensuring each bite looks irresistibly real.
Adding Realism to Chips
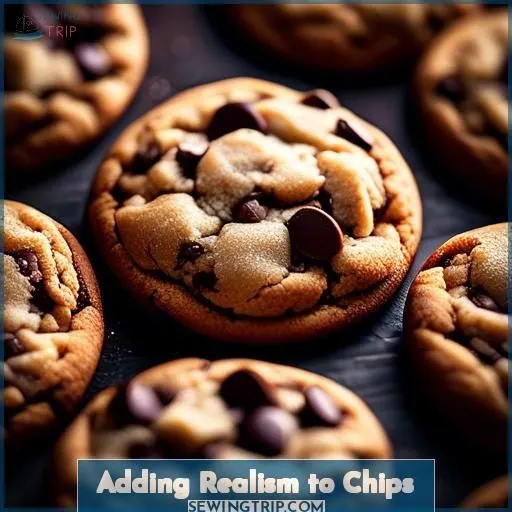
To add realism to your chocolate chip cookies, consider these four techniques:
- Chip size variation: Vary the size of your chocolate chips to mimic real-life cookies. This adds depth and texture to your creation.
- Chip color variation: Mix and match shades of brown for your chips to create a more authentic appearance. Darker chips can represent melted chocolate, while lighter ones can represent unbaked dough.
- Chip placement: Arrange your chips in a way that resembles how they’d be distributed on a real cookie. This can include clustering chips together or scattering them evenly.
- Chip attachment techniques: Experiment with different stitching methods to secure your chips to the cookie base. Overcast stitching can create a realistic texture, while using a variety of thread colors can add visual interest.
Attaching Chocolate Chips
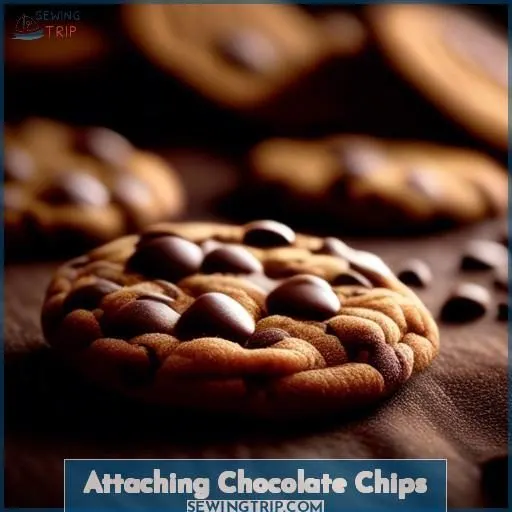
To add the chocolate chips to your felt cookie, use the overcast stitch. Creatively arrange the chips on the cookie base, overlapping them in a visually appealing way.
Overcast Stitch Method
To attach chocolate chips to your cookie base using the overcast stitch method, start by choosing a thread color that complements your cookie and chip colors. Select a needle size appropriate for your fabric thickness.
Begin sewing the chocolate chips onto one side of the large circle, using the overcast stitch. Continue sewing until you reach the desired amount of chips.
Arrange the chips creatively for a more visually appealing cookie.
Arranging Chips Creatively
To create a realistic chocolate chip cookie, consider the placement patterns of your chips. You can arrange them in a crumbly texture to mimic the sensory experience of biting into a freshly baked cookie.
Experiment with fabric variations to achieve different effects, such as a gingerbread decal style or a more rustic, homemade look.
Sewing Cookie Halves
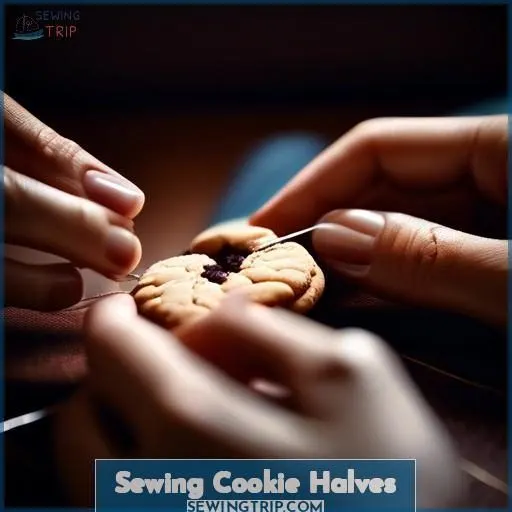
To sew your cookie halves together, it’s essential to carefully align the edges. Then, choose a robust stitch type that will secure the cookie and prevent it from unraveling.
Aligning Edges
After precisely adhering your chocolate chips, it’s time to animate your cookie by aligning its perimeters. Here’s how:
- Unite the halves, ensuring the centered chocolate chips are facing outwards for that authentic texture.
- Carefully line up patterns, matching every curvature and angle.
- Opt for the optimal needle type for accuracy.
- Maintain consistent stitch spacing to keep those edges firm and orderly.
Voilà, your cookie is materializing!
Choosing Stitch Type
Regarding the stitching of your chocolate chip cookie halves, you possess an assortment of stitch varieties at your disposal. The overcast stitch is commonly employed for safeguarding the margins, while the blanket stitch imparts an ornamental flair.
For a seam of simplicity and fortitude, endeavor the whipstitch or backstitch. Should you desire a more uninterrupted line, the running stitch may be your ideal choice.
Experiment with these stitches to ascertain the one that aligns with your aesthetic preference and the desired appearance for your cookies.
Finishing Touches
To give your felt chocolate chip cookies a professional finish, consider the following sewing techniques and decorating ideas:
- Sewing Techniques: Overcast stitch is ideal for attaching chocolate chips to the cookie base. Experiment with different stitch types to find the one that suits your style best.
- Cookie Decorating: Personalize your cookies by choosing unique fabric colors for the cookie and chocolate chips. Create a cohesive look by selecting complementary shades.
- Chocolate Chip Placement: Arrange chocolate chips in a creative pattern, such as a spiral or concentric circles, to add visual interest to your cookies.
Presenting Your Cookie
Once you’ve carefully crafted your felt chocolate chip cookie, it’s time to get creative with how you present it. Consider whimsical display ideas and be sure to handle your cookie with care to preserve its charming details.
Creative Presentation Ideas
Once your chocolate chip cookies are complete, it’s time to showcase their visual appeal. Consider creative display options like arranging them on a tiered stand or in a clear jar.
For gifting, think about unique gift wrapping ideas, such as using a sewing patterned paper or a mini sewing machine box.
When storing your cookies, choose airtight containers or consider using fabric pouch storage solutions that mimic the texture of felt.
Care and Maintenance Tips
To keep your sewn felt chocolate chip cookies looking their best, follow these care and maintenance tips:
Gently hand wash the felt with a mild detergent and let it dry naturally.
For fabric maintenance, iron on low heat with a pressing cloth.
Use stitching techniques like overcast stitch for added durability.
Store the cookies in a cool, dry place away from direct sunlight.
Present your cookies on a pretty plate or in a cookie jar for a delightful display.
Frequently Asked Questions (FAQs)
Can I use gluten-free fabric for this project?
You can use gluten-free fabric for this project. It’ll give your cookies a unique, one-of-a-kind texture and make for a fun, creative twist. Don’t be afraid to experiment – that’s the best part of crafting!
Is it safe to use vintage thread?
As spry as a sewing grandma, you can absolutely use vintage thread – it’s a stitch in time! Just give it a gentle tug to test for strength. Your cookie creations will be a thread of sewing history.
How do I make my cookie scent last longer?
To make your cookie scent last longer, add a few drops of vanilla extract or essential oil to the dough before baking. The fragrance will linger, delighting your senses with every bite. Experiment for your ideal aroma!
Can LED lights be incorporated into the design?
Sure, LED lights can definitely liven up your cookie design! Just sew them in between the layers for an eye-catching, holiday-inspired touch. Get creative – the possibilities are endless when you add a bit of techie flair.
Are there vegan alternatives for the stuffing material?
Sure, you can use vegan-friendly polyester fiberfill or organic cotton stuffing as cruelty-free alternatives to traditional stuffing. These materials are just as soft and pliable for your cookie creations.
Conclusion
Amusing, isn’t it? Who would’ve expected that sewing a cookie could be so enthralling? But with your newly acquired abilities, the possibilities for your handmade felt chocolate chip cookies are boundless.
Exhibit your craftsmanship with innovative displays and bring joy to friends and family with these enchanting treats.
So, why delay? Gather your felt, thread, and needle, and let’s commence sewing that cookie!

