This site is supported by our readers. We may earn a commission, at no cost to you, if you purchase through links.
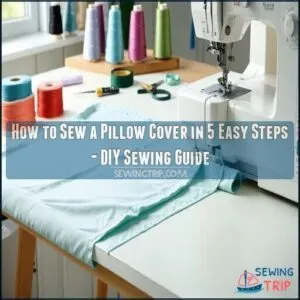
Cut two fabric pieces the same size, with right sides facing each other. Pin the edges, leaving a small opening for turning. Sew around the perimeter with a 1/2-inch seam, backstitch at the corners for strength.
Trim excess fabric, clip corners, and turn the cover right side out. Press the edges flat, then insert your pillow form through the opening. Smooth out any wrinkles, and you’re done!
Ready to take your sewing skills to the next level and work with a medium-weight fabric?
Table Of Contents
Key Takeaways
- You’ll nail your pillow cover by measuring your pillow form and adding 1 inch for seam allowance, ensuring a perfect fit every time.
- Select a medium-weight fabric like cotton that’ll hold its shape, and remember to pre-wash it to prevent future shrinkage and maintain the cover’s professional appearance.
- Master the basic sewing technique of pinning fabric right sides together, leaving a small opening for turning, and backstitch at corners for extra strength and durability.
- Your finished pillow cover will look professional when you trim excess fabric, clip corners, turn it right side out, press edges flat, and smoothly insert the pillow form through the opening.
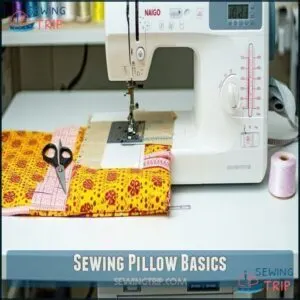
Sewing Pillow Basics
Ready to transform your plain pillows into custom masterpieces?
With just a few simple sewing techniques and some basic fabric know-how, you’ll be creating professional-looking pillow covers that’ll make your home decor pop in no time.
Choosing The Right Fabric
Diving into fabric selection, your pillow cover’s success starts with choosing the right material.
Choose fabrics that dance between durability and style, transforming your home with every stitch.
Cotton and linen offer durability and easy cleaning, perfect for homes with kids or pets.
Consider texture and color to complement your decor—smooth fabrics create a casual look, while textured options add depth.
A popular choice combines cotton and linen for enhanced properties.
Balance budget, style, and practicality when selecting your fabric pillow cover material.
Measuring and Calculating Fabric Dimensions
Ever wondered how to nail the perfect pillow cover dimensions?
Your fabric formula is key: multiply the pillow form’s size by two, add 2" for hems, and tack on 5" for that important overlap allowance.
This guarantees a snug fit that’ll make your DIY pillow cover look professionally custom, with just the right amount of give for your plump insert.
Preparing Fabric for Pillow Cover Sewing
Now that you’ve measured your pillow dimensions, it’s time to prep your fabric like a pro.
Before cutting, follow these key steps:
- Prewash your fabric to prevent future shrinkage
- Iron out wrinkles for precise grain alignment
- Confirm fabric’s straight grain to assure pattern placement accuracy
For superior results, think about high-quality cotton known for its durability.
Proper fabric preparation sets the stage for a flawless pillow cover that’ll make your DIY skills shine.
Sewing a Pillow Cover
Let’s transform that plain old pillow into a stunning DIY masterpiece with some strategic sewing skills! Sewing a pillow cover isn’t just a craft—it’s an art form that’ll elevate your home decor game.
| Tool | Purpose |
|---|---|
| Sewing Machine | Primary stitching |
| Fabric Scissors | Precise cutting |
| Pins | Fabric alignment |
When choosing your fabric, prioritize durability and washability. Pro tip: select a fabric weight that complements your pillow form. Start by laying out your materials—your sewing machine, fabric scissors, and chosen textile.
Make certain you’ve got a clean, flat workspace with good lighting. Remember, precision matters more than perfection. Before cutting, be sure to pre-wash the fabric to prevent shrinking after the pillow cover is sewn.
Whether you’re aiming for an envelope closure or a zippered finish, take your time and enjoy the process. Your handmade pillow cover will be a demonstration of your crafting prowess!
Creating Custom Pillow Covers
You’re about to transform simple fabric into a perfectly fitted pillow cover that’ll breathe new life into your living space.
Craft your perfect pillow cover—where creativity meets comfort, one stitch at a time.
By following a few key techniques for measuring, cutting, and sewing, you’ll create custom pillow covers that look professional and showcase your personal style.
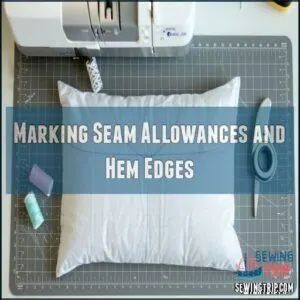
Marking Seam Allowances and Hem Edges
With precision as your sewing companion, marking seam allowances and hem edges transforms fabric into a professional-looking pillow cover.
Master these techniques to elevate your craft:
- Select crisp marking tools like fabric chalk or washable pencils
- Measure twice, mark carefully along cutting lines
- Use a ruler for straight, consistent seam allowances
- Press edges before marking to guarantee smooth hemming
Your attention to detail makes all the difference.
For accurate results, consider using a chalk hem marker.
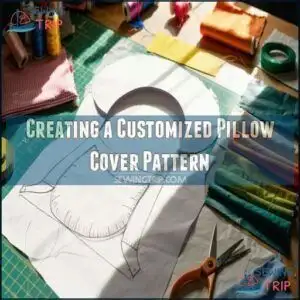
Creating a Customized Pillow Cover Pattern
After marking your seam allowances, it’s time to craft a custom pillow cover pattern that’ll make your DIY project shine.
Grab some paper and trace your pillow form’s outline, adding extra room for seams. Digital patterning tools can help, but a simple hand-drawn template works wonders for unique shapes and pattern alterations.
Consider exploring options for a unique pillow design for added personalization. Your personalized sewing pattern is taking shape!
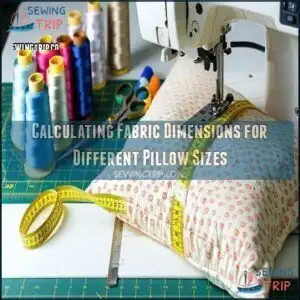
Calculating Fabric Dimensions for Different Pillow Sizes
After crafting your custom pattern, you’ll need smart size formulas for pillow form covers.
When calculating fabric dimensions, remember these key steps:
- Measure your pillow form’s exact width and length
- Add 1/2" seam allowance on all sides
- Include 5" overlap width for back panel stability
- Account for fabric shrinkage during pre-washing
- Create a snug fit by cutting slightly smaller than pillow form
Your diy pillow cover awaits!
Assembling Pillow Covers
You’re about to transform your plain fabric into a stylish pillow cover that’ll make your living space pop.
With just a few strategic folds, pins, and stitches, you’ll create a professional-looking envelope-style cover that fits snugly around your pillow form.
This process will help you achieve a stylish pillow cover with ease.
Creating Hemmed Edges and Seams
After wrestling with fabric edges, you’ll master hemming techniques that give your pillow cover a professional finish.
Seam finishes are your secret weapon for edge stability and durability.
For a professional finish, consider sewing fabric edges neatly.
Here’s a quick guide to help you nail those vital details:
| Technique | Purpose | Pro Tip |
|---|---|---|
| Quarter-inch Hem | Prevent Fraying | Iron before stitching |
| Backstitch | Secure Seams | Stop unraveling |
| Corner Snipping | Sharp Corners | Trim carefully |
| Press Seams | Crisp Finish | Use hot iron |
| Folded Edges | Clean Look | Fold twice |
Assembling Front and Back Panels
Now you’ll lay your front panel face up and place the back panels face down on top.
Align the edges carefully, ensuring a smooth panel connection.
Pin the fabric stack every three inches for stability, focusing on panel alignment and seam allowance.
Your sewing machine is about to transform these separate pieces into a cohesive pillow cover that’ll make your home pop with personality.
Sewing Seams and Corners
Now that your back panels are positioned, you’ll want to master those seams and corners like a pro.
Pin the perimeter every three inches for stability, then sew with a quarter-inch seam allowance.
Stop at corners, lift the presser foot, and rotate fabric for sharp turns.
Knowing the proper seam allowance is essential for accurate sewing.
Backstitch at the start to lock your seam and prevent unraveling – your pillow cover’s secret weapon, ensuring a professional finish with the right seam allowance.
Turning and Pressing The Cover
Now that you’ve sewn the seams, it’s time to transform your project.
Carefully turn the pillow cover right side out through the back opening, using a pointed tool to gently push out corners for sharp definition.
Press each edge and seam with a hot iron, smoothing out wrinkles and creating a crisp, professional finish that’ll make your DIY pillow cover look store-bought.
Finishing Pillow Covers
You’ve successfully crafted your pillow cover, and now it’s time to bring it to life with the perfect pillow form.
Press those seams, turn your cover right side out, and get ready to transform your handmade creation into a plump, professional-looking throw pillow.
That’ll make your space pop.
Inserting The Pillow Form
Once your seams are secure, it’s time to bring your pillow cover to life.
Carefully turn the cover right side out through the envelope closure or zipper opening. Gently push out the corners with your fingers to create crisp edges.
Now, slide your pillow form inside, making sure it fills every nook and cranny for that perfect, plump look.
Ensuring a Tight and Smooth Fit
After sliding your pillow form into the cover, you’ll want a snug fit that looks professionally fashioned.
Check the corner detailing and seam tension to verify smooth edges.
Gently stretch and adjust the fabric, smoothing out any wrinkles.
Your fabric choice and precise insert size make all the difference in creating a picture-perfect pillow cover that looks like it came straight from a high-end home decor store.
Troubleshooting Common Pillow Cover Issues
Battling pillow cover quirks can turn your DIY project into a smooth sailing adventure.
Here are some sewing troubleshooters to keep your covers looking sharp:
- Tackle seam puckering by adjusting thread tension and using a quality needle
- Prevent fabric slippage with Wonder Clips or careful pinning techniques
- Resolve uneven overlap by double-checking your initial measurements and cutting precision
To maintain good hygiene, consider that weekly pillowcase changes are generally recommended for a healthy sleep environment and to prevent the buildup of allergens and dust mites, ensuring your DIY project is not only aesthetically pleasing but also practical.
Creative Ideas and Variations
Your DIY pillow cover journey doesn’t end with the basics—it’s where creativity takes flight.
Step into a world of fabric embellishments and unique closures that’ll transform your home decor.
Check out these inspiring ideas:
| Technique | Materials | Challenge Level |
|---|---|---|
| Color-Blocking | Contrasting Fabrics | Intermediate |
| Piping Edges | Decorative Trim | Easy |
| Monogram | Embroidery Thread | Advanced |
| Waterproof Covers | Repurposed Jackets | Beginner |
Let your imagination stitch magic into every pillow!
Frequently Asked Questions (FAQs)
How do you sew a pillow cover?
Discover pillow magic with scissors and fabric!
You’ll cut panels, sew edges, create an envelope closure, then turn right-side out.
Press seams, slip in your insert, and voilà—a custom pillow cover that’ll make your space pop!
How long does it take to make a pillow cover?
You’ll need about 30-45 minutes to make a pillow cover, depending on your sewing skills.
Beginners might take longer, but practice makes perfect.
Grab your fabric, fire up the sewing machine, and you’ll be done in no time!
How do you make a throw pillow cover?
Grab your fabric, measure carefully, and cut two back panels and one front panel.
Sew the pieces together with a quarter-inch seam, creating an envelope closure.
Press, turn right side out, and slip in your pillow form.
What size fabric do I need for a pillow cover?
You’ll want fabric that’s 2 inches larger than your pillow form.
For a 16-inch pillow, cut 18-inch squares.
Follow the fabric formula: pillow size x 2 + 2 inches for hems, plus 5 inches for overlap.
How do you make 18 x 18 pillow covers?
Cut two 19" x 19" fabric squares, two 16" x 11" back panels.
Fold and press 1/4" hems on back panels.
Sew panels to front piece, right sides together, with a 1/4" seam allowance.
Turn and insert pillow form.
How do you put a pillow cover on a couch?
Slide your pillow cover over the insert like slipping on a cozy sweater.
Smooth out wrinkles, tuck corners neatly, and fluff gently to create an inviting, plump accent that transforms your couch’s look instantly.
What size to cut fabric for pillow forms?
Measure twice, choose wisely: for 16" pillows, you’ll want fabric cut to 17" x 39". Match your form’s size precisely—18" needs 19" x 43"—ensuring a snug, professional-looking pillow cover that’ll make your decor pop.
How to make your own pillow cover?
Grab your fabric and pillow form.
Pin two back panels to a front panel, creating an envelope closure.
Sew around the edges, turn right side out, and slip in your pillow for a snug, custom look.
What is the best stitch for a pillow cover?
In the context of stitching pillow covers, you’ll want to dance with a straight stitch on your sewing machine.
It’s sturdy, simple, and gives your cover that professional, crisp look you’re after.
What is the formula for envelope pillow cover?
You’ll want to multiply your pillow’s dimension by two, then add 2" for hems and 5" for overlap. So, an 18" pillow needs a 19" x 43" fabric piece to create a perfect envelope-style cover.
Conclusion
Wow, pillow cover sewing isn’t rocket science—it’s your ticket to home decor magic.
Now that you’ve mastered how to sew a cover for a pillow form, you’ll transform plain fabric into personalized comfort.
Practice makes perfect, so don’t sweat the small mistakes. With each cover you create, you’ll gain confidence and skill.
Whether you’re a beginner or a budding seamstress, these techniques will help you craft beautiful, professional-looking pillow covers that’ll make your space shine.

