This site is supported by our readers. We may earn a commission, at no cost to you, if you purchase through links.
 To sew a pillow cover by hand, grab fabric, a needle, thread, scissors, and pins.
Measure your pillow, adding an extra inch for seams. Cut two fabric pieces to size—one for the front and one for the back.
Pin them together with the right sides facing in. Use a simple running stitch to sew around three edges, leaving one side open.
Trim excess fabric at the corners, turn it right side out, and insert the pillow. Close the opening with a slip stitch for a clean finish. It’s simple, satisfying, and a great way to refresh your space—one stitch at a time!
Table Of Contents
- Key Takeaways
- Sewing Pillow Cover Basics
- Sewing a Pillow Cover by Hand
- Measuring Pillow Fabric
- Hand Sewing The Pillow Cover
- Finishing The Hand Sewn Pillow
- Stuffing The Pillow Form
- Hand Stitching The Opening Closed
- Inspecting The Pillow for Imperfections
- Adding Decorative Embellishments
- How Do You Sew a Pillowcase?
- How Do You Hand Sew a Pillow Closed?
- How Do You Make a Throw Pillow Cover?
- How to Sew The Pillow Cover?
- How Do You Sew a Pillow Cover?
- How to Sew a Pillow Cover by Hand?
- How Long Does It Take to Make a Pillow Cover?
- How Easy is It to Use a Pillow Cover?
- How to Sew a Pillowcase by Hand Step by Step?
- How to Stitch a Pillow Cover for Beginners?
- Frequently Asked Questions (FAQs)
- Conclusion
Key Takeaways
- Measure your pillow accurately, add a ½-inch seam allowance, and use sharp scissors for clean cuts.
- Use a basic running stitch to sew three sides, leaving an opening for turning the fabric right side out.
- Reinforce corners with extra stitches and use a ladder stitch or slip stitch to close the opening for a clean finish.
- Prewash fabric to prevent shrinking, and consider adding embellishments like tassels or embroidery for a personalized touch.
Sewing Pillow Cover Basics
Before you start sewing a pillow cover by hand, you’ll need a few basic supplies and tools to get the job done right.
Don’t worry, it’s simple—as long as you’ve got fabric, a needle, and some thread, you’re off to a great start with the basics!
Necessary Supplies for Sewing
Starting your hand-sewing journey requires the right tools — like a chef needing sharp knives and fresh ingredients.
For crafting pillow covers, gather these essentials:
- Sharp fabric scissors to cut clean, even shapes. No ragged edges here!
- A measuring tape to size everything accurately. Think of it as your sewing compass.
- Hand sewing needles in various sizes; the right one glides through fabric like butter.
- Quality thread that complements your fabric, ensuring durability and style.
- Fabric markers for marking guidelines and avoiding uneven seams.
- Thimbles to protect your fingers during long stitches.
- Pick pins or clips to secure fabric layers.
- Test thread types for smooth stitching.
To maintain precision, consider investing in exceptionally sharp models.
Essential Tools for Hand Sewing
You’re ready to hand sew your pillow! First, needle selection matters—grab sharp needles for cotton or ballpoints for knits.
A hand sewing needle set with various sizes keeps you prepared. Use matching thread types—polyester for stretch or cotton for soft fabrics.
Sharp fabric scissors are non-negotiable; don’t let dull blades ruin your cuts. Fabric markers let you draw crisp guidelines, easily removed later.
Pins, especially flat-head or safety pins, hold everything steady as you sew your pillow by hand. Save your fingers with a thimble—metal or plastic options work great.
Consider various needle types for different projects. With these tools, your hand sewing tutorial feels effortless!
Preparing The Fabric for Sewing
Fabric prep is key for pro-level results. Start with preshrinking—wash and dry your fabric to sidestep future shrinking mishaps. Then, smooth wrinkles with solid ironing techniques.
Follow these steps for foolproof prep:
- Grab your measuring tape, measure, and add a ½-inch seam allowance.
- Use a fabric marker to draw precise, visible cutting lines.
- Pair sharp fabric scissors with steady hands for clean, straight cuts.
- Align and secure edges with straight pins.
- Relax—a little patience goes a long way.
Perfect fabric prep makes stitching smoother and your project frustration-free! Think of it like setting the stage for a masterpiece.
Sewing a Pillow Cover by Hand
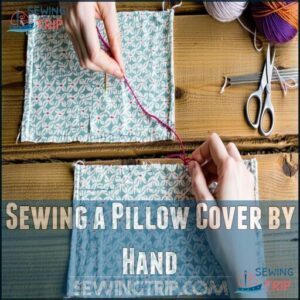
Hand sewing a pillow cover is simple, relaxing, and gives you full control over the process. Start by placing your fabric pieces with the right sides facing each other—like a secret hideaway for the design.
Hand sewing a pillow cover is a calming craft that transforms fabric into something uniquely yours.
Make sure the edges line up perfectly, then pin them in place. Straight pins are your trusty assistants, ensuring nothing shifts while you work.
Choose a sturdy thread that matches your fabric, and cut about 18 inches. Thread your needle and knot the end. For stitching, use a basic running stitch—keep your spacing even, about 1/4 inch between stitches, and stay consistent with tension.
That’s the secret to durability! To prevent shrinkage, remember to pre-wash your fabric.
Sew around three sides, leaving one side open for turning. Don’t forget to reinforce the corners with extra stitches to prevent wear. With patience, your DIY pillow cover will be hand-stitched perfection!
Measuring Pillow Fabric
Measuring your fabric accurately is the key to a snug-fitting pillow cover that looks polished.
Don’t skip this step—it’s like cutting the perfect slice of cake; a little care makes all the difference, as accurate measurements are crucial for a polished look.
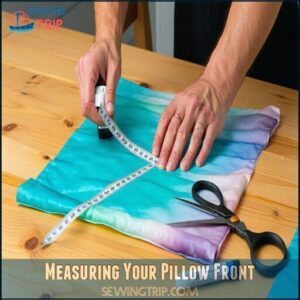
Measuring Your Pillow Front
Accuracy is everything when measuring your pillow’s front, so grab your measuring tape and let’s get it right! Think of this like tailoring—the better the fit, the better your pillow cover will look.
To calculate the fabric size, use this formula: pillow size + 1 inch (½ inch seam allowance for each side). For a 20" pillow, cut the fabric to 21" square. This guarantees snugness for pillow fullness. Sewing patterns rely on accurate body measurements to achieve the desired fit.
Here’s how to measure like a pro:
- Lay your pillow flat and measure edge-to-edge.
- Mark accurate dimensions with a fabric marker—don’t skip this!
- Double-check your measurements before cutting to avoid errors.
- Slice with sharp scissors for cutting precision.
Take your time—this step sets up your success!
Measuring Your Pillow Backs
Now that your pillow front is squared away, let’s get to those back pieces! You’ll want precision here to avoid any fit issues. The secret lies in getting the Overlap Allowance just right.
- Start with the pillow’s finished size (example: 20 inches square). Divide that width in half and add 2½ inches for overlap. Add ½ inch seam allowance to all sides. For a 20-inch pillow, you’d measure two back pieces at 14 inches by 20½ inches.
- Use a measuring tape, keeping it along the fabric’s grain direction for Accurate Dimensions. Double-check before cutting—Cutting Errors are no fun!
Well-measured backs mean your pillow cover stays secure while looking polished. Accurate back piece sizing really makes the project shine!
Calculating Fabric Size Requirements
Once you’ve measured the back pieces, it’s time to nail down how much fabric you’ll need.
Add a ½-inch seam allowance to all sides of your pillow’s dimensions. For a 16" pillow, cut fabric to 17" squares.
Use a measuring tape and account for a shrinkage factor if your fabric isn’t prewashed. Always plan for a little extra—better safe than hunting for scraps!
Don’t forget the hem overlap if making an envelope-style pillow cover. Precise cutting guarantees a snug fit around your pillow insert, creating that plump, polished look we all love.
Hand Sewing The Pillow Cover
Now it’s time to start stitching the pillow cover, and don’t worry—you’ve got this!
With a needle, thread, and a simple backstitch, you’ll create strong seams that keep your pillow looking great and staying sturdy.
Sewing The Pillow Cover Edges
A steady hand and attention to detail turn fabric pieces into a stunning, hand-stitched pillow. Begin by securing the edges with a 1/2-inch seam allowance. Choose a running stitch for simple yet effective edge finishing.
Follow these steps:
- Sew along three sides using small, even stitches to guarantee clean edges and durability.
- Reinforce the corners with backstitches for extra strength—these spots handle the most wear.
- Maintain even tension while stitching to prevent puckering.
For an invisible seam, consider using a ladder stitch technique. With these hand sewing techniques, you’ll create a perfectly stitched, fray-free pillow cover!
Leaving an Opening for Turning
When you hand sew a pillow cover, don’t seal it up completely—leave a 10-inch opening along one edge for turning the cover inside out.
This gap is your secret passageway to a professional finish. Reinforce the seams on either side of the opening to prevent unraveling during the flip.
Here’s a quick reference:
| Step | Action | Why It’s Important |
|---|---|---|
| Mark the opening | Use pins or chalk | Keeps placement accurate |
| Reinforce seams | Backstitch at each end | Adds durability |
| Leave 10 inches unstitched | Don’t sew this section yet | Allows turning techniques |
| Avoid corners | Place opening mid-edge | Makes invisible closure easier |
| Sew carefully | Use a strong backstitch | Guarantees stability during turning |
No need to stress—the opening will vanish with an invisible closure later!
Trimming Excess Fabric
Once you’ve left that gap for turning, it’s time to clean up those edges.
Use sharp fabric scissors to trim away excess, leaving a ¼-inch seam allowance. Don’t skip corner clipping—cutting them at a 45-degree angle keeps your corners neat instead of bulky.
Reducing bulk this way avoids lumpy pillow edges. For added durability, focus on preventing fraying now.
Your hand-sewn pillow cover will look polished and professional with these steps, and following them ensures a durable finish.
Turning The Cover Right Side Out
You’ve trimmed the fabric, so now it’s time for the big reveal—turning your work right side out! Here’s how:
- Flip the Fabric: Carefully pull the fabric through the opening using your fingertips. It’s a bit like turning socks inside out—satisfying and simple.
- Shape the Corners: Use a chopstick or eraser-end pencil for crisp Corner Shaping.
- Smooth the Seams: Run your finger along the edges for precise Seam Alignment.
- Avoid Pokes: Be gentle while shaping to keep stitches intact.
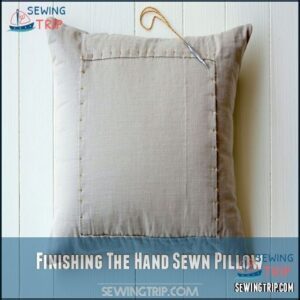
Finishing The Hand Sewn Pillow
You’re almost at the finish line, and now it’s time to add the final touches to your pillow.
From stuffing it snugly to stitching the opening closed, these last steps make your project look polished and complete.
Stuffing The Pillow Form
Take your pillow insert and gently slide it into the cover. It’s like putting on a well-fitted sock—take your time to prevent lumps.
Tuck the corners neatly into place, ensuring every inch of the cover is filled for that snug fit. If it’s feeling uneven, give the pillow form a light fluff.
A Stuffing Density Guide can help achieve fullness while the right insert size matters for smooth coverage. Flip the pillow around as you work, checking for balance and that perfect puffed-up look!
Hand Stitching The Opening Closed
Closing your pillow neatly makes all the effort worthwhile. Use an invisible stitch (also called a ladder stitch) for a sleek finish. Fold the raw edges inward and pinch the fabric to create a clean line. Work small, tight stitches along the seam, gently hiding thread as you go.
- Fold edges inward and pinch neatly for a smooth line.
- Use a ladder stitch for a professional, seamless look.
- Match your thread color to the pillow for a hidden closure.
- Knot carefully at the end to secure the seam and avoid unraveling.
Slow and steady wins this race!
Inspecting The Pillow for Imperfections
Once your hand-stitched pillow is complete, give it a proper inspection.
Check seam alignment by gently pulling the edges—loose stitches? Fix them! Look closely for fabric flaws or uneven stitching that might catch the eye.
Test the corners for sharpness; they should look crisp, not bulky.
Stitch quality matters, so repair any issues now. It’s all about crafting a polished, professional finish with sharp corners!
Adding Decorative Embellishments
Your pillow’s nearly done, but why stop there? Let’s add some flair with decorative embellishments!
You can attach tassels to the corners for a fun, textured look or sew ribbon trims around the edges for a polished touch.
Want a more personal vibe? Try embroidery designs like flowers or initials. Prefer bold? Appliqué techniques or adding fabric paint for quotes or patterns offers endless creativity. Even button accents can make your hand-stitched pillow unique!
A simple way to add flair is to create a ribbon embellished pillow.
- Use fabric paint to stencil bold shapes.
- Hand sew appliqués for themed patterns.
Get creative and make it pop!
How Do You Sew a Pillowcase?
Sewing a pillowcase by hand starts with aligning the fabric pairings, ensuring the right side faces inward.
Use a ½-inch seam allowance and a strong backstitch for durability. Reinforce corners to keep seams secure.
For a neat finish, use invisible closures like a slip stitch. Hand stitched pillow edges give a personal, polished touch that’s hard to match!
How Do You Hand Sew a Pillow Closed?
After stuffing your pillow, finishing it neatly is a breeze with an invisible stitch.
Use these steps to hand sew the pillow closed:
- Fold raw edges inward for smooth seams.
- Thread your needle with matching thread.
- Use small, even stitches along the folded edges.
- Pull gently to secure seams.
- Knot tightly, ensuring the hand-stitched pillow stays firm.
The key to a professional finish is in the details, making sure each step is followed carefully to achieve a neat and smooth closure.
How Do You Make a Throw Pillow Cover?
If you’re making a throw pillow cover, start by cutting durable fabric slightly smaller than your pillow insert for a snug fit.
Reinforce seams for strength and clip corners for easy shaping.
Use invisible closures like a slip stitch to finish cleanly.
Add embellishment ideas, like buttons or trims, for flair. It’s a simple, fun DIY!
How to Sew The Pillow Cover?
To sew your pillow cover:
- Pin the fabric pieces together, right sides facing.
- Use a ½-inch seam allowance and backstitch for strong edges.
- Sew three sides, reinforcing corners to keep seams intact.
- Finish seams with a neat trim to avoid fraying.
- Leave one side open—don’t worry, it’s for flipping later! Simple, right?
How Do You Sew a Pillow Cover?
Start by pinning your fabric pieces together, right sides facing in.
Use a backstitch for strong seams, leaving a small opening for turning. Reinforce corners with extra stitches to avoid unraveling.
Trim excess fabric and carefully turn it right side out. Shape the corners for a clean finish.
You’ve just mastered the basics of hand sewing a pillow cover!
How to Sew a Pillow Cover by Hand?
To hand sew a pillow cover, fold the fabric with the right sides together.
Use a backstitch along the edges, leaving one side open. Reinforce corners with extra stitches for durability.
Trim seams for a polished finish and turn it right side out.
For invisible closures, use a slip stitch to close the opening securely—simple, durable, cozy!
How Long Does It Take to Make a Pillow Cover?
The time to hand sew a pillow depends on your skill and the project complexity.
Beginners may need 1-2 hours, while seasoned crafters often finish faster.
Simpler pillow cover sewing with lightweight fabrics and basic stitches goes quickly, but using heavier materials or adding embellishments impacts time.
Considering fabric characteristics can also influence project duration.
Take it slow—rushing can make stitches uneven or seams messy, which affects the overall quality of the pillow.
How Easy is It to Use a Pillow Cover?
Using a pillow cover is a breeze! They’re practical, stylish, and easy to swap for cleaning or freshening up your look.
With options like zippered covers or envelope closures, maintenance stays simple. Plus, their versatility means you can change designs with the seasons.
- Protects your pillow and extends its life.
- Quick to remove and wash.
- Offers endless style options.
- Lightweight and convenient.
How to Sew a Pillowcase by Hand Step by Step?
Something magical happens when you hand sew a pillowcase.
Begin by preshrinking your fabric, then measure carefully to match your pillow’s size, adding seam allowances.
Choose a strong stitch—like the backstitch—and reinforce the corners for durability.
Close the opening with an invisible stitch for a seamless look.
Follow these step-by-step instructions, and your pillowcase sewing will shine!
How to Stitch a Pillow Cover for Beginners?
To hand sew pillow covers, start with simple stitches like the backstitch for strength.
Choose fabric wisely—cotton’s forgiving for beginners.
Verify a ½-inch seam allowance and reinforce corners to avoid wear.
Leave an opening to turn your work inside out.
Closing methods, like the slip stitch, keep it neat.
This beginner sewing project is fun and practical!
Frequently Asked Questions (FAQs)
How to sew a pillowcase by hand step by step?
Measure twice, cut once!
Mark fabric dimensions for overlap. Cut, pin right sides together, and sew three sides with strong backstitches.
Trim corners, turn it out, press seams, then finish stitching invisibly—simple and satisfying!
What size pillow goes in an 18×18 cover?
You’ll want to use a 20×20 pillow insert for an 18×18 cover.
It makes the pillow look plump and full, not saggy or flat, which gives your space that cozy, polished vibe.
How to make a pillowcase without a sewing machine?
Cut your fabric to size, pin it right sides together, and sew with a backstitch, leaving one side open.
Turn it right side out, stuff the pillow insert, and close with a slip stitch.
What fabrics are best for reversible covers?
Pick durable fabrics like cotton or linen for versatility.
Combine contrasting colors or patterns, like floral and stripes, for a stylish reversible look.
Avoid slippery materials like satin; they can be tricky to hand-sew neatly.
How do you choose pillow insert firmness?
Firmness makes or breaks a pillow’s vibe.
For plush comfort, choose soft inserts filled with down or polyfill.
Need structure? Go for firmer foam or memory foam.
Match firmness to comfort and decorative needs!
Can pillow covers be made waterproof?
Yes, you can make pillow covers waterproof.
Use water-resistant fabrics like outdoor polyester or vinyl.
For regular fabric, apply a waterproofing spray or iron-on vinyl.
These keep spills away while maintaining the pillow’s charm.
How to sew covers for irregular shapes?
Sewing covers for irregular shapes isn’t rocket science, but it’s a puzzle.
Trace the shape onto fabric, add a ½ inch seam allowance, cut carefully, and use backstitching for strength.
Adjust as needed.
What stitches work for decorative edging?
You’ll love using a whip stitch for neat, decorative edges—it’s quick, sturdy, and adds charm.
For nearly invisible finishing, try a slip stitch.
A blanket stitch also works beautifully if you want extra flair!
Conclusion
Did you know hand-sewing a pillow cover can save you up to 50% compared to buying one?
With just fabric, a needle, and thread, you’ve created a custom, handmade piece for your home.
You measured, pinned, stitched, and even mastered a slip stitch for a polished look.
Now that you know how to sew a pillow cover by hand, you can update your space anytime, and it’s simple, creative, and gives your decor a personal touch!


