This site is supported by our readers. We may earn a commission, at no cost to you, if you purchase through links.
Cut two 5-inch fabric pieces and one batting square. Place fabric right sides together with batting on top.
Pin layers and sew around edges with ¼-inch seam allowance, leaving a 2-inch opening. Turn right side out through the opening, push corners crisp, and press flat.
Hand-stitch the opening closed, then topstitch around the entire coaster for durability. The whole process takes about 15 minutes per coaster once you’ve got your rhythm down.
Your homemade coasters will protect surfaces while adding personal style to any space.
Table Of Contents
- Key Takeaways
- How to Sew a Drink Coaster
- Preparation
- Construction
- Supplies
- Tutorial
- Use and Care
- Materials Needed for Fabric Coasters
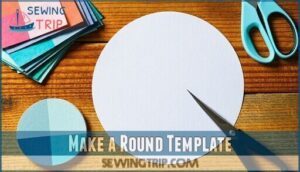
- Make a Round Template
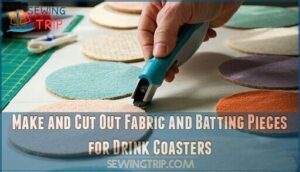
- Make and Cut Out Fabric and Batting Pieces for Drink Coasters
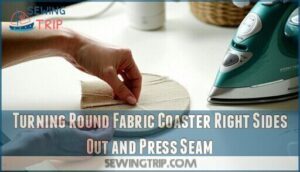
- Turning Round Fabric Coaster Right Sides Out and Press Seam
- Frequently Asked Questions (FAQs)
- Conclusion
Key Takeaways
- You’ll need basic materials – two 5-inch fabric squares, batting, thread, and basic sewing skills to create professional-looking coasters in about 15 minutes each.
- Cotton fabric works best – choose 100% cotton for durability and absorbency, with quilting cotton or cotton canvas providing the ideal weight for daily use.
- Follow the fabric sandwich technique – layer fabrics right sides together with batting on top, sew with a ¼-inch seam allowance, leave a 2-inch opening for turning.
- Proper finishing makes them last – turn right side out, press flat, hand-stitch the opening closed, then topstitch around edges for durability and a professional appearance.
How to Sew a Drink Coaster
In the context of mastering the art of sewing drink coasters, you’re diving into a beginner-friendly craft that’ll protect your furniture while showcasing your creativity. This sewing coaster tutorial transforms simple materials into functional home accessories that guests will admire.
Fabric choices set the foundation for your project. Cotton works best because it’s absorbent and easy to handle. Gingham patterns add charm, while solid colors offer versatility. Batting options include cotton, fleece, or Insul-Bright for heat resistance – each providing different levels of cushioning.
Perfect fabric and batting choices create coasters that protect and impress.
Shape variations keep things interesting. Start with squares since they’re forgiving, then try circles or hexagons as your confidence grows. Edge finishing techniques like topstitching create professional results while securing layers together.
This fabric coaster DIY project uses basic straight stitches, making it perfect for newcomers. Your quilted coaster pattern can feature decorative stitching or simple geometric designs. Embellishment ideas include contrasting thread colors or small appliqué details.
The easy coaster sewing process teaches fundamental skills you’ll use in future projects. This drink coaster craft proves that practical items can be beautiful too.
Preparation
Before you start stitching your fabric coasters, you’ll need to gather your materials and prep both your workspace and fabric.
Getting everything ready upfront makes the actual sewing process smooth and helps you avoid those "oops, I forgot something" moments that can derail your creative flow.
Gather The Supplies
Before starting your beginner sewing project, gather quality cotton fabric in two coordinating colors.
You’ll need batting options like cotton-poly blend for structure, matching thread selection, and template materials such as cardstock.
Essential cutting tools include fabric scissors and a rotary cutter.
This fabric coaster DIY requires basic supplies that make easy coaster sewing accessible for any drink coaster craft enthusiast.
For accurate fabric measurements, a simple tape measure is essential.
Get Your Sewing Machine Ready
Now you’ll transform your sewing machine into a coaster-making powerhouse.
Set up your machine with confidence using these essential steps:
- Bobbin Winding and Threading Machine – Wind your bobbin with matching thread and install it properly, then thread your machine through all guides
- Presser Foot and Stitch Settings – Attach the all-purpose presser foot and set your machine to straight stitch (width 0, length 2-3)
- Machine Maintenance Check – Test your tension and make certain smooth operation before starting your project
Your sewing machine setup determines your coaster’s success, so take time getting these basics right.
Consider using a specialized winding machine for increased efficiency.
Prepare The Fabric
Before you start cutting, fabric preparation sets the foundation for professional results.
Prewash 100% cotton fabrics in warm water to prevent shrinkage later.
Dry completely, then press with an iron to remove wrinkles and create smooth cutting surfaces.
This washing step also removes sizing that could affect fabric fusing.
Choose colorful quilting cotton or use fabric scraps for budget-friendly coasters.
Proper ironing guarantees accurate cutting and crisp seams throughout your project.
Construction
Now you’ll start putting the pieces together to create your finished coasters.
The construction phase transforms your cut fabric and batting into functional drink coasters through careful sewing and finishing techniques.
Sew a Coordinating Storage Bag
Complete your coaster set with a matching storage bag that keeps everything organized. Choose bag fabric that coordinates with your coasters – perhaps the same print or complementary colors.
Cut two 5×7-inch rectangles from your selected fabric. This sewing project transforms fabric scraps into a practical accessory.
Place rectangles right sides together and sew three sides, leaving the top open. Turn right side out and press flat. Fold the top edge down one inch and stitch for a clean hem.
Consider closure type options like drawstring or simple fold-over design for your coaster gift idea.
Celebrate With Fabric Drink Coasters
Your vibrant fabric drink coasters deserve their moment in the spotlight! These handcrafted beauties transform ordinary table settings into conversation starters.
Whether you’re hosting friends or gifting loved ones, these DIY coasters showcase your sewing skills perfectly.
Here are three ways to make the most of your creation:
- Coaster Gift Ideas – Bundle sets with coordinating napkins for housewarming presents or hostess gifts
- Seasonal Fabric Choices – Switch out patterns for holidays, using autumn leaves or winter snowflakes for themed decor
- Coaster Party Favors – Create personalized coaster designs for special events, letting guests take home functional keepsakes
Your beginner sewing project becomes both practical protection and stylish coaster decor themes that reflect your personality.
Cleaning The Fabric Coasters
Keep your fabric coasters looking fresh with proper fabric care.
Machine wash in cold water using gentle cycles, or hand wash delicate pieces. Apply stain remover before washing for tough spots.
For an alternative, consider no sew options using Mod Podge for a simple project.
| Cleaning Method | Best For |
|---|---|
| Machine wash (cold water) | Cotton coasters, regular maintenance |
| Hand wash | Felt-backed or delicate trim coasters |
| Spot clean with dish soap | Fresh spills and minor stains |
| Baking soda paste | Stubborn, set-in stains |
| Air dry flat | All fabric coaster types |
More Sewing Education
Once your fabric coasters are sparkling clean, you’ll want to expand your sewing education beyond this beginner-friendly project.
Think of coaster-making as your gateway drug to the wonderful world of stitching – there’s so much more to explore!
Start building your sewing skills through advanced techniques like French seams or bound buttonholes.
These methods will transform your future projects from amateur to professional-looking.
Master fabric selection by understanding fiber content, weight, and drape.
Cotton works great for coasters, but silk behaves completely differently for garments.
Explore pattern design software to create custom templates.
Your sewing machine needs regular maintenance too – clean lint, oil moving parts, and replace needles frequently.
Consider turning your hobby into a sewing business once you’ve mastered these fundamentals.
Practice various sewing techniques on scraps before tackling bigger projects.
Follow online tutorials, join local quilting circles, or take classes.
Remember, every expert seamstress started exactly where you’re now.
Each sewing project teaches valuable sewing tips that build your confidence and expertise.
Supplies
Selecting the right supplies makes or breaks your fabric scrap project. You’ll need 100 cotton fabric for durability and absorbent coaster fabric properties.
Batting options include cotton or fleece for insulation. Thread choices should match your fabric colors. Template materials like cardstock help create consistent shapes.
Rotary cutting tools guarantee precise cuts, while your sewing machine handles assembly. To guarantee accuracy, you’ll want to use tailor’s chalk for marking.
Here’s your essential supply checklist:
- Fabric types: Two contrasting 100 cotton fabrics, 1/4 yard each
- Batting options: Cotton batting or fleece, cut into 4-inch squares
- Thread choices: All-purpose thread matching your fabric colors
- Template materials: Heavy cardstock for 4-inch and 4.5-inch circle patterns
- Cutting tools: Rotary cutting tools, scissors, ruler, and cutting mat
Tutorial
Now you’ll follow these five simple steps to create professional-looking fabric coasters.
This tutorial breaks down the process into manageable stages that’ll have you sewing like a pro in no time.
Step 1 – Cut
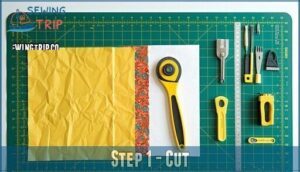
Start by creating a 4.5-inch template using cardstock or heavy paper.
Square your fabric using a cutting mat and rotary cutting tools for precise measurements. Cut two fabric pieces per coaster, considering print placement if using patterned material.
Your ruler guarantees accurate cuts while the rotary cutter delivers clean edges. Template creation makes consistent fabric coasters every time, using precise measurements and ensuring clean edges with a rotary cutter.
Step 2 – Assemble Layers
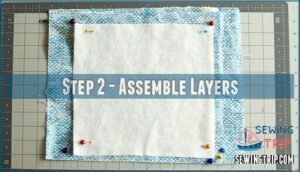
Creating your fabric sandwich requires careful attention to layering order and fabric alignment. You’ll build from bottom to top, ensuring each component nestles perfectly together like pieces of a puzzle.
- Bottom layer: Place your first fabric piece face-up on your work surface
- Middle layer: Center the cotton batting directly on top, matching edges precisely
- Top layer: Add your second fabric piece face-down, creating the "sandwich"
- Pinning techniques: Insert pins perpendicular to edges, spacing them 2-3 inches apart
- Final check: Smooth out wrinkles and verify all layers align before sewing
This fabric layering creates the foundation for your drink coasters, with batting options providing the absorbency you need for those inevitable spills.
Step 3 – Clip
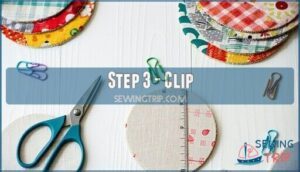
Now comes the critical step of precise clipping before you start this sewing project. After stacking your fabric coasters layers, secure them with sewing clips or quilting clips spaced about 2 inches apart around the perimeter.
This prevents shifting during stitching. Once you’ve sewn around the edges, proper clipping becomes your best friend.
Use sharp fabric scissors for bulk reduction by trimming seam allowances to about 1/8 inch. For curve clipping on round drink coasters, make small perpendicular cuts toward the seam line every half inch.
This prevents puckering when you turn the coaster right side out. Clipping corners requires a different approach – cut diagonally across corner points, leaving about 1/16 inch from your stitching.
Seam notching helps curved areas lay flat. Don’t skip this step, even though it feels tedious. Precise clipping makes the difference between amateur-looking and professional-quality fabric coasters that’ll make your friends jealous.
Step 4 – Repeat
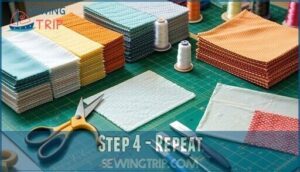
Now that you’ve clipped your layers together, it’s time to repeat the process for your remaining coasters.
This stage brings significant Efficiency Gains through Batch Production—you’ll work smarter, not harder.
Here’s your streamlined approach:
- Stack and cut multiple sets simultaneously using your fabric coaster template for consistent results
- Explore Fabric Variety by mixing different cotton prints for each coaster in your fabric coaster set
- Practice Design Iterations with various quilting patterns to enhance your sewing techniques
- Focus on Skill Improvement by maintaining consistent seam allowances across all pieces
- Document your sewing tutorial progress to track which combinations work best for future sewing projects
Think of this as your coaster assembly line. Each repetition builds muscle memory and confidence.
You’ll notice your cutting becomes more precise and your fabric handling improves with each coaster. By the fourth set, you’ll be clipping layers like a pro.
This methodical approach guarantees your entire fabric coaster set maintains uniform quality while letting you experiment with different fabric combinations.
Step 5 – Sew
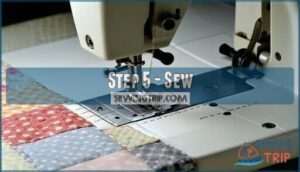
With your sewing machine humming, guide the layered fabric through at a steady pace using a 1/4-inch seam allowance. Leave a 2-inch turning opening for flipping your drink coaster right-side out later.
One should also maintain even stitches to guarantee a neat finish. This sewing pattern requires precise corner trimming after stitching to reduce bulk.
| Sewing Element | Recommended Setting |
|---|---|
| Stitch length | 2.5-3.0mm |
| Seam allowance | 1/4 inch |
| Turning opening | 2 inches |
| Thread tension | Medium (3-4) |
| Topstitching options | 1/8 inch from edge |
The provided table outlines the specific settings for your sewing machine, including stitch length and thread tension, to ensure a professional-looking finish.
Use and Care
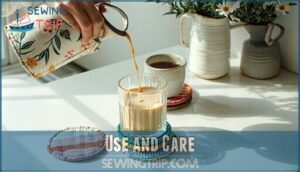
Throughout the life of your fabric coasters, proper care will keep them looking fresh and functional for years.
Start with stain removal – treat spills immediately with a gentle stain remover before they set.
For washing instructions, use cold water on a gentle cycle to preserve the fabric’s integrity. Skip the dryer entirely; air-drying prevents shrinkage and maintains shape.
Storing them flat can help prevent stretching. Store your drink coasters in a clean, dry place when not in use.
A coordinating storage bag works perfectly for organization and protection. These simple longevity tips guarantee your handmade treasures stay beautiful. With consistent care, your fabric coasters will handle countless beverages while maintaining their charm and absorbency.
Materials Needed for Fabric Coasters
You’ll need just a few basic materials to create professional-looking fabric coasters that protect your furniture while adding style to your home.
Start with cotton fabric, batting for absorbency, and standard sewing supplies like thread and scissors, to ensure you have everything needed to complete the project.
Richcheck 60 Inch Gingham Check Orange Fabric by the Yard
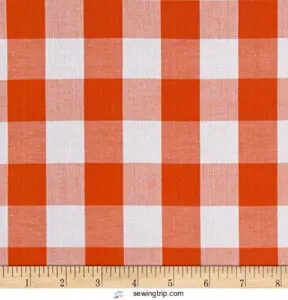
When choosing vibrant fabrics for your sewing project, the Richcheck 60 Inch Gingham Check Orange Fabric delivers both style and substance.
This eye-catching cotton blend features classic gingham colorfastness that won’t fade after countless washes. The medium-weight construction provides excellent orange fabric durability for drink coasters that’ll withstand daily use.
You’ll love the precise check pattern size—it’s small enough for detailed work yet bold enough to make a statement. With 60-inch width, this fabric yardage uses efficiently for multiple fabric coasters from a single yard.
The timeless pattern pairs beautifully with coordinating fabrics in cream, navy, or white. Whether you’re learning to sew coasters or tackling an advanced sewing project, this reliable fabric makes every stitch count.
Warm Natural Twin Cotton Batting
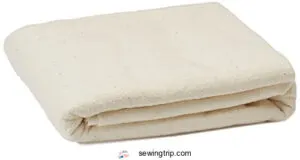
Cotton batting forms the heart of your fabric drink coasters, providing structure and absorbency. This natural cotton batting offers excellent heat resistance for hot beverages while maintaining proper batting density for durability.
The fiber content guarantees your sewing project stays soft yet supportive. You’ll appreciate how this batting handles washing without shrinking or bunching.
Its moderate batting thickness works perfectly for drink coasters – not too thick to create bulk, not too thin to lack protection. The natural fibers absorb moisture effectively while maintaining shape through repeated use.
When sewing fabric coasters, this batting cuts cleanly and doesn’t shift during stitching. It quilts beautifully, allowing stitches up to 10 inches apart without requiring pre-washing. The smooth needle glide makes your sewing experience enjoyable, especially for beginners tackling their first coaster project.
Clover Point Two Point Turner

You’ll find the Clover Point Two Point Turner becomes your secret weapon for achieving Corner Perfection in your sewing project.
This dual-ended tool transforms frustrating fabric manipulation into smooth, effortless work.
The curved end tackles those stubborn corners on your drink coasters, while the fine-tipped end delivers Seam Accuracy that’ll make you feel like a pro.
No more wrestling with pencils or chopsticks as Tool Alternatives – this ergonomic helper fits comfortably in your hand and creates razor-sharp Pointed Edges every time.
Whether you’re crafting fabric coasters for guests or making a full set, this turner guarantees professional results.
Your corners will thank you, and so will anyone admiring your flawless handiwork, which is a testament to the tool’s ability to achieve flawless work.
Singer ProSeries Thread Snips Teal
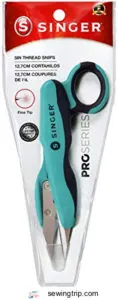
After securing your fabric pieces with the Point Turner, you’ll need reliable cutting tools.
The Singer ProSeries Thread Snips in teal deliver professional precision for your drink coasters project. These 5-inch snips feature rubberized comfort grip handles that reduce hand fatigue during extended sewing sessions.
The fine-tip blades excel at detailed trimming around curved seams and tight corners—perfect for fabric coasters. Each blade undergoes individual inspection and hand testing for quality assurance.
The snips ergonomics support comfortable use, while the teal color benefits include easy visibility on your sewing table. Regular snip maintenance keeps blades sharp for clean cuts.
The ProSeries comparison shows superior durability over basic thread snip uses, making them essential for precise fabric work.
Make a Round Template
Creating your round template is like drafting the blueprint for your DIY fabric drink coasters. You’ll need sturdy template materials like cardstock or heavy paper for durability.
Draw two accurate circles: a 4-inch diameter for batting and a 4½-inch for fabric pieces. These template sizes guarantee consistent results across all your drink coaster projects.
Alternative methods for marking fabric include:
- Using a compass for perfect geometric precision
- Tracing around a cookie cutter or bowl
- Finding household items like plates or cups
- Downloading printable circular coaster tutorial patterns
- Creating multiple sizes for variety sets
A reliable template prevents wonky shapes and guarantees your coasters stack neatly when finished.
Make and Cut Out Fabric and Batting Pieces for Drink Coasters
Now that you’ve created your template, it’s time to cut your fabric and batting pieces with precision.
You’ll use the 4-inch template for batting circles and the 4½-inch template for fabric pieces, ensuring each coaster has the right materials for both structure and style.
Cut Out Cotton Batting Pieces
With your 4-inch template in hand, you’ll transform ordinary cotton batting into the cozy heart of your drink coasters.
Place the template on your batting and trace around it with a fabric pen. Cut carefully along the lines for clean edges.
You can easily find cotton batting options online.
- Batting Circle Size: Each piece should measure exactly 4 inches in diameter
- Template Alternatives: Use a cookie cutter, compass, or small plate if needed
- Layering Batting: Stack multiple batting layers for thicker, more absorbent coasters
- Cutting Multiple: Fold batting to cut several pieces simultaneously for efficiency
Cut Out Fabric Pieces
Now you’ll cut the fabric pieces for your drink coasters.
Use rotary cutters and your 4½-inch template to cut fabric pieces from both materials.
Place two fabric layers right sides together and trace your template shapes.
This cutting precision guarantees consistent seam allowance and perfect fabric layering for your sewing project.
Fabric cutting is easier with a specialized cutting tool.
| Step | Fabric A | Fabric B |
|---|---|---|
| Cut squares | 4 pieces (4.5") | 4 pieces (4.5") |
| Stack method | Right sides together | Right sides together |
| Template use | Trace carefully | Trace carefully |
| Final prep | Pin before cutting | Pin before cutting |
The final prep step involves pinning the fabric layers together before cutting to ensure accuracy and prevent mistakes, which is crucial for achieving perfect fabric layering.
Turning Round Fabric Coaster Right Sides Out and Press Seam
After turning your coaster right side out through the opening, you’ll need to push out the curves and press the seam for a professional finish.
This step transforms your inside-out fabric sandwich into a smooth, flat coaster ready for the final touches, giving it a smooth appearance.
Insert Cotton Batting
Now you’ll place the cotton batting inside your fabric coasters.
Center the batting within the turned fabric, ensuring even distribution across the surface.
The batting thickness adds cushioning while improving absorbency for your drink coasters.
Check that batting alternatives like fleece work equally well.
Focus on securing batting placement without shifting.
This cotton batting creates the foundation for your finished sewing project, transforming simple fabric into functional fabric coasters.
Remove Basting Threads
Now it’s time to remove those temporary basting threads that guided your coaster’s shape. Grab your seam ripper or small scissors and gently snip each basting stitch. You’ll feel like you’re unwrapping a present as your coaster’s true form emerges.
Take care not to cut the actual seam stitches—nobody wants their hard work unraveling! This sewing project reveals its crisp edges once freed from temporary constraints.
Here are key considerations for this fabric coasters step:
- Thread Visibility: Use contrasting basting thread colors to easily distinguish from permanent stitches
- Knot Security: Check that main seam stitches remain intact while removing temporary threads
- Fabric Stability: Work slowly to maintain seam integrity and prevent fabric distortion
Your drink coasters now showcase their intended shape without temporary guides cluttering the design.
Finishing Stitching for Your Drink Coasters
Now you’ll complete the finishing touches that transform your fabric squares into polished drink coasters.
Start by closing the turning opening with edge stitching, sewing 1/8 inch from the coaster’s perimeter. This secures layers while creating a professional appearance. Choose thread that matches your fabric for an invisible stitch, or select contrasting colors for decorative stitches that add personality.
Your sewing machine handles this final step beautifully – just maintain steady pressure and consistent speed. Consider adding a second row of stitching 1/4 inch from the edge for extra durability.
These finishing techniques guarantee your fabric coasters withstand daily use while showcasing your sewing project skills perfectly.
Quilting The Coasters
Your fabric coasters are nearly perfect, but quilting patterns add that professional finish.
Choose matching or contrasting thread based on your style preference. Stitch around the coaster’s edge first, then add decorative lines—diagonal grids work beautifully on square coasters.
These coasters are a cost-effective project, especially if you use fabric scraps.
Keep stitch density consistent for even batting security. This quilting step transforms simple drink coasters into stunning sewing project ideas.
Frequently Asked Questions (FAQs)
How to make DIY drink coasters?
Cut two 5-inch fabric squares and one batting piece. Pin fabrics right-sides together with batting underneath. Sew 1/4-inch seam, leaving 2-inch opening. Turn right-side out, press flat, topstitch edges.
What is the best fabric for coasters?
Like spilling wine on your grandmother’s antique tablecloth, you’ll want 100% cotton fabric for your coasters.
Cotton absorbs moisture perfectly, washes easily, and won’t leave lint behind.
Choose quilting cotton or cotton canvas for best results.
How thick should a drink coaster be?
Your coaster should measure about 1/4 to 3/8 inch thick for ideal functionality.
This thickness provides excellent absorbency while remaining stable under drinks.
You’ll achieve this by layering cotton batting between two fabric pieces during construction.
Whats the best fabric weight for coasters?
Why settle for flimsy fabric when medium-weight cotton’s your secret weapon?
Choose quilting cotton or cotton canvas weighing 4-6 ounces per square yard.
You’ll get perfect absorbency without bulk, plus they’re durable enough for daily spills and machine washing.
How do you prevent puckering when quilting?
Prevent puckering by using proper tension settings, stabilizing with batting or interfacing, maintaining consistent speed.
Don’t pull fabric through the machine—let it feed naturally, and ensuring your fabric layers stay aligned.
Can you make coasters without batting?
Building Rome wasn’t done in a day, and neither are perfect coasters.
You can skip batting entirely and create functional drink coasters using just two fabric layers.
They’ll be thinner but still protect surfaces effectively.
What seam allowance works for beginners?
For beginners, you’ll find success with a 1/4-inch seam allowance. It’s forgiving enough to handle wobbles while keeping your coasters sturdy and professional-looking once finished.
How do you fix uneven coaster edges?
Picture a wonky picture frame – just like uneven coaster edges throw off the whole look.
You’ll trim excess fabric with sharp scissors, then press edges flat with an iron.
Topstitch around the perimeter to create clean, professional-looking borders.
Conclusion
Practice makes perfect when learning how to sew a drink coaster, and you’ll quickly develop your own rhythm with these simple techniques.
These handmade fabric coasters offer excellent protection for your furniture while showcasing your personal style. You can experiment with different fabric combinations, patterns, and quilting designs to create unique sets.
The skills you’ve learned here transfer beautifully to other small sewing projects. With just basic materials and fifteen minutes per coaster, you’ll have functional, attractive pieces that make thoughtful gifts or perfect additions to your home décor collection.
You’ll have functional pieces that make thoughtful gifts.

