This site is supported by our readers. We may earn a commission, at no cost to you, if you purchase through links.
Whether you’re drawn to the structure of quilting cotton, the flowy movement of rayon challis, or the breathable ease of linen, you’re about to discover that sewing a pull-on skirt is way more achievable than you think. With the right tools, accurate measurements, and a few straightforward techniques, you’ll have a custom skirt that looks polished and feels like it was made just for you.
Table Of Contents
Key Takeaways
- A pull-on skirt is beginner-friendly because it requires no zippers or closures, just accurate measurements, basic sewing techniques, and the right fabric choice.
- Pre-washing your fabric and taking precise waist, hip, and length measurements are essential steps that prevent shrinkage and ensure your skirt fits your body perfectly.
- Creating a comfortable elastic waistband involves measuring your waist, subtracting two inches, and stitching the elastic into a casing so it stretches without slipping.
- You can customize your skirt with pockets, decorative trims, and various hemming methods while troubleshooting common issues like uneven hems or tight waistbands by making pattern adjustments.
Supplies Needed for Sewing a Pull-on Skirt
Before you start sewing, you’ll need to gather a few key supplies. Having the right tools makes the whole process smoother and more enjoyable.
Let’s look at what you’ll need to create your pull-on skirt.
Essential Sewing Tools and Materials
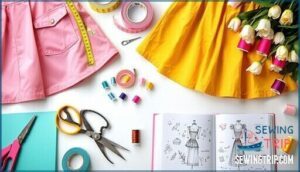
Before you even thread your first needle, let’s gather the must-have tools that’ll make your pull-on skirt project a breeze instead of a battle. Here’s what you’ll need:
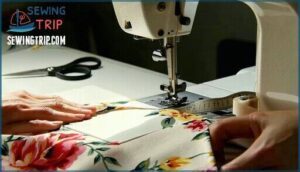
- A reliable sewing machine with basic presser feet
- Sharp fabric scissors or rotary cutters for clean cuts
- Fabric markers for transferring measurements
- Seam rippers (because we all make mistakes!)
You’ll also want an ironing board nearby and pins to hold everything in place while you work.
Choosing The Right Sewing Machine
You don’t need a fancy industrial machine to sew a great pull-on skirt—just one that manages basic stitches and can power through a few layers of fabric without throwing a fit.
For beginners, look for beginner machines with straight stitch and zigzag options—budget considerations matter, but even affordable models work beautifully for this beginner project.
Keep your machine clean and oiled, and you’ll have a reliable partner for learning sewing basics.
Selecting Thread and Needles
Once your machine is ready to roll, matching the right thread and needle to your fabric is like pairing the perfect shoes with an outfit—it makes everything work better and look cleaner.
Quick matching guide for sewing success:
- Thread types: All-purpose polyester works for most projects
- Needle sizes: Use 70/10 for lightweight fabrics, 90/14 for medium weight
- Fabric matching: Match thread color closely to your skirt material
- Tension adjustments: Test on scraps first to avoid puckering
- Problem solving: Switch needles if you see skipped stitches
These sewing techniques will build your beginner sewing skills fast.
How to Choose and Prepare Skirt Fabric
Picking the right fabric makes all the difference when you’re sewing a pull-on skirt. The texture, weight, and how you prep it will shape how your skirt looks and feels.
Let’s walk through what to look for so your project turns out exactly how you want it.
Best Fabrics for Pull-on Skirts
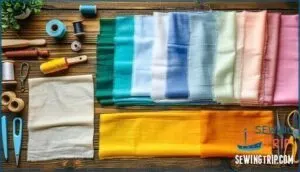
Choosing the right fabric is like picking the perfect partner for your project—it sets the tone for everything. Cotton breathability makes it ideal for everyday skirts, while quilting cotton offers structure and easy care. Rayon challis delivers that coveted rayon drape for flowy designs. Lightweight linen provides excellent airflow, though linen wrinkling requires occasional ironing. Polyester durability suits active lifestyles, and wool insulation keeps you cozy in cooler months. Your fabric selection transforms the final look and feel of your drapey fabric skirt.
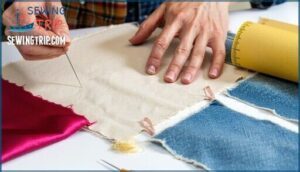
Preparing fabric by washing helps prevent future shrinkage.
Fabric Weight and Drape Considerations
Think of fabric weight as the personality of your skirt—it determines whether you’ll float through your day or hold a sharp, structured silhouette. Lightweight linen and rayon challis create beautiful drape coefficient for flowy designs, while medium-weight fabrics maintain shape.
Seasonal fabrics matter too: choose breathable options for summer and slightly heavier ones for cooler months. Fabric opacity also affects your final look, especially with layering fabrics underneath.
Pre-washing and Preparing Fabric
Before you cut a single piece, washing your fabric is like giving it a test run—it prevents your finished skirt from shrinking or warping after the first trip through the laundry. Always check for color bleeding and shrinkage allowance by pre-washing in warm water. Skip fabric softeners—they can interfere with sewing.
After drying, use proper ironing techniques to straighten the grain alignment, making fabric cutting and preparation much easier for your skirt tutorial.
Taking Accurate Measurements for a Perfect Fit
Getting the fit right starts with good measurements. You’ll need to measure your waist, hips, and desired length to create a skirt that flatters your shape.
Let’s walk through each measurement so you can feel confident your skirt will fit like a dream.
Measuring Waist and Hips
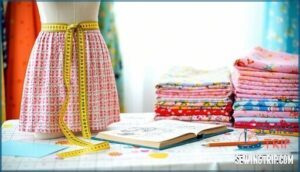
Getting your measurements right is the difference between a skirt that fits like a dream and one that sits in your closet forever, so grab your measuring tape and let’s make sure yours turns out perfect.
Accurate measurements are the difference between a skirt that fits perfectly and one that sits unworn in your closet
For your waist measurement, wrap the tape around the narrowest part of your torso—usually an inch above your belly button. Your hip measurement goes around the fullest part, usually eight to nine inches below your waist. Write both numbers down, and you’re ready for sewing success!
Determining Skirt Length
Your perfect skirt length is totally up to you—whether you want a breezy mini, a classic knee-length, or a flowy maxi that sweeps the floor.
Measure from your waist down to where you want the hemline to hit, keeping your personal style and fabric choice in mind.
Don’t forget to add three to four inches for hem allowance—your skirt pattern will thank you later!
Tips for Sizing Elastic
The secret to a comfy waistband that won’t pinch or sag is cutting your elastic to just the right length—and it’s easier than you think.
Start by measuring your elastic around your waist where the skirt will sit, pulling it snug but not tight. Subtract about two inches from that measurement to account for waistband stretch and elastic overlap.
If you’re using 1 inch wide elastic for your elastic waistband skirt, remember that wider elastic types need less stretch than narrow ones.
Cutting, Sewing, and Assembling The Skirt
Now it’s time to bring your skirt to life. You’ll cut your fabric pieces, sew them together, and add that comfy elastic waistband.
These steps transform flat fabric into a wearable skirt you can feel proud of.
Placing and Cutting Your Pattern
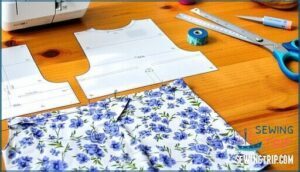
Once you’ve got your fabric ready, it’s time to turn those measurements into real pattern pieces you can actually work with. Here’s your game plan for pattern layout and cutting fabric:
- Align your pattern pieces with the fabric grain for a skirt that hangs beautifully
- Pin your pattern down securely to prevent shifting while cutting
- Add seam allowance around all edges (usually ⅝ inch)
- Use sharp cutting tools for clean, precise edges
- Mark notches and important points with tailor’s chalk
This careful approach sets you up for successful skirt construction and a hem that’ll look totally professional!
Sewing Side Seams and Finishing Edges
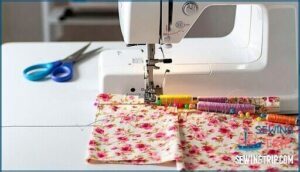
With your pattern pieces cut and ready, it’s time to start bringing your skirt to life by connecting those fabric panels together. Place your skirt pieces right sides facing each other, pin along the side edges, and stitch with a consistent seam allowance.
For sewing beginners tackling skirt construction, French seams work beautifully—they hide raw edges inside for a clean finish. If you’ve got a serger, use it for quick edge finishes that prevent fraying and look totally professional.
Creating and Attaching The Elastic Waistband
Now it’s time to add the comfy elastic waistband that makes this skirt so easy to pull on and off. Measure your waist, subtract two inches, and cut your elastic to that length. Create an elastic casing by folding the waistband edge down and stitching close to the raw edge, leaving a small opening for elastic insertion techniques.
Overlap the elastic ends by about an inch, stitch them together securely for your elastic join, then close that opening. Your waistband fit should feel snug but not tight—you want freedom of movement!
Here’s what makes this step so satisfying:
- You’re literally building comfort into every stitch
- Watching that elastic weaving through the casing feels like magic
- Your skirt transforms from flat fabric into something you can actually wear
Hemming Techniques for a Professional Finish
After all that careful stitching, it’s time to finish your skirt’s edge with a hem that looks polished and holds up through countless wears. You’ve got solid options depending on your skill level and machine type.
A blind hemming creates nearly invisible stitches perfect for formal looks. Rolled hems work beautifully on lightweight fabrics, while serged edges add durability. For beginners, bias tape or hem facing offer foolproof finishing without special techniques. Pick the method that feels right for your project.
| Hemming Method | Best For | Difficulty |
|---|---|---|
| Blind Hemming | Professional finish | Intermediate |
| Rolled Hem | Lightweight fabrics | Beginner |
| Serged Edge | Durability | Intermediate |
Optional Skirt Customizations and Sewing Tips
Your pull-on skirt is almost done, and now comes the fun part—making it uniquely yours. You can add practical features like pockets or dress it up with decorative trims that match your style.
We’ll also walk you through fixing common hiccups and share some insider tips to make your sewing smoother and more enjoyable.
Adding Pockets or Decorative Trims
Want to make your skirt truly yours—something that fits your life and your style perfectly? Adding pockets transforms your skirt from basic to exceptional. Side seams are perfect pocket spots; just insert rectangular fabric pieces before sewing seams together.
For trim placement, stitch decorative ribbons or lace along the hemline or waistband. Choose lightweight trims so your skirt hangs beautifully.
These embellishment techniques let you customize your design and create accessories that match your personal style perfectly.
Troubleshooting Common Issues
Skirt issues usually come down to a few key problems. Waistband fit troubles happen when elastic’s too tight—aim for 2–4 inches shorter than your actual waist so it stretches comfortably without slipping. Hemming problems like wavy edges occur from uneven pressure; ease up on your presser foot and let fabric hang 24 hours before hemming for accuracy. Seam alignment shifts when front and back patterns don’t match your body shape, so adjust for your natural proportions.
One important step is to make certain you make the correct waistline adjustments for comfort and style. Skirt tightness and wrinkles signal insufficient ease—add width where needed.
Fabric choice matters hugely; soft, drapey materials like rayon work beautifully, while stiff quilting cotton creates unwanted puffiness. These tweaks transform your beginner sewing project into success.
Helpful Tips for Beginner Sewists
Every beginner sewist hits a few bumps along the way, but that’s totally normal and part of learning your craft. Start with practice fabrics like cotton muslin before cutting into your final material. Pay close attention to seam allowance—consistent measurements make all the difference.
Check your thread tension and needle selection for each new project, as these affect stitch quality. Press as you go; it keeps everything neat and makes sewing easier.
These sewing fundamentals build your confidence for future beginner sewing projects.
Frequently Asked Questions (FAQs)
How can I add pockets to a pull-on skirt?
Adding pockets transforms your pull-on skirt into something truly functional. Try side seam pockets for simplicity—they’re sewn directly into your side seams before assembly.
Cut rectangular pocket pieces from your main fabric, attach them to the seam allowances, and sew everything together. For reinforcement, backstitch at the corners where pockets meet the waistband.
This sewing technique works beautifully for beginners tackling easy sewing projects.
Can I use a serger to finish the seam allowances?
A serger is perfect for finishing seam allowances on pull-on skirts. It trims, wraps, and stitches edges simultaneously, creating professional seams that prevent fraying.
Use appropriate serger thread types and needle sizes for your fabric weight. Adjust differential feed settings for your fabric’s drape to avoid puckering or stretching.
What type of needle should I use when sewing a pull-on skirt?
Just like a needle threading through fabric, choosing the right needle guides your entire project to success.
For pull-on skirts, use universal needles in size 80/12 or 90/14—they work beautifully with most woven and knit fabrics. If you’re sewing stretchy materials, ballpoint needles prevent skipped stitches.
Match your needle size to fabric weight for professional sewing results every time.
How do I adjust the length of the skirt to my desired measurement?
Try on your sewn skirt to find your ideal length—knee, midi, or maxi work beautifully depending on your style. Mark where you want the hemline, measure from your waist down, then trim fabric accordingly. Remember to add extra inches for hemming, accounting for fabric thickness and your preferred finish.
Can I add a decorative trim or embellishments to the hem of the skirt?
Your hemline is a perfect canvas for creativity. Add lace, ribbon, or pom-pom trim by pinning it to your hem allowance before sewing.
Choose trim that complements your fabric weight. Secure embellishments with a straight stitch for durability in these easy sewing projects.
How do I adjust the pattern for different body shapes?
Different body shapes need tweaks to your pattern. For plus-size adjustments, grade the waist and hip measurements up evenly. Petite alterations mean shortening the skirt length and reducing the A-line shape. Maternity modifications add extra room at the waist and hips.
Always make a muslin fitting first to test your pattern making adjustments before cutting final fabric.
Can I wear the skirt without a slip underneath?
Wearing your pull-on skirt without a slip is absolutely doable—your comfort matters most. Fabric opacity determines visibility, so lightweight fabrics work best with slip alternatives like bike shorts or tights.
Weather considerations and occasion-appropriate choices guide your decision. Personal preference wins here.
How do I add a zipper or button closure instead?
You’ll need to modify your waistband to accommodate a zipper or button closure.
For a zipper, insert it into a center front seam before attaching elastic.
For buttons, create a facing or overlap at the waistband opening and sew buttons through both layers securely.
Will the skirt shrink after washing and wearing?
Yes, your skirt will likely shrink, especially if you used natural fabrics like cotton or linen.
Pre-wash your fabric before cutting to prevent shrinkage. Always follow garment care labels and use cold water with gentle cycles to minimize post-sewing shrinkage.
Conclusion
Who knew learning how to sew a pull-on skirt could be such a stitch of confidence? Now, your closet isn’t just full—it’s filled with proof that your own hands can turn fabric into something wonderful.
Every seam stitched and elastic threaded was a small act of possibility.
Take pride in the skirt you’ve created—it’s more than a piece of clothing; it’s a reminder you can make comfort, style, and joy with just a little thread.

