This site is supported by our readers. We may earn a commission, at no cost to you, if you purchase through links.
Most people think sewing a skirt requires years of training or natural talent, but the truth is simpler: it just needs the right steps and decent materials. Whether you want a practical everyday piece or something with more personality, making your own skirt gives you control over fit, fabric, and style in ways ready-made options rarely do.
The process breaks down into manageable stages—measuring, cutting, assembling, and finishing—each one building on the last. You’ll move from flat fabric to something you can actually wear, and the skills you pick up along the way transfer to almost any other sewing project.
Your first skirt might not be perfect, but it’ll be yours, and you’ll understand exactly how to improve the next one.
Table Of Contents
Key Takeaways
- Sewing your first skirt doesn’t require years of training—just the right materials, accurate body measurements, and a step-by-step approach that transforms flat fabric into a wearable garment you control completely.
- Your fabric choice determines everything from drape to structure, with A-line skirts thriving in medium-weight wovens, gathered styles needing lightweight fabrics, and pencil skirts requiring heavier materials around 200-300 gsm.
- Accurate measurements of your waist, hips, and desired length—combined with proper ease allowances for your chosen style—create the foundation for a skirt that actually fits your unique body instead of a generic form.
- Machine sewing handles the heavy construction work three to six times faster than hand-stitching, but combining both methods—machine speed for seams and hand precision for invisible finishes—delivers truly professional results.
Essential Tools and Materials for Sewing a Skirt
Before you start cutting fabric and threading your machine, you’ll need to gather the right tools and materials for the job. Having everything ready beforehand makes the sewing process smoother and helps you avoid frustrating stops midway through your project.
Let’s walk through exactly what you need to get started.
Fabric Selection for Different Skirt Styles
Your fabric choice shapes everything about how your skirt looks and feels. A-line skirts thrive in medium-weight wovens like cotton twill, while gathered styles need lightweight fabrics with good drape—think viscose or cotton blends. Circle skirts demand fabric that moves, so rayon works beautifully. Pencil skirts need structure, so reach for wool-blends or heavier fabrics around 200–300 gsm.
Consider seasonal needs too: lightweight cottons for summer, midweight for year-round wear. Fabric weight and drape determine your skirt’s success. When shopping online, consider that fabric weights matter for determining suitability.
Choosing Matching Thread and Notions
Now that you’ve selected your fabric, it’s time to gather thread and notions that’ll make your skirt come together beautifully. Thread fiber types matter—synthetic polyester threads dominate the market because they’re strong and reliable for seams. Match your thread color to your fabric: choose neutrals like gray or beige for most fabrics, or go one shade darker if an exact match isn’t available. To guarantee a professional finish, remember to look at visible stitching options.
Think about your closure too:
- Zippers for structured skirts
- Elastic for gathered styles
- Buttons for waistband detail
Measuring Tools and Cutting Supplies
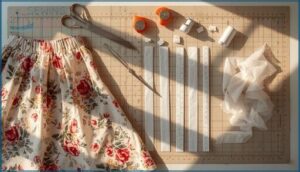
Once your thread and notions are chosen, reach for a measuring tape—standard 60-inch versions work for most skirts. Tape measure accuracy matters, so check for stretching. Rotary cutter sizes range from 28mm for curves to 60mm for long cuts. Pair sharp fabric shears with a sturdy cutting mat. Use tailor’s chalk, pins, or clips for precise marking and layout.
| Measuring Tape | Rotary Cutter | Fabric Shears |
|---|---|---|
| ————–: | : | |
| ————: | : | |
| ————-: | ||
| 60-inch, dual-scale | 28mm, 45mm, 60mm | 8”, micro-serrated |
| Metric/inch marks | For curves, straight cuts | For detail, long strokes |
| Check for stretch | Self-healing mat | Silk, cotton, denim |
| Fractional inches | Up to 6 layers | Precision cutting |
Sewing Machine and Alternative Hand-sewing Tools
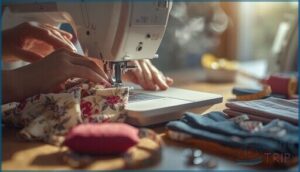
Your sewing machine becomes the workhorse for construction. Most home machines stitch 600 to 1,000 times per minute—fast enough for seams, hems, and waistbands. Consider a walking foot attachment; it feeds layered fabric evenly, preventing puckering on multi-layer hems.
Hand-sewing complements machine work. Keep quality needles, thimbles, and scissors nearby for finishing touches like invisible hems or zipper attachment. This combination—machine speed paired with hand precision—delivers professional results:
- Walking feet prevent fabric shifting
- Thimbles protect fingers on thick seams
- Quality scissors provide clean edges
- Hand-stitching creates invisible finishes
- Machines save three to six times the time
Taking Accurate Measurements for a Perfect Fit
Getting accurate measurements is where the magic happens—it’s the difference between a skirt that fits beautifully and one that doesn’t work at all. Your body is unique, so taking time to measure yourself properly means you’ll end up with a skirt made just for you.
Accurate measurements are the difference between a skirt that fits beautifully and one that doesn’t work at all
Let’s walk through exactly how to get these measurements right, what to adjust based on your style choice, and how much fabric you’ll actually need.
Measuring Waist, Hips, and Skirt Length
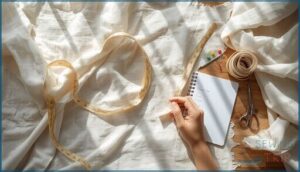
Getting your measurements right sets the foundation for a skirt that actually fits. You’ll need three key measurements: waist, hip, and skirt length.
Measure your waist at the narrowest part of your torso while standing relaxed. Next, measure your hips at the fullest part of your buttocks, keeping the tape parallel to the floor. Finally, measure from your waist down to where you want your hem to fall.
Double-check each measurement—accuracy matters here.
Adjusting Measurements for Different Skirt Styles
When you adjust your waist measurement, hip measurement, and skirt length for style, you’re shaping comfort and silhouette. Ease allowances differ—A-line adjustments add room at the hem, while pencil adjustments keep hips snug. Grading sizes means distributing changes evenly, and body shape tweaks make sure measuring for a skirt fits you perfectly. Here’s what sparks confidence:
- More ease for A-line freedom
- Pencil skirt precision
- Grading sizes for growth
- Body shape, measurements, and comfort
Calculating Fabric Requirements
Your fabric needs depend on three key factors: skirt circumference, fabric width, and panel layout. Start by multiplying your hip measurement by an ease factor—semi-fitted skirts use 1.2, loose styles use 1.3 to 1.5. Add seam allowances, then divide by your fabric width to determine how many panels you’ll need.
Don’t forget to account for pattern repeats and a shrinkage allowance of 0.25 yard. This calculation ensures you purchase exactly what you need.
Choosing and Cutting The Skirt Pattern
Now that you’ve got your measurements locked in, it’s time to pick your style and get your fabric ready. The pattern you choose depends on what look you’re going for—whether that’s a flowing A-line, a gathered waist, or something else entirely.
Let’s walk through the different styles and show you exactly how to cut each one.
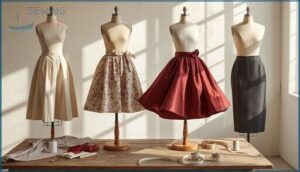
Selecting a Skirt Style (A-line, Gathered, Circle, Pencil)
Ever wondered which skirt style flatters your body type and fits your occasion? Choosing between A-Line, Gathered, Circle, or Pencil skirts depends on your fabric choice, skill level, and style trends.
- A-Line Skirt: universally flattering, easy for beginners
- Circle Skirt: dramatic flare, perfect for movement
- Pencil Skirt: fitted design, ideal for formal occasions
Creating or Using a Paper Pattern
Think of your paper pattern as the blueprint for your skirt’s success. Whether you’re drafting with manila pattern paper or using a commercial pattern, pay close attention to grainline markings—they guide your fabric’s drape.
If printing a PDF skirt pattern, always check scaling with the calibration square.
Creating paper patterns using drafting formulas ensures your pattern pieces fit perfectly.
Aligning, Folding, and Pinning Fabric for Cutting
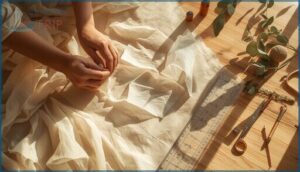
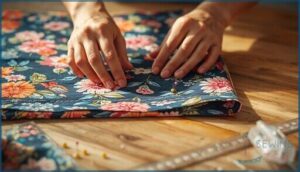
Did you know that aligning your skirt pattern with the fabric grain can prevent twisting by up to 30%? Start by smoothing your material flat, then fold it with the selvages perfectly matched.
Pin placement matters—space pins 1–2 inches apart, especially along curves, to keep layers steady. Careful folding strategies and grain alignment set the stage for cutting precision.
Cutting Skirt, Waistband, and Interfacing Pieces
Once your fabric is pinned and ready, cutting accuracy shapes the fit and look. Marker efficiency helps reduce waste, so use sharp scissors or a rotary cutter for crisp edges. Remember to add seam allowances and trim fusible woven interfacing pieces slightly smaller.
For a smooth skirt, focus on these four steps:
- Cut skirt panels
- Cut waistband pieces
- Cut interfacing
- Check every edge
Sewing and Assembling The Skirt
Now that your fabric is cut and ready, it’s time to bring your skirt to life by stitching the pieces together. This section walks you through the core steps—from joining your seams to attaching your waistband and choosing between elastic or a zipper closure.
You’ll finish strong with polished edges and pressed seams that give your skirt that handmade-but-professional look.
Sewing Side Seams and Darts
With precision and patience, you’re ready to sew your skirt’s side seams and darts. Start by aligning front and back pieces with right sides together, matching notches carefully. Use a standard 1.5 cm seam allowance for your side seams to accommodate closures smoothly.
Sew darts first, tapering toward the hipline and stopping about one inch before it. Trim dart tips to 3mm to reduce fabric bulk. Press seams toward the back, then finish raw edges with French seams or zig zag stitching for durability.
Creating and Attaching The Waistband
Your waistband is the foundation that holds everything together. Cut interfacing 1/8 inch smaller than your waistband fabric—this prevents bulk and ensures a smooth finish. Fuse it using the medium heat setting, then sew waistband pieces along the 3-inch edge.
Attach your waistband to the skirt with a 1.5 cm seam allowance, aligning quarters (front, back, sides). Press seams toward the band, then topstitch for durability and polish.
- Professional structure that defines your skirt’s silhouette
- Clean seams that won’t show through fitted tops
- Confidence knowing your waistband will last through countless wears
Inserting Elastic or Zipper Closures
Now comes the closure—either elastic or a zipper, depending on your skirt style.
For elastic waistbands, use at least 1-inch-wide elastic to prevent twisting and discomfort. Thread it through your casing using a safety pin, overlapping ends by 1 inch before stitching.
For zipper installation, machine-baste the opening first, then use a zipper foot for precise stitching.
Both methods require careful attention to make sure your skirt fits perfectly and functions smoothly.
Finishing Raw Edges and Pressing Seams
After your closure is installed, it’s time to protect those raw edges and lock in your seams for longevity. Raw fabric frays easily, so finishing prevents unraveling throughout the skirt’s life.
Choose your edge finishing method based on fabric type:
- French seams enclose raw edges completely for enhanced durability and a polished interior
- Zigzag stitching at 2.4mm length prevents fraying on lighter fabrics efficiently
- Serger machines trim and finish seam allowances simultaneously for professional results
Press each seam immediately after stitching, using temperature guides matching your fabric. Cotton tolerates 400°F, while synthetics need just 275°F to prevent damage. Press seam allowances open from the wrong side first, then from the right side for crisp, invisible pressing marks. Proper seam durability depends on these finishing techniques.
Hemming and Finishing Touches
You’re almost at the finish line—now it’s time to hem your skirt and add those final touches that make it look polished and complete. Hemming seals the raw edges and gives your skirt a professional look, while finishing details like embellishments or pockets can make it truly yours.
Let’s walk through each step to get your skirt ready to wear.
Measuring and Pressing Hem Allowance
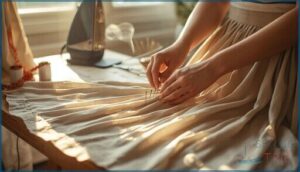
Your hem allowance is the foundation of a polished finish. Standard allowances range from 5/8 inch to 1 1/2 inches, depending on your fabric weight and hem style.
Lightweight fabrics need smaller allowances to avoid bulk, while thicker materials demand more room for structure. Measure your desired hemline while wearing the skirt, then add that extra fabric. Use a seam gauge for consistency.
Press your allowance with a steam iron on appropriate heat settings, using a press cloth to protect delicate weaves.
Sewing The Hem by Machine or Hand
Your needle’s path at the hemline makes or breaks the final look. Machine hemming works best on medium to heavier fabrics—use a straight stitch length of 2.5–3.0 mm to prevent puckering and thread breakage.
Hand-sewn hems give you invisible control on delicate skirts through blind stitch techniques. Adjust tension carefully, testing on fabric scraps first. Blind hems demand at least 2.0 cm allowance for proper folding.
The right stitch length and tension quality transform raw edges into polished, durable finishes.
Adding Embellishments, Pockets, or Trims
Your skirt’s personality emerges through thoughtful pocket construction and trim selection. Patch pockets add casual charm, while inseam options keep lines clean.
Fabric embellishment transforms basics into statement pieces. Consider decorative stitching, lace edges, or ribbon accents along hems and pocket openings. Modern machines offer built-in decorative stitches perfect for custom details.
Market demand for individualized garments reflects a growing interest in unique touches. Buttons on waistbands or pocket flaps provide both function and flair, completing your design vision.
Troubleshooting Common Sewing Issues
When stitches skip or fabric puckers, don’t panic—these common problems have straightforward fixes. Incorrect thread tension and mis-threading cause roughly 60% of skipped stitches; rethreading and cleaning your machine resolve most issues before repair becomes necessary.
Using the wrong needle size increases skipping by over 30%. Check your needle type matches your fabric, replace worn needles every project, and prewash fabric to prevent shrinkage distortion.
Measure twice, cut once. These sewing techniques prevent costly mistakes.
Frequently Asked Questions (FAQs)
What is so Sew Easy how to sew a skirt?
So Sew Easy’s 30-minute tutorial teaches beginner-friendly skirt making with elastic waistbands and direct fabric drafting. It emphasizes proper waist-to-hip shaping, quick completion, and personal fit through individual measurements.
Reader successes confirm this accessible approach works for first-time garment makers seeking fast results.
How do you make a little skirt?
A child’s twirly circle skirt can spark pure joy. Kids skirts require less fabric and fewer seams than adult designs, making them ideal first projects. Choose lightweight cotton fabric, use simple patterns with elastic waistbands, and follow beginner sewing tutorials.
How long does it take to sew a skirt?
Your sewing project timeline depends on Skill Level, Style Complexity, Machine Quality, Prep Efficiency, and Finishing Details.
Beginners usually need two hours for simple gathered skirts, while experienced sewists complete A-line styles in one hour.
Can you sew a skirt with a sewing machine?
Yes, you can confidently sew a skirt with a sewing machine. Machine stitch strength exceeds hand sewing, and over 28 million households worldwide own machines, making skirt construction faster, more durable, and accessible to sewers at every skill level.
Can a beginner sew a skirt?
Absolutely—beginner sewists thrive with simple skirt projects. Easy skirt styles like gathered or circle designs teach fundamental sewing techniques for beginners.
Focus on fabric grain alignment, elastic waistband tips, and mitigating common errors for success.
How much fabric do I need for a skirt?
Fabric width and skirt style determine your yardage. Straight skirts need less—about 1⅝ yards at 44-inch width—while gathered styles require more. Always add extra for print matching and hem allowance.
What are the steps in making a skirt?
You measure yourself, cut the fabric to size, stitch the side seams together, attach the waistband or elastic casing, insert closures if needed, and finish by hemming the bottom edge.
How to design a skirt pattern?
Start with your waist and hip measurements, then draft a basic block on paper. Add ease allowance for comfort, place darts strategically, and mark grainline direction.
Style geometry transforms simple pattern pieces into wearable designs through careful alterations.
How do I modify a skirt for religious dress codes?
Imagine a skirt police measuring hemlines—thankfully, real life’s simpler. Length adjustments, opacity solutions, and fit alterations address most faith-based needs.
Policy compliance means adding fabric panels, opaque linings, or layering options for modest skirt variations.
What is the armscye depth for a skirt bodice?
Bodice armscye depth measures the vertical distance from your shoulder to underarm, usually ranging from 7 to 8 inches depending on body variables and size charts.
This sewing pattern measurement ensures proper fit when combining bodice and skirt designs.
Conclusion
Learning how to sew a skirt is like building confidence stitch by stitch—each seam you complete reinforces what you already know and readies you for the next challenge. You’ve moved through measuring, cutting, assembling, and finishing, and now you understand the logic behind garment construction.
Your first skirt proves you can transform fabric into something functional and personal. Keep that momentum going, hone your technique with each project, and watch your skills expand beyond what you thought possible.
- https://craftindustryalliance.org/the-size-of-the-quilting-market-quilting-trends-survey-results-2024/
- https://www.marketgrowthreports.com/market-reports/home-sewing-machines-market-112738
- https://www.grandviewresearch.com/horizon/outlook/sewing-machine-market-size/global
- https://ucanr.edu/sites/default/files/2011-06/102517.pdf
- https://www.lendingtree.com/insurance/appliance-injuries-study/

