This site is supported by our readers. We may earn a commission, at no cost to you, if you purchase through links.
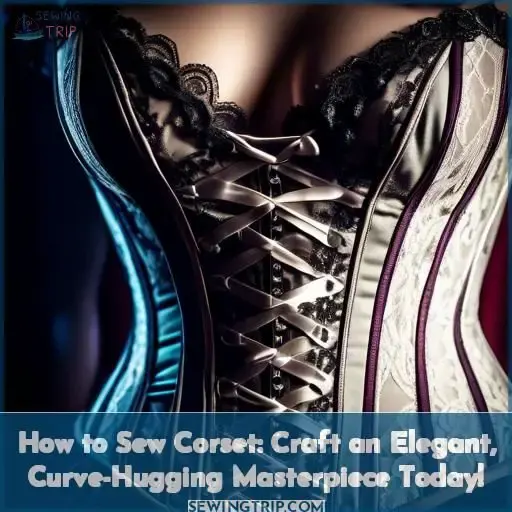
To sew a corset, start with high-quality fabric like silk, cotton, or satin.
Cut panels using a historical or modern pattern.
Then sew the outer fabric and lining together, leaving room for boning channels.
Install steel or spiral boning in these channels to give your corset structure and shape.
Next, bind the top edge and add lace-up eyelets or a front busk closure.
Carefully trim and press your garment.
Embellish with embroidery or lace for a luxurious finish.
Crafting your own curve-hugging corset allows you to master an intricate historical technique while expressing your unique style.
For a thorough tutorial on bringing this lavish garment to life, let’s proceed.
Table Of Contents
Key Takeaways
- Start with high-quality fabric like silk, cotton, or satin for your corset.
- Use a historical or modern pattern and create a muslin mockup for fitting before construction.
- Choose a pattern that aligns with your desired shape and style, and select appropriate boning based on the design.
- Carefully assemble panels, sew boning channels, and add closures before embellishing with embroidery or lace for a luxurious finish.
How to Sew Corset?
To sew a corset, you’ll need a corset pattern, suitable fabric, and corset making supplies such as boning, eyelets, and fasteners.
Start by cutting the pattern pieces from your chosen fabric, then sew the panels together, inserting boning channels as needed.
Sew the facing or binding to finish the edges. Add closures, such as eyelets and lacing, and attach any straps.
Finally, sew the panels together to create the corset body.
Corset Materials
To craft an elegant, curve-hugging corset, you’ll need a variety of materials. The outer fabric, typically made of raw silk or a modern alternative like cotton, linen, or satin, adds a luxurious touch and drapes beautifully. For the lining fabric, choose a strong material like coutil or cotton to provide support and stability. Interfacing helps reinforce the back panel for eyelet stability, while spiral or steel boning (20 pieces) is essential for shaping and support. Eyelets and lacing complete the closure system.
When selecting a pattern, consider the desired shape, such as waist cinching or bust coverage. Choose a historical or modern pattern, and always create a muslin mockup for fitting before construction. Draping or flat pattern making methods can be used for pattern creation, and online resources are available for pattern generation and purchase.
Boning is vital for corset construction. Avoid plastic boning, which can twist and buckle, and opt for steel or spiral bones. Steel bones are suitable for straight seams, while spiral bones are ideal for curves. Purchase bones to the correct size (3/4 shorter than the seam) and order them from specialized retailers online.
Fabric cutting involves doubling up the fabric for mirrored pieces, using a 1/2 seam allowance, and cutting outer fabric and lining fabric sets. Iron on interfacing to the back panel for eyelet stability.
Assembling panels involves sewing panels together for the outer and lining fabrics, clipping and ironing seams, and sewing the outer fabric to the lining fabric along the back panel. Sew channels for bones (close to seam lines, 3/8 width for 1/4 bones) and trim channel edges.
Types of boning include steel boning, which is flexible and durable, and spiral boning, which is more pliable. Steel boning is recommended for historical corsets, while spiral boning is suitable for modern corsets.
Inserting the boning involves sewing the boning into channels and closing the bottom edge, adding bias tape, and closures. Lace-up eyelets provide an adjustable fit and corset shape, while front busks facilitate lacing and removal.
Finishing touches include embellishments like embroidery, beading, trim, and fabric dye, as well as fold-over facing for reinforcement and final pressing for a polished look.
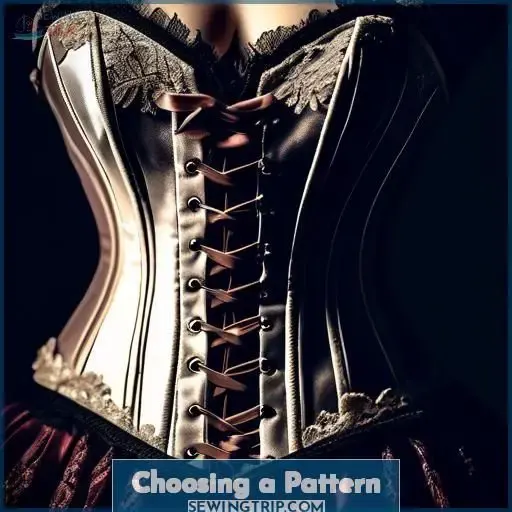
Choosing a Pattern
When choosing a corset pattern, carefully consider the desired shape – do you prefer dramatic waist cinching or fuller bust coverage? The pattern should align with your vision, whether a historical or modern style; purchase a reputable pattern or draft one using draping or flat pattern making methods.
Pattern Selection
Creating a Corset: A Guide to Choosing the Perfect Pattern
To embark upon the journey of crafting a corset, the initial step entails selecting a suitable pattern. Whether your inspiration stems from historical eras or contemporary trends, there’s an array of options to cater to your desires. Here is a comprehensive breakdown of the factors to contemplate:
- Desired Shape: Define the type of corset you aspire to create, such as an overbust or underbust style, based on your preferences and the aesthetic you envision.
- Historical or Modern Pattern: Determine if you seek a pattern rooted in a specific era, such as Victorian or Edwardian, or a more modern design.
- Pattern Grading: If a custom-made pattern isn’t employed, it’s essential to adjust the size to align with your measurements. This may entail grading the pattern to guarantee a proper fit.
- Customizing Patterns: Enhance the uniqueness of your corset by incorporating embellishments or distinctive features.
- Lining: Opt for a lining fabric that harmonizes with your outer fabric while providing stability and support.
- Sewing: Verify that you possess the requisite sewing skills and tools to construct your corset.
- Straps and Interfacing: Contemplate the type of straps you desire and whether interfacing should be utilized for enhanced stability.
- Finishing Touches: Envision how you’ll complete your corset, such as by adding closures or decorative elements.
Boning Types
Regarding the selection of the optimal boning for your corset, various types merit examination. Here are three alternatives that can augment the corset’s form, support, and comfort:
-
Flat Steel Boning: This established option is ideal for establishing a sturdy foundation and preserving the corset’s shape. Flat steel boning is appropriate for corsets of both historical and contemporary design, imparting a timeless appearance and sensation.
-
Spiral Steel Boning: This option incorporates flexibility, enabling the corset to adapt to the body’s curves while providing support. Spiral steel boning is ideal for corsets with considerable movement or for individuals seeking a more comfortable fit.
-
Plastic Boning: This type strikes a balance between comfort and structure, making it a versatile option for daily wear or for individuals desiring a lighter corset. Plastic boning is also suitable for corsets with a more relaxed fit or for those preferring a less rigid feel.
Fabric Cutting
Now that you’ve chosen your boning, it’s time to cut your fabric.
Start by selecting a pattern that suits your desired shape and style.
Remember to scale it down to your measurements and make any necessary adjustments using a muslin mockup.
When cutting, match your fabric, use interfacing for eyelet stability, and follow the pattern’s seam allowance instructions.
For a more detailed guide, refer to the table below.
Cutting the Fabric
When cutting your corset fabrics, carefully lay out both the outer fabric and lining fabric on a flat surface.
Take care to make sure the grainlines are straight and match any patterns if present.
Allow for a 1/2 seam allowance when cutting the panels.
This narrow seam allowance is typical for corsetry to reduce bulk while still providing adequate seam strength.
Fabric Layout
After selecting your design, it’s time to arrange your fabric. This stage is key to making sure your corset fits snugly and complements your figure. Here’s how to do it well:
- Follow the Grain: Consistently place your pattern pieces along the fabric’s grain. This guarantees your creation moves with you, not against you.
- Pay Attention to Details: Think about sewing corners and including design features now. It’s easier to modify the pattern before cutting.
- Finalize with Care: Plan how you’ll finish your seams in advance. This foresight ensures a corset that’s both durable and visually appealing.
Seam Allowances
When cutting out your corset, it’s crucial to think about seam allowances to guarantee a tidy finish and adequate seam strength. Seam allowances are the extra fabric added to the edges of a pattern piece to make room for seam construction. They can vary in width depending on the seam type and direction. Here are some guidelines for working with seam allowances:
- Seam Finish: Depending on the type of seam you’re using, you may need to finish the seam allowances differently. For example, you might choose to overlock, serge, or zigzag the edges to prevent fraying.
- Seam Type: Different seams require different seam allowance widths. For example, a French seam might’ve a 1.5cm seam allowance on one side and a 6cm seam allowance on the other.
- Seam Strength: The width of your seam allowance can affect the overall strength of your corset. A wider seam allowance can provide more support and stability, while a narrower seam allowance can be more flexible.
- Seam Direction: The direction of your seam allowance can also impact the final look of your corset. For example, you might choose to press your seam allowances towards the outside of your corset for a more polished finish.
To add seam allowances to your corset pattern, you can either enlarge the pattern to include the seam allowances or add them directly to the fabric as you cut out the pattern pieces. It’s crucial to be precise when marking and cutting your seam allowances to guarantee a proper fit and finish for your corset.
Assembling Panels
You’ll start assembling the outer fabric panels first. Carefully sew the panels together, following the seam allowances on your pattern and using a strong upholstery thread. Next, repeat this process for the lining fabric, ensuring both the outer fabric and lining are constructed identically.
Outer Fabric
Selecting the right fabric for your corset is essential for both the appearance and functionality of your creation. Here are some key factors to keep in mind when choosing the outer fabric for your corset:
- Fabric selection: Choose fabrics that are strong, supportive, and durable. Silk, satin, and velvet were commonly used in historical corsets, while modern corsets often feature cotton, linen, or satin.
- Fabric weight: The weight of the fabric can affect the overall shape and structure of the corset. Heavier fabrics may provide more support, while lighter fabrics can be more comfortable for everyday wear.
- Fabric texture: The texture of the fabric can influence the corset’s drape and overall look. Smooth fabrics like satin may be more suitable for the outer layer, while textured fabrics like brocade or taffeta can add visual interest.
- Fabric color: The color of the fabric can affect the corset’s overall aesthetic. Consider the desired color scheme and whether you want the corset to be a standalone piece or to be worn over other garments.
When choosing the outer fabric for your corset, keep in mind the desired shape and style of the corset. For example, raw silk is recommended for a more traditional look, while modern corsets may feature a variety of fabrics, such as cotton, linen, or satin.
Remember to also consider the lining fabric, which should be strong and supportive, and the boning, which can be made of steel or spiral bones.
Lining Fabric
To craft a stunning corset, it’s essential to contemplate the appropriate lining fabric. Here are three alternatives to explore:
- Coutil: This fabric is tailored specifically for corsetry and is renowned for its resilience and longevity. Its dense weave easily accommodates the rigorous tension and structure demanded by a professional corset.
- Cotton: Cotton offers breathability, making it a prevalent choice for corsets. It also boasts a soft texture and is effortless to manipulate.
- Linen: Linen presents another durable option that exudes a gentle touch. It’s frequently combined with cotton to create a blend that harmonizes strength and comfort.
When selecting your lining fabric, take into account the color schemes and fabric textures that will complement your outer fabric. Additionally, consider the positioning of eyelets and how they’ll be affixed to the lining fabric.
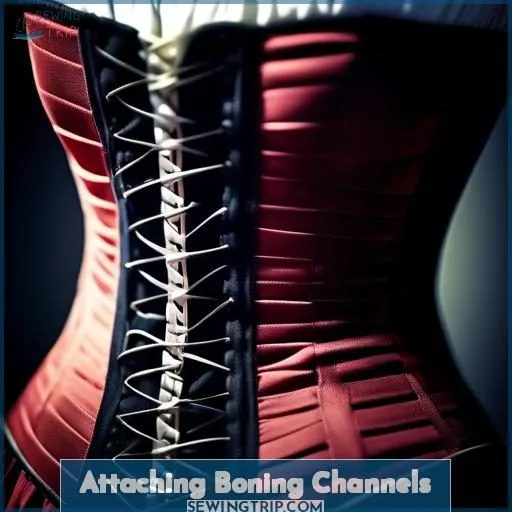
Attaching Boning Channels
After sewing together the outer fabric and lining panels, you’ll need to prepare for attaching the boning channels.
These channels are narrow fabric casings that allow the boning to slide in, providing structure and shape to the corset.
Position the channels along major seam lines, curving them to follow the desired silhouette.
Construct the channels by sewing strips of sturdy cotton twill or coutil with a straight stitch, leaving an opening for inserting the bones.
Channel Placement
To achieve the perfect corset, you’ll need to pay close attention to the placement of your boning channels. Here’s a step-by-step guide to guarantee a flawless result:
- Mark your pattern: Start by marking the lines on your pattern where you want your boning channels to be. This will serve as your guide for the placement of the channels.
- Position the boning tape: Iron your boning tape and center it over the marked line on your pattern, or over the seam it will be sewn over. Pin the tape perpendicular to the edges, ensuring it’s straight and aligned with your pattern or seam.
- Baste the tape: Baste the tape as close to the edge as possible on both sides of the tape and as straight as you can. This will provide a guide for your sewing machine to follow when you sew the boning channel.
- Sew the channels: Sew the boning channel from the right side of the corset, closing your basting stitches as you go. This will give you a smoother and neater finish. Use a zipper foot or a clear applique foot if it helps you see your stitching lines more clearly.
- Remove the basting stitches: After machining, remove the basting stitches to reveal your perfect boning channel. Remember, the channel must be 2mm wider than your bone, so adjust the width of your channel accordingly.
Channel Construction
In the world of corsetry, creating boning channels is essential for a well-crafted, supportive garment. These channels provide the base for the boning, ensuring it stays in place and supports the intended shape. Here’s a step-by-step guide on how to construct boning channels for your corset:
- Measure the width of your boning: Ensure that your boning fits snugly in the boning cases to prevent shifting and causing discomfort. Measure the width of your boning precisely, as it will determine the width of your boning channels.
- Choose the stitch type: Select a stitch type that will securely hold the boning in place. A three or three and a half out of five stitch length is recommended for a stable, yet not overly tight stitch.
- Decide on the channel material: Use a material that’s compatible with your boning and provides enough space for the boning to move freely. For example, if you’re using spiral boning, you may want a channel material that can accommodate the curves.
- Consider seam allowance: Ensure there’s enough space in your seam allowance for the boning channel. If you’re using a seam allowance wider than the boning, you may need to adjust your pattern accordingly.
- Sew the boning channels: Sew along the lines you’ve marked for the boning channels. Be sure to maintain an even stitch length and tension for a consistent look.
- Adjust the width of your channels: If you’re using double boning, you may need to widen your channels to accommodate both bones.
- Press the boning channels: Iron the boning channels flat to ensure they lie smoothly against the corset fabric.
Types of Boning
When constructing a corset, you’ll need to choose between steel boning and spiral boning. Steel boning provides rigidity and structure along straight seams, while spiral boning allows for flexibility around curved areas like the bust and hips. Select the appropriate type based on the corset’s design and your desired level of support and shaping.
Steel Boning
Steel boning is a sought-after option for corset crafting due to its flexibility and durability. Here are four critical points to mull over when utilizing steel boning:
- Boning Materials: Steel boning is crafted from slender aluminum wire, coiled into a spiral and then flattened. It’s procurable in pre-cut lengths and by the meter.
- Boning Channels: Steel boning should be inserted into channels that are adjacent to seam lines and approximately 3/8 inches wide for 1/4 inch bones.
- Boning Placement: Steel boning is frequently employed for the central front, central back, and lateral panels of a corset, providing structure and support.
- Boning Installation: Steel boning can be installed using metallic end caps or alternative techniques such as hot adhesive, plasti-dip, or UV resin.
Bear in mind to select the appropriate boning type based on your corset’s design and desired level of support.
Spiral Boning
Spiral boning is a type of steel boning that offers flexibility and comfort in corset-making. It comes in a flattened coil design, allowing for more fluid movement in any direction. This design revolutionized corsetry by allowing women to move more freely and opened up greater opportunities for function and wear. Spiral boning is particularly suitable for curved seams and for bone placement where the bone needs to bend in a direction other than with the flat surface of the bone. It’s commonly used in combination with sprung steel boning, with spiral steels used at the sides for ease of movement and sprung steels used at the back and front for support.
To incorporate spiral boning into your corset-making project, consider the following steps:
- Choose the right width and channel size: Spiral boning comes in various widths, so select the appropriate width based on the seam allowance and the desired shape of your corset. The channel size should be chosen to accommodate the width of the spiral bone, typically 3/8 inches for 1/4 inch bones.
- Position the boning channels: Place the channels close to the seam lines, ensuring that the bone will be able to bend in the direction required by the seam.
- Sew the boning channels: Sew the channels onto the corset fabric, making sure to leave enough space for the spiral bone to move within the channel.
- Trim the channel edges: After sewing the channels, trim the excess fabric around the channel edges to prevent bulkiness.
- Insert the spiral bone: Carefully insert the spiral bone into the channel, making sure it’s properly aligned and not twisted.
Inserting the Boning
To insert the boning into your corset, follow these steps:
- Choose the Right Boning: Use steel or spiral bones for your corset, as they provide better support and stability than plastic boning. Steel bones are suitable for straight seams, while spiral bones are ideal for curves.
- Prepare the Channels: Sew boning channels into the seam allowance along the sides of each pattern piece or attach them directly to the fashion fabric. Make sure the channels are snug enough for the boning to fit securely without shifting around.
- Insert the Boning: Slide the boning into the channels, ensuring they fit tightly and don’t slide around when wearing the corset. Hand stitch or machine topstitch around the edges of the channels to keep the boning firmly in place.
Binding and Facings
After inserting the boning into the channels, it’s time to secure the top and bottom edges of your corset.
For the top binding, cut bias strips from your fashion fabric and sew them together end-to-end, ensuring enough length to encircle the entire top edge.
Wrap the binding around the raw top edge, pin in place, and stitch close to the bottom folded edge.
Top Binding
Now that we’ve inserted the boning, it’s time to add the top binding.
Start by cutting bias tape to match the length of the top edge.
Press the fabric edge and the bias tape to make them crisp.
Sew the bias tape to the top edge of the corset, making sure to leave a small gap for turning.
Once done, press the bias tape to the inside and pin it in place.
Finally, sew the bias tape to the inside of the corset, closing the gap we left earlier.
This will give your corset a neat and polished finish.
Bottom Facing
To craft an exquisite corset, it’s essential to address the bottom facing, a pivotal design element. Here’s a step-by-step guide to handling it:
- Determine Your Bottom Curve: The pattern you select may present various options for bottom curves. Choose one that aligns with your preferences and body contours.
- Trace the Pattern Components: Utilize freezer paper or an appropriate medium to outline the pattern components onto your fabric. Ensure you incorporate the required seam allowance and mark any notches or waistline indicators.
- Cut the Fabric: Meticulously cut your fabric along the pattern components, ensuring alignment with the grain line to prevent distortion.
- Craft the Bottom Facing: Depending on the pattern, you may need to create a distinct piece for the bottom facing. It can be fashioned from the same fabric as the corset or a contrasting material for visual appeal.
- Attach the Facing: Join the bottom facing to the main corset component, aligning the raw edges. Secure each attachment point with backstitches for durability.
Keep in mind the design of your corset and whether you desire a straight or angled seamline at the bottom. This choice is influenced by your body shape and the desired aesthetic of your corset.
Adding Closures
For the lace-up closure, you’ll strategically position eyelets along the back edges of your corset panels.
Space them evenly, allowing enough room to thread sturdy lacing that will cinch the corset to your desired fit.
Next, install the busk–a rigid closure typically made of steel–by carefully stitching it to the front center edges.
This gives structure and facilitates an easy lace-up or release.
Lace-up Eyelets
Adding lace-up eyelets to your corset is like threading the needle of self-belief. You’re not just sewing; you’re crafting a tool to unleash your inner strength. Carefully select your eyelet materials; they’re the backbone of your corset’s lace-up back. Space them uniformly for a comfortable fit that exudes confidence. Reinforce each eyelet to guarantee their longevity, a symbol of resilience and beauty. Choose a lace style and color that resonates with you, making every lace-up session a symphony of self-expression.
| Eyelet Materials | Eyelet Spacing |
|---|---|
| Brass for sophistication | Even for balance |
| Stainless steel for resilience | Tailored to body shape |
| Eyelet Reinforcement | Lace Style & Color |
| Interfacing for durability | Striking for empowerment |
| Fabric scraps for ingenuity | Understated for allure |
Front Busk
Front busks are a crucial element of corsetry, providing a secure and practical closure for your corset. They come in diverse types and materials to cater to various corset styles and preferences. Here’s an extensive guide to front busks:
Types of Busks:
- Steel Busks: These busks are crafted from high-quality steel, offering robustness and flexibility. They’re suitable for both overbust and underbust corsets and come in assorted finishes to match your corset’s aesthetic.
- Spoon Busks: These busks are designed for tighter lacing, providing greater control over the abdomen. They’re available in two sizes and a nickel finish.
Busk Materials:
- Steel: Steel busks are durable and flexible, making them a popular option for corsetry. They’re available in various finishes to suit different corset styles.
- Wood: Wooden busks were historically used and can be made from materials such as timber strapping. However, they necessitate more effort and time to craft into corset bones.
Busk Installation:
- Positioning: Busks are typically placed in the center front of the corset, allowing for effortless closure and adjustment. They can be set with the eye side facing the fabric or the post side facing the fabric, based on the pattern and your preference.
- Replacement: If your busk becomes damaged or worn, it can be swapped out with a new one. Simply remove the old busk and insert the new one, ensuring it’s securely fastened in the corset.
Busk Lengths:
- Standard Busks: These busks are generally 11 inches long and can be used for a range of corset styles, from waist cinchers to long-line corsets.
- Custom Lengths: Busks are also available in various lengths to accommodate different corset designs.
Finishing Touches
Once the corset panels are assembled, boning inserted, and closures attached, you can add embellishments to personalize your creation. Finish by pressing the corset to set the stitches, guarantee a crisp appearance, and achieve the desired curve-hugging silhouette.
Embellishments
Embellishing Your Corset: A Guide to Beaded Accents, Lace Appliques, Embroidery Details, and Sequined Embellishments
Embellishing your corset is a fantastic way to add a touch of personal flair and creativity to your garment. From beaded accents to lace appliques, embroidery details, and sequined embellishments, the possibilities are endless. Here’s a list of four ways to enhance your corset’s appearance:
- Beaded Accents: Adding beads to your corset can create a stunning visual effect. You can use a variety of beads, such as Swarovski crystals, pearls, or glass beads, and choose from different techniques like bead weaving, bead embroidery, or bead knotting. The beads can be attached directly to the corset fabric or stitched onto a separate layer of mesh or lace.
- Lace Appliques: Lace appliques can add a delicate and feminine touch to your corset. You can find pre-cut lace motifs or create your own by cutting lace to the desired shape. The lace can be stitched onto the corset fabric using a clear nylon thread to secure it in place.
- Embroidery Details: Embroidery can add a touch of elegance and sophistication to your corset. You can use a specialized embroidery machine or hand-embroider the design onto the corset fabric. Embroidery can be used to create floral patterns, geometric designs, or even your initials.
- Sequined Embellishments: Sequins can add a touch of sparkle and glamour to your corset. You can sew sequins onto the corset fabric or attach them to a separate layer of mesh or lace. Sequins can be used to create a variety of designs, such as stars, flowers, or geometric patterns.
Final Pressing
As the final details of your corset-making journey draw near, it’s time to focus on the finishing touches that will elevate your creation to a truly elegant and curve-hugging masterpiece. Here’s how to approach the final pressing stage with confidence and precision.
- Pressing the Fabric:
Start by pressing your corset with a cool iron, making sure that all seams, folds, and embellishments are smooth and free from wrinkles. Be gentle when pressing around delicate elements like eyelets and beads to avoid damaging them.
- Final Embellishments:
Take a moment to ponder any additional embellishments that will add the perfect touch of sophistication to your corset. This could include adding beads, sequins, or other decorative elements to the lace or eyelet areas.
- Secure Closures:
Make sure that all closures, such as zippers, buttons, or eyelets, are properly secured and function smoothly. Test the closure mechanism to make sure it’s not too tight or too loose, as this can affect the overall fit and comfort of your corset.
- Final Fitting:
Try on your corset one last time to ensure a perfect fit. Adjust any straps, busks, or other components as needed to ensure a comfortable and flattering fit.
- Storage and Care:
Once your corset is complete, store it in a cool, dry place to prevent any damage or discoloration. Be sure to follow the specific care instructions for your fabric and embellishments to keep your corset looking beautiful for years to come.
Frequently Asked Questions (FAQs)
How do I create a pattern for a corset if Im not using a commercial pattern?
Create your own corset pattern by draping fabric on a dress form or drafting it from your bust, waist, and hip measurements. Experiment, iterate, and refine until you achieve your desired silhouette. The possibilities are endless!
What are the best techniques for hand sewing corsets without a machine?
Handsewing corsets demands patience and precision. Begin by whipstitching boning channels and securing bones. Painstakingly install eyelets with an awl and eyelet setter. Conclude with a carefully hand-stitched center back closure. The effort results in a stunning, personalized corset.
How do I properly install eyelets in my corset?
Have you ever wondered how to properly install those intimidating eyelets on your corset? Fear not, my friend! With a few simple steps, you’ll have those suckers set in no time. First, grab your trusty eyelet setting kit and let’s get to work!
What is the best way to ensure a good fit when making a corset?
Get the ideal fit by designing a bespoke corset pattern. Measure yourself precisely, then adjust and test several muslins until you attain that close, flattering shape. It’s a process of trial and error, so don’t hesitate to experiment.
How do I properly care for and clean my finished corset?
Gently hand-wash your corset in cool water, air-dry it flat, and store it away from direct sunlight to preserve its shape and integrity. Treat it with the care it deserves, and it’ll reward you with years of faithful service.
Conclusion
Creating your own alluring corset isn’t a simple task, but with the appropriate tools and methods, you’ll be stitching corset masterpieces in a short period of time. The process of sewing a corset may be elaborate, but the reward of a meticulously tailored, exclusive garment is truly worth the effort.
Take satisfaction in your craftsmanship as you wear your custom-made creation, drawing attention with your timeless refinement.
Assemble your materials, unleash your imagination, and begin sewing a corset now!

