This site is supported by our readers. We may earn a commission, at no cost to you, if you purchase through links.

You’ve got several options: stamp your own using permanent ink on twill tape, print designs on fabric using transfer paper, or create iron-on labels with heat transfer vinyl.
For attachment, pin the label in position and sew around all four edges with a straight or zigzag stitch—it’s like giving your creation a signature.
Hand-sewn labels work too, though they’re more time-consuming.
The secret lies in choosing the right materials and placement for both durability and professional appearance that withstands countless washes.
Table Of Contents
Key Takeaways
- You’ve got multiple creation methods – stamp with permanent ink on twill tape, print designs on fabric transfer paper, or use heat transfer vinyl for iron-on labels that suit different skill levels and budgets.
- Material choice determines durability – select medium to heavy-weight woven fabrics, prewash them before cutting, and use quality permanent inks or heat-activated adhesives to survive countless wash cycles.
- Proper attachment is everything – sew around all four edges with straight or zigzag stitches, position labels strategically away from skin contact, and always mirror text before cutting vinyl to avoid backwards designs.
- Strategic placement elevates professionalism – position labels at the center back neckline for brand identity, side seams for care instructions, or decorative spots for creative flair while maintaining comfort and functionality.
Sewing Your Own Clothing Labels
Creating your own clothing labels adds that perfect finishing touch to handmade garments while giving them a professional, branded look.
You’ll love how easy it’s to personalize your creations with custom tags that reflect your unique style and help recipients care for their special pieces, giving them a branded look.
Benefits of Homemade Labels
Beyond practicality, custom clothing labels transform your handmade clothes into memorable keepsakes.
You’re creating a unique finishing touch that screams "made with love" – perfect for handmade gifts that recipients will treasure.
Custom labels turn everyday handmade pieces into treasured heirlooms that speak volumes about your craft.
These DIY labels establish your custom identity while enhancing your personal brand, making every piece distinctly yours through thoughtful label sewing techniques, which can be seen as a way to add a "unique finishing touch" and show that each item is "distinctly yours".
Using Twill Tape or Ribbon for Tags
You don’t need fancy equipment to create stunning custom clothing labels.
Looking at this content about creating custom clothing labels, here’s an engaging blockquote that captures the same encouraging, accessible tone:
Simple materials, stunning results – your handmade pieces deserve that perfect finishing touch.
Twill tape and ribbon offer the perfect starting point for stylish sew on labels that’ll make your handmade pieces shine.
Start with twill tape in widths from 1/4 to 1/2 inch, choosing colors that complement or boldly contrast your fabric.
Ribbon labels work equally well—satin adds elegance while grosgrain brings durability.
The beauty lies in customization through fabric markers for hand-lettered charm or embroidery machines for professional-looking monograms.
Picture these DIY embellishments transforming your creations:
- Soft cream twill tape with hand-drawn flowers for children’s pajamas
- Black grosgrain ribbon stamped with metallic silver initials for formal wear
- Colorful striped ribbon creating playful tags for summer dresses
- Natural linen tape with embroidered family names for heirloom quilts
- Vintage-style lace ribbon adding romantic touches to handmade lingerie
Understanding sewing label basics is essential for a professional finish.
Tag making becomes addictive once you discover how these simple materials elevate your work from homemade to boutique-quality.
It’s about creating a professional finish with simple materials that make your handmade pieces truly special.
Affiliate Links Disclosure
When recommending products, I follow Transparency Rules and Disclosure Policies to maintain trust with you.
As an Amazon Associate and clothing labels maker affiliate, I earn small Commission Rates from qualifying purchases.
These Affiliate Marketing partnerships support my work creating content about custom clothing labels and sewing labels tutorials.
Affiliate links help fund this blog while you discover quality products for your DIY projects.
Your support through these partnerships keeps valuable sewing content coming your way without extra cost to you.
Stamp Your Own Clothing Labels
If you’re ready to add some personality to your handmade creations, stamping your own labels is one of the easiest ways to get started.
All you need are some alphabet stamps, permanent ink, and a strip of twill tape or ribbon to create professional-looking labels that’ll make your garments stand out, using permanent ink.
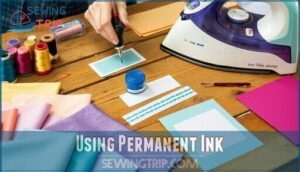
Using Permanent Ink
Permanent ink transforms simple stamps into durable label-makers.
Choose oil-based or archival pigment inks like StazOn—they’ll survive countless wash cycles without fading.
Heat-set your stamped labels with an iron for maximum staying power.
Test different ink types on fabric scraps first, since some spread more than others on loose weaves.
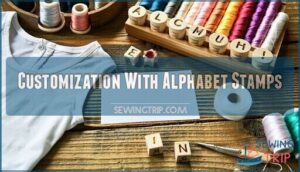
Customization With Alphabet Stamps
Once you’ve got your permanent ink sorted, alphabet stamps open up endless creative possibilities for custom clothing labels.
These versatile tools let you craft personalized messages that reflect your unique style and brand identity.
Here are five creative stamp techniques to try:
- Layer different font styles – Mix serif and sans-serif stamps for visual interest
- Create gradient effects – Use multiple ink colors on one stamp for ombre looks
- Build compound words – Combine stamps to spell "HAND" + "MADE" with decorative spacing
- Add symbol accents – Frame text with hearts, stars, or geometric shapes
- Try reverse stamping – Press unstamped areas for subtle texture backgrounds
Experiment with color choices beyond basic black – metallic gold adds luxury while rainbow inks bring playful energy.
Dollar store alphabet stamps work perfectly for label design projects, making this an budget-friendly option.
The key is practicing your stamp techniques on scrap fabric first to perfect pressure and spacing before creating your final DIY clothing labels.
Understanding sewing label techniques can also enhance your custom clothing label design and attachment process.
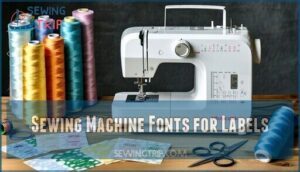
Sewing Machine Fonts for Labels
Your sewing machine’s built-in font styles open up exciting label design possibilities beyond basic stamping.
Explore embroidery options and text effects to create professional custom clothing labels that showcase your personal brand.
Test different sewing techniques on sample fabric first—machine fonts can be tricky!
These automated label sewing methods deliver consistent results, letting you craft multiple custom labels efficiently while maintaining that handmade charm you’re after.
Understanding various sewing machine fonts is essential for creating unique and personalized labels.
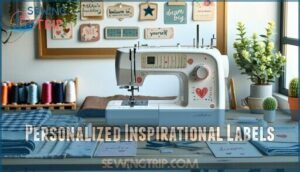
Personalized Inspirational Labels
Beyond customizing fonts, you can transform your labels into daily motivation boosters.
Adding inspirational quotes to custom clothing labels turns each handmade piece into a personal cheerleader that whispers encouragement throughout your day.
Here are five inspiring message ideas for personalized labels:
- Motivational mantras – "You’ve got this!" or "Stronger than yesterday"
- Self-love reminders – "Made with love" or "Perfectly imperfect"
- Gratitude phrases – "Blessed beyond measure" or "Choose joy"
- Achievement celebrations – "Handmade hero" or "Creator extraordinaire"
- Symbolic icons – hearts, stars, or infinity signs alongside text.
When sewing custom labels with meaningful messages, consider fabric choices that complement your inspirational theme—soft pastels for gentle affirmations or bold colors for power statements.
These thoughtful touches in label design make every garment uniquely yours.
Custom Print Fabric Labels
If you want total creative control over your label designs, custom printed fabric labels are your best bet.
You’ll design them digitally, print them on fabric, then cut and sew them into your garments for that perfectly polished, professional look.
Using Graphic Design Software
Graphic design software transforms your custom clothing labels from basic to brilliant.
Adobe Illustrator and Photoshop offer professional font styles, color schemes, and text effects that’ll make your labels pop.
Design tools like Canva provide ready-made label templates, perfect for beginners who want polished results without the learning curve.
You’re not just making labels—you’re crafting tiny brand ambassadors.
To achieve professional-looking results, consider using iron on methods for transferring your designs onto the labels, and make your labels truly pop with professional font styles and color schemes.
Cutting Printed Fabric Into Strips
Once your design’s printed, precision in fabric cutting transforms your creation into professional-looking sewing labels.
Sharp fabric shears make all the difference—dull blades create jagged edges that’ll fray faster than you can say "homemade disaster."
- Use a rotary cutter with ruler for perfectly straight strips and consistent widths
- Cut along the lengthwise grain to minimize fraying and maximize durability
- Maintain 1/2 to 3/4 inch width for easy handling and professional appearance
- Add extra length for folding allowances and seam attachments
- Keep cutting machines sharp for clean edge finishing without pulled threads
Storing and Folding Fabric Labels
After cutting your printed fabric into strips, proper label storage keeps them crisp and ready for use.
Fold each label neatly and store them in clear containers or small boxes for easy access. Create organized systems using small jars for different designs or sealable bags for bulk storage.
Good folding techniques prevent wrinkles and fraying. Keep your fabric labels flat and protected from dust until you’re ready to sew them onto your handmade garments, using proper care to maintain their quality.
Sewing Fabric Labels for Durability
Once you’ve created your beautiful printed labels, proper sewing fabric labels becomes the make-or-break moment for long-lasting custom clothing labels. Think of it like building a house – you wouldn’t skip the foundation, right?
Here’s your durability roadmap:
- Fabric Selection: Choose medium to heavy-weight woven materials that won’t fall apart after three washes
- Label Materials: Prewash and dry your fabric before cutting to prevent shrinkage surprises
- Sewing Techniques: Use a tight zigzag stitch or double-row straight stitch for maximum hold
- Thread Choices: Match your thread quality to your fabric – cheap thread equals cheap results
When attaching your label sewing machine creations, fold and press those edges first. Nobody wants frayed labels screaming "amateur hour." Smart label attachment means placing them along inner seams or at the center back neckline where they’ll stay put through countless wash cycles.
Your durability testing starts now – these babies should survive everything from gentle cycles to teenage laundry disasters. Understanding sewing label techniques is vital for a professional finish.
Custom Iron on Labels
If you’re looking for a professional finish that won’t wash away, heat transfer vinyl labels are your best bet.
You’ll need to remember one essential step: mirror your text before cutting, or you’ll end up with backwards labels that’ll make you look like a beginner.
Reminder to Mirror Words for Vinyl Cutting
When vinyl cutting your label design, you’ll need to mirror text before cutting—think of it like creating a rubber stamp.
This mirror image process guarantees your words read correctly once the heat transfer vinyl transfers to fabric.
Without mirroring, you’ll end up with backward text that looks like hieroglyphics!
Your Cricut Maker’s software typically handles this automatically, but always double-check your cutting tips settings before hitting start.
Using Cricut Maker for Vinyl Cutting
Your Cricut Maker transforms heat transfer vinyl into professional custom clothing labels with precision cutting technology.
This powerhouse machine handles intricate lettering and complex designs effortlessly.
- Load your vinyl onto the Standard Grip mat, shiny side down for maximum adhesion
- Select "Iron-On" settings in Design Space, enabling Fast Mode for quicker cuts
- Apply 4kg pressure automatically – the Rotary Blade cuts through thick specialty vinyls cleanly
The Cricut Maker’s cutting techniques deliver crisp edges on everything from glitter to holographic vinyl materials, making label design limitless for your creative vision.
The machine’s compatibility with various Cricut Maker tools enhances its overall performance and versatility.
Following Machine-Specific Instructions
Your machine’s manual is your roadmap to success with vinyl cutting and heat press applications.
Each cutting machine has unique machine settings for different label materials, so you can’t wing it here.
| Setting Type | Why It Matters |
|---|---|
| Blade Depth | Wrong depth tears vinyl or leaves incomplete cuts |
| Pressure | Too much crushes material, too little won’t cut through |
| Speed | Fast cutting can shift delicate vinyl materials |
| Temperature | Heat press temps vary by vinyl type and thickness |
| Time | Under-processing means labels won’t stick properly |
Following your sewing machine’s label sewing tutorials prevents costly mistakes.
These sewing label instructions cover everything from label stitching techniques to proper sewing label attachment methods.
Tips for Heat Transfer Vinyl Labels
Mastering heat transfer vinyl labels transforms your DIY projects from amateur hour to professional quality.
Here’s your roadmap to vinyl label success:
- Use a teflon sheet when heat pressing vinyl.
- Allow labels to cool completely before folding or stacking.
- Wait 24 hours before machine washing finished projects.
The heat press technique requires precision—rushing this step ruins everything.
Your vinyl cutting skills won’t matter if adhesion methods fail during application. Test one label first to dial in your heat transfer settings.
Label design software gives you creative freedom, but proper application keeps those ironon labels looking sharp through countless wash cycles.
Following these label sewing tutorials and heat transfer vinyl tips guarantees your sewing label customization projects last.
Attaching Labels to Clothing
Now that you’ve created your perfect labels, you’ll need to attach them properly to make them last through countless washes and wears.
Whether you’re sewing by hand or using shortcuts like fabric glue, the right attachment method depends on your label type and how long you want them to stick around.
Sewing Options: Hand Sewing and Machine Sewing
Choosing between hand sewing and machine sewing for custom clothing labels depends on your project scope and sewing tools available.
Hand sewing offers precision control using running or whip stitches with polyester thread, perfect for delicate fabric selection.
Machine sewing delivers consistent results with zigzag stitch types, ideal for bulk label attachment methods requiring professional-grade sewing techniques.
When considering the pros and cons, understanding the concept of sewing method differences is essential for making an informed decision.
Attaching Fabric Without Sewing: Glue and Tape
Skip the needle and thread—fabric adhesives offer quick label attachment solutions.
Fabric glue creates permanent bonds between your custom labels and garments, while double-sided heat press tape provides removable options.
These adhesive methods work brilliantly for delicate fabrics where sewing might cause damage.
Test different glue types on fabric scraps first to check adhesive strength and compatibility.
Some permanent ink markers can actually help prepare surfaces for better bonding.
Apply fabric adhesives evenly to prevent lumpy textures or weak spots.
Tape applications work best for temporary labels or when you’re still experimenting with placement.
Remember, bonding methods vary—lightweight cotton needs gentler adhesives than heavy denim.
These no-sew label attachment techniques save time while delivering professional-looking results.
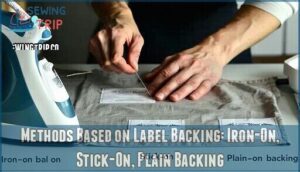
Methods Based on Label Backing: Iron-On, Stick-On, Plain Backing
Your label backing determines how you’ll attach tags to your garments.
Iron On Labels use heat-activated adhesives that bond permanently when pressed with an iron – perfect for durability.
Stick On Tags feature instant adhesives for quick application, though they’re best for temporary use since washing can weaken the bond.
Plain Backing labels lack adhesives entirely, giving you flexibility to use fabric glue, sewing, or other label attachment methods.
Each backing material serves different needs, so consider your garment’s care requirements before choosing your approach.
Attaching Price Tags or Hang Tags
Beyond traditional label attachment, hang tags offer versatile branding without permanent commitment.
These removable tags showcase your brand while keeping garments pristine.
Three Smart Tag Placement Strategies:
- Thread through buttonholes – Perfect for shirts and jackets where tags won’t interfere with wear
- Attach with jewelry pins – Creates elegant presentation for delicate fabrics or special pieces
- Tie with twine to loops – Works brilliantly for casual wear and adds rustic charm
Price tags and hang tags communicate essential info—pricing, care instructions, brand story—without altering your garment’s integrity.
Strategic attachment methods let you highlight key design details while maintaining professional presentation.
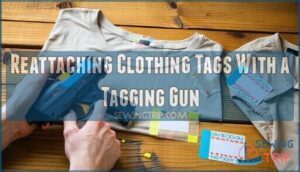
Reattaching Clothing Tags With a Tagging Gun
When traditional sewn labels start coming loose, a tagging gun becomes your secret weapon for professional reattachment. This handy tool lets you quickly restore that crisp, store-bought appearance without the hassle of needle and thread.
Here’s why tagging gun reattachment rocks:
- Instant satisfaction – No more waiting around with hand-sewing projects
- Perfect placement – Adjust positioning until it looks just right
- Zero fabric damage – Clean attachment without visible needle holes
- Professional finish – Rivals any commercial label attachment
Simply load your tagging gun with plastic fasteners, position the clothing tags where you want them, and squeeze. The compressed air mechanism creates a secure hold that’ll survive multiple wash cycles.
Practice on scraps first – you’ll master label reattachment in no time. This method works brilliantly for vintage finds or handmade pieces where Tag Removal happened accidentally. Remember Gun Safety basics and always store fasteners properly for future Label Reuse projects.
Importance of High-Quality Clothing Labels
High-quality clothing labels aren’t just fancy extras—they’re the finishing touch that transforms your homemade garments from amateur hour to professional-looking pieces.
Whether you’re building a brand or just want your handmade gifts to look polished, the right label makes all the difference in how people perceive your work.
Contact for Help and Free Quote
Need help perfecting your custom clothing labels? Don’t let technical hiccups derail your creative momentum.
Professional Customer Support transforms your label making journey from frustrating to fabulous. Whether you’re wrestling with sewing label customization or need guidance on clothing label sewing techniques, expert Help Desk services provide the safety net every maker craves.
| Service Type | What’s Included | Turnaround |
|---|---|---|
| Label Inquiry | Design consultation, material recommendations | 24 hours |
| Free Consultation | Project assessment, cost estimates | Same day |
| Quote Process | Custom pricing for bulk orders | 48 hours |
| Technical Support | Troubleshooting, application tips | Immediate |
Professional services offer custom labels expertise when DIY methods hit roadblocks. From material selection to final application, seasoned professionals guide you through every step.
Their Free Consultation service helps identify the perfect approach for your specific project needs, ensuring your handmade creations shine with that polished, professional finish you’re after.
Branding and Custom Labels
Transform your handmade garments into memorable brand experiences with custom apparel labels that speak volumes about your commitment to quality.
When customers discover your unique label design tucked inside their favorite piece, they’re not just seeing a tag—they’re connecting with your brand story.
Custom fashion labels serve as powerful textile marketing tools that differentiate your creations in crowded markets.
Research shows that 60% of customers judge garment quality by label appearance, making label customization a vital investment in your fashion branding strategy.
Your custom logos and brand identity deserve premium presentation through thoughtfully designed labels that:
- Showcase craftsmanship – High-quality materials and printing demonstrate attention to detail
- Build recognition – Consistent branding across all pieces creates lasting customer memories
- Foster loyalty – Professional touches encourage repeat purchases and word-of-mouth recommendations
Whether you’re launching a clothing line or adding personal flair to handmade gifts, clothing label branding transforms ordinary garments into branded experiences that customers remember and treasure.
Importance of Finishing Touches
Your handmade creations deserve that final flourish that screams "I’ve got this!"
Professional finishing transforms good work into great work, and it’s simpler than you think.
| Placement | Purpose | Impact |
|---|---|---|
| Center Back Neck | Brand Identity | Professional credibility |
| Side Seam | Care Instructions | Functional guidance |
| Collar/Cuff | Sewing Customization | Personal signature |
Quality label finishing isn’t just about neat label edges—it’s your chance to showcase attention to detail through thoughtful fabric selection and precise sewing techniques.
Suggested Placement of Labels in Garments
Strategic label placement transforms your handmade creations from amateur to professional-looking garments. Your clothing labels deserve thoughtful positioning that balances functionality with brand visibility.
- Center back neckline – Position 2-3 inches below collar for easy identification
- Left side seam – Place at hip level for consistent garment customization
- Right shoulder seam – Hide labels while maintaining accessible garment care information
- Waistband interior – Perfect for bottoms requiring discrete label positioning
Consider label visibility when choosing seam placement. Folded edges prevent fraying while maintaining clean sewing labels that withstand washing cycles.
Adding Labels for Fun and Decorative Element
Labels don’t just identify your handmade pieces—they’re your creative signature waiting to shine.
Think of custom labels as tiny canvases where you can showcase your personality through bold color options and unique font styles.
Whether you’re creating DIY clothing labels with contrasting thread or adding label embroidery in unexpected places, these finishing touches transform ordinary garments into conversation starters.
Smart label placement goes beyond the traditional neckline.
Try sewing labels along side seams, pocket edges, or even as decorative patches on sleeves.
Your fabric choices matter too—polka dots on minimalist designs or geometric patterns on vintage-inspired pieces create visual interest.
When sewing labels, experiment with decorative stitches like zigzag or blanket stitch to make them pop.
Remember, label design should reflect your brand’s vibe while serving its practical purpose, and consider using unique font styles to enhance your personality through custom labels.
Frequently Asked Questions (FAQs)
What are the three rules for labeling clothing?
Think of Sarah frantically searching through her kids’ clothes after laundry day—everything’s mixed up.
You’ll save yourself that headache by following three simple rules.
Choose durable materials, use permanent marking methods, and position labels where they won’t irritate skin.
What machine is used to make woven labels?
You’ll need a jacquard weaving machine or computerized loom to create professional woven labels.
These specialized machines interlace threads to form text and designs directly into the fabric structure, creating durable, high-quality labels.
How to attach labels to fabric?
Position, pin, and press—that’s your winning trio for perfect label attachment.
You’ll sew straight stitches, use fabric glue, or apply heat-activated backing.
Each method guarantees your labels stay put through countless washes, ensuring a perfect attachment.
What label size works best for childrens clothing?
For children’s clothing, aim for labels around 1-2 inches wide and ½ to ¾ inch tall.
They’re big enough for little hands to identify but won’t overwhelm tiny garments or irritate sensitive skin.
How do you prevent labels from scratching sensitive skin?
Scratchy labels can turn your lovingly handmade clothes into torture devices.
Choose ultra-soft materials like bamboo ribbon or silk twill tape, fold raw edges inward, and position labels away from direct skin contact for ultimate comfort.
This approach ensures that the labels do not cause discomfort, making the clothes more comfortable to wear.
Can labels survive commercial washing machine cycles?
Labels hold up well in commercial washing if you use proper materials and attachment methods.
Choose durable fabrics like twill tape, set inks with heat, and sew labels securely into seams for best results.
Whats the cheapest method for making clothing labels?
Over 60% of handmade sellers use stamping techniques.
You’ll save money using twill tape with alphabet stamps and permanent ink—costs under $10 total.
This beats custom printing services while creating professional-looking labels you’ll actually want to show off.
How do you remove old labels completely?
Use a seam ripper to carefully cut through stitches holding the old label. Gently pull the label away, then use tweezers to remove any remaining threads from the fabric.
Conclusion
Mastering how to sew custom clothing labels is absolutely game-changing for your handmade creations.
You’ve learned stamping techniques with permanent ink, fabric printing methods, and iron-on vinyl applications. Each approach offers unique benefits—from quick stamping to professional-looking printed designs.
Remember to choose durable materials and strategic placement for labels that’ll survive countless washes. Whether you’re hand-sewing or machine-stitching, proper attachment guarantees your signature touch stays put, elevating every piece you create.

