This site is supported by our readers. We may earn a commission, at no cost to you, if you purchase through links.
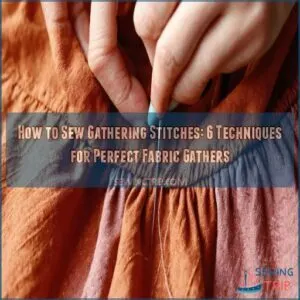 To sew gathering stitches, set your machine to the longest stitch length and mark your seam allowance. Sew two parallel rows of stitches about 1/4 inch apart—no backstitching!
Leave long thread tails, then gently pull the bobbin threads to gather the fabric.
For heavier fabrics or extra control, try three rows of stitches or zigzag over a thin cord. Adjust the gathers evenly by sliding the fabric along the threads, and secure with pins or stitches before sewing.
Remember, patience is key—uneven gathers can be smoothed out with a bit of coaxing. Want flawless gathers? Practice on scraps first!
Table Of Contents
- Key Takeaways
- Gathering Fabric: a Step-by-Step Guide
- Preparing for Gathering
- Techniques for Gathering Fabric
- Securing The Gathers
- Finishing The Gathered Seam
- 6 Methods for Gathering Fabric
- Tips for Achieving The Best Gathering Stitch
- Sewing Without Visible Stitches: Tips and Tricks
- Frequently Asked Questions (FAQs)
- Conclusion
Key Takeaways
- Set your sewing machine to the longest stitch length and sew two parallel rows 1/4 inch apart, leaving long thread tails for easy gathering.
- Gently pull the bobbin threads to gather the fabric, adjusting the fullness evenly with your fingers and securing with pins before sewing in place.
- For heavier fabrics or more control, add a third row of stitching or use a zigzag stitch over a sturdy cord to prevent puckering.
- Practice on fabric scraps to fine-tune stitch length, tension, and technique before working on your main project for smooth, flawless gathers.
Gathering Fabric: a Step-by-Step Guide
To master gathering fabric, start by picking the right material—lightweight woven fabrics work best.
Adjust your machine to the longest stitch length for smooth results.
Mark the area you’ll gather, then sew two parallel rows of stitching: one 1/4 inch inside your marked line, the second 1/4 inch apart. Be sure to leave long thread tails at each end.
Gently pull the bobbin threads to create gathers, adjusting them evenly across the fabric. Secure the gathers with pins, then sew over them using your regular stitch length to lock everything in place.
Once secured, remove the basting stitches, press the seam, and finish the edges as needed. Troubleshooting gathers takes patience, and finding the right gather fabric tutorial can also improve your skills.
Experimenting with fabric, stitch length, and technique will improve your results!
Preparing for Gathering
Getting ready to sew gathering stitches? Start with the basics to avoid frustration and skipped stitches. Here’s how:
- Choosing fabric: Check its weight—heavier fabric needs a longer stitch length for smoother gathering.
- Marking seam allowance: Draw clear lines to keep your gathers are neat and within the seam.
- Thread selection: Use strong, high-quality thread, and loosen the tension slightly for better control.
- Testing stitch length: Practice on scraps to adjust stitch length and tension before you start sewing.
- Understanding what’s gathering in sewing what is gathering in sewing is also key to mastering the gathering stitches.
Guide fabric gently while sewing to prevent uneven gathers—it’s like herding folds into place!
Techniques for Gathering Fabric
You’ve got plenty of options regarding gathering fabric, and each technique offers its own unique benefits.
From simple two-thread gathering to zigzagging over a cord, these methods make it easy to create perfectly even, adjustable gathers for any project.
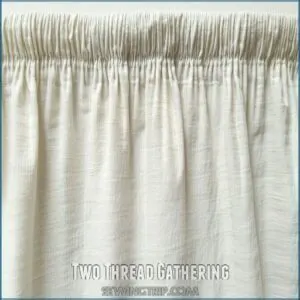
Two Thread Gathering
When you’re ready to sew gathering stitches, two thread basting is a straightforward method. Start by testing stitch length on scrap fabric to find the sweet spot for smoother gathers.
Set your machine to a long stitch length and sew two parallel rows of gathering stitches, about 1/4 inch apart, within the seam allowance. Leave long thread tails, then gently pull the top threads to gather fabric.
For better gather control, mark sections on large pieces to keep things even. Once pinned and adjusted, secure the gathers with a normal stitch, and snip away the gathering threads afterward.
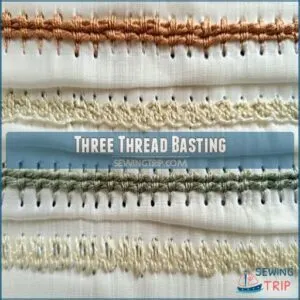
Three Thread Basting
With three-thread basting, you gain precision and control for beautifully balanced gathers. Adding a third row to your gathering stitches gives extra stability, making it great for heavy or tricky fabrics. Adjust thread tension—top high, middle normal, bottom loose—and test stitch length on scrap fabric first. You can also improve your basting technique by mastering the basics of a basting stitch guide.
Here’s how to elevate your gathers:
- Use straight or zigzag stitches for variety.
- Gently pull threads for even gather density.
- Experiment with fabric types to find what works best.
- Troubleshoot by tweaking tension or spacing between rows.
Zig Zag Over a Cord
If heavier or slippery fabric has you struggling, cord gathering may be your solution.
For more information on adapting gathering techniques, consider using a combination of three-thread basting methods.
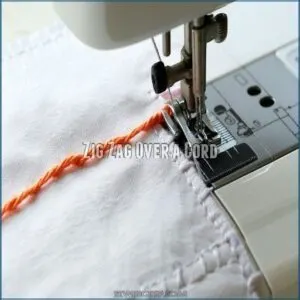
Place a sturdy cord beneath your fabric, adjusting your zigzag stitch width so it just clears the cord on each side. Use a larger stitch length, check your cord tension, and guide the fabric as you sew to prevent shifting.
The zigzagging over cord method avoids puckering and handles materials like canvas or satin beautifully. Once stitched, pull the cord to form gathers. Proper needle size and stitch density matter here.
Troubleshooting tip? Always test on scraps to perfect your gathering stitches.
Securing The Gathers
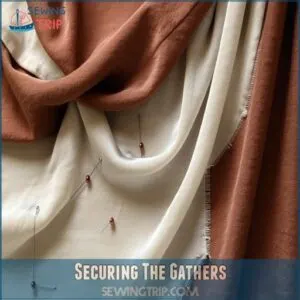
After creating beautiful gathers, securing them is key to keeping your hard work intact. Start by tying off bobbin and needle threads in a tight knot to prevent unraveling. Long tails make this easier—just trim excess carefully afterward. Pins work wonders, too, locking gathers in place without distorting the fabric. Wrap thread tails around a pin in a figure-eight motion for extra security.
To prevent threads from breaking, it’s also essential to adjust your sewing machine’s thread tension settings.
For added reinforcement, use hand basting stitches with double-threaded needles, especially on delicate fabrics. Adjust your sewing machine’s tension to pull threads smoothly and avoid breakage.
Once you’ve arranged the gathers just right, knot the thread tails tightly near the edge. These stitch-securing steps keep your gathering stitches tidy and ready for the next steps.
Finishing The Gathered Seam
To wrap up your gathered seam perfectly, focus on both function and flair. The goal? A clean, professional finish without bulk or mess. Fabric type affects gather drape, which is important to keep in mind when understanding gathering techniques.
Here’s how to achieve seamless success:
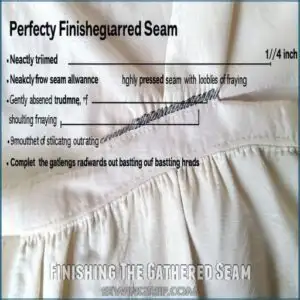
- Trim the seam allowance to about 1/4 inch for less bulk, but leave the flat fabric untouched—this creates a flap.
- Prevent fraying with seam finishing options like a zigzag stitch, serger, or bias binding.
- Press your gathers gently away from the seam using the iron’s point for a polished look.
- Remove any visible basting threads after the seam is secure to keep the fabric neat.
Don’t rush—it’s these final touches that turn stitched fabric into a masterpiece, whether you’re sewing garments or perfecting gathering stitches.
6 Methods for Gathering Fabric
For gathering fabric, you’ve got plenty of options to match any project or material.
From quick machine techniques to traditional hand stitching, these six methods will help you create beautiful, even gathers with ease.
Machine Gathering
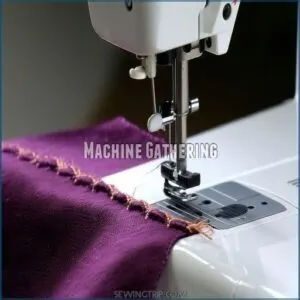
Machine gathering makes adding texture to fabric a breeze. Start by adjusting your sewing machine settings for gathering—set stitch length to its longest.
Sew two parallel rows 1/4 inch apart inside the seam allowance. Gently pull the bobbin threads to create gathers, adjusting fullness as needed.
- Use medium-weight fabrics for best results.
- Test stitch length and tension control on scraps first.
- Keep gather density even.
- Troubleshoot issues by rechecking the tension.
Three Rows Gathering
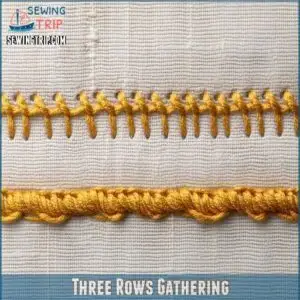
If you want finer control over your gathers, three-thread basting is your go-to method. Start by sewing two rows like usual—tighten the thread tension slightly and lengthen the stitch length. Add a third row right between them. This trick spreads fullness evenly, especially on light to medium fabric types. Adjust all three rows gently for smooth gather density.
Then, sew a permanent seam over the middle row.
A preferred gathering technique involves sewing multiple rows of gathering stitches to attach longer fabric to shorter fabric.
Troubleshooting issues? Test stitches on scraps first. It’s foolproof!
Hand Gathering
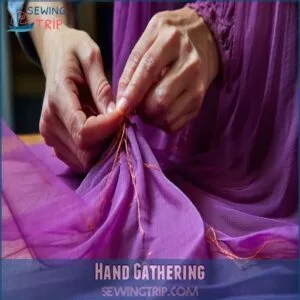
Hand gathering stitches give you ultimate control over delicate fabrics like chiffon or lace. Forget machines—this method relies on your hands, a needle, and thread for easy gathering stitches with personal flair. Using a strong thread like polyester thread will prevent breakage and guarantee a smooth gather.
- Prep your fabric: Mark your seam allowance and stitch spacing to keep things even.
- Choose strong thread: Use silk thread for light fabrics; durable threads for midweights.
- Adjust as needed: Tie knots at both ends and slide fabric along the thread to tweak the gathers.
Mastering hand gathering stitches opens up endless design potential—no machines needed!
Serger Gathering
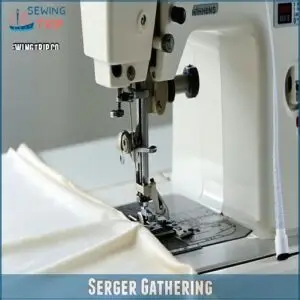
Let’s talk about serger gathering—a great way to quickly and evenly gather lightweight fabrics.
Adjust the serger tension by increasing the upper looper tension and lowering the bottom one to help your threads pull the fabric together. Boost the differential feed—set it around 2.5 to 3—so the lower layer feeds faster for better gather density. Always test these settings on fabric scraps first; a good practice saves headaches later.
Unlike hand gathering, a serger also finishes raw edges as you sew, keeping things clean and durable.
Once you’ve stitched, a light steam press will set your gathers nicely. Serger gathering isn’t just fast—it’s efficient, making it a top pick for smooth, professional-looking edges.
Cord Gathering
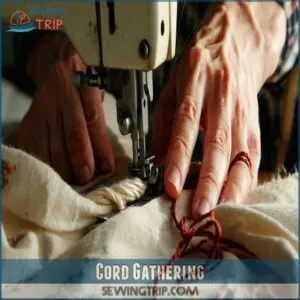
Tackling heavier fabrics like denim or canvas? Cord gathering is your go-to.
Grab a sturdy cord that matches the fabric weight, and set your sewing machine to a zigzag stitch. Position the cord within the seam allowance, taking care not to stitch through it. Adjust thread tension and stitch density for smoother results.
For the best cord gathering tools, consider investing in a cord gathering tool kit.
Go slow—rushing can cause skipped stitches or a tangled mess. Once gathered, remove the cord for crisp folds.
This method is perfect for structured garments, home decor, or adding polished smocking and ruffles.
Tips for Achieving The Best Gathering Stitch
Perfecting your gathering stitch starts with attention to detail.
After exploring fabric gathering techniques, here’s how to elevate your stitches for effortless control and crisp results:
- Set the stage with stitch length and thread tension: Use the longest stitch length (4-5 mm) and slightly lower thread tension (2-4) for even gathering. This helps fine-tune control, especially on lighter fabric types. For precise gathering, consider using a ruffler gathering foot.
- Double or triple up on basting rows: Sewing two or three rows of stitching makes gathers stronger and evenly spaced. Always pull threads gently from the bobbin side.
- Mark and section smartly: Divide your fabric into sections with notches or pins—it’s easier to manage gather density this way.
- Troubleshooting skips or breaks? Avoid backstitching and test on scraps first to iron out surprises.
Sewing Without Visible Stitches: Tips and Tricks
For professional, polished projects, sewing without visible stitches makes all the difference. It’s like magic—your seams stay strong, but the stitches stay hidden. Mastering hand sewing basics is key to achieving this effect.
- Choose fine thread that matches your fabric color for a seamless look. For dark fabrics, dark thread works best.
- Skip traditional backstitching; instead, take a tiny backward stitch directly on top of the previous one to secure your work.
- Focus on stitch density. Keep stitches tiny and consistent, around 10-12 per inch.
- Hide stitches inside folds. Sew just inside the folded edge of hems or facings so the fabric hides the thread.
- Sew along seam allowance. On linings or facings, position stitches right against the seam line to keep them out of view.
- Use clear elastic for gathers. It blends in and works beautifully when paired with a gathering foot.
- Try shirring elastic in your bobbin for smocking or stretchy gathers.
- Trim excess gathering stitches once your seams are secured to keep everything neat.
With these tips, your invisible stitches will be your secret weapon for elegant, neat finishes every time.
Frequently Asked Questions (FAQs)
How to do a gathering stitch on a sewing machine?
Gathering stitches on a sewing machine are shockingly simple.
Set the stitch length to its longest.
Sew two parallel rows 1/4 inch apart.
Then gently pull the bobbin threads to bunch the fabric evenly.
What is the best stitch for gathering?
The best stitch for gathering is a long basting stitch.
Set to the longest stitch length on your machine.
Sew two parallel rows of stitching, about 1/4 inch apart, for even, adjustable gathers.
What are the settings for gathering stitches?
It’s like tuning a car engine—you’ve gotta set your stitch length to the longest (0 or higher) and loosen the tension slightly.
Use high-quality thread.
Sew two parallel rows for even gathers.
What tension is needed for gathering stitch?
Set your machine’s tension slightly looser than normal for gathering stitches—around 3-5 works for most fabrics.
This keeps threads from breaking while letting you pull bobbin threads easily to create even, beautiful gathers.
How do I fix uneven gathering stitches?
Uneven gathers feel like rebellious teenagers, but don’t stress.
Tug your bobbin threads gently to redistribute fullness, stroke gathers into place with your fingers, or re-sew problem spots.
Pin sections evenly next time to prevent chaos. This will help avoid uneven gathers.
Can I gather stretchy fabrics without elastic?
You can gather stretchy fabrics without elastic by using long basting stitches and gently pulling the bobbin thread to gather.
Avoid overstretching the thread, and secure the gathers with pins to keep them even.
What’s the best thread for dense gathers?
A stitch in time saves nine," so use strong polyester thread for dense gathers.
It’s tough, resists breaking, and handles tension like a champ.
For lightweight fabrics, fine silk thread works beautifully without adding bulk.
How do I prevent thread from breaking?
Loosen your top thread tension slightly, and use strong, high-quality thread like polyester.
Pull the bobbin thread gently when gathering, and stitch extra rows for support.
Test on scraps to avoid surprises and frustration.
Can I gather fabric with decorative stitches?
Use a zigzag or other decorative stitch over a cord to gather fabric with flair.
As you pull the cord, the decorative stitches create a unique, stylish effect while gathering the fabric.
Conclusion
Did you know gathering stitches are a go-to for 75% of sewing projects that involve creating volume?
Now that you’ve got the hang of how to sew gathering stitches, you’re ready to tackle any fabric with confidence.
Whether you’re using two rows, zigzagging over a cord, or hand sewing, remember: patience pays off. gathering stitches
Practice on scraps, adjust your technique as needed, and secure your gathers tightly. beautifully gathered seams
Soon, you’ll have beautifully gathered seams every time!


