This site is supported by our readers. We may earn a commission, at no cost to you, if you purchase through links.
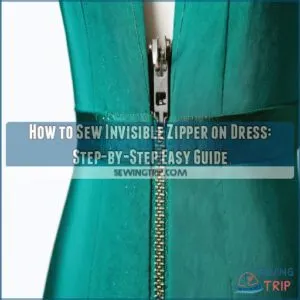
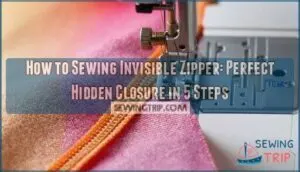
Mark the zipper placement, ensuring the seam allowance is spot-on.
Pin the zipper to the fabric, right sides together, and attach an invisible zipper foot to your sewing machine.
Sew close to the zipper teeth, rolling them outward as you go for a seamless look.
Repeat on the other side, then finish the seam below the zipper.
Press everything flat for a polished finish.
A little patience here goes a long way toward that professional, store-bought vibe!
Table Of Contents
- Key Takeaways
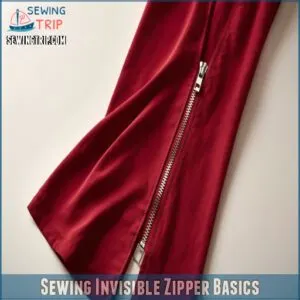
- Sewing Invisible Zipper Basics
- Sewing Invisible Zipper on Dress
- Preparing Fabric and Zipper
- Installing Invisible Zipper Foot
- Machine Sewing The Zipper
- Hand Sewing The Invisible Zipper
- Finishing The Zipper Seam
- Troubleshooting Common Issues
- Achieving a Professional Finish
- Quality Control and Inspection
- Frequently Asked Questions (FAQs)
- Conclusion
Key Takeaways
- Gather essential tools like an invisible zipper foot, matching thread, and fusible interfacing to stabilize your fabric for a seamless finish.
- Pin the zipper to the fabric with right sides together, and use an invisible zipper foot to sew close to the zipper teeth for a professional look.
- Take your time aligning and sewing both sides of the zipper evenly to avoid puckering and ensure smooth zipper function.
- Test the zipper movement, press the seams flat, and check for imperfections to achieve a polished, store-bought appearance.
Sewing Invisible Zipper Basics
Sewing an invisible zipper might sound tricky, but it’s easy once you know the basics.
With the right tools and a little prep, you’ll have it looking neat and professional in no time.
Essential Tools and Materials
Before starting your invisible zipper project, round up some essential tools—it’s like gathering your sewing “dream team”!
- Sewing machine with an invisible zipper foot
- Various thread colors to match your fabric
- Basic sewing notions (pins, scissors, ruler)
- Correct zipper gauges for your project
- Fusible interfacing options to stabilize fabric
You can purchase an invisible zipper foot online.
You’re ready to nail this invisible zipper tutorial!
Choosing The Right Fabric and Zipper
Picking the right fabric and zipper is key to a smooth finish.
Use an invisible zipper for lighter fabrics like silk or cotton, ensuring a seamless look for your dress zipper.
For a detailed guide, explore this helpful invisible zipper tutorial.
Check the zipper length—it’s easier to shorten than struggle later.
Match your zipper and fabric texture, and don’t skip interfacing options for added stability when sewing invisible zippers.
Preparing The Sewing Machine
Before diving into invisible zipper installation, check your sewing machine’s thread tension and calibration—it’s like tuning an instrument for a perfect note.
Gathering the necessary materials, like an invisible zipper foot, is vital for success.
Attach the invisible zipper foot securely, then test the sewing speed on scrap fabric.
Double-check needle selection and bobbin management to avoid hiccups.
These small steps guarantee smooth stitching and flawless sewing instructions for your invisible zipper.
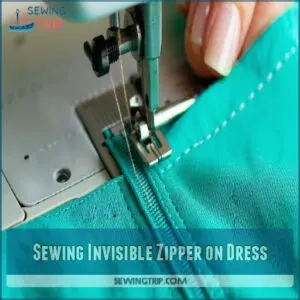
Sewing Invisible Zipper on Dress
Sewing an invisible zipper on a dress doesn’t have to be a head-scratcher.
With a little patience and the right steps, you’ll nail it.
The trick? Precision and keeping things aligned.
Here’s how to do it:
- Mark the zipper placement on your fabric, making sure the seam allowance is spot on.
- Pin the zipper to the fabric, right sides together, and double-check the alignment for evenness.
- Attach the invisible zipper foot to your sewing machine and set it to a straight stitch.
- Sew close to the zipper teeth, rolling them out as you go for a clean finish.
- Repeat on the other side, ensuring the zipper glides smoothly.
Zipper alignment and sewing techniques make all the difference!
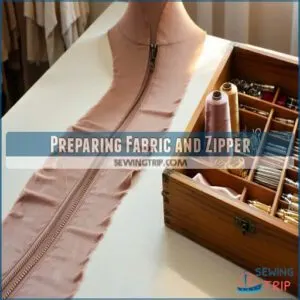
Preparing Fabric and Zipper
Getting your fabric and zipper ready is like setting the stage for a smooth sewing experience.
Take a few minutes to iron, finish raw edges, and prep the zipper—it’ll save you headaches later!
Measuring and Cutting Fabric Pieces
Your fabric’s success starts with precise measurements.
Use a ruler, tailor’s chalk, and sharp scissors for clean cuts.
Always factor in seam allowance and follow the fabric grain for accuracy.
Need a quick guide?
Check this out:
| Task | Tools Needed | Key Tip | Avoid This |
|---|---|---|---|
| Measure fabric | Measuring tape | Add seam allowance | Guessing measurements |
| Mark fabric | Tailor’s chalk | Use light, removable markings | Permanent markers |
| Cut fabric | Sharp scissors | Follow fabric grain | Dull cutting tools |
| Align pattern | Paper patterns | Match grainlines to fabric | Ignoring pattern lines |
Ironing and Finishing Raw Edges
Once your fabric pieces are cut, it’s time to prep those edges like a pro.
Raw edges can fray faster than old jeans, so finish them up neatly.
- Use zigzag, overlock, or serging for Edge Finishing.
- Iron seams flat for smooth Fabric Smoothing.
- Try Edge Binding for a polished look.
- Practice Seam Pressing with steady Ironing Techniques.
- Keep edges clean for a flawless invisible zipper finish.
Applying Fusible Interfacing
Now that your edges are finished, it’s time to add fusible interfacing for extra fabric stability.
Choose the right interfacing type based on your fabric’s weight.
For more detailed guidance, explore this guide on applying fusible interfacing.
Use low heat to bond it securely.
This edge reinforcement keeps your invisible zipper installation smooth and professional.
Remember, good adhesive strength is key—don’t rush this step!
| Interfacing Type | Fabric Suitability | Bonding Tips |
|---|---|---|
| Lightweight | Silks, chiffons | Use low heat, no steam |
| Medium-weight | Cottons, linens | Press firmly, steady heat |
| Heavyweight | Denim, canvas | High heat, press longer |
Installing Invisible Zipper Foot
Swapping out your regular presser foot for an invisible zipper foot is quick and easy.
It’s like giving your sewing machine a tiny upgrade to handle those hidden zippers perfectly!
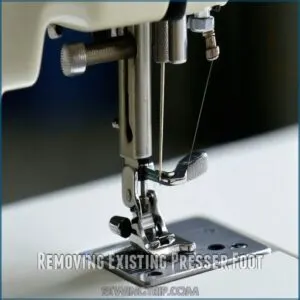
Removing Existing Presser Foot
Ready to swap out your presser foot? First, raise the sewing machine’s presser bar.
Locate the release lever—think of it as the “eject button” of presser foot anatomy—and press it to pop the foot off.
You can find a variety of invisible zipper foot products online.
Keep these foot removal tips in mind:
- Check for zipper compatibility before replacing.
- Clean the area for smooth sewing machine maintenance.
- Explore foot replacement options if needed.
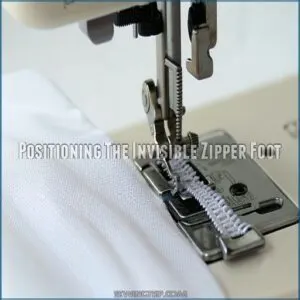
Positioning The Invisible Zipper Foot
Now that the old presser foot is off, it’s time for the invisible zipper foot.
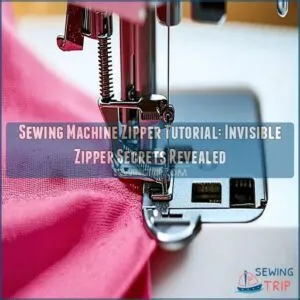
Slide it under the machine’s ankle, guaranteeing proper alignment for precise stitching.
Lower the ankle to snap it in place.
You can find a variety of invisible zipper foot products online.
This small step guarantees sewing precision and stitch control, making zipper installation smooth.
A snug fit here means flawless results later!
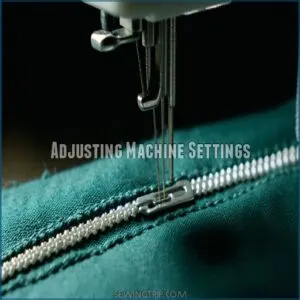
Adjusting Machine Settings
Getting your sewing machine settings right is key to nailing that invisible zipper.
Follow these steps:
- Set stitch length to 2.5mm (adjust for fabric weight).
- Center the needle for perfect needle alignment.
- Tweak machine calibration to sew close to zipper teeth.
- Control speed for precision—slow and steady wins here!
Perfect settings make sewing a breeze!
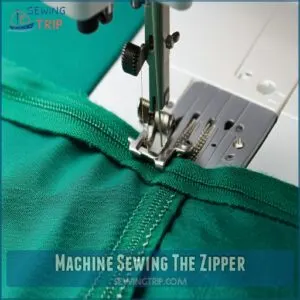
Machine Sewing The Zipper
Now it’s time to sew that zipper in place and make it look seamless.
Don’t worry—it’s easier than it sounds if you follow a few simple steps!
Pinning The Zipper to Fabric
Pinning the zipper is where precision shines.
Lay your fabric flat, verifying proper fabric tension.
Align the zipper teeth with the seam for perfect zipper alignment.
Place pins vertically for better edge control and seam accuracy.
| Tip | Why It Matters | Pro Tip |
|---|---|---|
| Pin Placement | Keeps zipper steady while sewing | Use fine pins to avoid snags |
| Fabric Tension | Prevents puckering or misalignment | Smooth fabric before pinning |
| Zipper Alignment | Ensures a seamless finish | Double-check teeth placement |
Sewing The Zipper Close to Teeth
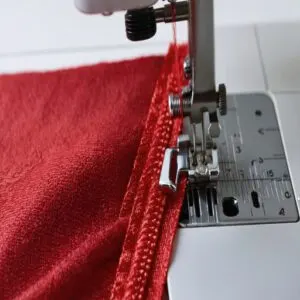
Slide the zipper teeth under the groove of the invisible zipper foot—this keeps the teeth exposure minimal.
Start sewing at the top edge, using steady fabric tension for smooth zipper guidance, and keep your stitching close to the teeth for sewing precision.
Watch your zipper alignment as you go—small adjustments make it easier to sew invisible zippers perfectly.
Repeating Steps for The Other Side
Now that one side’s done, it’s time to tackle the other! Make sure your zipper alignment matches perfectly—uneven sides scream “rookie mistake.”
- Pin the zipper to the fabric, keeping fabric tension even.
- Sew close to the teeth using the same stitch length as before.
- Check alignment as you go—no shortcuts here!
Note: Since there was only one group of related instructions, no additional grouping was necessary beyond separating the introductory sentence from the steps.
Hand Sewing The Invisible Zipper
If you’re skipping the sewing machine, hand sewing an invisible zipper is a great alternative that’s easier than you’d think.
With a needle, thread, and a bit of patience, you’ll have a flawless finish in no time!
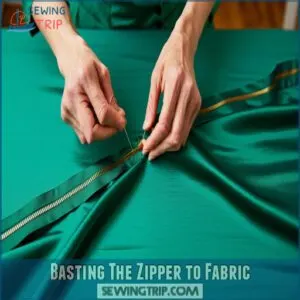
Basting The Zipper to Fabric
Basting techniques make sewing an invisible zipper on a dress easier.
Use diagonal stitches to temporarily secure the zipper to the fabric.
Keep fabric tension steady and check zipper alignment as you go.
Choose a strong thread and a medium stitch length for control.
This step guarantees the zipper stays in place, making the final stitching smoother.
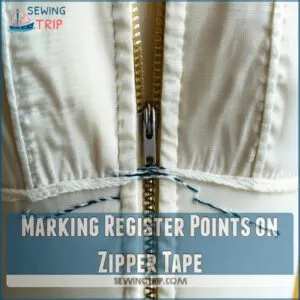
Marking Register Points on Zipper Tape
Getting your zipper alignment spot-on starts with marking register points on the zipper tape.
These marks act like sewing guides to keep everything neat.
Here’s how:
- Measure tape length against fabric notches.
- Mark key points with chalk or fabric pen.
- Match marks to fabric edges.
- Double-check tape measurement.
- Keep marks visible while you sew.
This process ensures that your zipper is properly aligned, making the sewing process easier and the final result more professional, with a focus on achieving perfect sewing guides.
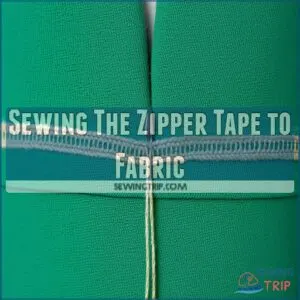
Sewing The Zipper Tape to Fabric
You’ve marked your register points—now it’s time to sew the zipper tape to the fabric.
Use short, steady stitches like a pro.
Keep an eye on zipper alignment and fabric tension as you go.
Choose a strong thread and a strong thread and a stitch length that feels right.
Remember, sewing techniques matter here—patience wins the game!
| Step | Tip | Why It Matters |
|---|---|---|
| Pin Zipper | Align carefully | Guarantees smooth closure |
| Start Stitching | Use short stitches | Adds durability |
| Check Alignment | Match register points | Avoids uneven seams |
| Finish Edges | Bind with bias tape | Prevents fraying |
| Inspect Work | Test zipper movement | Confirms functionality |
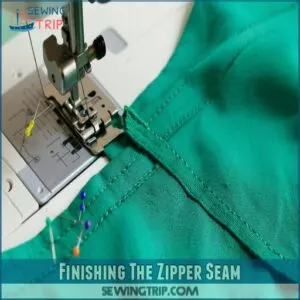
Finishing The Zipper Seam
Now that the zipper’s in place, it’s time to clean things up and make it look polished.
You’ll trim any extra fabric, press the seams flat, and check for small mistakes—kind of like giving your dress a final checkup!
Trimming Excess Fabric
After sewing the invisible zipper on your dress, grab those scissors.
Trim any excess fabric along the seam allowance carefully—don’t go overboard or you’ll risk cutting into your stitches.
Keep the edges clean to avoid bulk, and toss those fabric scraps aside.
For a professional finish, explore various serger-free seam finishing techniques.
This step keeps everything neat and preps the seam for flawless edge finishing.
Pressing Seams Flat and Smooth
Now that you’ve trimmed the fabric, it’s time to press those seams flat and smooth.
Grab your iron and set it to the appropriate heat for your fabric. This step guarantees perfect zipper alignment and a polished look.
- Use a pressing cloth to avoid shine.
- Press from the wrong side of the fabric.
- Focus on edge finishing for neat seams.
- Try garment steaming for stubborn creases.
Checking for Imperfections
Once you’ve sewn the invisible zipper, take a close look.
Check zipper alignment—are the seams even?
Run your fingers over the fabric to spot any puckers.
Inspect stitch quality and thread tension; uneven stitching can ruin the look.
Open and close the zipper to verify smooth movement.
A quick seam inspection now saves headaches later!
Troubleshooting Common Issues
Sometimes zippers don’t cooperate, but fixing them is easier than you think.
Let’s tackle common issues like sticking, uneven stitching, or a stubborn zipper pull so your dress looks flawless.
Addressing Zipper Sticking Issues
If your invisible zipper on a dress sticks, don’t panic—it’s fixable!
- Check alignment: Misaligned teeth? Gently press and realign.
- Reduce fabric friction: Trim excess fabric near seams.
- Clean teeth: Use a soft brush or apply zipper lubrication sparingly.
These quick fixes can save your zipper application and keep it moving smoothly!
Correcting Uneven Stitching
Uneven stitching messing up your invisible zipper dress? It’s all about balance.
Align the fabric grain, adjust stitch tension, and sew both sides top-to-bottom.
Use basting tape instead of pins for steadier placement.
Keep sewing speed consistent and pick the right needle size for your fabric.
| Problem | Cause | Fix |
|---|---|---|
| Crooked stitches | Misaligned fabric grain | Realign fabric, baste securely |
| Uneven tension | Incorrect thread choice | Match thread to fabric weight |
| Visible puckering | Inconsistent sewing speed | Slow down and sew evenly |
Handling Zipper Pull Placement
Getting the zipper pull in the right spot is key for smooth operation.
Always face the pull downward when sewing.
Use reinforcement strips for stability, and test on scrap fabric first.
Align the zipper tabs carefully with the seam.
Zipper guides help keep things straight, so your invisible zipper dress looks flawless.
Precision here avoids future headaches!
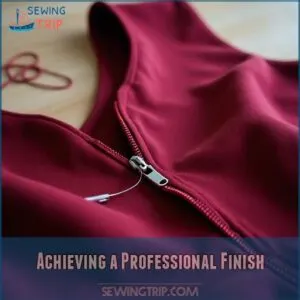
Achieving a Professional Finish
Getting that polished, professional look isn’t as tricky as it seems.
With a few simple checks—like smoothing the zipper and inspecting your stitches—you’ll have a finish that looks store-bought.
Ensuring Smooth Zipper Movement
Smooth zipper movement isn’t magic—it’s all about the right prep.
Here’s how to nail it:
- Check Zipper Alignment: Misaligned teeth? Reseam if needed.
- Mind Fabric Tension: Too tight or loose fabric messes things up.
- Adjust Machine Calibration: A well-tuned machine guarantees flawless sewing speed.
Use quality thread, and your invisible zipper on dress will glide like butter!
Inspecting The Finished Zipper
Check your zipper alignment by ensuring the teeth meet perfectly at the seam.
Test the closure security—zip it up and down a few times to confirm smooth movement.
For a truly invisible finish, consider a hand sewn zipper installation guide.
Look for any puckering or fabric tension issues along the seam.
If the zipper visibility is noticeable, you may need to adjust.
Seam quality matters—press everything flat for a polished finish.
Making Final Adjustments
Now that the zipper’s in place, fine-tune everything.
Test the zipper’s movement—does it glide smoothly? If not, adjust the fabric tension or check the stitch quality.
Look for any puckering or uneven zipper alignment.
Trim stray threads and press the seam for a polished finish.
Closure testing is your final step—ensure it zips up cleanly without a hitch!
Quality Control and Inspection
Make sure your zipper works smoothly and stays firmly in place—it’s the final test of your sewing skills.
A quick check now saves you from embarrassing wardrobe malfunctions later!
Checking Zipper Functionality
Before calling it done, make sure the zipper works like a charm.
Run a quick Zipper Test:
- Zip up and down to check for Smooth Operation.
- Look for any Closure Issues or snags.
- Inspect Zipper Alignment—the fabric edges should meet perfectly.
- Tug gently to confirm it’s secure and functional.
For a truly invisible zipper, you’ll want to troubleshoot invisible zipper installation problems beforehand.
A flawless invisible zipper? Nailed it!
Ensuring Secure Attachment
Before you call it done, double-check the zipper alignment.
Tug gently to test fabric tension and confirm secure fastening.
Reinforce stitches near the zipper stop for added seam integrity.
If anything feels off, don’t hesitate to tweak it.
A well-inserted invisible zipper on garments should glide smoothly—like butter!
Master this, and your dress will scream professional finish.
Frequently Asked Questions (FAQs)
How to sew an invisible zipper to a dress?
Start by ironing the zipper teeth flat, then pin it to the dress with right sides together.
Use an invisible zipper foot to stitch close to the teeth.
Finish seams, press, and test functionality.
Do I need a special foot to sew an invisible zipper?
You’ll need an invisible zipper foot—it’s a game-changer.
It lets you sew super close to the zipper teeth, keeping them hidden.
Without it, you’ll struggle to get that seamless, professional look.
How to sew an open-ended invisible zipper?
To sew an open-ended invisible zipper, align the zipper teeth with the fabric edges, pin in place, and sew each side separately using an invisible zipper foot.
Make certain teeth stay rolled outward for a seamless finish.
How to get an invisible zipper over a seam?
Slide the seam allowance flat beneath the zipper teeth.
Pin carefully for alignment.
Use an invisible zipper foot to sew close to the coils.
Keep seams trimmed and pressed to prevent puckering or bunching.
How do I shorten an invisible zipper?
Chop the zipper to size by trimming it with scissors, leaving an extra inch.
Melt the cut edge lightly with a candle or lighter to prevent fraying.
Sew a few stitches below the stop for security.
Can I sew an invisible zipper without a special foot?
You can, but it’s trickier.
Use a regular zipper foot and sew close to the teeth while rolling them flat.
Go slow, keep the fabric steady, and double-check alignment to avoid puckering.
How do I fix a misaligned invisible zipper?
Ever feel like your zipper’s playing hide-and-seek?
Unpick the seams around it, realign the fabric edges, and re-pin the zipper.
Sew carefully, ensuring both sides match, and then test the zip before final stitching—no surprises later!
What fabrics are hardest for invisible zippers?
Delicate and slippery fabrics like silk, satin, or chiffon can be tricky for invisible zippers.
They shift easily, making precise sewing tough.
Stabilizing with interfacing and sewing slowly helps prevent frustration and improves results.
How do I replace a broken invisible zipper?
Out with the old, in with the new!
Carefully rip out the broken zipper using a seam ripper, then prep the fabric edges.
Install the replacement invisible zipper following proper alignment and sewing techniques.
Voila!
Conclusion
Sewing an invisible zipper on a dress can feel like solving a puzzle, but once you’ve done it, you’ll wonder why it seemed so tricky.
With the right tools, patience, and a clear plan, you’ll nail that seamless, professional look.
Follow this guide, take it step by step, and remember—you’re not just sewing a zipper; you’re perfecting your craft.
Now grab that invisible zipper foot, and let’s make your dress look amazing!
- https://www.craftsy.com/post/how-to-sew-an-invisible-zipper
- https://sewcanshe.com/2014-5-6-sewing-201-the-no-fuss-invisible-zipper/
- https://siemachtsewingblog.com/2023/03/how-to-sew-an-invisible-zipper/
- https://www.seamwork.com/articles/sewing-an-invisible-zipper
- https://thefloramodiste.com/blogs/tfm/how-to-sew-an-invisible-zipper-the-teri-dress-sewing-tutorial

