This site is supported by our readers. We may earn a commission, at no cost to you, if you purchase through links.
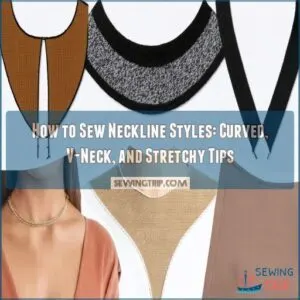 Want to master how to sew neckline styles like a pro? Start by choosing lightweight interfacing that matches your fabric weight and complements your garment design.
When pinning, place pins perpendicular to edges and keep fabric taut to prevent stretching. For curved necklines, use triangle cuts around curves to release fabric and create smooth seams.
On stretchy fabrics, pin at quarter points and use a double-pass straight stitch for reinforcement. V-necklines require precise stay-stitching and careful trimming.
Pro tip: Always test your stitch tension on scrap fabric first – your future garments will thank you for the extra care.
Table Of Contents
Key Takeaways
- You’ll transform your sewing game by selecting the right interfacing and matching it carefully to your fabric weight, ensuring a professional-looking neckline every time.
- Master pinning techniques by placing pins perpendicular to edges, keeping fabric taut, and using quarter-point alignment—especially crucial for stretchy and curved necklines to prevent unwanted stretching.
- Learn to trim and notch curves strategically, using triangle cuts that release fabric tension and create smooth seams, which is key to achieving a polished, professional finish on your garments.
- Always test your stitch tension and technique on scrap fabric first, giving yourself a chance to practice and perfect your approach before working on the final piece, which can save you time and frustration.
Sewing a Curved Neckline
Mastering curved necklines can transform your sewing projects from homemade to professional-looking with just a few key techniques.
You’ll want to choose the right facing.
Pin carefully.
Learn how to trim and notch curves for a smooth, clean finish that hugs your garment perfectly.
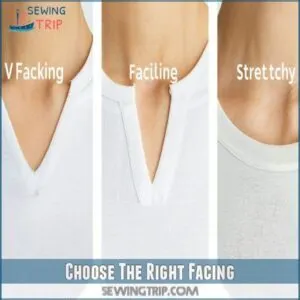
Choose The Right Facing
Choosing the right facing can make or break your curved neckline‘s professional finish. The key is matching fabric weight and style to your garment’s design.
Understanding what’s facing in sewing Types of Facings and Interfacing can also help you choose the right one.
Here’s what’s worth thinking about:
- Select a lightweight interfacing for crisp edges
- Match facing fabric to your main garment material
- Your facing should complement the neckline’s overall structure.
A smart facing transforms your sewing project from homemade to haute couture.
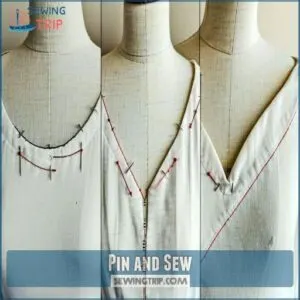
Pin and Sew
After selecting the perfect facing, it’s time to transform your fabric into a professional-looking neckline.
Master the art of pinning by strategically placing sharp pins perpendicular to the edges, creating a smooth canvas for sewing.
Utilizing curved neckline sewing techniques and tools from curved sewing kits can also help achieve a clean finish.
| Pin Placement | Fabric Tension | Sewing Tips |
|---|---|---|
| Perpendicular | Keep taut | Backstitch ends |
| Match seams | Avoid stretching | Use sharp needles |
| Even spacing | Support curves | Remove pins carefully |
| Check alignment | Minimize puckering | Maintain steady pace |
| Anchor key points | Control stretch | Smooth as you go |
Stitch with confidence, letting your machine glide smoothly along the curved edge.
Trim and Notch
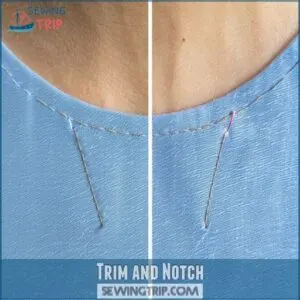
Fabric’s curves demand precision. Your scissors become sculptors, carefully notching seam allowances to liberate neckline edges from bulky constraints.
Triangle cuts strategically placed around curves let fabric breathe and drape smoothly.
Trim excess material with confidence, transforming stiff seams into fluid, professional-looking neckline finishes that’ll make your garment sing.
Crafting a V-notch neckline requires careful consideration of v-notch size guidelines to achieve a polished look.
Sewing a Stretchy Neckline
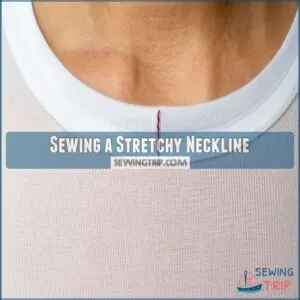
When sewing stretchy necklines, you’ll need a special touch to prevent puckering and maintain fabric elasticity.
By mastering a few key techniques like pinning at quarter points and using the right stitch, you’ll create a professional-looking finish.
A professional-looking finish that moves comfortably with the wearer.
Pin at Quarter Points
Your neckline’s secret weapon? Precision pinning at quarter points. Mastering this technique transforms stretchy fabric from foe to friend, ensuring your neckband hugs curves without a single pucker.
Start by dividing both the neckband and neckline into four equal sections, marking these anchor points. When you match these quarter points, you’re basically giving your fabric a roadmap for perfect alignment.
Pins become your guiding stars, strategically placed to distribute stretch evenly.
Understanding proper neckband length distribution, especially how the front neckline generally has more circumference than the back Quartering a Neckband, will also help you achieve a smooth finish.
Pro tip: Practice on scrap fabric first—your patience will pay off in professional-looking necklines that look like they’ve been sewn by a seasoned pro.
Sew Straight Stitches
Several expert sewers swear by a double-pass straight stitch technique when working with stretchy necklines. Line up your neckband carefully, then sew a smooth, even line using a straight stitch that accommodates fabric movement. Immediately follow with a reinforcement row to prevent dreaded stretching and distortion.
Pro tip: remove pins just before they reach the presser foot to maintain precise seam alignment.
When dealing with thick knits, lightweight interfacing can be your secret weapon. If the band starts to skew, gently realign instead of ripping out stitches.
Always test your tension and stitch length on scrap fabric first to guarantee professional-looking results, and be sure to use the right zigzag stitch techniques for a smooth finish.
Sewing a V-Neckline
If you’re ready to tackle a V-neckline, you’ll need precision and patience to create a professional-looking finish.
With the right techniques, you’ll master stay-stitching, careful pinning, and clean trimming.
to transform your garment’s neckline into a polished, eye-catching detail.
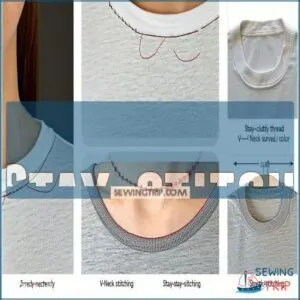
Stay-stitch
Stabilizing a V-neckline begins with strategic stay-stitching, locking in the fabric’s shape before further construction. This vital step prevents unwelcome stretching and maintains your design’s integrity.
To avoid stretching, some sewists prefer using knit stay tape alternatives for necklines, especially on unstable fabrics.
- Protect delicate fabric edges
- Prevent potential warping nightmares
- Reinforce neckline structural
- Produce professional-looking finished garment
Stay-stitch within the 5/8" seam allowance, using careful tension and precise stitch lengths.
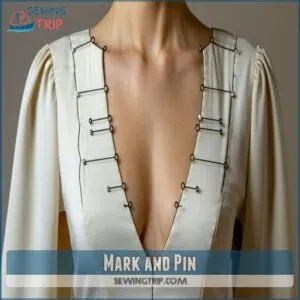
Mark and Pin
With precision and flair, master the v-neck neckline marking technique by creating your sewing roadmap. Here’s how to pin like a pro:
When working with delicate or stretchy fabrics, consider using specialized v-neck sewing pins.
- Chalk a 5/8-inch guide from raw edges
- Use a ruler for laser-sharp marking accuracy
- Insert pins perpendicular, easing fabric without stretching
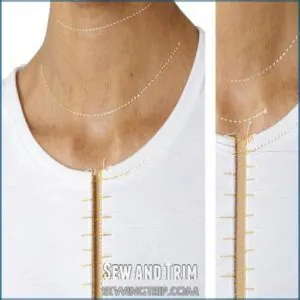
Sew and Trim
Anyone can nail that V-neck seam with the right technique.
Carefully sew around the neckline at 5/8" seam allowance, stitching each side separately for precision.
Grab your pinking shears or rotary cutter to trim excess fabric, creating clean edges that reduce bulk. This strategic trimming lets your facing lay smooth as silk inside the garment.
Proper Hemming Techniques can also make a big difference in the overall appearance of your V-neckline.
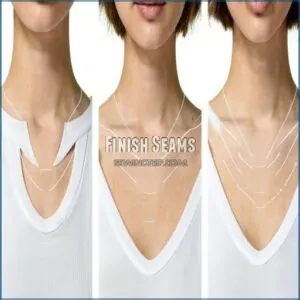
Finish Seams
After trimming those V-neck seams, you’ll want to press them flat for a crisp finish.
Serge or zigzag the raw edges to prevent fraying.
Topstitch near the seam for extra stability, creating a professional-looking neckline that’ll make your sewing skills shine.
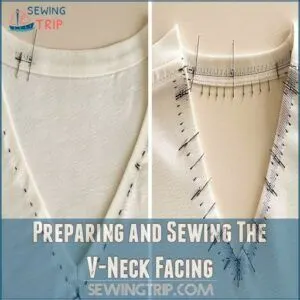
Preparing and Sewing The V-Neck Facing
When you’re ready to tackle a professional-looking V-neck, mastering the facing technique is your secret weapon for a clean, polished finish.
You’ll want to carefully prepare your fabric.
Pin with precision.
Sew with confidence to create a neckline that looks like it came straight from a high-end boutique.
Prepare Facing and Neckline
Ready to transform your V-neck from good to jaw-dropping? Preparing your neckline facing is your secret weapon.
- Feel the fabric’s potential beneath your fingertips
- Breathe life into precise interfacing choices
- Embrace each carefully marked seam
- Celebrate your growing sewing confidence
- Trust your crafting instincts
Don’t forget to use high-quality interfacing to add shape and support to your garment.
Stay-stitch the neckline perimeter within the 5/8" seam allowance, setting the stage for sewing magic.
Pin and Sew Carefully
Your neckline’s destiny hangs on precise pin placement and steady stitching. When preparing to sew your V-neck facing, consider using a bias binding technique with a topstitch method for a professional finish.
Transform your workspace into a precision workshop:
- Position pins perpendicular to the seam line
- Match shoulder seams with laser-like accuracy
- Sew slowly, treating each stitch like a delicate dance
- Check alignment frequently, preventing future frustration
Maintain a 5/8-inch seam allowance, letting your fabric guide your hands with confident, controlled movements.
Finish Facing Cleanly
When wrestling with a tricky neckline facing, grading the seam allowance is your secret weapon against bulk.
Having the right v-neck facing tools can also make a big difference in achieving a professional finish.
Understitch close to the edge, catching the facing to prevent peek-outs.
Trim layers precisely, then topstitch a quarter-inch from the edge to lock everything in place.
Pro tip: A fabric glue stick can be your ally in keeping those layers perfectly aligned during this delicate dance of sewing finesse.
Tips for a Perfect Neckline
When you’re sewing a neckline, the right techniques can make or break your garment’s professional look.
Sharp scissors are a secret weapon for creating a polished, crisp neckline.
Strategic pin removal and careful pressing are also essential.
This will have everyone asking where you bought your perfectly crafted piece.
Use Sharp Scissors
Because precision matters in sewing.
Invest in high-quality, razor-sharp scissors exclusively for fabric cutting.
Keep them pristine and professionally sharpened annually to slice through neckline materials like a hot knife through butter, ensuring clean, professional-grade cuts every single time.
Remove Pins as You Sew
After wielding sharp scissors, mastering pin removal becomes your next sewing superskill. Dodge potential disaster with these pro moves:
- Pull pins before needle approaches
- Keep fingers clear of moving parts
- Grip fabric above and below presser foot
- Maintain steady, controlled fabric movement
- Stop immediately if fabric shifts
Making smooth, professional-looking neckline seams requires the right thread selection for your fabric type.
Sewing without pin interference prevents broken needles and creates smooth, professional-looking neckline seams that’ll make your garment shine.
Press Carefully
Iron-wielding sewists know pressing is an art form that can make or break your neckline. Master your ironing techniques with precision and care, transforming fabric from wrinkled to runway-ready.
When sewing delicate fabrics like indigo-dyed cotton, techniques such as Shibori indigo dyeing can add an extra layer of complexity to your pressing routine.
| Pressing Tool | Best Use | Pro Tip |
|---|---|---|
| Cool Iron | Delicate Fabrics | Test temperature first |
| Steam Iron | Stubborn Creases | Use sparingly |
| Pressing Cloth | Sensitive Materials | Protect fabric surface |
| Appliqué Foot | Curved Areas | Maintain even pressure |
Your garment’s polished look depends on gentle, strategic pressing that respects each fabric’s unique personality.
Frequently Asked Questions (FAQs)
How do you sew a neckline on a garment?
Thread your way to sewing success.
by pinning the neckline carefully.
using the right stitch (stretch or straight), trimming seams, and pressing with a cool iron.
to create a crisp, professional-looking finish on your garment.
How do you pin a neckline for sewing?
Align pins perpendicular to the neckline’s edge, spacing them 2-3 inches apart.
Pin from the center outward, ensuring fabric lies flat without stretching.
Keep pins’ heads facing outward for easy removal while sewing.
How do you sew a curved neckline?
Pin your fabric carefully, matching curves precisely.
Use stay stitching to prevent stretching.
Then sew with a slight zigzag or stretch stitch.
Trim seam allowances, clip curves, and press for a smooth, professional-looking curved neckline that sits perfectly.
How do you sew a V-neckline?
Grab your pattern and fabric.
Carefully mark center points and seam allowances.
Sew the V shape with precision, reinforcing corners.
Trim excess, press seams, and understitch for a crisp, professional-looking V-neckline that’ll make your garment pop.
How do you sew a neckline with interfacing?
Your neckline’s secret weapon? Interfacing!
You’ll want to carefully cut it to match your pattern.
Press it smoothly onto the fabric’s wrong side.
Then sew it in place for a crisp, professional finish that screams custom-made perfection.
Should you stretch out a neckline before sewing?
Carefully stretch your neckline to about 80% of its original length before sewing. This helps distribute fabric evenly, preventing puckering and ensuring a smooth, professional finish on your garment.
How to stitch a neckline for beginners?
Stitch a neckline by first stay-stitching to prevent stretching.
Then pin and sew facing or binding with a stretch stitch.
Press seams flat, understitch for a crisp finish, and trim excess fabric for a professional-looking edge. This ensures a crisp finish.
How do you sew bias around a neckline?
Fold bias tape in half, press edges, and align raw edges with neckline.
Pin carefully, sew with a scant quarter-inch seam.
Then flip inside, press, and edgestitch for a clean, professional finish.
What is the method of finishing a neckline?
You’ll want to choose between three key methods: neckline facings that mimic your garment’s shape, bias binding for a clean edge, or ribbing for knit fabrics.
Pick what suits your fabric best.
How do you sew a perfect V neck?
Think V-necks are your sewing Everest? Forget the fear!
Carefully mark your center line, pin the fabric, stitch with precision, and clip those curves.
Press gently, and voilà—a perfectly crisp V-neck that’ll make your garment sing.
Conclusion
Sew what, crafty creators? Mastering neckline styles isn’t rocket science—it’s about patience and practice.
Whether you’re tackling curved, stretchy, or V-neck designs, remember that how to sew neckline techniques improve with each stitch.
Your garments will transform from homemade to handcrafted professional pieces.
Don’t fear mistakes; they’re just creative opportunities. Keep your scissors sharp, your tension balanced, and your spirit adventurous.
Soon, you’ll confidently create necklines that’ll make even seasoned sewists stop and stare. necklines that’ll make even seasoned sewists stop and stare. Mastering neckline styles. how to sew neckline techniques.

