This site is supported by our readers. We may earn a commission, at no cost to you, if you purchase through links.
 Unlock the power of sewing your own jacket! Making a tailored, custom-fitted jacket is an art form that can be achieved with just a few steps. With this step-by-step guide on how to sew a jacket, you’ll learn everything from choosing the right pattern and gathering materials to exploring complex details like welt pockets and lapels.
Whether you’re an experienced sewer or new to garment construction, this comprehensive guide will help equip you with the knowledge needed for creating beautiful jackets that are made exactly for your body type.
Table Of Contents
Key Takeaways
- Consider fabric choices: silk, wool, linen, cashmere.
- Choose suitable lining: satin, Bemberg rayon.
- Select quality interfacing: hair canvas, fusible options.
- Start with a suitable pattern matching your skill level and style preference.
- Decide on closure types: buttons, zippers, hooks, snaps.
- Explore advanced techniques: welt pockets, notched collars.
- Experiment with different fabrics for collar and facing.
- Choose from various lining materials: satin, cotton.
- Master details: bound buttonholes, lapels.
- Prepare pattern pieces with straight grain lines.
- Cut fabric meticulously to minimize waste in a single session.
- Apply interfacing strategically for shape and support.
- Assemble the jacket by sewing lining, interfacing, and exterior fabric together.
- Pin and sew body pieces, focusing on seam alignment.
- Attach sleeves and hem them for a neat finish.
- Carefully attach the collar, lapel, and sleeves to define the jacket’s character.
- Match thread type to fabric and adjust tension for clean stitching.
- Press seam allowances and use a ham for curved seams.
- Serge-finish sleeve and lining hem edges for a clean interior.
- Create buttonholes and pockets with precision.
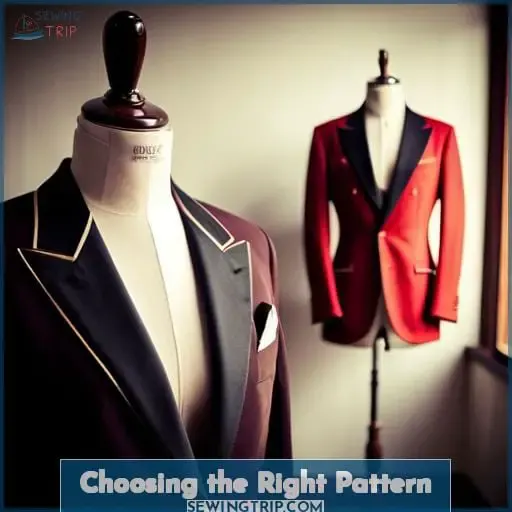
Choosing the Right Pattern
When choosing your jacket pattern, consider your skill level and the style you want before selecting one with the right size and details. Start with a simple pattern without too many pieces or tricky steps if you’re a beginner.
Check that it has good instructions and illustrations. As your skills improve, move on to more advanced patterns. Also, think about the style of jacket you’d like – fitted, boxy, cropped, long – and choose a pattern that matches.
Make sure to select the right size based on your measurements, not just your normal dress size. Pay attention to the suggested fabrics too, as some drape and sew better for tailored jackets. Don’t be afraid to make a muslin first to check the fit. Choosing the right pattern upfront will set you up for success in your jacket sewing project.
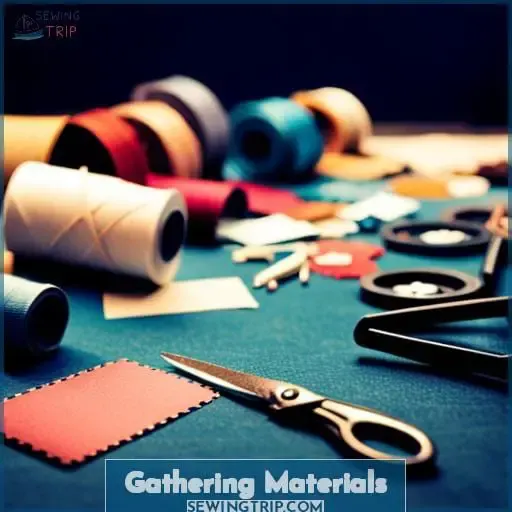
Gathering Materials
As you prepare to sew your jacket, first gather all the necessary materials. Select a medium or heavyweight wool fabric and pair it with a smooth satin or Bemberg rayon lining. Fusible interfacing adds structure, and choose closures like buttons, zippers, or hooks and eyes.
Don’t forget to stock up on coordinating thread for construction and buttonholes.
Fabric
With hands nimble as hummingbirds, run your fingers over silk smooth as a calm lake, picturing a gem of a jacket.
- Fabric Selection
- Fabric Quality
- Fabric Patterns
- Fabric Colors
- Fabric Care
Seek high-end fabrics like silk, wool, linen, and cashmere in solids or subtle patterns for structured jackets. Lightweight cottons or silky polyesters work for unlined styles. Handle fabrics to evaluate quality and drape.
Consider care requirements. Audition colors against your complexion. Drape swatches over your shoulders before committing, feeling the possibilities before cutting.
Lining
You’ll then choose a soft lining like silky satin that hugs your body for comfort.
| Column1 | Column2 | Column3 |
|---|---|---|
| Satin | Soft drape | Smooth texture |
| Cotton | Breathable | Casual style |
| Silk | Luxurious | Slippery hand |
| Polyester | Durable | Easy care |
| Wool | Warm | Natural fiber |
With precise stitching and interfacing, you’ll master even complex jacket construction techniques like welt pockets and notched collars to create a perfectly tailored jacket.
Interfacing
Don’t skimp on quality interfacing or your jacket will lose its shape faster than last year’s fads. Select the best quality hair canvas interfacing or fusible weft for supporting areas that need structure, such as collars, lapels, and hems.
Check pattern instructions for interfacing requirements and placement. Choose lightweight fusibles for softer sections, like side or sleeve heads. Proper interfacing application and pressing are key for a crisp jacket with enduring shape.
Closures
Consider your closure options like buttons, zippers, hooks, or snaps when selecting your jacket pattern.
- Buttons
- Zippers
- Hooks and eyes
- Snaps
Closure selection impacts the jacket style and ease of wearing. Master buttonholes early with practice fabric. Allow extra time for hand-sewing closures. Correct fit ensures closure placement flatters your figure.
Thread
Pick high-quality thread as it forms the foundation of your garment. Interestingly, Gütermann’s Sew-All thread consists of over 300 meters of thread per spool. Choose the appropriate thread type for your fabric – cotton, polyester, or silk.
Match the thread color closely to the fabric. Adjust the tension; too tight can cause puckering, while too loose can create loopy seams. High-quality thread is resistant to breaking and tangling. Brands such as Gütermann, Coats & Clark, and Mettler ensure durability.
| Thread Type | Uses | Brands |
|---|---|---|
| Cotton | Natural fibers | Gütermann |
| Polyester | Synthetics, stretch | Mettler |
| Silk | Delicate fabrics | Aurifil |
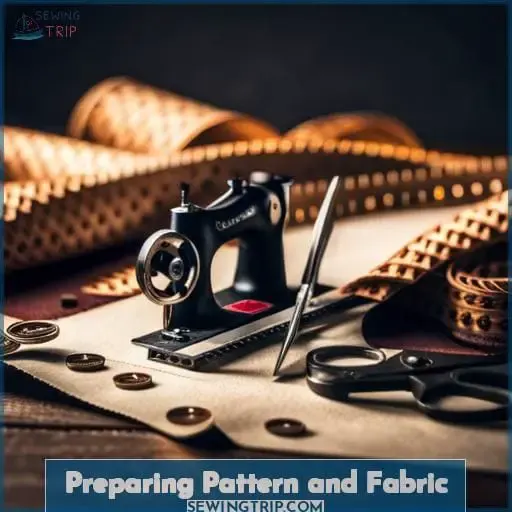
Preparing Pattern and Fabric
Let’s prepare to make that jacket. First, carefully cut out all the pattern pieces labeled with letters and pin them to the fabric. Then, cut along the edges with sharp shears and pay attention to the grain line.
Don’t forget to add interfacing to the areas specified by the pattern for structure and shape.
Cutting Pattern Pieces
Mind your seam allowances when cutting the precise pattern pieces. Select the proper fabric and prepare it correctly to ensure accurate pattern placement. Take your time to spread out the tissue pattern pieces and align the grainlines.
Use sharp shears and cut carefully along the outlines. Handle the fabric gently to avoid shifting it off-grain. Laying out all the pieces methodically leads to a beautifully cut garment. Precision trimming and precise alignment create a flawless foundation for quality construction.
Pinning and Cutting Fabric
After revitalizing the fabric with a quick ironing, begin laying out your fabric in a single layer and cut out all the pieces at once. When choosing fabrics, ensure that the grain is straight and the weight of the fabric matches your pattern.
Take care to align the slippery pattern pieces accurately before pinning. Be careful when cutting along the bias grain edges and curved seams to prevent distortion. With careful fabric preparation and cutting, you will be ready to start sewing that exquisite jacket.
Adding Interfacing
You’ll interface your fabric to give it oomph where needed. Interfacing gives shape and structure to certain fabric pieces in tailored garments like jackets. Use hair canvas, woven fusible, or nonwoven options based on the fabric weight and needed support.
Apply it carefully, following pattern guides. For beginners, try a lighter fusible. Let it shape subtly with the fashion fabric’s drape. Consider alternatives like self-fabric bias binding at edges for light stabilization without bulk.
Assembling the Jacket
Let’s start stitching to assemble that jacket! First, sew the lining, interfacing, and exterior fabric together. Then, pin the body pieces of the jacket together and sew along the edges as indicated by the pattern before attaching the sleeves and hemming them for a neat finish.
Sewing Lining, Interfacing, and Exterior Fabric
Pin the lining, interfacing, and exterior fabric together before sewing along the seam allowances as the pattern directs, just like a tailor assembling a bespoke suit.
Select a lightweight lining like Bemberg for comfort yet structure from the hair canvas at the front.
Liberty of London lawn offers a polished look, so finish interior edges with serging or Hong Kong seams for longevity.
With precise cutting and pressing, your tailored jacket will rival those of Savile Row.
Pinning and Sewing Body Pieces
Now carefully pin the jacket’s body pieces together, with the outer fabric facing each other, then sew along the edges as your pattern indicates. When aligning and pinning the body pieces, handle the fabric gently yet decisively to ensure precision.
As you stitch, focus on seam alignment and maintaining uniform tension for a smooth finish. With practice, you’ll find body piece assembly almost meditative, with each motion bringing you closer to manifesting your vision.
The swish of fabric and the hum of the machine grant a sense of purpose and liberation.
Attaching Sleeves and Hemming
After carefully sewing the jacket’s body, align the sleeve cap with the armhole and match the notches before easing the sleeve into place.
- Pin the sleeve and body together with ease stitches.
- Sew the sleeve using a 5/8 seam allowance.
- Trim seam allowances and notch curves for flexibility.
- Press the sleeve head for a crisp finish.
Trim all loose threads, press the sleeve hems, and ensure the lining matches the exterior length for a professionally finished jacket.
Exploring Pattern Details
Let’s begin our exploration of pattern details for sewing a jacket. First, consider a fitted jacket pattern with a notch collar and bound buttonholes, as well as a bagged lining and shoulder pads. Also, explore using different fabrics like lightweight wool for the cropped jacket exterior while selecting from various lining materials like satin or lightweight cotton.
You’ll want to incorporate interfacing from quality brands for structure and learn techniques like making welt pockets and a notched collar with stay tape for the lapels.
Notch Collar and Bound Buttonholes
Slap yourself out of focusing on collars and buttonholes, for life is fleeting. Instead, concentrate on the precise details that make a jacket shine. Play with collar styles like notched, shawl, or peak for completely different looks.
Master professional techniques such as handworked bound buttonholes, undercollar interfacings, and closure options from buttons to zippers. Experiment with creative touches – contrast fabric on the collar, unique buttons, lining prints.
The devil is in these jacket details; indulge in the craftsmanship that liberates your inner couturier.
Bagged Lining and Shoulder Pads
Feeling the structured silhouette of a lined jacket, attach bagged lining for a professional tailoring effect. Ease the two-piece sleeve heads into the armholes before sewing the linings together. Target the desired size and shape of the shoulder pads to achieve the desired structure.
Experiment with different lining fabrics, from satin to Bemberg. Before sewing the lapels, fuse lightweight hair canvas interfacing onto single-layer notched collars.
Different Fabrics for Facing and Collar
You would use a sturdier fabric for the collar and facing. For fabric options, consider a crisp cotton, linen, or silk for the collar. Play with different textures like smooth satin or textured tweed for unique styling.
Apply lightweight interfacing to the collar pieces. Take care when sewing the curved seams. Press them gently. Consider a contrast fabric for a distinctive lapel. Make the collar a highlight.
Various Lining Materials
Slide swanky satin or whispery cotton against your skin for a fancy feel. Satin’s sheen telegraphs luxury, while cotton caresses with familiar softness. Choose lightweight satin, silk charmeuse, or batiste for flowy linings, or crisp cotton shirtings for structure.
Play with mixing interfacing weights and fusing areas for personalized shaping. Collars and lapels hug better in satin; pad them with wool shoulder heads and chest pieces for an haute contour. Opt for a notched collar’s flexibility over a peaked lapel’s stiffness. The lining against your body matters.
Using Interfacing for Structure
Consider pairing a strong interfacing from Pinotti with lightweight fabrics for structure.
- Hair canvas provides shape and support.
- Fusible gives crispness to lapels and collars.
- Hymo is lightweight yet firm.
- Interfacing adds resilience and durability.
Interfacing is essential in tailored garments. Match the weight and application method of the interfacing to the fabric. Interface individual pieces before assembly for the cleanest finish. Proper interfacing supports the shape and structure of the garment.
Welt Pockets and Lapels
Start shaping your jacket’s style by deciding whether to add welt pockets and notched lapels. Precision is key for fine welt pockets—baste guidelines and line up seams perfectly. Construct notched lapels with interfacing for structure and clip curves for a smooth finish.
Embellish your jacket with bespoke details like welt pockets and lapels to master advanced techniques.
Sewing Tips and Techniques
As an experienced seamstress, I wanted to provide some key tips and techniques for sewing a beautifully tailored jacket. Before cutting any fabric, take the time to prepare your pattern pieces, pre-treat the fabric, and cut everything in a single session.
Remember to press seam allowances after every step, using a ham for curved areas. Serge-finishing the sleeve and lining hem edges will result in a clean, professional finish.
Mise en Place in Sewing
Prep your workspace and gather fabrics before cutting to stay organized.
- Clear your sewing table.
- Organize sewing tools within reach.
- Iron fabrics flat.
- Straighten fabric grain.
- Lay out patterns and fabric.
Keeping your sewing area tidy allows you to find what you need quickly. Prepare your fabrics, patterns, and tools ahead of time so you can focus on the joy of creating.
Pretreating Fabric and Straightening Grain
Next, ensure your fabric’s grain is straight by tugging the cut edges before washing to pre-shrink the material.
| Wash Type | Water Temperature | Drying Method |
|---|---|---|
| Machine wash | Cold or warm | Lay flat or tumble dry on low |
| Hand wash | Lukewarm | Lay flat to dry |
| Dry clean | N/A | Dry clean per care label |
Proper fabric preparation and straightening the grain are essential pre-sewing steps for material handling and sewing efficiency.
Single-Layer Layout for Cutting Fabric
Once you’ve pretreated and straightened your fabric, try a single-layer layout for efficient cutting. For precision cuts and optimizing material, avoid folding fabric layers. Place pattern pieces ideally with no overlap, aligning grain lines.
This cutting strategy allows you to precisely match pieces, reducing waste. Carefully measure and pin patterns before cutting.
Making a Full Back Pattern Piece
Before cutting your jacket pieces, create a full back pattern piece from muslin when the pattern has a center fold. Achieving a perfect fit and grain alignment with single folds can be challenging. Strategically cut and spread additional width across the upper back and shoulders for comfort on your custom muslin.
Once the muslin mockup meets your fit and design needs, carefully transfer adjustments to your fashion fabric. Your slopers will serve you through countless creations when artfully fitted. Refine them with thought, care, and patient precision.
Importance of Pressing Seam Allowances
You’ll love the results when you press each seam allowance as you go.
- Well-pressed seams create a professional finish.
- Pressing flattens seam allowances, reducing bulk.
- Seam allowances pressed open reduce strain on curved areas.
Proper pressing at each step gives your garment a high-quality, couture look and improves the drape of the final product.
Using a Ham for Pressing Curved Seams
When shaping curved areas such as armholes or princess seams, support the area over a ham as you press for a smooth finish. The contour of the ham allows the fabric to relax into shape, preventing distortion.
Your garment deserves meticulous ironing for precision. Master pressing techniques like draping over a ham, which is the hallmark of couture sewing.
Serge-Finishing Sleeve and Lining Hem Edges
Better trim those sleeve and lining hem edges perfectly with your serger before they become a ragged mess! Using your serger for edge finishing will streamline the process of hemming sleeves and linings.
Serge-finish the raw edges, especially on fabrics that are prone to fraying and raveling. This technique will neatly contain the fabric edge in a tidy finish. Prior to hemming, serge the sleeve and lining hem allowances for a flawless inside jacket.
The Buttonholes and Pockets
Next, meticulously measure and mark the buttonhole placement on the jacket front before cutting precise slits with an awl and chiseling them open with a buttonhole stitch.
For a polished finish, practice your buttonhole technique on scrap fabric first.
Determine the pocket style that complements your jacket design, such as welt, patch, or flap pockets.
Carefully measure and mark the pocket placement, allowing adequate seam allowance.
Construct the pockets, press well, then pin and sew them to the jacket front and lining.
Select decorative buttons that align with your style.
Place them strategically for function, starting from the bottom.
Ensure the buttons slide through the buttonholes with ease.
Beautiful bound buttonholes and thoughtfully placed pockets elevate your jacket with couture details.
The Collar, Lapel, and Jacket Sleeve
After stitching the pockets and bound buttonholes, which greatly affected the jacket’s ultimate look, carefully attach the collar, lapel, and sleeves because they really define the character of your bespoke garment.
Shaping the collar and lapels demands meticulous fitting and interfacing. Master hand-stitching the notched collar to the lapel and neckline.
Interfacing builds structure; pad stitch lapels for a subtle roll. Set sleeves precisely so the jacket moves with you.
Press as you go, steaming lapel rolls in place. Insert lightweight shields at stress points. Your bespoke jacket evolves with each unique detail. Savor the process and the freedom of creating an extension of your personal style.
Conclusion
With a bit of skill and patience, you can create a stunning jacket with a unique style that will be the envy of all your friends. From selecting the perfect pattern to adding the final touches, this step-by-step guide will help you sew a jacket with confidence.
With the help of this guide, you are now equipped to create an impeccable jacket that you can proudly wear and cherish for years to come.

