This site is supported by our readers. We may earn a commission, at no cost to you, if you purchase through links.
These markings act like puzzle pieces, ensuring you align seams correctly and maintain proper fabric orientation during assembly. Single notches mark front pieces, while double notches identify back seams.
Cut small triangular shapes into seam allowances or extend them outward, depending on your fabric type. Match corresponding notches when pinning pieces together—they’re your roadmap to professional-looking results.
Choose your marking method based on fabric weight and stretch to avoid damage. Master this technique and you’ll discover how these simple marks transform chaotic construction into seamless precision, with notches being a crucial part of the process to achieve professional-looking garments.
Table Of Contents
Key Takeaways
- You’ll transfer notches from pattern to fabric using chalk, small snips, or tailor’s tacks – these triangular marks act like puzzle pieces that ensure perfect seam alignment during garment construction.
- Choose your marking method based on fabric type – use outward notches for delicate materials to prevent fraying, inward cuts for thick fabrics, and chalk markers for knits to avoid runs or damage.
- Match corresponding notches before pinning – single notches mark front pieces while double notches identify back seams, and aligning these marks prevents twisted seams and construction errors.
- Cut notches strategically for strength – limit depth to half your seam allowance width and space multiple notches ¼ to ½ inch apart for clear visibility without weakening the fabric.
What Are Sewing Notches?
Sewing notches are small triangular marks or cuts placed on seam edges that help you align pattern pieces correctly during construction.
You’ll find these essential guides on nearly every sewing pattern, where they guarantee your fabric pieces match up perfectly and maintain proper orientation throughout the assembly process, with complete concepts and proper orientation being key to successful sewing.
Definition and Purpose of Notches
Sewing notches are triangular wedges or small cuts you’ll add to your seam allowances during pattern marking. These strategic markers guide seam alignment and guarantee proper fabric orientation throughout garment assembly.
Think of notches as your fabric’s GPS system—they guide every piece to its perfect destination
Think of notches as your roadmap for perfect pattern matching. Seam allowance notches are also vital for garment construction.
- Matching corresponding seam edges with precision triangular guides
- Identifying front versus back pieces through single or double notch systems
- Marking design details like dart arms, pleats, and zipper placement points
Types of Notches in Sewing
You’ll encounter several sewing notches types, each serving specific purposes.
Single notches mark front pieces, while double notches identify back seams. Triple notches highlight special features like zipper ends.
Triangle notches point inward or outward from seam allowances. Diamond notches always extend outward, providing clear alignment.
Understanding these notch techniques helps you choose the right marking method for your fabric. Notches also act as essential balance points for aligning pattern pieces, and serve as a key factor in sewing and pattern creation, with more information available at essential balance points.
Placement and Pattern Markings
Notches strategically mark up your pattern pieces with essential placement information throughout the seam allowance.
You’ll find center markings, dart placement guides, and balance points that help align pattern pieces correctly.
These pattern marking tools indicate design details like pocket locations and guarantee your tailor’s marks create perfect seam connections during construction, ensuring a professional finish with perfect seam connections.
How to Sew Notches Step by Step
Now you’re ready to transfer notches from your pattern to fabric and start sewing with precision.
The process involves three main steps: transferring pattern markings accurately, choosing the right marking tool for your fabric, and using proper cutting techniques that won’t weaken your seams.
Transferring Notches From Pattern to Fabric
Now that you understand what notches are, you’ll need to transfer them accurately from your pattern to fabric.
Place your pattern pieces on fabric and mark notch locations using pattern marking tools, such as chalk versus snips, or use tailors tacks for delicate fabrics.
Digital pattern notches appear as triangles or diamonds on printed patterns, and it’s crucial to mark each notch carefully to guarantee matching notches accurately during assembly.
As proper pattern marking determines successful seam alignment, many beginners start with simple A-line skirts due to their straightforward construction, making them an ideal choice for learning about seam alignment.
Marking Notches With Different Tools
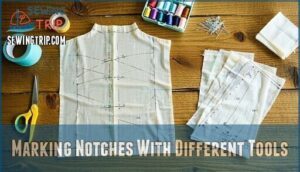
Several marking methods exist for transferring notches to fabric. Chalk marking creates temporary, visible lines that brush away easily after sewing.
Tailors tacks use contrasting thread loops for precise placement on delicate fabrics. Pattern notcher tools cut small gaps directly into seam allowances. Fabric scissors work for careful snipping.
Tape methods offer removable alternatives for marking pattern pieces without permanent marks. For more delicate fabrics, consider tailor’s chalk options to avoid damage, using delicate fabrics and tailor’s chalk options can be beneficial, and precise placement is also crucial, and it is important to have removable alternatives.
Cutting and Marking Methods for Notches
You’ll master cutting notches through three proven methods that suit different fabrics and skill levels.
Choose your approach based on your project needs:
- Pattern Notchers – Use specialized tools for clean, precise cuts into seam allowances
- Tailors Tacks – Create removable thread markers with contrasting colors for delicate fabrics
- Chalk Marking – Draw temporary notch guides using fabric-safe markers or chalk
Each technique offers unique benefits for notching fabric accurately.
A dedicated tool can guarantee consistent notch depth.
Choosing The Right Notching Technique
Not all notching techniques work for every fabric or pattern design.
You’ll need to choose between inward cuts, outward triangles, or alternative marking methods based on your fabric’s weight and stretch properties.
Inward Vs. Outward Notches
You’ll find cutting direction makes all the difference when notching fabric.
Inward notches cut into the seam allowance, while outward notches extend beyond the fabric edge.
Outward notches offer better seam strength and won’t weaken your fabric, especially on curves.
Choose inward notches for thick fabrics where bulk matters more than a professional finish.
T-Shape and Slash Notches
T-shape notches offer excellent durability by creating a small horizontal cut with a vertical line down into the seam allowance.
This technique prevents tearing better than simple slash notches.
Slash notch uses work well for lightweight fabrics where you make straight cuts perpendicular to the seam edge.
One must consider fabric stretch and drape to avoid distortion during the cutting process.
Both cutting notches methods help align fabric notches during construction, giving you reliable sewing techniques for professional results.
Matching Notching Styles to Fabric Type
Different fabric types require specific notching approaches to prevent damage and guarantee accuracy.
You’ll want to match your technique to your material’s weight and structure.
- Lightweight fabrics: Use outward triangle notches (1/8 inch) to prevent fraying on delicate fabrics like chiffon
- Medium-weight fabrics: Apply standard 1/4 inch inward or outward notches for woven materials like cotton
- Heavyweight fabrics: Cut larger outward notches (up to 3/8 inch) for clear visibility on denim and wool
- Knit fabrics: Make tiny outward snips or use fabric markers for knit notching to avoid runs
- Bias cuts: Choose marking pens over cutting notches to maintain stretch and prevent distortion
Aligning and Using Notches During Sewing
Now that you’ve transferred your notches to fabric, it’s time to put them to work during assembly.
Matching these alignment marks correctly guarantees your seams come together perfectly and your garment fits as intended, with perfectly being a key aspect of the process.
Matching Notches for Accurate Assembly
When everything lines up, your notches become your best friends for seam alignment.
Pin corresponding notches together before sewing, especially on curve matching and complex patterns.
For zipper placement and dart alignment, match single notches with single, double with double.
This simple step prevents twisted seams and guarantees your garment construction flows smoothly from start to finish, ensuring a process that is free from errors and twisted seams.
Ensuring Correct Fabric Orientation
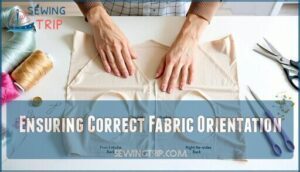
Positioning fabric pieces correctly prevents construction headaches later in your sewing project.
Notches serve as visual cues for fabric face identification, ensuring right sides meet during seam matching. Single notches typically mark front pieces, while double notches indicate back sections in sewing patterns.
Check notch symmetry and grainline alignment before pinning to guarantee pattern piece matching and professional results.
Notches for Curved Seams and Special Features
Curved seams present unique challenges that require strategic notch placement. When sewing curves like armholes or necklines, you’ll need multiple notches along the seam allowance to guide proper alignment.
Space notches evenly on curved pieces, marking key points where the curve changes direction. For zipper placement, add triple notches at start and end points.
Dart alignment relies on precise notch positioning at dart legs and points for accurate folding.
Tips for Accurate and Efficient Notching
You’ll achieve professional-looking results by using the right tools and techniques that prevent common notching mistakes.
These methods save time while creating stronger seams that won’t fray or tear during construction.
Professional Tools and Shortcuts
Professional tools can transform your notching from a tedious task to a smooth operation.
Transform your notching from tedious task to smooth operation with the right professional tools
A pattern notcher hole-punch creates consistent marks while automated cutting systems handle batch production efficiently.
Essential sewing tools that streamline your workflow:
- High-carbon steel notchers produce precise 1/8" marks on any fabric type
- Rotary cutters with notching blades reduce hand fatigue during repetitive cutting
- Magnetic seam guides guarantee perfect notch placement along curved edges
- Digital pattern marking systems offer laser-guided accuracy for complex projects
- Pre-cut adhesive guides stick directly to patterns for instant tracing references
Professional shortcuts include basting notches with contrasting thread for easy removal and pressing seams immediately after alignment.
These techniques, combined with proper sewing tools, create fabric reinforcement at stress points while maintaining clean finishes throughout your garment construction process.
Utilizing a sewing notch tool can substantially improve the accuracy of your notches.
Preventing Fraying and Weak Seams
Smart notch placement prevents weak seams and fraying fabrics. Never cut notches deeper than half your seam allowance width.
Apply fray prevention immediately after cutting – use pinking shears on cotton or zigzag stitches on delicate materials.
For narrow seam allowances, mark notches with chalk instead of cutting. Seam reinforcement like staystitching adds strength before assembly, and using techniques like staystitching can be particularly beneficial.
Enhancing Precision and Reducing Errors
Using precision tools consistently improves notch accuracy and reduces pattern errors by up to 60%.
Mark notches with contrasting thread for easy removal after assembly, avoiding permanent marks on fabric. Walk curved seams carefully when transferring pattern notching techniques to maintain seam allowances.
These small steps preserve fabric integrity while enhancing overall construction quality and professional results. Understanding the purpose of seam notches is essential for achieving accurate and efficient sewing outcomes.
Frequently Asked Questions (FAQs)
How do I transfer notches from a paper pattern to fabric?
Nobody wants their fabric pieces playing hide-and-seek during construction! Transfer notches by making small snips into the seam allowance, or mark them with chalk for delicate fabrics.
What tools can I use to cut notches?
You can cut notches using fabric scissors, pattern notchers, or specialized notching hole-punch tools.
Fabric scissors work for careful snipping, while pattern notchers create precise cuts in seam allowances for professional results.
How deep should I cut inward notches?
Disaster lurks if you’re too aggressive with those cuts!
You’ll want to slice inward notches about 1/8 inch deep into your seam allowance—shallow enough to maintain fabric strength while deep enough for clear visibility during assembly.
How do I know which type of notch to use?
Single notches mark front pieces, double notches identify back pieces, and triple notches indicate special locations like zipper ends.
You’ll match the notch numbers between corresponding seam edges for proper alignment.
Can I skip using notches if I’m an experienced sewer?
Even experienced sewers shouldn’t skip notches—they’re your safety net against alignment disasters.
You’ll save time and frustration by using them, especially on complex patterns with multiple pieces requiring precise matching.
Can notches be added to purchased patterns?
Yes, you can definitely add notches to purchased patterns.
Simply mark alignment points where seams meet, curves connect, or design details like pockets appear using chalk, fabric markers, or small snips, to ensure complete concepts are properly aligned.
How to fix accidentally cut notches?
Don’t panic over your cutting catastrophe! You can easily repair accidentally cut notches by reinforcing the area with small fabric patches or interfacing, then re-marking proper notch locations nearby.
What spacing distance between multiple notches?
You’ll want to space multiple notches about ¼ inch to ½ inch apart.
That way, you can easily tell them apart and avoid confusion.
If you’re marking zipper ends, keep them consistently spaced for accuracy.
Do serged seams require different notching?
Serged seams don’t change your notching approach. You’ll still cut notches into the seam allowance before serging. The serger trims excess fabric, so place notches slightly deeper than usual.
Can bias tape hide poorly marked notches?
Bias tape won’t magically erase your notching mistakes, but it’s a clever lifesaver for covering up wonky markings. You’ll still need proper alignment underneath for professional results.
Conclusion
Picture your sewing project transforming from scattered fabric pieces into a perfectly aligned masterpiece.
When you master how to sew notches, you’ll turn construction chaos into organized precision. These simple triangular marks become your guide for flawless seam matching and proper fabric placement.
You’ll save time, reduce frustration, and create professional-quality garments. With practice, notching becomes second nature, elevating every project you tackle to achieve flawless seam matching.

