This site is supported by our readers. We may earn a commission, at no cost to you, if you purchase through links.

You’ll need to lower your machine’s tension and use a straight stitch plate to avoid puckering.
Pre-treat your silk with spray starch or temporary stabilizer, and always cut in a single layer using sharp fabric shears.
Hand-baste seams before machine stitching, and finish edges with French seams or serging to prevent fraying.
The key is working slowly and letting the machine do the work rather than pulling the fabric, which helps to achieve stunning professional results by mastering these fundamentals and applying them to transform challenging silk projects into beautiful work, using techniques like machine stitching.
Table Of Contents
Key Takeaways
- You’ll need a microtex needle (size 60/8 or 70/10) and reduced machine tension to prevent snags and puckering on silk’s delicate fibers.
- You should always cut silk in a single layer using sharp shears or rotary cutters, and stabilize slippery fabric with tissue paper or spray starch before cutting.
- You must hand-baste seams before machine stitching and use French seams or serged edges to prevent fraying and achieve professional results.
- You’ll get better control by working slowly with shorter stitch lengths (2-2.5mm) and letting the machine feed the fabric rather than pulling it through.
Sewing Silk Basics
When you sew silk, you’ll need to know the different types of silk fabric, their unique textures, and how to prepare each one before stitching.
Even if silk seems slippery and fussy, a few careful steps make your project much smoother—no pun intended, with the goal of creating a smoother experience.
Silk fabric responds beautifully to patience and proper technique—your investment in careful preparation pays off with professional results.
Types of Silk Fabric
Understanding silk types helps you choose the right fabric for your project.
Each variety offers unique benefits for silk sewing success.
Here are three main silk categories you’ll encounter:
- Mulberry silk – Premium choice with smooth texture and consistent silk weight, perfect for garments requiring excellent fabric drape
- Wild silk types – Including tussah and muga, featuring natural texture differences and enhanced silk durability for structured pieces
- Specialty weaves – From lightweight chiffon to heavyweight dupioni, offering diverse weave variations for different sewing applications.
Many options are available based on silk fabric construction.
Characteristics of Silk
Silk’s unique properties make it both luxurious and challenging to work with.
This natural protein fiber offers unmatched elegance but requires specific techniques for successful sewing projects.
| Characteristic | Description |
|---|---|
| Silk Drape | Flows gracefully, creating beautiful silhouettes |
| Fabric Weight | Ranges from lightweight chiffon to heavyweight dupioni |
| Weave Types | Plain, satin, and twill weaves affect texture |
| Fiber Source | Silkworm cocoons create smooth, lustrous threads |
| Silk Luster | Natural sheen varies from subtle to brilliant |
Understanding silk fabric characteristics helps you choose the right silk types for your project and anticipate handling challenges during construction.
Preparing Silk for Sewing
Before you start cutting, proper preparation sets you up for success. Prewash silk fabric to prevent watermarks and shrinkage later.
This step removes manufacturing treatments and guarantees colorfastness.
Next, you’ll need to tackle silk’s slippery nature:
- Apply fabric stabilizer or spray starch to temporarily stiffen the material
- Use tissue paper underneath for added stability during handling
- Align pattern pieces with the grain for proper drape
Stabilizing methods like gelatin solution work wonders for stubborn silk fabric wrinkles, making cutting techniques much easier to execute.
Is Silk Hard to Sew
Many sewers wonder if tackling silk means signing up for frustration.
Looking at the paragraph’s tone – conversational, reassuring, and directly addressing reader concerns – here’s a fitting blockquote:
**Silk intimidates sewers unnecessarily, but mastering it just takes the right techniques.
The truth? Silk sewing challenges are totally manageable once you know the tricks.
Silk Difficulty Factors like slippery texture and fraying edges intimidate beginners, but these aren’t deal-breakers.
The fabric’s reputation for being "impossible" is one of those Silk Sewing Myths that keeps people away unnecessarily.
Your Essential Skills for sewing silk fabric boil down to patience and proper fabric handling.
Start with Beginner Silk Projects like scarves or simple pillowcases rather than complex garments.
These build confidence without overwhelming you with intricate construction details.
Overcoming Challenges happens when you adjust your approach.
Silk behaves differently than cotton, but it’s not rocket science.
Think of it like learning to drive a sports car after years with a minivan – same basic principles, just requires finesse.
With the right sewing techniques, silk transforms from intimidating to enjoyable.
Preparing Silk Fabric
Preparing silk properly sets the foundation for successful sewing, transforming this challenging fabric into a manageable material.
These essential steps prevent costly mistakes and guarantee your finished garment looks professional and fits perfectly, ensuring a professional finish.
Pre-wash and Dry Silk
Before diving into the sewing process, you’ll want to tackle pre-washing your silk fabric to prevent future heartbreak.
This essential step removes sizing, tests colorfastness, and prevents shrinkage that could ruin your finished garment.
Here’s your pre-wash game plan:
- Test colorfastness on a hidden corner using lukewarm water and mild detergent
- Choose gentle handwashing with baby soap or silk-specific detergents in cool water
- Rinse thoroughly with cool water, adding white vinegar to remove soap residue
- Skip the wringer – gently squeeze out excess water without twisting the fabric
- Air dry flat away from direct sunlight to prevent fading and fiber damage
Stiffen Silk With Gelatine
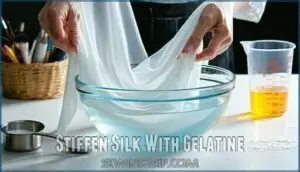
Gelatine mixture transforms slippery silk into manageable fabric for precise cutting and sewing.
Mix one teaspoon unflavored gelatine with sixteen ounces hot water, let sit thirty minutes. Soak silk for one hour, then air dry completely.
For best results, consider gelatin stiffening methods for your fabric. This gelatine ratio creates paper-like stiffness without permanent damage.
Application methods work better than tissue paper or alternative stabilizers for stabilize silk effectively.
Stabilize Silk With Interfacing
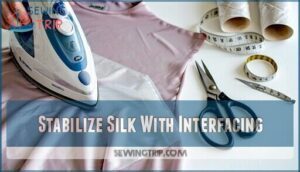
Interfacing provides the backbone your silk needs without sacrificing its natural drape.
Choose lightweight fusible options or sew-in interfacing like silk organza for delicate fabrics.
Match interfacing weight to your silk—never go heavier.
Consider grain direction when cutting woven interfacing to prevent warping.
Tissue paper can temporarily stabilize silk during construction, while fusible interfacing permanently reinforces high-stress areas like necklines and buttonholes.
Cutting Silk Fabric
Cutting silk fabric requires patience and the right approach, since silk’s slippery nature can turn pattern cutting into a wrestling match.
You’ll need to stabilize the fabric and use specific techniques to guarantee clean, accurate cuts that won’t leave you pulling your hair out, which is crucial for a successful project that requires accuracy.
Cut Silk in Single Layer
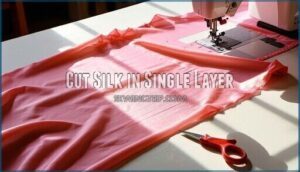
Cutting silk straight requires patience and precision to avoid fabric distortion.
Always cut silk fabric in a single layer to guarantee accuracy and prevent shifting.
Use pattern weights instead of pins to secure your pieces without snagging the delicate fibers.
A rotary cutter works better than scissors for clean, even cuts.
Place tissue paper or canvas underneath for stabilizing methods that keep slippery fabrics manageable.
Focus on grain alignment to maintain proper drape in your finished garment.
Transfer Pattern Markings
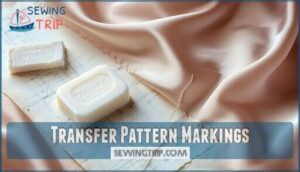
Marking silk requires gentle precision to avoid damage. Skip harsh marking tools that can snag delicate fibers and compromise your project’s professional finish.
Fabric preparation, including pre-washing the material, helps guarantee accurate results.
- Tailors tacks: Hand-stitch loose loops through pattern and fabric layers for removable marks
- Bar soap: Draw light lines with soap edge – disappears with steam or washing
- Fine chalk: Use only soft tailor’s chalk, testing on scraps first for removability
- Avoid tracing wheels: Skip these aggressive tools that can tear silk’s delicate weave
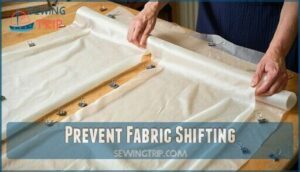
Prevent Fabric Shifting
When shifty silk starts acting like a stubborn cat, you need the right tools to keep it in line.
Tissue paper sandwiching your fabric creates a stable cutting surface, while fabric clips and pattern weights hold everything steady without creating holes.
| Method | Best For | Technique |
|---|---|---|
| Tissue Paper | Delicate silks | Sandwich fabric between layers |
| Pattern Weights | All silk types | Place on pattern edges |
| Hand Basting | Shifty pieces | Secure layers before cutting |
Smart sewists know that blockfuse interfaced pieces and stabilizer options prevent fabric slipping disasters.
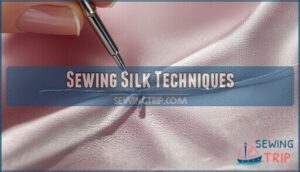
Sewing Silk Techniques
Once you’ve prepared your silk fabric properly, you’ll need to master the right sewing techniques to achieve professional results.
The key lies in selecting the appropriate needle, thread, and machine settings that work harmoniously with silk’s delicate nature.
Choose Right Sewing Machine Needle
In the context of sewing machine needles for silk, think of needle selection as your secret weapon against fabric disasters.
Microtex needles with their razor-sharp points are silk’s best friend—sizes 60/8 or 70/10 work perfectly for most silk weights. These specialized sewing machine needles create tiny, precise holes that won’t damage delicate fibers.
Universal needles can work in a pinch, but microtex needles explained simply: they’re designed specifically for preventing fabric damage in fine woven materials like silk.
To prevent issues, match needle size to fabric weight, using your secret weapon and considering the importance of fabric weight.
Select Suitable Thread for Silk
Thread material matters when silk sewing becomes your focus.
Silk thread offers natural compatibility with your fabric’s fiber content, creating seamless color matching and lustrous thread finishes.
Polyester thread provides durability and wider color options, while cotton thread works gently but lacks strength for lightweight silks.
Consider exploring different silk thread options for your project.
Choose fine thread weight like 100-weight silk or 60-80 weight polyester to prevent puckering and maintain proper thread tension throughout your project.
Adjust Machine Tension
Machine tension acts like a balancing act between your top and bobbin threads.
Start with your sewing machine tension dial at the standard setting (usually 4) and test on silk scraps.
If you see thread looping on top, decrease tension slightly. When fabric puckering appears, your tension’s too tight.
Balanced stitches form when both threads meet perfectly in the fabric center. Tension troubleshooting saves headaches later, ensuring a smooth sewing process with perfectly balanced stitches.
Machine Sewing Silk
When you’re ready to start machine sewing your silk, you’ll need to adjust your settings and techniques for this delicate fabric.
The right stitch length, proper stabilization, and careful seam finishing will transform your silk projects from frustrating disasters into professional-looking garments.
Stitch Settings for Silk
Your sewing machine settings for silk projects need precise adjustments for flawless results.
Set your stitch length to 2-2.5mm—shorter stitches prevent puckering on delicate silk fabric.
Reduce tension adjustment to avoid thread pulling through the weave.
Lower foot pressure helps feed dogs move silk smoothly without stretching.
Test these silk sewing machine settings on scraps first.
For ideal results, consult information on upper thread tension, which is crucial for achieving delicate silk fabric handling and smooth operation.
Prevent Fabric Layers Shifting
Shifty silk loves to play hide-and-seek during sewing, but you can outsmart it.
Sandwich fabric between tissue paper layers to create friction and prevent sliding. Use fabric clips instead of pins to avoid distortion.
Pattern weights hold pieces steady while you stitch. Hand-basting seams before machine sewing locks layers together.
Stabilizing sprays add temporary grip to slippery surfaces, making your silk behave like a well-trained pet, and this helps to outsmart the silk, allowing you to work with slippery surfaces more easily.
Finish Raw Edges
Silk’s delicate fibers demand careful edge finishing to prevent unraveling.
French seams work beautifully for lightweight fabrics like chiffon, enclosing raw edges completely.
For thicker silks like dupioni, try Hong Kong seams with bias binding for a professional look.
Serging silk requires gentle settings to avoid puckering.
Hand-rolled hems create elegant finishes on scarves and lingerie, while pinked edges offer quick solutions for lined garments.
French seams are particularly useful for maintaining the integrity of silk fabrics.
Hand Sewing Silk
Hand sewing silk requires patience and the right approach, but it’s actually more forgiving than machine sewing since you have complete control over tension and speed.
You’ll get beautiful, professional results once you master the proper needle choice and stitching techniques that prevent the fabric from puckering or shifting.
Choose Right Hand Sewing Needle
Two needle types work best for hand sewing silk: "Between" needles and sharp needles.
Between needles, sized 9-12, offer excellent thread compatibility and create precise stitches through delicate fabric thickness.
Sharp needles in sizes 9-11 penetrate silk smoothly without snagging.
Choose your needle size based on silk weight—finer silks need smaller needles for ideal stitch quality and minimal fabric damage.
Many sewers purchase specialized sewing products for silk projects, which can include specialized tools and high-quality materials.
Use Right Thread for Hand Sewing
When choosing thread for hand sewing silk, match your Thread Fiber to your fabric’s natural properties.
Silk thread provides the best Thread Weight compatibility and Color Matching for silk seams.
For silk basting, use fine cotton or polyester thread.
Your hand sewing needle should accommodate the thread thickness while maintaining Knot Security.
Different Stitch Types require specific thread weights, so test combinations before starting your silk sewing project to guarantee smooth stitching.
Prevent Puckering
Tension plays a vital role in preventing fabric puckering when hand sewing silk.
Keep your thread tension loose and avoid pulling tight, which creates unsightly gathers.
Use shorter stitch lengths and smaller needle sizes to minimize fabric distortion.
Monitor your fabric feed carefully—silk’s delicate fibers require gentle handling.
Adjust your grip pressure to prevent bunching while maintaining consistent stitches throughout your project.
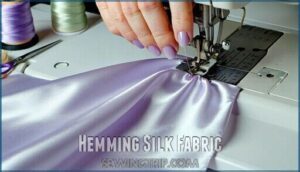
Hemming Silk Fabric
Hemming silk requires careful attention to achieve a professional finish without damaging this delicate fabric.
You’ll need to choose the right hemming technique based on your silk’s weight and drape, then press with proper heat settings to avoid scorching or water spots, which is crucial for a professional finish.
Level Hemming
Achieving even hemlines requires careful measurement and marking before cutting.
Measure your desired hem length from the floor up, marking with fabric clips or chalk at consistent intervals around the garment.
For silk’s tendency to stretch and shift, hand hemming with a blind stitch prevents machine distortion.
Machine rolled hems work well for straight edges, while hand rolled hems suit curved areas perfectly.
Hemming Options for Silk
Several hemming options work beautifully with silk, each offering distinct advantages.
Machine rolled hems using a rolled hem foot create professional finishes on lightweight silks like chiffon.
Hand rolled hems produce nearly invisible edges perfect for couture work.
Serged hems offer speed for scarves and bias cuts, while baby hems work wonderfully for lingerie.
Bias binding adds durability to structured garments, making it a great option for those who want a more durable finish.
Ironing Silk Fabric
Ironing silk fabric requires gentle heat and careful technique to avoid damaging the delicate fibers.
Always check iron settings before pressing silk, as excessive heat can cause permanent damage or unsightly shine.
- Use low to medium heat (silk setting) with steam or dry iron depending on fabric type
- Place a pressing cloth between iron and silk to prevent shine and protect the surface
- Press lightly with quick, lifting motions rather than dragging the iron across fabric
- Test ironing techniques on fabric scraps first to determine best heat and pressure settings, ensuring a delicate approach to handling silk fabric, and considering the permanent damage that can occur.
Common Silk Sewing Mistakes
Silk’s slippery nature can lead to costly mistakes that turn your dream garment into a frustrating project.
You’ll avoid these common pitfalls with the right knowledge and techniques, saving time and preserving your precious silk fabric.
Puckering and Distortion
Puckering turns silk sewing into a nightmare, but it’s preventable.
Tension Issues happen when your machine pulls too tightly, creating unwanted gathers.
Use lighter tension settings and shorter Stitch Length for better Fabric Feed control.
Stabilizing Methods like tissue paper underneath prevent silk from shifting.
When sewing slippery fabrics, proper Needle Size matters—too large creates holes that cause fabric distortion around stitching lines, and using the right techniques can prevent tension issues and improve fabric feed control.
Incorrect Needle Choice
Using the wrong needle can turn silk sewing into a nightmare of snags and skipped stitches.
Your delicate fabric deserves better than a dull, oversized needle that creates holes like a tiny battering ram.
Here’s what happens with incorrect needle choice:
- Wrong needle size causes fabric damage and visible puncture marks in delicate silk
- Dull or bent needles create skipped stitches and thread breaks during sewing
- Incorrect needle type fails to pierce silk cleanly, causing puckering and distortion
Choose microtex or sharp needles in sizes 60/8 to 70/10 for superior results.
Insufficient Stabilization
Skipping proper stabilization turns your silk project into a wrestling match. Without adequate support, cutting challenges multiply as fabric slides around your workspace, creating marking problems and sewing mishaps.
| Stabilizer Types | Best For | Application Method |
|---|---|---|
| Spray starch | Light silks, temporary stiffening | Spray evenly, press with iron |
| Gelatine solution | Slippery fabrics, washable hold | Soak fabric, air dry flat |
| Tissue paper | Cutting support, machine sewing | Sandwich silk between layers |
| Freezer paper | Pattern transfer, temporary backing | Iron shiny side to fabric |
Smart slippage solutions include sandwiching silk between tissue and freezer paper during cutting, then removing layers gradually. This method prevents the fabric from shifting while maintaining clean edges for professional results.
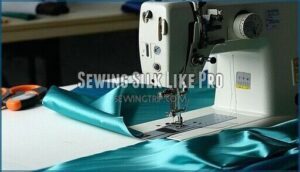
Sewing Silk Like Pro
You’ll achieve professional silk sewing results by mastering three essential elements: proper interfacing placement, advanced techniques, and quality tools.
With the right preparation and equipment, even challenging silk projects become manageable and produce stunning finished garments.
Use Interfacing for Stability
For stability’s sake, interfacing transforms slippery silk into manageable fabric.
Choose fusible interfacing for lightweight silks or sew-in interfacing when heat might damage delicate fibers.
Proper interfacing placement along necklines, buttonholes, and waistbands prevents stretching.
This fabric stabilization technique works alongside tissue paper methods, giving you control over shifty materials, and smart interfacing choices elevate your silk sewing techniques from amateur to professional results.
Mastering Silk Sewing Techniques
Master silk sewing by fine-tuning your approach—small adjustments make huge differences.
Perfect tension adjustment prevents puckering, while proper needle selection guarantees clean penetration through delicate fibers.
Essential silk sewing techniques include:
- Hand basting seams before machine stitching to prevent shifting
- Adjusting stitch length to 2mm for better fabric control
- Testing tension settings on scraps before sewing your garment
- Using French seams or Hong Kong seam finishes for professional results
- Maintaining consistent sewing machine settings throughout your project
Choosing Right Tools for Silk Sewing
Three essential tools make silk sewing manageable: sharp rotary cutting implements or fine shears for clean cuts, microtex sewing machine needles in sizes 60/8-70/10, and quality polyester or silk thread.
For ideal results, consider using genuine silk thread to achieve the best outcome.
Consider needlepoint alternatives like fabric clips instead of pins, specialized machine feet like Teflon presser feet, and pin alternatives such as pattern weights to prevent fabric damage during your silk fabric projects.
Frequently Asked Questions (FAQs)
Can you sew silk with a regular sewing machine?
Yes, you can absolutely sew silk with a regular sewing machine.
Use a fine needle (size 60/8 or 70/10), reduce tension, shorten stitch length, and consider stabilizing slippery silk with tissue paper underneath.
Is it difficult to sew silk?
Silk isn’t particularly difficult to sew, but it requires patience and proper technique. You’ll need sharp needles, gentle handling, and stabilization methods to manage its slippery nature successfully.
What is the best stitch for sewing silk?
Most sewers don’t know that 70% of silk sewing failures stem from wrong stitch selection. You’ll want a straight stitch with 2mm length for best results on silk fabrics.
Do I need a special needle to sew silk?
Fine needles are essential for silk sewing.
Use microtex or sharp needles in sizes 60/8, 70/10, or 80/
For delicate silks like chiffon, try size 55/7 needles.
Sharp, smooth needles prevent snags and minimize fabric damage.
What interfacing works best with different silk weights?
Choose lightweight fusible interfacing for delicate silks like chiffon or charmeuse.
Medium-weight interfacing works well with dupioni or taffeta.
Always test on scraps first since silk’s delicate fibers can react unpredictably to heat and adhesives.
How do you store silk fabric properly?
Store your silk fabric rolled around acid-free tubes or flat in breathable cotton muslin bags.
Keep it in cool, dry places away from direct sunlight, moisture, and temperature fluctuations to prevent fading and fiber damage.
Can you machine wash finished silk garments?
You can machine wash silk garments, but hand washing remains safer. Use cold water, gentle cycle, mild detergent, and skip the spin cycle to prevent damage.
Whats the best way to repair silk tears?
Delicate silk threads shimmer like spun moonbeams when torn, but don’t panic.
For small tears, use needle and matching thread to carefully weave through existing fabric fibers, creating invisible mends.
Larger rips need professional repair or decorative patches.
How do you prevent silk from yellowing?
Prevent silk yellowing by storing garments away from direct sunlight in breathable cotton bags.
Keep them in cool, dry places and avoid plastic storage that traps moisture and accelerates fabric deterioration, to prevent silk yellowing effectively.
Conclusion
Studies show 90% of sewers avoid silk because they’re scared of ruining expensive fabric, but you’ve now learned how to sew silk confidently.
You’ll create stunning garments by choosing the right needle, adjusting tension settings, and stabilizing your fabric properly.
These techniques transform challenging projects into professional results, and with practice, you’ll master silk sewing and expand your creative possibilities substantially.
Remember to work slowly and let your machine guide the process.
- https://guthrie-ghani.co.uk/blogs/blog/laurens-top-tips-for-sewing-with-silk-fabric
- https://biddlesawyersilks.com/how-to-sew-silk-10-top-tips/
- https://www.jjneedles.com/needles-guide
- https://www.reddit.com/r/sewing/comments/1cfddt4/silk_sewing_trouble_tips_appreciated/
- https://www.mhthread.com/blog/products/types-of-sewing-thread


