This site is supported by our readers. We may earn a commission, at no cost to you, if you purchase through links.
 To sew silk fabric by hand, start by pre-washing and drying it to remove any dye and shrinkage.
Stabilize the fabric using spray starch or tissue paper to prevent shifting.
Carefully cut the fabric with tissue paper underneath and silk pins for precision.
When sewing, use a fine needle and matching thread, testing the tension and stitch length first.
Employ techniques like backstitch, running stitch, and slip stitch for strong, invisible seams.
Finish by pressing the seams gently and hand-hemming for a professional touch.
If you follow these steps, you’ll guarantee a delightful sewing experience and beautifully finished garment.
Table Of Contents
Key Takeaways
- Sewing silk is like dancing with a delicate partner – it requires patience, finesse, and the right tools.
- Don’t let shifty silk slip away! Use tissue paper or starch to stabilize it and keep it in place.
- Treat your silk seams like royalty – hand-basting and pressing them will ensure they’re smooth and stay in place.
- Choose the right needle for the job – a fine needle will glide through silk without snagging or puckering.
How to Sew Silk Fabric by Hand?
To sew silk fabric by hand, start by stabilizing and cutting the fabric precisely. Use fine needles and appropriate stitches like the running stitch or slip stitch to handle the delicate material effectively .
Preparing Silk Fabric for Hand Sewing
Before you begin hand sewing silk fabric, it’s essential to properly prepare it. You’ll need to pre-wash and dry the fabric to prevent shrinkage, stabilize it to make it easier to work with, and carefully cut it according to your pattern or desired shape.
Pre-Wash and Dry the Fabric
Before you embark into hand sewing silk, pre-washing is essential. Here’s your silk prepping playbook:
- Hand-wash with mild detergent
- Rinse using 1/4 cup vinegar in water
- Gently squeeze out excess water
- Air dry or lay between towels
- Use a hairdryer on low for quicker drying
Don’t skip this step! Pre-washing removes dye remnants, prevents color bleeding, and eliminates minor shrinkage. It’s your ticket to a smooth sewing experience and a flawless finished product.
Stabilize the Fabric
To tame silk’s slippery nature, stabilizing is key. You’ll find this step a game-changer for your hand-sewing journey. Here’s how to stiffen your fabric:
- Spray starch: Quick and easy, but watch for residue
- Gelatine solution: Natural and effective, though time-consuming
- Tissue paper backing: Great for delicate silks
- Fabric stabilizer spray: Professional results, pricier option
- Cornstarch paste: Budget-friendly, requires careful application
Cut the Fabric
Now that you’ve stabilized your silk, it’s time to cut. Lay tissue paper underneath to prevent slipping, then pin the fabric down with silk pins. Cut each pattern piece individually, taking care to trim away any fraying edges. This precise approach ensures precision and prevents frustration later.
Here’s why cutting silk correctly matters:
- Enhances fit and drape
- Prevents unraveling during sewing
- Improves overall garment quality
- Boosts your confidence in working with luxurious fabrics
Preparing to Hand Sew
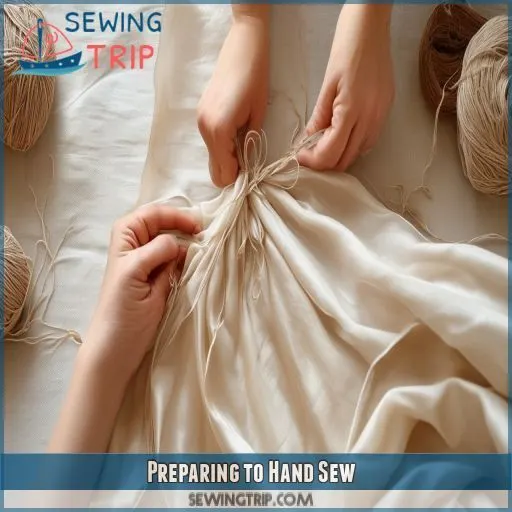
Before you begin hand sewing silk, you’ll need to pin your fabric pieces together and press the seams for a smooth foundation. Next, prepare your needle and thread, selecting a fine needle and silk or cotton thread that complements your fabric’s color and weight.
Pin Fabric Together
Now that you’ve prepared your silk, it’s time to pin the fabric pieces together. Remember, silk is slippery, so precision is key. Use silk pins for delicate handling and place them perpendicular to the seam line. Here’s how to pin like a pro:
- Align edges carefully, smoothing out wrinkles
- Place pins every 2-3 inches, closer on curves
- Consider hand-basting for extra stability, especially on bias-cut silk
This step sets the foundation for your hand-sewing journey.
Press the Seams
After pinning your silk fabric, it’s time to press those seams. You’ll want to tread lightly here, as silk can be temperamental. Set your iron to low heat and use a pressing cloth to protect the delicate fibers. Here’s how to press like a pro:
- Steam press gently, moving the iron in one direction
- Open seam allowances for a flat finish
- Use a cotton cloth as a barrier between iron and silk
- Cool seams completely before handling to set the press
Prepare the Needle and Thread
Choose a fine, sharp needle for your silk project. Thread it with cotton or silk thread, matching the color to your fabric. Before diving in:
- Test your thread tension on a scrap piece
- Adjust your stitch length for best results
- Practice hand-basting techniques
Hand Sewing Techniques
You’ll master five essential hand-sewing techniques for silk: backstitch, running stitch, whipstitch, slip stitch, and ladder stitch. Each method serves a specific purpose, from creating strong seams to invisible hems, allowing you to tackle various silk sewing projects with confidence.
Backstitch
Now that you’ve pinned and pressed your silk, it’s time to master the backstitch. This versatile stitch is perfect for creating strong seams in delicate fabrics. Here’s how to nail it:
- Insert needle from back to front, then back again 1/8 inch behind
- Bring needle up 1/4 inch ahead of first stitch
- Repeat, creating a continuous line of overlapping stitches
- Experiment with backstitch variations for decorative edges
- Try different thread colors and needle sizes for unique effects
Running Stitch
Switching to a running stitch, you’ll find it versatile for gathering, basting, or adding decorative touches. This simple in-and-out motion can embellish your silk projects beautifully. Remember these tips:
- Use small, even stitches.
- Keep tension low to prevent puckering.
- Practice on scrap silk.
- Hand-baste edges first.
Mastering it enhances both form and function.
Whipstitch
To execute a whipstitch on silk, guarantee proper fabric stabilization. This technique joins two edges with slanted stitches:
- Align the edges and hand-baste if necessary.
- Pass the needle over the fabric edge at an angle.
- Keep stitches evenly spaced for consistency.
A whipstitch is perfect for finishing seams, providing a secure yet flexible hold.
Slip Stitch
The slip stitch is ideal for creating nearly invisible hems on your silk fabric. To master it:
- Fold the hem and press it.
- Catch just a few threads of the fold with your needle.
- Move the needle forward inside the hem fold and repeat.
Ladder Stitch
The ladder stitch, perfect for hand sewing silk, creates invisible seams. To master it:
- Insert needle between fabric layers and make small stitches back and forth.
- Pull thread tight to close seam and hide stitches.
- Practice different variations like ladder stitch embroidery, blanket, rug, and binding for versatility.
Finishing Touches
Secure your threads with a firm knot, ensuring they won’t come loose over time. Carefully press your seams to set them, then hand-hem your garment with precision for a professional finish.
Knot and Secure Threads
Now that you’ve mastered the hand sewing techniques, it’s time to secure your threads. Take a few small stitches in one spot to lock your thread, then bring the needle through to the wrong side and knot. Make sure your knot is strong and secure to prevent it from coming undone.
- Use a suitable thread type, such as cotton or silk, that matches your fabric.
- Choose the right needle size for your thread and fabric.
- Fabric preparation is key to ensuring a smooth sewing process.
- Finishing techniques, like knotting and securing threads, give your project a professional touch.
Press Seams
Pressing seams is critical to achieving a professional finish when working with silk fabric. Always use a pressing cloth to avoid watermarks and prevent wrinkles. This will guarantee your seams are smooth and will protect the delicate fabric.
- Press on the fabric’s backside
- Use silk organza as a pressing cloth
- Avoid direct contact with the iron’s metal plate
- Use a dry iron for polyester satins
- Let the garment cool before moving
Hem by Hand
When hemming silk by hand, precision is key. Follow these steps for a perfect finish:
- Fold and press the hem, using a small iron on low heat.
- Use a slip stitch or blind hem stitch for an invisible finish.
- Apply a hand-rolled hem for delicate fabrics.
- Reinforce seams with fray-check or a similar product.
Tips for Success
Success in hand sewing silk demands utmost care and attention to detail. Here are four key pointers to guarantee your fabric stability, seam preparation, needle selection, and stitch execution are exceptional:
- Stabilize Fabric: Utilize spray starch or tissue paper below to prevent shifting.
- Prepare Seams: Consistently press seams with a low-temperature iron, employing a pressing cloth to safeguard delicate silk.
- Select the Appropriate Needle: Opt for a sharp, fine needle to minimize damage. Size 60/8 or 70/10 is optimal.
- Perfect Your Stitch Technique: Choose small, uniform stitches. Maintain low thread tension to prevent puckering.
Frequently Asked Questions (FAQs)
Can you sew with silk?
Sewing with silk is like mastering a delicate dance – with finesse and patience, use sharp silk pins, hand-baste seams, employ a fine needle, and always stabilize your fabric. Your careful steps will create elegance and sophistication (Source).
How do you sew silk?
Sew silk fabric by stabilizing with starch, gelatine, or tissue paper. Use fine needles (sizes 60/8, 70/10, 80/12), hand baste seams, shorten stitch length, and finish edges with French or bias-bound seams to prevent fraying.
How do you sew Shifty silk?
Did you know that 15% of sewers avoid silk due to its challenges? To sew shifty silk, use fine needles, hand baste seams, and stabilize fabric with tissue paper or starch to prevent shifting and puckering .
How do I get Ready for sewing silk?
Prepare for sewing silk by pre-washing the fabric, stabilizing it with starch or tissue paper, and using fine needles and silk thread. Hand-baste before stitching to make certain your fabric doesn’t slip.
How do you hold two pieces of silk fabric together?
Imagine holding delicate silk feels like grasping a wisp of cloud. Use silk pins or hand-baste seams together, aligning the edges precisely. Stabilize with tissue paper between layers to prevent shifting.
How to sew silk without Puckering?
To sew silk without puckering, use a shorter straight stitch length, hand-baste seams, and add tissue paper between feed dogs and fabric; also, use a straight stitch throat plate and finish seams with French or bias-bound seams to prevent fabric shifting.
What type of thread is best for silk?
The best thread for sewing silk is silk thread, known for its strength and smoothness. It glides effortlessly through the fabric without snagging. For details, use 100% silk spooled thread for a lustrous finish .
How can I prevent silk from fraying?
A stitch in time saves nine." To prevent silk from fraying, use French seams or bias bound seams. Hand-baste edges, and sew with a short stitch length and fine needle for greater stability .
What are common mistakes when sewing silk?
Common mistakes when sewing silk include not stabilizing fabric, using dull needles or improper thread tension, skipping pre-washing, failing to hand-baste or pin correctly, and not using a pressing cloth during ironing .
Are there specific scissors recommended for silk?
Using sharp, high-quality scissors is essential for cutting silk, akin to a chef’s knife for preparing a meal. Consider sewing shears or rotary cutters specifically designed for fabric to make precise, clean cuts .
Can I use a rotary cutter on silk?
You can use a rotary cutter on silk fabric, ensuring a new, sharp blade for clean cuts. Stabilize the fabric with tissue paper or a stabilizer and cut in manageable chunks to prevent shifting (Source).
Conclusion
Think of hand sewing silk as orchestrating a delicate symphony—each step plays its part in the harmonious creation of your garment.
You’ve prepared, pinned, and stitched with precision and professionalism.
By mastering techniques like backstitch and slip stitch, you’re ensuring strong, invisible seams.
Finally, by pressing gently and hand-hemming, you add the finishing touches.
Following these steps on how to sew silk fabric by hand, you’ll create luxurious, beautifully finished pieces.

