This site is supported by our readers. We may earn a commission, at no cost to you, if you purchase through links.
Start by pressing the zipper tape flat with an iron to open the coil. Position the zipper face-down on your fabric’s right side, aligning it with your seam line.
Use an invisible zipper foot to stitch close to the coil teeth, allowing the zipper to naturally curl back and hide within the seam. This creates a seamless closure that’s virtually undetectable from the outside.
The secret lies in precise placement and understanding how the zipper’s construction works with your fabric’s natural drape, which is crucial for a successful invisible zipper installation.
Table Of Contents
Key Takeaways
- Press the zipper tape flat before installation – You’ll need to iron the zipper tape to uncurl the coil, which allows it to lie flat against your fabric and creates the foundation for a seamless finish.
- Use an invisible zipper foot for precise stitching – You can’t achieve professional results with a regular foot, since the invisible zipper foot’s grooves guide the needle close to the teeth without catching them.
- Sew the zipper before completing the seam – You’ll attach the invisible zipper to your fabric pieces first, then finish the remaining seam below the zipper for proper integration.
- Prepare your fabric properly for best results – You should finish seam edges, apply interfacing for stability, and mark your seam allowances accurately before beginning the installation process.
Sewing Invisible Zipper Basics
You’ll master invisible zippers quickly once you understand their unique construction and installation method. These hidden fasteners create seamless closures that blend perfectly into your garment’s seam lines.
What is an Invisible Zipper
An invisible zipper is a concealed zipper that creates seamless fastening by hiding its coil zipper design within the seam.
Unlike regular zippers, you’ll sew this hidden zipper before completing the seam, making it virtually disappear into your fabric.
The secret to invisible zippers lies in their clever construction—they disappear completely into your seam.
The zipper tape material features fine nylon teeth that blend seamlessly with your project, perfect for blending seams in dresses, skirts, and cushions where you want flawless finishing.
For best results, pressing the zipper tape before installation is key to achieving a seamless and professional finish.
Types of Invisible Zippers
You’ll find several zipper coil materials and zipper tape styles when shopping for invisible zippers.
Standard nylon coil invisible zippers work perfectly for most garments, while lace tape versions suit delicate fabrics like chiffon.
Heavy-duty options handle thicker materials, and reverse coil types offer durability for sportswear.
Zipper lengths range from 7 to 60 inches, with zipper color options matching any fabric you choose.
These zippers are designed to be concealed within fabric for a seamless look.
Benefits of Using Invisible Zippers
You’ll love how invisible zippers transform your projects with their seamless appearance and professional finish.
These versatile applications work perfectly in formal wear, home décor, and everyday garments without disrupting design aesthetics.
The enhanced durability of invisible zipper installation creates a perfect invisible zipper closure that lasts while maintaining clean lines for superior zipper installation results.
How to Sew Invisible Zipper
Learning to sew an invisible zipper transforms your sewing projects from amateur to professional-looking garments.
You’ll master this essential skill by following four key steps that guarantee a smooth, hidden closure every time.
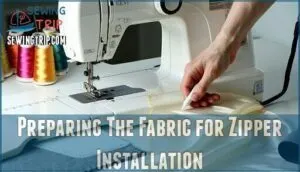
Preparing The Fabric for Zipper Installation
Before you start your invisible zipper tutorial, proper fabric preparation sets the foundation for professional results.
Take time to prepare your fabric correctly – it’s the difference between a smooth installation and a frustrating sewing experience.
Here’s your essential prep checklist:
- Seam Edge Finish – Serge or zigzag stitch the raw edges where your zipper will attach to prevent fraying during handling
- Fabric Pre-washing – Wash and dry your fabric before cutting to prevent shrinkage after zipper installation
- Interfacing Importance – Apply lightweight fusible interfacing to stabilize drapey fabrics like rayon or silk for easier sewing
Use proper Pressing Techniques when flattening your fabric pieces, and complete your Seam Allowance Marking with chalk before beginning this zipper installation guide.
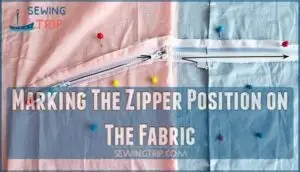
Marking The Zipper Position on The Fabric
Now you’ll mark where your invisible zipper goes on the fabric.
Use chalk marking or a fabric marker to create guidelines on your fabric pieces. Mark ¾" from the top edges of both pieces for proper zipper alignment.
Draw a ⅝" seam allowance line where the zipper will attach. Pin placement marks help you position the invisible zipper correctly during sewing.
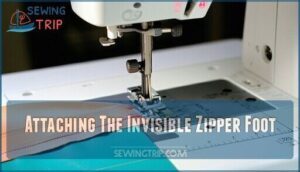
Attaching The Invisible Zipper Foot
Switch to your invisible zipper foot before starting. This specialized foot has grooves that guide the zipper coil, letting you stitch closer to the teeth.
Adjust your needle position to align with the foot groove for precise stitching. Check foot pressure settings and make certain zipper foot compatibility with your machine.
You may want to explore foot options for different machines. Securing the foot properly prevents shifting during sewing invisible zipper projects, ensuring a smooth process with your zipper foot.
Sewing The Zipper to The Fabric
Place the zipper face down on your fabric’s right side, aligning the coil with your marked seamline.
Pin carefully, then use your invisible zipper foot to stitch close to the teeth. The basting technique helps prevent shifting on slippery fabrics.
Focus on coil alignment and consistent allowance for perfect seam matching. The pressing the zipper tape guarantees a smooth seam.
Repeat for the opposite side, ensuring your sewing techniques create that flawless invisible zipper finish, with perfect seam matching and using the basting technique.
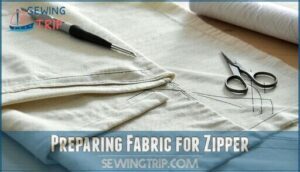
Preparing Fabric for Zipper
Before you install an invisible zipper, you’ll need to prepare your fabric properly to guarantee a smooth finish.
Start by finishing the seam edges where the zipper will go, then press the fabric flat and mark your seam allowances accurately.
Finishing The Seam Edges
Before installing your invisible zipper, you’ll need to finish the seam edges where the zipper will be placed.
Raw fabric edges can fray over time, weakening your seam allowance and creating an unprofessional finish.
Serging seam edges provides the cleanest result, while a zigzag stitch finish works well for most home sewers.
You can also use bias tape binding for delicate fabrics, or a simple method involves using pinking shears to create a zigzag edge.
Choose an edge finish type that matches your fabric weight and prevents fraying effectively.
Pressing The Fabric for Smooth Zipper Installation
Heat sets the stage for a perfect invisible zipper installation.
Press your fabric with a synthetic or low heat setting to avoid melting the zipper teeth. Use a pressing cloth to protect delicate materials and prevent damage.
Iron the zipper tape flat on the wrong side, rolling teeth away from the tape. This careful pressing creates smooth fabric stabilization for precise sewing.
Using Interfacing for Added Stability
Adding interfacing strips prevents fabric stretching and creates professional results when sewing invisible zipper installations.
Cut lightweight interfacing one inch wide and match your zipper length. Apply fusible interfacing to cotton or polyester fabrics using heat, while sew-in types work better for delicate materials.
Consider fabric weight when selecting interfacing types – lightweight strips support drape impact without creating stiffness. Position interfacing placement carefully along seam allowances before attaching your zipper foot.
An invisible zipper foot is essential for this process, ensuring a professional finish with invisible zipper installations.
Marking The Seam Allowance
Accurate seam allowance marking sets the foundation for professional invisible zipper installation.
Use measuring techniques with marking tools like chalk or fabric markers to mark your ⅝" seam allowance precisely.
This fabric preparation step guarantees placement precision when sewing invisible zipper components.
Your sewing machine will follow these guidelines smoothly, creating perfect sewing basics for any invisible zipper project, ensuring a successful outcome with professional invisible zipper installation.
Sewing The Invisible Zipper
Now you’re ready to attach the invisible zipper to your fabric using the proper technique and tools.
Follow these steps carefully to guarantee your zipper lies flat and creates a seamless closure that won’t pucker or twist.
Placing The Zipper on The Fabric
Position your invisible zipper face-down on the fabric’s right side, aligning the coil with your marked seamline.
Perfect alignment creates the foundation for professional invisible zipper results.
Zipper tape alignment guarantees consistent seam allowance throughout the installation.
Match the coil-seam perfectly before pinning, as this precise placement creates the foundation for professional results with your zipper foot and sewing machine.
Pinning The Zipper in Place
Pin the invisible zipper carefully to maintain fabric stability and guarantee perfect seam alignment. Start by placing the zipper face down on your fabric’s right side, aligning the coil with your marked seamline.
Follow these essential pin placement steps:
- Secure the top edge – Pin the zipper tape at the neckline or waistband first
- Check seam alignment – Verify the zipper coil follows your marked seamline exactly
- Pin every 2-3 inches – Use enough pins for zipper securing without overcrowding
- Maintain tension control – Keep fabric smooth but not stretched while pinning
- Test zipper function – Gently zip and unzip to verify smooth operation before sewing
These invisible zipper techniques prevent shifting during stitching, making your sewing tutorial results professional-looking.
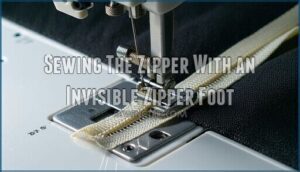
Sewing The Zipper With an Invisible Zipper Foot
Once you’ve pinned your invisible zipper in place, it’s time to sew with the invisible zipper foot.
This specialized foot alignment allows you to stitch extremely close to the zipper teeth without catching them.
Use steady stitching techniques, keeping the needle positioned just beside the coil.
The invisible zipper foot’s groove guides the teeth perfectly, ensuring your perfect invisible zipper installation succeeds every time.
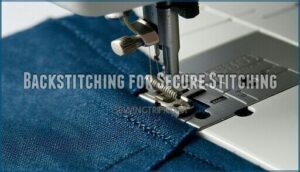
Backstitching for Secure Stitching
Once you’ve positioned your invisible zipper and sewn close to the teeth, secure your work with proper backstitching.
Start each seam with 2-3 reverse stitches to lock the thread securely in place. This prevents unraveling and guarantees seam strength throughout the zipper insertion process.
End with backstitching too, creating thread security that’ll last through countless wears and washes of your finished garment.
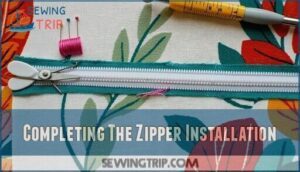
Completing The Zipper Installation
Once you’ve sewn both sides of the invisible zipper, you’ll need to complete the installation by securing the loose ends and closing the remaining seam.
This final step guarantees your zipper functions smoothly and creates a professional-looking finish that will last through regular use.
Hand Stitching The Zipper Tape
After completing the machine sewing, hand stitch the zipper tape to secure loose ends and prevent shifting.
Basting Benefits include stabilizing the invisible zipper during construction. Choose strong Thread Choice like polyester for durability.
Use tiny backstitches along the tape, maintaining consistent Tension Control for smooth results. Focus on Securing Ends at the zipper bottom with extra hand sewing reinforcement.
Keep Stitch Visibility minimal by working close to seam allowances, ensuring your basting stitches remain hidden inside the garment. For nearly invisible stitches, consider using a prick stitch method.
Adding a Fabric Loop or Hook and Eye
Secure your invisible zipper with added closures for professional results.
Position a fabric loop 1 cm below the zipper pull on the left side for Loop Placement.
Choose Hook Options like flat hooks for minimal bulk.
Select Eye Styles that match your garment’s weight.
These closures provide Added Security against zipper separation while enhancing Aesthetic Choices.
Your invisible zipper closure tutorial benefits from these essential zipper sewing tips for lasting durability.
Frequently Asked Questions (FAQs)
Do I need a special foot to sew an invisible zipper?
You’ll need an invisible zipper foot for best results.
This special foot has grooves that guide the needle close to the zipper teeth, creating a truly invisible seam that regular feet can’t achieve.
How to finish the bottom of an invisible zipper?
Hand stitch each zipper tape end to your seam allowance at the bottom, securing them flat against the fabric.
This prevents the tape from flapping around and gives your invisible zipper a professional, clean finish.
How do you choose the right invisible zipper length?
Choose your invisible zipper length by measuring the seam opening and adding one to two inches.
You’ll trim excess length later, but having extra guarantees proper closure and prevents installation headaches.
Can you shorten an invisible zipper if needed?
Yes, you can shorten an invisible zipper by cutting it from the bottom end.
Cut the zipper tape below your desired length, then create a new stopper by hand-stitching across the teeth several times with strong thread.
What fabrics work best with invisible zippers?
Like a chameleon blending into its surroundings, invisible zippers work best with medium-weight fabrics.
You’ll find cotton, linen, wool, and synthetic blends provide the perfect canvas for seamless integration without puckering or distortion.
How do you fix a stuck invisible zipper?
Apply gentle pressure with pliers to grip the zipper pull, then work it back and forth slowly.
Use soap, wax, or graphite from a pencil to lubricate stuck teeth, making the zipper glide smoothly again.
Should you pre-shrink invisible zippers before sewing?
Most zippers shrink up to 3% during washing, potentially warping your garment’s fit.
You don’t need to pre-shrink invisible zippers since they’re made from stable nylon coil materials that resist shrinkage and maintain their shape through regular washing cycles.
Conclusion
Perfect invisible zipper installation transforms your garment like magic, creating a flawless finish that elevates your sewing skills.
You’ve mastered the essential steps for how to sewing invisible zipper successfully.
Remember to press the zipper tape flat, align it precisely with your seam line, and use the invisible zipper foot for professional results.
Take your time with each step, and you’ll achieve that seamless, hidden closure every time.
Your patience and attention to detail will reward you with beautifully finished garments.
- https://blog.mychildhoodtreasures.com/sewing-machine-feet-guide/
- https://rhfzipper.com/a-comprehensive-guide-to-invisible-zippers-everything-you-need-to-know/
- https://hookedonsewing.com/different-types-of-zippers/
- https://www.blog.wawak.com/post/zipper-size-chart
- https://www.moodfabrics.com/notions/zippers/invisible

