This site is supported by our readers. We may earn a commission, at no cost to you, if you purchase through links.
That’s why more people are turning to their sewing machines to create custom underwear that actually works for their bodies. You don’t need industrial equipment or years of experience to make underwear that rivals anything you’d find in stores. With the right fabric, a ballpoint needle, and some stretchy elastic, you can sew underwear that fits better and lasts longer than most commercial options.
The best part? You’ll know exactly what touches your skin, and you can customize every detail from leg openings to waistband width.
Table Of Contents
- Key Takeaways
- Gather Your Materials
- Understanding The Basics of Underwear Construction
- Stitching The Pieces Together
- Sewing Elastic in Underwear
- Tips for Sewing Period Underwear
- Step-by-Step Guide to Sewing Panties
- Ideas for Embellishments and Customizations
- No-Serger Panty Sewing Method
- Free Panties Patterns and Customization Options
- Professional Finish With Singer Brother Janome Sewing Blind Hem Foot
- Frequently Asked Questions (FAQs)
- Conclusion
Key Takeaways
- You don’t need expensive equipment to make comfortable underwear—a basic sewing machine with a ballpoint needle, stretchy fabric like cotton jersey or modal, and the right elastic will produce results that rival store-bought options.
- The fabric you choose directly impacts comfort and durability, so prioritize knits with 5-12% spandex blend for proper stretch and recovery, and always prewash to remove chemicals and control the 3-10% shrinkage that happens with unwashed cotton.
- A narrow zigzag stitch (2mm length, 0.5mm width) is essential for underwear construction because it allows fabric to stretch 30-50% without breaking seams, while straight stitches fail at just 5-10% stretch.
- Tracing your favorite pair of underwear creates a custom-fit pattern that works better than most commercial options, and with elastic cut 5-10% shorter than your measurements, you’ll achieve professional-looking results in under an hour.
Gather Your Materials
Before you start cutting fabric and threading your needle, you’ll want to gather the right materials—they make all the difference between underwear that feels great and underwear that doesn’t.
The good news is you probably don’t need much, and most of it you can find at any fabric store or online.
Let’s go through what you’ll actually need to pull this off.
Recommended Fabrics
Your fabric choice makes or breaks your comfort, so pick knits that stretch without losing their shape. Cotton jersey and modal are ideal—breathable, soft, and naturally moisture-wicking. Cotton jersey offers everyday comfort with solid recovery, while modal absorbs up to 50% more moisture than cotton without feeling damp.
For sustainable options, consider organic cotton (free of harsh chemicals) or bamboo rayon, which requires ten times less water to produce. One thing to keep in mind is that bamboo offers moisture-wicking properties, making it a good choice for comfort.
If you’re tackling period underwear, specialty fabrics like merino wool or PUL provide extra protection. Aim for knits with 5-12% spandex blend to nail that perfect stretch and recovery you need.
Elastic Options
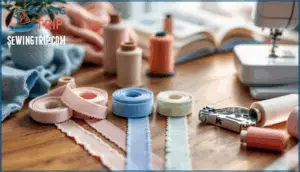
Now that you’ve picked your fabric, let’s talk elastic—it’s the unsung hero keeping everything in place. Your choice here directly impacts comfort, durability, and how long your underwear actually lasts.
Here’s what you need to know about elastic types and widths:
- Waistbands: Use ½" to 1" wide knit elastic (used in over 60% of commercial styles) for soft, multidirectional stretch
- Leg openings: Go with ¼" to ½" picot edge or lace elastic to prevent chafing and add polish
- Foldover elastic (FOE): Delivers up to 170% stretch with a clean finish that won’t irritate skin
- Woven elastic: Retains 92% stretch after 50 wash cycles—serious durability if longevity matters to you
- Silicone-backed elastic: Creates 15% more grip against skin, reducing ride-up in designs without seams
Match your elastic width to your pattern, and you’re golden. Premium elastic also improves the overall wearing experience. Quality elastic transforms your project from homemade to actually wearable.
Sewing Machine and Needle Requirements
Now your machine setup matters just as much as your fabric choice. You’ll need a ballpoint or stretch needle sized 70/10 or 80/12—these slip between knit fibers without snagging, which keeps your stitches clean and your fabric intact. Set your machine to a narrow zigzag stitch (2mm length, 0.5mm width) to allow the fabric to stretch without breaking seams. Keep thread tension between 2-3 for most stretch materials. Always test on fabric scraps first, and swap needles every 6-8 hours of sewing since dull ones cause skipped stitches and snags that’ll ruin your work.
| Needle Type | Best For | Size | Why It Works |
|---|---|---|---|
| Ballpoint | Jersey knit, spandex | 70/10–80/12 | Pushes fibers aside instead of piercing |
| Stretch | High-elasticity fabrics | 70/10–80/12 | Prevents skipped stitches in lycra |
| Microtex | Powernet, tight weaves | 70/10–90/14 | Creates clean punctures, avoids pulls |
| Universal | Mixed construction | 80/12–90/14 | Works on hooks, eyes, channels |
| Fresh needle | All projects | Any size | Maintains stitch precision every 6–8 hours |
Understanding The Basics of Underwear Construction
Before you start stitching, you need to understand how underwear actually comes together—it’s simpler than you might think, but the details matter. The foundation of any pair comes down to three main steps: creating your pattern, preparing your fabric, and laying everything out correctly on the knit.
Getting these basics right sets you up for a finished product that fits well and feels great to wear.
Creating an Underwear Pattern
Want your underwear to actually fit? Start by tracing your favorite pair flat onto pattern paper, then add 1 cm seam allowances around all edges. Here’s what matters most:
- Account for fabric stretch — knit fabrics with 35–40% horizontal stretch need pattern adjustments so your underwear stays put, not saggy.
- Plan your gusset design — a standard 14 cm gusset works for most sizes, adjustable by 1 cm for your comfort preference.
- Test before committing — sew your pattern pieces with scrap fabric first and make tweaks until the fit feels right.
Consider the grainline direction too—horizontal stretch keeps things comfy. Modern pattern drafting software can simulate your exact elastic reduction, but honestly, testing with scraps beats theory every time. You’ll nail this.
Prewashing Fabric
Skipping the prewash step? That’s how your handmade underwear ends up disappointing you after the first wash. Prewashing removes chemical finishes and manufacturing residues that can irritate skin, while controlling shrinkage—cotton usually shrinks 3–10% when unwashed fabric gets wet. Water hardness affects how well detergent removes residues, so use mild detergent and skip fabric softeners to preserve the stretch your underwear needs. Air-dry completely before cutting.
Here’s what makes prewashing non-negotiable:
- Eliminates formaldehyde and starch sizing for safer skin contact
- Prevents uneven shrinkage along warp and weft directions that distorts fit
- Cotton shrinks up to 10% in the first wash if you skip this step
- Softens fibers, improving drape and comfort in close-fitting garments
- Reduces pesticide residues by up to 35.8% compared to unwashed fabric
Laying Out The Pattern on Knit Fabric
With knit fabric, your grainline is everything. Look for vertical ribs running parallel to the selvage—that’s your grain direction. Lay pattern pieces straight along these ribs to let the fabric stretch horizontally around your body.
Use pattern weights instead of pins to avoid distorting the stretch. Let fabric rest 24 hours after washing before cutting, which stabilizes tension and prevents misalignment.
This setup helps your underwear keep its shape through wear and washing.
Stitching The Pieces Together
Now comes the moment where your pieces come together—literally. You’ve cut your fabric carefully and prepped everything, so it’s time to start stitching.
The order matters here, and getting it right means the difference between underwear that fits great and underwear that doesn’t. Let’s walk through how to join each piece so your seams stay strong and your fabric stays stretchy.
Assembling The Back Piece and Crotch Pieces
Think of the crotch sandwich as your underwear’s foundation—get this step right and everything else follows smoothly. Layer your back piece between two crotch pieces, right sides together, creating that important enclosed seam structure.
Here’s what makes this assembly work:
- Layer orientation matters: Position lining (right side up), back piece (right side up), and main crotch (right side down) before stitching
- Pin strategically: Secure all edges to prevent fabric shifting during stitching
- Use proper stitching methods: Set your machine to a narrow zigzag (2.5mm width, 1.5–2mm length) for stretch seams
- Maintain seam reinforcement: Keep stitch density at 10–12 stitches per inch for maximum durability through 50+ wash cycles
- Trim excess fabric: Cut corners within 3mm of seams to prevent puckering and bulk
Stitch along the short edge connecting crotch to back—this keeps internal seams enclosed for hygiene and longevity. Work slowly; rushing skipped stitches aren’t worth fixing later.
Attaching The Front Piece
Your front piece is where the gusset integration truly matters—align it carefully to create seams that will stay strong through dozens of washes. Pin the front to your assembled back and crotch pieces with right sides together, matching all notches and center points perfectly.
This seam construction demands precision:
- Match notches between front and adjoining pieces to maintain consistency and prevent fabric twisting
- Position the front with right side facing up, making sure accurate alignment with crotch and side seams
- Use a narrow zigzag stitch (2.5–3.0 mm width and length) for stitching techniques that preserve fabric stretch
- Keep seam allowances between 6–10 mm, the industry standard for knitwear assembly
Press seams flat as you work. Taking time here prevents headaches later.
Finishing Raw Fabric Edges
Raw edges are where your underwear either holds up or falls apart. After attaching your front piece, you’ll finish those seams to prevent fraying and extend the life of your work. A serged edge is the best approach—it trims and encases edges in one pass, reducing fraying by 95% compared to unfinished seams.
Don’t have a serger? A narrow zigzag stitch (2.5–4mm width) works beautifully on most home machines and maintains elasticity through repeated stretching. For delicate fabrics, try a French seam or bias binding. Pinking shears offer a budget-friendly option for tightly woven cottons.
The right finish transforms your handmade panties from homemade to professional.
Sewing Elastic in Underwear
Now comes the part that holds everything together—literally. Getting your elastic right makes the difference between underwear that feels great and underwear you’ll never wear again.
The good news is that you have options, and each one creates a different look and feel. Let’s walk through the main ways to apply elastic so you can pick what works best for your project.
Measuring and Cutting Elastic
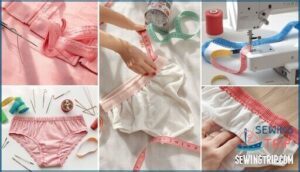
Getting your elastic measurements right is where most DIY underwear projects either shine or stumble. Here’s how to nail it:
- Measure your waist or leg opening, then subtract 1–2 inches for comfortable tension without squeezing
- Cut elastic with sharp scissors to prevent fraying and guarantee even edges that maintain their integrity
- Add a 1-inch overlap allowance plus 0.5–1 inch per side for sewing seams
- Mark quarter points with pins to distribute stretch evenly across fabric panels
- Pre-stretch elastic slightly before sewing to prevent post-construction shrinkage
Matching elastic width to your fabric matters too—thin knits need ¼–⅜ inch elastic, while heavier jerseys work better with ½–¾ inch widths. This balance keeps your finished underwear comfortable without distorting edges.
Sewing Elastic for Different Styles (Picot Edge, Foldover, Regular Elastic)
Now that you’ve cut your elastic pieces, it’s time to pick the style that fits your vision—and your comfort level. Each elastic type brings something different to the table, so choose based on durability, aesthetics, and how you want your finished underwear to feel against your skin.
- Picot edge elastic features a plush-backed design that softens skin contact; cut it about 10% shorter than your fabric edge for a snug fit, then sew with two passes using a zigzag stitch
- Foldover elastic creates a clean, invisible finish without visible stitching; apply it with no seam allowance, marking quarters for even distribution, then cut 5–10% shorter to prevent gaping
- Regular knit elastic excels in stability and longevity, maintaining elasticity for over 150 wash cycles; use a 85–90% stretch ratio and three-step zigzag stitching for best grip
- Tension control matters—improper tension can stretch openings out after less than 20 wears, so match stitch width to half your elastic’s finished width
- Fabric pairing affects performance: thin knits need ¼–⅜ inch elastic widths, while heavier jerseys work better with ½–¾ inch for balanced, comfortable wear
Tips for Sewing Period Underwear
Period underwear is a breakthrough for comfort and sustainability, but sewing them requires a few thoughtful adjustments to your regular approach. You’ll need to think differently about your fabric choices, how you care for finished pieces, and ways to customize them for your unique needs.
Let’s walk through what makes period underwear special and how to make yours work perfectly for you.
Choosing Specialty Fabrics
The fabric you choose makes all the difference in period underwear that actually works. Zorb fabric is your secret weapon—it absorbs ten times its weight in seconds, creating a leak-proof gusset layer you can trust.
Pair it with moisture-wicking options like bamboo or modal to keep you dry and comfortable all day. For eco-friendly choices, look for organic cotton or recycled nylon. If you run hot, merino wool regulates temperature beautifully. High-performance athletic blends work great if you’re active.
Don’t overlook antibacterial properties either—they naturally reduce odor and keep things fresh.
Care Instructions for Period Underwear
Your specialty fabrics need a maintenance routine that keeps them performing. After each use, rinse immediately in cool water—this prevents blood from setting and stops bacteria from establishing. Pre-soak for 30 minutes in cold water to loosen particles before washing.
When it’s time to wash:
- Use cold water below 80°F with gentle, enzyme-based detergent
- Avoid bleach and fabric softeners that wreck absorbency
- Skip the dryer entirely; hang or lay flat to air dry
This care routine extends your underwear’s lifespan considerably while maintaining that leak-proof protection you’ve worked to create.
Personalizing Your Period Underwear
Your period underwear can reflect your personality while staying functional. Over 65% of people choose custom sizing and coverage that fits their body perfectly—try adjusting gusset lengths or waistband heights for comfort.
Mix fabric choices like bamboo blends with bold prints or contrasting trim colors. Add aesthetic features such as picot edge elastic or small embellishments.
Inclusive designs with easy-on modifications work for different needs, and this market trends toward personalization for good reason.
Step-by-Step Guide to Sewing Panties
Now that you’ve got the right materials and know your way around underwear construction, it’s time to put it all together.
This step-by-step guide walks you through cutting your fabric, assembling the pieces, and applying elastic to create a comfortable, well-fitting pair of panties.
Let’s get started with the details that’ll take you from pattern to finished underwear.
Cutting The Fabric
Think of this step as laying the foundation for a house – precision here prevents problems later.
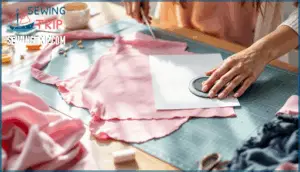
Start with fabric preparation: prewash your knit fabric to eliminate up to 10% shrinkage and prevent warping down the road. Lay it flat and identify the grainline orientation, which runs parallel to the selvage edge. Pin your pattern pieces carefully along this grain for stability, then cut with sharp scissors, respecting seam allowances.
Mark notches clearly – they’re your roadmap during assembly. An efficient layout means less waste, so nest pieces strategically. Before cutting, test elastic compatibility with a scrap to avoid stretching mishaps.
Sewing The Panties
With your fabric pieces freshly cut and prepped, you’re ready to bring your panties construction to life. Begin gusset construction by layering the back piece between two crotch linings—this sandwich technique conceals raw edges beautifully. Pin carefully, then stitch with a stretch stitch or zigzag (2mm long, 0.5mm wide) to maintain elasticity.
Next, attach the front piece, aligning notches for pattern accuracy. Test seam finishes on scrap fabric first—this elasticity testing guarantees puckering and makes your sewing underwear stays comfortable through every stretch.
Sewing Different Elastic Styles
With so many elastic styles available, matching the right application process to each type transforms your handmade panties from homemade to store-quality.
Braided elastic works best in casings for leg openings—cut it 8–10% shorter than your seam line and stretch only the elastic while zigzag stitching.
Knitted elastic maintains its width when stretched, making it perfect for direct fabric application using a three-step zigzag stitch.
For picot edge elastic, position the decorative scallop on the right side and topstitch close to the edge.
Fold-over elastic simplifies finishing—just fold it over raw edges and secure with a multi-stitch zigzag for durability considerations that last through dozens of washes.
Ideas for Embellishments and Customizations
Once you’ve mastered the basics of sewing underwear, it’s time to make your creations truly your own. Adding personal touches transforms plain panties into something special that reflects your style.
Here are three easy ways to customize your handmade underwear with creative embellishments.
Adding Bows, Crystals, and Buttons
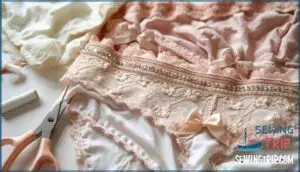
You’re about to turn plain panties into something special—let’s talk embellishments and customizations! Bow placement at the center front waistband adds instant charm, and surveys show 68% of people find this detail adorable.
Here’s your quick guide to personalizing period underwear and everyday styles:
- Attach tiny bows using ribbon or lace for classic femininity
- Apply flat-back crystals with fabric glue—crystal adhesion works best on smooth fabrics, and these embellishments command 18% higher prices
- Sew decorative buttons with 4-hole styles and strong thread for button durability
Remember care considerations: hand wash embellished pieces to extend their life by 45%, since machine washing risks detachment and snagging.
Mixing Fabric Colors or Patterns
Color blocking in underwear opens up a world of creative possibilities. For Spring/Summer 2024, pastels like lavender and pistachio saw a 37% surge in popularity, while bold combinations of canary yellow and navy appeared in over half of new lingerie lines.
When mixing fabric colors and patterns, it’s crucial to match fabric weights and stretch ratios carefully. Pair fabrics with stretch differences within 25% of each other to maintain a consistent fit and prevent awkward bunching. Lightweight mesh and lace pair beautifully with cotton or silk blends, comprising 60% of mixed-material designs.
Here’s your quick reference for successful fabric selection:
| Fabric Type | Best Paired With | Stretch Compatibility |
|---|---|---|
| Cotton jersey | Bamboo, modal | High (similar ratios) |
| Mesh/lace | Silk blends, lightweight cotton | Low-stretch panels only |
| Tulle | Organic bamboo, recycled knits | Side/hip placement |
| Sport knits | Jersey, microfiber | Match weights closely |
Place low-stretch fabrics like mesh over hip or side panels—a trick used in 85% of colorblock designs to minimize fit distortion. Print mixing also works wonders: geometric patterns paired with solids boosted favorability ratings by 20-37% in sewing surveys.
For color fastness, use citric acid and high-temperature water when dyeing fabric scraps—this reduces post-wash fading by 28%. Layer transparent dyes fully dried between coats for sharper, more vibrant results.
Sustainable materials are gaining traction, with organic bamboo and recycled tulle appearing in 56% of eco-focused collections. Notably, 58% of sewers now prefer certified organic fibers for their customization options. Brands incorporating these sustainable materials into color-blocked designs saw repeat purchases increase by 19% year-over-year.
Using Picot Edge Elastic on Nighties and Camisoles
Picot edge elastic is like jewelry for your nighties and camisoles—that delicate scalloped trim instantly upgrades homemade sleepwear into boutique-worthy pieces. Choose elastic widths between 3/8 and 5/8 inch with plush backing for superior comfort against your skin.
When attaching elastic to necklines and armholes, cut it 10% shorter than the edge, then secure with a zigzag stitch about 1/8 inch from the picot edge. For stitch durability, fold the elastic inward and topstitch with a three-step zigzag.
Smart fabric pairing matters—lightweight stretch fabrics work best with this elastic trim. Use overlap reinforcement at strap junctions for professional results when sewing lingerie.
No-Serger Panty Sewing Method
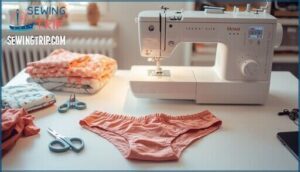
You don’t need a serger to make comfortable, quality underwear at home. A regular sewing machine with the right stitch can do the job beautifully.
Here’s how to work with minimal fabric, keep your seams stretchy, and create panties that feel just as good as store-bought.
Using Minimal Fabric (e.g., Old T-shirts)
When you’re ready to embrace T-shirt Upcycling, you’re choosing Sustainable Underwear that’s both kind to your wallet and the planet. One adult t-shirt can yield fabric for up to three pairs, cutting costs by roughly 92% compared to store-bought options. This Cost-Effective Sewing approach transforms fabric scraps into fresh DIY underwear while supporting Fabric Waste Reduction—every shirt you repurpose diverts about a quarter kilogram from landfills and saves thousands of liters of water.
Here’s what makes this ecofriendly approach work:
- Soft cotton t-shirts offer excellent Material Performance with natural breathability and moisture absorption
- Minimal fabric requirements mean you’re using just 0.15–0.20 square meters per pair
- Tracing existing panties creates a custom pattern that guarantees comfort and fit
- High utilization rates reduce textile waste by up to 70% compared to traditional sewing methods
Sewing Process Using a Regular Sewing Machine
Your regular sewing machine can manage this job beautifully with the right setup. Start by threading a ballpoint needle (size 70/10 or 80/12) to prevent snags in stretch fabrics. Lower your thread tension by one or two notches—this prevents puckering and thread breakage. Set your machine to a zigzag stitch with 2.5mm width and 2.3mm length for elasticity.
| Step | Machine Setting | Purpose |
|---|---|---|
| Pin pieces | Standard presser foot | Keeps fabric stable |
| Stitch seams | Zigzag (2.5W x 2.3L) | Allows stretch without breaking |
| Finish edges | Zigzag or overlock | Prevents fraying |
| Attach elastic | Zigzag while stretching | Secures waistband smoothly |
Sew slowly around curves, gently stretching the fabric as you go. These stitch settings and tension adjustments create professional seam finishes without a serger.
Maintaining Fabric Stretchiness With a Zigzag Stitch
Your zigzag stitch does more than connect fabric pieces—it works like built-in stretch insurance. A zigzag stitch lets fabric expand up to 30–50% beyond its original width without snapping threads, while straight stitches fail at just 5–10%. That’s why your underwear moves comfortably with you instead of splitting at the seams.
Fine-tuning your stitch settings makes all the difference:
- Stitch width of 2.0–3.0mm maintains ideal elasticity without restricting movement
- Stitch length between 1.5–2.0mm balances security and flexibility perfectly
- Lower thread tension by 0.5–1.0 units prevents tight, brittle seams that pop
- Use ballpoint or stretch needles to reduce skipped stitches by 80%
- Choose polyester thread quality for seams that maintain stretch integrity through 30+ washes
Test your tension settings on fabric scraps first—you’ll avoid that frustrating pucker and keep your handmade underwear feeling store-bought soft.
Free Panties Patterns and Customization Options
You don’t need to buy expensive patterns to start sewing your own underwear. Making a custom pattern is as simple as tracing a pair you already love, and once you know where to place your elastic, you’re good to go.
Let’s look at how you can create patterns from scratch and find free options that fit your style.
Tracing Existing Panties for a Custom Pattern
Think of tracing your favorite panties as creating a custom blueprint for a perfect fit. Iron the garment first to prevent fabric distortion, then fold it in half to maintain symmetry and pin it along the grainline alignment. Use tracing paper and a pencil to mark the outline, capturing every curve.
Add a seam allowance of ¼ to ⅜ inch around all edges—this prevents sizing errors and makes your DIY panty patterns sew together smoothly. Label each pattern piece with garment type and stretch direction for error prevention during future underwear pattern-making projects.
Elastic Placement Tips
For a secure, comfortable fit, mark four quarter points on both your elastic and fabric openings—this tension consistency prevents uneven gather and twisted waistbands.
Cut your elastic 5-7% shorter than the garment’s waist measurement, then stretch it gently while sewing with a zigzag stitch to avoid puckering.
This elastic placement tip works for all elastic styles and guarantees your attaching elastic underwear stays smooth through every wash.
Exploring Various Free Panties Patterns Online
Where do you find the best free panties patterns online? Over 15 distinct underwear patterns are available across major sewing platforms, covering thongs, bikinis, briefs, hipsters, and boyshorts. Look for Size Inclusivity—some patterns offer XXS–3X with hip measurements up to 50".
Pattern Accessibility is excellent, with 90% providing instant PDF downloads and step-by-step instructions. Check User Feedback and ratings (usually 4.6–4.8 out of 5) to find beginner-friendly options.
Style Diversity and Design Customization let you mix waistbands, add lace, or create gender-neutral designs that fit your body perfectly.
Professional Finish With Singer Brother Janome Sewing Blind Hem Foot
With a blind hem foot, you can transform your DIY underwear from "I tried" to "where did you buy these?" Compatible with Singer, Brother, and Janome sewing machines, this attachment creates invisible stitching that elevates your homemade pieces to professional quality.
The foot includes a metal guide that keeps your fabric perfectly aligned, while three grooves on the underside prevent slippage—essential when hemming knits. When the needle swings over the guide, it catches just one or two threads, making the stitch nearly disappear on the right side.
Here’s your game plan for success:
- Press your hem before sewing so the fabric stays put and the stitch stays even
- Adjust your stitch width and needle position to customize the "bite" for different elastic thicknesses
- Practice on scrap fabric first—blind hemming takes a few tries to nail
Match your thread color to your fabric, or try monofilament thread for maximum invisibility. With stitch adjustment and proper elastic application, your sewing techniques will deliver that boutique finish every time.
Frequently Asked Questions (FAQs)
Should you sew your own underwear?
Sewing your own underwear offers cost savings, customization freedom, and sustainable sewing benefits.
You’ll get a perfect fit, embrace ethical fashion, and enjoy creating comfortable underwear that matches your style.
DIY underwear projects let you control every detail.
How do you sew underwear with a sewing machine?
With your sewing machine set to a zigzag stitch, you’ll join fabric panels using the right needle selection and tension settings for stretch.
Proper elastic application and seam finishing help your handmade underwear stay comfortable and durable.
How do you make a pattern for underwear?
You can trace your favorite underwear directly onto paper, adding a 1cm seam allowance around all edges. Before cutting fabric, test your pattern pieces using scrap fabric to check fit and adjust grainline placement.
Pattern alterations and 3D drafting tools help improve underwear pattern making.
Should you use a sewing machine to sew underwear?
Yes, you should use a sewing machine for underwear. Machine Stitch Options like zigzag work perfectly with stretch fabric control. Needle Type Matters—ballpoint needles prevent snags.
Seam Durability Concerns disappear with proper stitch selection, making home sewing just as reliable.
How do I choose the best fabric for sewing underwear?
Pick cotton jersey or bamboo rayon for fabric breathability and moisture wicking. Knit stretch fabric guarantees comfort and movement.
Best fabric types for underwear balance fabric durability with cost effectiveness—making smart fabric choices matter for your finished piece.
What should I look for when sewing underwear?
When sewing underwear, focus on fabric choice, elastic type for waistband and leg openings, stitch selection that allows stretch, pattern fit based on your measurements, and overall comfort level.
These elements work together to create underwear that moves with you.
How hard is it to sew your own underwear?
It’s easier than you’d think. With beginner sewist-friendly patterns and basic sewing skills, DIY underwear becomes a quick win.
Most underwear sewing patterns take under an hour, offering serious cost savings while you master a practical, confidence-building beginner project.
Is it worth it to make your own underwear?
Making your own underwear is absolutely worth it. You’ll slash costs on underwear patterns, achieve custom comfort through precise fabric selection, and turn DIY underwear into a creative outlet.
You’ll develop sewing skills while addressing ethical concerns about mass production.
What stitch is used for underwear?
A narrow zigzag stitch works perfectly for sewing underwear stitches and seams—set yours to 2mm long and 5mm wide. This stitch setting lets your fabric stretch without snapping threads.
For finishing raw edges, switch to an overlock seam or continue with zigzag if you’re working without a serger.
Do you need a serger to sew underwear?
You don’t need a serger to sew underwear—your regular sewing machine works perfectly. Use a zigzag stitch to manage knit fabric stretch and prevent fraying.
A ballpoint needle helps too, giving seam durability and a professional finish when attaching elastic.
Conclusion
Once you’ve sewn your first pair, you’ll wonder why you waited so long to try sewing underwear. The freedom to choose every detail—from fabric weight to elastic width—transforms a basic necessity into something genuinely comfortable.
Your body deserves underwear that works with it, not against it. Now you’ve got the skills to create exactly that, one pair at a time. Keep experimenting with different fabrics and patterns until you find your perfect combination.
- https://dataintelo.com/report/lingerie-fabrics-market
- https://www.businessresearchinsights.com/market-reports/lingerie-fabrics-market-101600
- https://comeandseetheseitz.wordpress.com/2010/03/09/panty-tutorial-how-to-sew-underwear/
- https://www.youtube.com/watch?v=KeX2gCKwgsA
- https://www.grandviewresearch.com/industry-analysis/sewing-machine-market-report

