This site is supported by our readers. We may earn a commission, at no cost to you, if you purchase through links.
Ditch those bulky knots for a cleaner, more professional finish.
Try the Loop Method: double your floss, thread both ends, poke through your fabric, and anchor with a loop.
Less bulk means smoother stitches and an impressive back – your cross-stitch’s secret superpower!
Use quality floss, match your needle to fabric, and watch tension like a hawk.
Keep stitching like a pro and your project will be taut as a drum.
Stay tuned for more stitch-perfect tips!
Table Of Contents
Key Takeaways
- Ditch the knots while cross-stitching, and embrace the loop method for a neat, professional finish. It’s like giving your fabric a warm hug instead of burdening it with bulky bumps.
- Choose quality embroidery floss and match your needle to the fabric. It’s like pairing the perfect dance partners to ensure your stitches glide smoothly.
- Use a needle and fabric that suit your project. Aida cloth is great for beginners, while linen offers a challenge. Remember, your fabric is as important as your thread in this stitchy symphony!
- Keep your floss organized to avoid knotty nightmares. Floss bobbins are your best friends and will keep your threads as tangle-free as a well-brushed hairdo.
Starting Cross Stitch Without Knots
Starting your cross stitch without knots can feel like magic, transforming the back of your work into a tidy masterpiece. You won’t have to worry about pesky bumps or tangles, just a neat and seamless finish that even your grandma would envy!
Benefits of Knotless Starting Methods
Ditching knots in cross stitch might just be your golden ticket to a cleaner back and a more professional look. Who needs extra bulk anyway? With knotless starting methods, you’ll enjoy less frustration and easier finishing. Here’s why they’re amazing:
- Cleaner Back: No messy tangles behind.
- Reduced Bulk: Your work lies flat.
- Professional Look: Impress anyone with your craftsmanship!
Choosing the Right Thread and Needle
Why ponder which thread or needle to use? Simply pick high-quality, vibrant embroidery floss for your project, matching the fabric count with the right floss weight understanding fabric count. Choose needle sizes that glide through effortlessly—round-end tapestry needles work wonders!
- Starting your cross stitch project without a knot is an important part of your overall embroidery techniques (different embroidery techniques).
- Many stitchers struggle to find a way to begin their needlepoint journey (needlepoint vs cross stitch).
- Hand-driven art, including cross stitch and embroidery, offers many different options to personalize and create a truly unique embroidery art (understanding embroidery techniques).
- Exploring different stitches, materials, and threads will help you master various stitch techniques (cross stitch options).
- Starting with cross-stitch is often the easiest way to introduce yourself to various hand stitching techniques (beginner friendly stitching).
. Enjoy!
Understanding Fabric Types and Counts
The fabric you choose for your cross stitch project can make a big difference in how you start your stitches embroidery types.
Aida cloth is a popular even-weave fabric that’s perfect for beginners, with its clearly defined holes for easy counting.
Linen, on the other hand, has a more intricate weave that may require different starting techniques.
Pay attention to the thread count and weave of your fabric to determine the best knotless starting method.
Tips for Smooth, Tangle-Free Stitching
Once you’ve chosen your fabric wisely, let’s tackle thread tangles. Keep it loose but not willy-nilly. Use short floss lengths for ease and to prevent snarls. Enjoy the symphony of needle and fabric by practicing smooth, even stitches. Think of floss management as taming wild spaghetti—yes, even for French knots or waste knots! Happy untangling!
Mastering the Loop Method
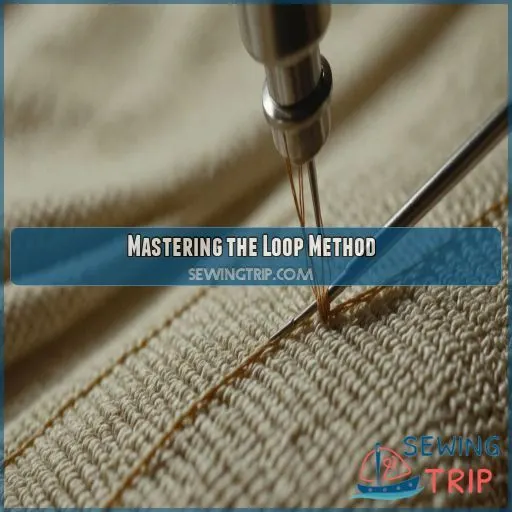
Mastering the Loop Method is like finding the secret shortcut in a video game; it’s incredibly satisfying and keeps your work neat. You’ll be stitching with glee as you learn to leave knots behind and achieve a clean, professional finish on your cross stitch projects.
Step-by-Step Guide to the Loop Method
Ready to tackle the Loop Method for beginners? Start with these easy steps that even your cat might find intriguing:
- Cut your floss twice the usual length; it’s like upgrading to a limo instead of a cab.
- Fold and thread both ends.
- Stitch through the loop; think of it as giving your fabric a warm hug.
- Avoid Loop Method mistakes for a cleaner finish.
Adapting the Loop Method for Multiple Strands
| Strands | Fold Strands |
|---|---|
| 2 | 1 in half |
| 4 | 2 in half |
| 6 | 3 in half |
| Floss Length | Double |
| Security | Tight and Flat |
Adjust the floss length for more strands, ensuring loop security while practicing these variations.
Troubleshooting Common Loop Method Issues
Now you’ve got the loop method under your belt, it’s time to squash those pesky problems. If your loop’s slipping, check your thread tension like Goldilocks, not too tight, not too loose. Needle size and fabric type can also play tricks understanding large needle sizes on your cross stitch. Make sure your floss length isn’t excessive. Adjust these elements, and you’ll stitch like a pro. Happy crafting!
Practice Exercises for Mastering the Loop Method
- Thread Treasure Hunt: Experiment with different thread lengths to find the best tension.
- Fabric Detective: Try on different fabric types to see what works.
- Stitch Repetition: Practice for consistency, aim for even Xs.
- Needle Quest: Test various needle sizes for smoother stitching.
Happy stitching, maestro!
Alternative Knotless Starting Methods
Let’s face it, nobody wants a lumpy mess on the back of their beautiful cross stitch project tidying up the back. You’ve got options that keep things knot-free and smooth, guaranteeing a neater finish every time!
The Two-Strand Method for Quick Starts
Check out the two-strand method, perfect for beginners seeking simplicity! Although limiting compared to the versatile loop method, its a cinch for quick starts when using two strands. Grab one long strand, fold it, and thread the looped end. Its as easy as falling off a log, but remember, thread choice is key for seamless stitches.
The Waste Knot Method for Secure Starts
Get to know the Waste Knot Method!
First, place your waste knot, a handy little backup knot, on top of the fabric.
Control your thread tension while backstitching to neatness nirvana, regardless of your chosen fabric type.
Keep knot size modest, ensuring stitches stay secure without fuss.
This technique masterfully avoids unwanted bumps, making your cross-stitch journey as smooth as a well-oiled machine.
Isolated Stitches and French Knots Without Knots
Continuing from the waste knot method, mastery awaits with isolated stitches. Picture French knot variations that dance on your fabric like stars, secured without knots. Use tiny stab stitches for secure stitch placement and thread tension control. Think of needle size impact as drivers behind your embroidery prowess. These backstitch techniques make sure nothing slips away, keeping your work impeccable.
Bury Method for Finishing Without Knots
Once you’ve mastered isolated stitches, let’s talk about the bury method. It’s like hiding treasure! Instead of knots, weave your thread tails between stitches on the back. It’s a nifty way to keep your back as tidy as your front. Use different embroidery thread types and consider your fabric to maintain that clean, professional look.
Essential Tools and Materials for Knotless Starts
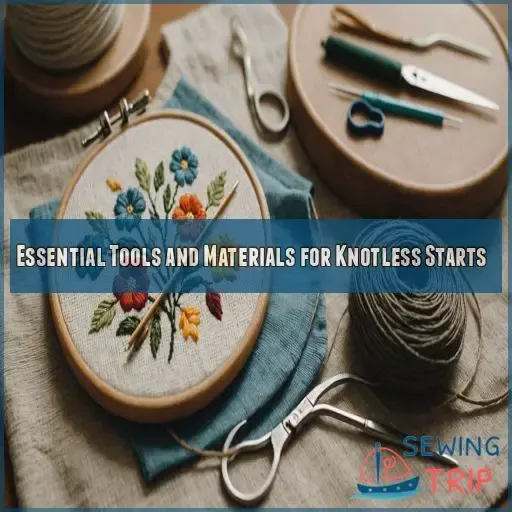
When you’re starting cross stitch without knots, having the right tools makes it a whole lot easier—and maybe even fun! Hoops keep your fabric tight, the right needle helps you glide through, and organizing your threads saves time (and sanity).
Embroidery Hoops and Frames for Tension Control
Choose a hoop size that snugly fits your fabric, ensuring even tension for neat stitches. Tension adjustment is really important — too tight, and it’ll warp; too loose, and your design’s as floppy as a soggy noodle! Explore hoop types and frames, as they promise stability and control. Enjoy mastering tension with this essential embroidery tool.
Needle Types and Sizes for Smooth Stitching
When stitching, choosing the right needle size is really important. For even-weave fabrics, opt for a blunt-tipped needle; its rounded point won’t poke unwanted holes. Match needle size to thread weight for smooth sailingthink of it like pairing the perfect dance partners! Metal needles are durable, but flexible bamboo offers a soft touch. Find your needle, rule your craft!
Thread Organization and Management
How’s your thread storage situation? Getting organized helps make your stitching journey smoother. Use these tips:
- Floss bobbins keep your threads neat, reducing tangles.
- Color organization lets you find that elusive shade in a jiffy.
- Consistent thread tension makes your work impressive and uniform.
Mastering these tricks keeps your needle selection easy-peasy and projects flowing freely!
Scissors and Other Essential Tools
Snip away with a sharp pair of embroidery scissors – they’ll make clean, precise cuts to keep your threads tidy. Don’t forget a needle threader to easily feed those finicky floss strands through the eye. And an embroidery hoop or frame is a must for maintaining even tension across your fabric. With the right tools, knotless stitching is a breeze!
Common Challenges and Solutions for Knotless Starts
Starting your cross stitch without knots can be like trying to keep a cat off the kitchen counter challenging, but not impossible. With a few tricks up your sleeve, you’ll manage thread tangles, maintain neat tension, and make sure your work has a tidy backside, turning chaos into embroidery art.
Preventing Thread Tangles and Knots
After getting your tools in order, it’s time to tackle those pesky thread tangles. Here are some nifty tricks to keep your floss from misbehaving:
- Thread Storage: Use bobbins or cards for tidy floss organization.
- Needle Size: Match needle size to fabric count.
- Tension Control: Keep it balanced, like topping a pizza.
- Thread Quality: Use quality floss for smoother stitching.
Managing Thread Tension for Even Stitches
Feeling a bit tangled up with tension control in your cross stitch? Whether you’re battling fabric stretch or playing Goldilocks with needle size, finding the right balance is key. Remember, hand position impacts stitch length. Here’s a quick table to clarify:
| Issue | Solution |
|---|---|
| Fabric stretch | Use a hoop |
| Needle size | Try smaller |
| Stitch length | Keep consistent |
| Hand position | Relax your grip |
Aim for controlled freedom in your craft, and watch your stitching become smooth as butter!
Troubleshooting Common Issues With Knotless Starts
- Adjust thread tension – too tight can cause puckering, too loose leads to loose stitches.
- Prevent tangles by keeping thread organized and untwisting regularly.
- Choose the right fabric type – some are better suited for knotless starts than others.
- Practice makes perfect! Experiment on scrap fabric to master the techniques.
Tips for Maintaining a Neat and Tidy Backstitch
You’re doing a fab job avoiding tangles. Now, let’s talk neat backstitching. Keep your thread tension just right—think Goldilocks, not too tight, not too loose. Choose your needle size based on fabric choice for stitch consistency. Remember, back stitch length should be even. Here’s a handy table for quick reference:
| Aspect | Tip |
|---|---|
| Thread Tension | Balanced is key |
| Needle Size | Match to fabric |
| Stitch Consistency | Even pressure |
| Back Stitch Length | Uniform stitches |
Frequently Asked Questions (FAQs)
How to start a stitch without a knot?
Starting a stitch without a knot is like making a bed without wrinkles—smooth and seamless. Try the loop method. Fold the floss, thread it, and start stitching. Secure your work without leaving mountains behind.
How do you prevent knots when cross stitching?
Prevent knots in cross stitching by using the loop method or the waste knot technique. The loop method is for even strands, while the waste knot works with any thread. Both methods keep the back tidy and professional.
How to start the first stitch in cross stitch?
Imagine this: you’re ready to stitch, needle in hand. Try the loop method for a knotless startfold your floss in half, thread the ends, and make your first stitch through the loop. Its smooth sailing!
How to finish a cross stitch without a knot?
To finish a cross stitch without a knot, simply weave your needle under a few nearby stitches on the back, then snip the excess thread. This creates a clean, professional finish that keeps your work tidy and knot-free.
Can the loop method be used with metallic threads?
Unfortunately, the loop method isn’t ideal for metallic threads because they fray easily and aren’t flexible. Instead, try knotting the ends for security. Think of metallic threads as the divas of cross stitch—a bit high-maintenance! (Source).
How does loop method affect tension in intricate patterns?
Using the loop method keeps your fabric’s tension tight as a drum even in complex patterns. It’s like having a sewing assistant that magically tidies up the back of your work—no bulky knots messing around!
Is the loop method suitable for hardanger embroidery?
The loop method isn’t ideal for hardanger embroidery due to its reliance on even numbers of strands, which may not suit hardanger’s typical thread counts. It’s best to stick to methods ensuring neat, precise finishes.
Can you use the loop method on plastic canvas?
How to adapt the loop method for left-handed stitchers?
Ever feel like a left-handed stitcher living in a right-handed world? No worries—just flip the script! Rotate your work 180 degrees and use the loop method as usual. It’s like dancing to your own rhythm.
Conclusion
Savvy stitchers, skip those snarly knots for smooth starts instead!
You’ve learned how to start a cross stitch without a knot using tried-and-true techniques like the loop method.
Enjoy the benefits of crisp, clean creations with a little practice and patience.
Whether you’re mastering loops or exploring alternative methods, each stitch strengthens your skill set.

