This site is supported by our readers. We may earn a commission, at no cost to you, if you purchase through links.
This step-by-step tutorial is crafted to empower you with the knowledge and confidence to thread your machine effortlessly.
Understanding how to properly thread your device is crucial for achieving perfect stitches and ensuring your sewing projects look professional.
Let’s dive into the process of how to thread a handheld sewing machine, ensuring you’re equipped to tackle any sewing challenge that comes your way.
Table Of Contents
Key Takeaways
- Insert 4 AA batteries.
- Secure thread on spool pin.
- Pass thread through first thread guide.
- Run thread through tension disks.
5 Best Handheld Sewing Machines
Exploring the best handheld sewing machines, you’ll find options that cater to various sewing needs and skill levels.
The Mini Electric Handheld Sewing Machine is a compact and portable option, perfect for quick repairs or small projects.
The Round Wood Quilt Hoop Edmunds is a versatile tool for quilters, providing a sturdy and adjustable surface for working on quilts of all sizes.
Each product offers unique features to enhance your sewing projects, making them valuable additions to any sewing enthusiast’s toolkit.
1. Mini Electric Handheld Sewing Machine
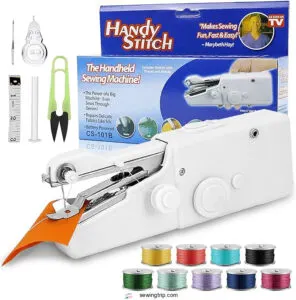
The CENGOY Mini Electric Handheld Sewing Machine is a portable and convenient option for quick repairs or on-the-go sewing projects. Its compact size makes it easy to store and carry, and it’s lightweight enough to use for extended periods without fatigue.
The machine is powered by 4 AA batteries, so you don’t have to worry about finding an outlet or dealing with cords. It features a simple threading system and comes with clear instructions, making it easy to get started even for beginners.
- Compact and portable
- Lightweight and easy to use
- Battery-powered for convenience
- Simple threading system
- Suitable for quick repairs and small projects
- Limited power compared to larger machines
- May not be suitable for heavy fabrics or large projects
- Requires batteries, which can add to the cost
2. Handheld Mini Sewing Machine Power Supply
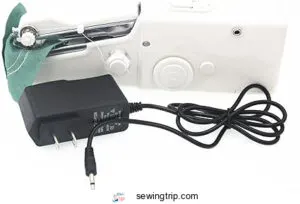
Switching to a Handheld Mini Sewing Machine Power Supply is like finding a cheat code for your sewing gadget. No more frantic searches for batteries at the bottom of your drawer or the dreaded mid-project power fade.
This nifty adapter plugs right into the wall, ensuring your mini sewing machine is always ready for action. It’s a game-changer, offering a seamless transition from battery to plug-in power, making your sewing experience smoother than a freshly ironed shirt.
- Say goodbye to constant battery purchases and hello to savings.
- Enjoy uninterrupted sewing without the worry of losing power.
- Universal voltage compatibility means you can sew from anywhere in the world.
- Your sewing machine becomes tethered to an outlet, limiting mobility.
- The initial cost of the adapter (but think of the long-term savings!).
- Not all sewing machines are compatible, so check before you buy.
3. Bohin Crewel Embroidery Needles Size
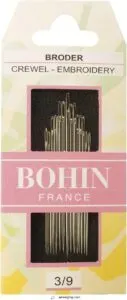
When diving into the world of handheld sewing machines, don’t overlook the importance of choosing the right needles. The Bohin Crewel Embroidery Needles, size 3/9, are your secret weapon. Crafted in France, these metal marvels aren’t just any needles.
They’re like the Swiss Army knife for your embroidery projects—versatile, durable, and ready to tackle anything from delicate designs to the tough stuff. With 15 needles in a pack, you’re set for success, ensuring your handheld sewing machine stitches with precision and grace.
Remember, the right needle can turn a frustrating sewing session into a smooth sailing adventure.
- Versatile for various embroidery projects
- Durable metal construction
- Pack of 15 ensures ample supply
- Size variety may be confusing for beginners
- Not suitable for all fabric types
- Specific to embroidery, limiting use for other sewing tasks
4. Clover Natural Fit Leather Thimble
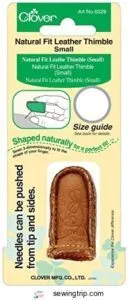
Switching gears to the Clover Natural Fit Leather Thimble, it’s like finding the glass slipper of sewing accessories. Imagine a thimble that doesn’t just sit on your finger but hugs it, thanks to its finger-shaped design and 3D stitching technology.
No more awkward needle jabs at seams or stitches; this thimble smooths the way from your fingertip to your palm. Initially snug, it soon becomes a second skin, making hand sewing a breeze. Perfect for those marathon knitting sessions or when your fingers are begging for mercy during a quilting sprint.
- Finger-shaped for a natural fit
- 3D stitching eliminates needle snag points
- Adapts to your finger over time for enhanced comfort
- May feel tight initially
- Requires a break-in period to achieve the perfect fit
- Not suitable for those who prefer traditional metal thimbles
5. Round Wood Quilt Hoop Edmunds
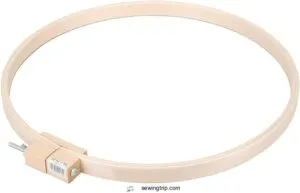
Let’s dive into the world of quilting with the Edmunds Round Wood Quilt Hoop. Imagine holding your quilt as snug as a bug in a rug; that’s what this 18-inch hoop does for your projects. Crafted from solid Basswood, it’s like the strong, silent type that doesn’t brag but always delivers.
Its smooth, sanded finish and rounded edges are gentle on your hands, making those marathon quilting sessions a breeze. The solid wood block closure and 4-inch plated tension bolt are your trusty sidekicks, keeping everything tight and just right.
Lightweight yet sturdy, it’s the unsung hero of your quilting adventures, ensuring your masterpiece remains wrinkle-free and ready for the spotlight.
- Solid Basswood construction ensures durability.
- Smooth, sanded finish and rounded edges for comfortable handling.
- Lightweight design makes it easy to work with for extended periods.
- Limited to one size, which may not suit all projects.
- Wood material may not be as versatile as metal hoops.
- Requires manual adjustment to keep fabric tight.
How to Thread a Handheld Sewing Machine
To start threading your handheld sewing machine, first ensure it’s powered by inserting 4 AA batteries.
Next, secure your thread on the spool pin to begin the setup process.
Load 4 AA Batteries
Before diving into the world of handy stitches with your handheld sewing machine, let’s kick things off with the basics: loading those AA batteries.
- Battery type: AA, the common soldiers of the power world.
- Battery life: Varies, but don’t let it catch you off guard.
- Battery cost: Minimal, but it adds up.
- Battery maintenance: Keep ’em fresh for uninterrupted creativity.
- Battery safety: No mix and match—consistency is key.
Attach Thread Using Spool Pin
After popping in those 4 AA batteries, it’s time to buddy up with the spool pin.
Think of the spool pin as your thread’s dance partner. Whether it’s a sleek metal or a sturdy plastic pin, it’s ready for action.
Slide your thread spool onto the pin, ensuring it’s snug. This is your first step towards mastering your portable sewing machine.
Pass Thread Through First Thread Guide
Next, you’ll guide the thread through the first thread guide, which is usually located near the top of the machine.
This guide helps keep the thread in place as it moves through the tension disks.
The tension disks are responsible for controlling the tightness of the stitch, so it’s important to make sure the thread is properly aligned in the guide.
If the thread is too loose, the stitches will be weak and may unravel.
If the thread is too tight, the fabric may pucker or even tear.
Run Thread Through Tension Disks
- Locate the tension disks, usually near the needle.
- Guide the thread through the tension disks, following the indicated path.
- Adjust the tension by turning the tension adjustment knob to achieve the desired thread tension.
Chain Stitch Operation
When using a handheld sewing machine, you’ll sew using a chain stitch.
Chain stitches only require one thread.
Machine Sews Using a Chain Stitch
Diving into the world of handheld sewing, the chain stitch stands out for its simplicity and strength.
It’s a solo act, needing just one thread to weave its magic. But beware, it’s a bit of a Houdini; without a firm final knot, your stitch may pull a vanishing act.
For travel-friendly sewing, this stitch is your go-to, blending durability with portability.
Chain Stitch Requires Only One Thread
Chain stitch is a unique feature of handheld sewing machines. Unlike traditional machines that require two threads, chain stitch requires just one.
The thread tension is crucial in chain stitch. Too much tension can cause the thread to break, while too little tension can result in loose stitches.
Chain stitch is well-suited for quick repairs and hemming, making it a versatile tool for crafters and DIY enthusiasts.
Hold Last Stitch to Prevent Unraveling
Once you’ve threaded the machine, you’re ready to start sewing!
But before you do, remember to hold onto the last stitch of thread to prevent it from unraveling.
This is especially important when using a chain stitch, which only uses one thread.
By holding onto the last stitch, you’re ensuring that your stitches stay secure and your fabric doesn’t come apart.
It’s a simple step that can make a big difference in the quality of your sewing.
Stitch 6 of Excess Thread
When finishing your chain stitch, leaving a 6-inch tail of thread is like giving your stitch a safety net. This extra length isn’t just for show; it’s crucial for securing your stitch, especially when dealing with tricky fabric types or hefty projects like a motorcycle armor jacket.
Think of it as the unsung hero in your sewing toolkit, ensuring your stitches don’t unravel at the first sign of stress. Adjusting thread tension and choosing the right needle size can make all the difference, much like adding a ruffler foot to your machine can elevate your sewing game.
Hemming Pants
Place your pant leg beneath the needle, then unlock the machine and start sewing.
Once you’ve finished sewing, detach the thread from the bottom hook to remove the fabric from the machine, using the rotary wheel to assist you.
Place Pant Leg Under Needle
To hem your pants, place the pant leg under the needle ensuring that the fabric is aligned properly.
Lower the presser foot to hold the fabric in place.
Adjust the stitch length and presser foot pressure according to the fabric’s thickness, then start sewing.
Hold the last stitch to prevent unraveling.
Unlock Machine and Start Sewing
Once your pant leg is snugly under the needle, it’s time to kick things into gear.
You’re not just hemming jeans; you’re:
- Shortening sleeves
- Fixing rips
- Sewing curtains
- Altering clothes to fit like a glove
Each stitch is a step closer to becoming a sewing maestro.
Detach Thread From Bottom Hook to Remove Fabric
- Detach the thread from the bottom hook to remove the fabric.
- Locate the bottom hook on the machine.
- Use a pair of scissors to cut the thread.
- Gently pull the fabric away from the machine.
- Use the rotary wheel to help guide the fabric out of the machine.
Now that you know how to detach the thread from the bottom hook, you can easily remove the fabric from the machine and continue sewing.
Rotary Wheel Aids in Removing Fabric
Once you’ve finished hemming your pants, it’s time to free your creation from the machine’s grasp.
Here’s where the rotary wheel shines. Give it a gentle turn, and like magic, the fabric eases out, no fuss, no muss.
Think of it as your sewing sidekick, making sure your fabric exits as smoothly as it entered.
Frequently Asked Questions (FAQs)
Can I use any brand of thread?
Sure, you can use any brand of thread, but remember, not all threads are created equal.
Stick to quality brands to avoid the frustration of weak seams and the dreaded threadbare scenario.
How often should I replace the needle?
Needles dull over time, so replace them every 8 hours of sewing.
This helps prevent skipped stitches and fabric damage, ensuring your projects look their best.
Is a handheld sewing machine suitable for quilting?
A handheld sewing machine isn’t your go-to for quilting. It’s like bringing a knife to a gunfight; sure, it can stitch, but lacks the power and precision for the layers and detail quilting demands.
Stick to the heavyweights.
Can I sew denim with a handheld machine?
You can try to sew denim with a handheld machine. Brace yourself for a bumpy ride. These little troopers struggle with heavy fabrics, so it’s like bringing a knife to a gunfight.
How do I fix a jammed handheld sewing machine?
Ever felt like you’re wrestling a tiny beast when your handheld sewing machine jams?
First, gently remove any fabric and cut away tangled threads.
Then, check for lint and clear the bobbin area.
Voilà, back in business!
Conclusion
Threading a handheld sewing machine isn’t as difficult as it seems.
Just follow the steps in this guide, and you’ll be threading your machine like a pro in no time.
With a little practice, you’ll be able to thread your machine quickly and easily, which will save you time and frustration in the long run.
So, what are you waiting for? Grab your machine and let’s get started!

