This site is supported by our readers. We may earn a commission, at no cost to you, if you purchase through links.
To thread an older Singer sewing machine, first identify the threading hooks, tension assembly, uptake lever, and needle-guiding hooks.
Next, thread the top hook, tension assembly, uptake lever, and needle-guiding hooks before threading the needle.
For the bobbin, position it in the casing, thread it counterclockwise through the top area, and insert it into the machine, snapping it securely in place.
Turn the hand wheel to guide the bobbin thread up, check for proper tension, and you’re ready to sew.
If you need more detailed instructions on threading an older Singer sewing machine, keep reading.
Table Of Contents
Key Takeaways
- Familiarize yourself with the sewing machine’s components, including the thread guides, tension assembly, take-up lever, and needle-guiding hooks.
- Thread the top thread guide, tension assembly, take-up lever, and needle-guiding hooks before threading the needle.
- Position the bobbin in the bobbin case, thread it counterclockwise through the tension spring, and insert it into the machine, snapping it securely in place.
- Turn the hand wheel to bring the bobbin thread up, check for proper tension, and you’re ready to sew.
How to Thread an Older Singer Sewing Machine?
To thread an older Singer sewing machine, follow these steps:
- Raise the presser foot and rotate the hand wheel until the thread take-up lever is at its highest position.
- Place the spool on the spool pin and bring the thread over to the first thread guide.
- Bring the thread around the tension discs and hold the spool of thread while pulling the thread over until the check spring pops into the guide.
- Feed the thread behind the little bar and through the take-up lever.
- Thread the machine from right to left, not front to back like newer machines.
To wind the bobbin, follow these additional steps:
- Push the bobbin winder button and place the bobbin on the winder.
- Wind the bobbin thread by pushing the pedal of your machine.
- Trim the thread and place the bobbin in the bobbin case.
- Thread the bobbin case with the thread going in the correct direction.
- Place the bobbin in the machine and hear a snap when it’s securely in.
- Pull the bobbin thread through the machine by holding the top thread and turning the hand wheel until the needle does one full stitch.
- Carefully pull on the top thread to guide the bobbin thread up and out.
Remember to double-check your sewing machine manual for specific instructions on your particular model.
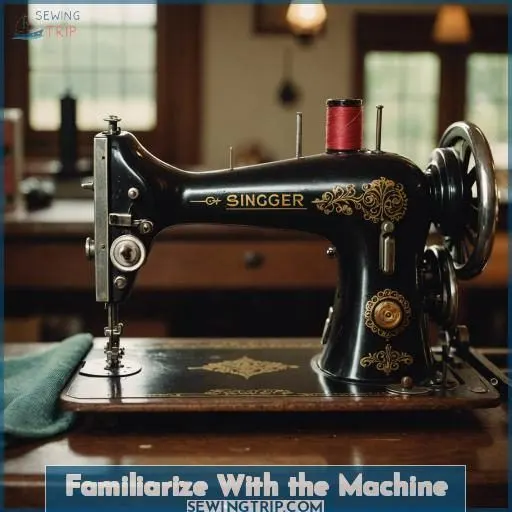
Familiarize With the Machine
Before you can thread your older Singer sewing machine, you’ll need to familiarize yourself with it. Identify the threading hooks, tension assembly, uptake lever, and needle-guiding hooks so you know where to direct the thread.
Identify Threading Hooks
Before you begin threading your older Singer sewing machine, it’s crucial to become acquainted with the machine’s components. One of the critical parts is the threading hooks, which guide the thread through the various mechanisms of the sewing machine. To identify these hooks, follow these steps:
- Locate the tension assembly, which is in charge of maintaining the correct tension of the thread. This component is usually found near the needle area.
- Next, find the uptake lever, which assists in pulling the thread up and around the bobbin.
- Finally, identify the needle-guiding hooks, which assist in directing the thread through the needle and into the fabric.
Locate Tension Assembly, Uptake Lever, and Needle-guiding Hooks
To thread an older Singer sewing machine, you’ll need to locate the tension assembly, uptake lever, and needle-guiding hooks. The tension assembly is responsible for maintaining the proper tension on the thread. The uptake lever is used to thread the needle with the bobbin thread. The needle-guiding hooks help guide the needle through the fabric.
To thread the old Singer sewing machine, you’ll need to weave the thread through the top hook, thread through the tension assembly and uptake lever, guide the thread through the needle-guiding hooks, and thread the needle.
Remember to position the bobbin in the casing, thread through the top area, make sure the thread goes counterclockwise, and insert the bobbin into the machine. Once everything is in place, you can turn the hand wheel one full stitch and hold the top thread to guide the bobbin thread up.
Thread Through the Front
Now it’s time to thread your older Singer sewing machine. First, weave the thread through the top hook, then thread it through the tension assembly and uptake lever before guiding it through the needle-guiding hooks and finally, threading the needle.
Weave Thread Through Top Hook
To weave the thread through the top hook of your Singer sewing machine, follow these steps:
- Identify the threading hooks on your machine. These hooks are usually located near the top of the machine and are used to change the direction of the thread.
- Weave the thread through the top hook to change the direction of the thread so it starts to head down.
- Once the thread is directed downward, locate the tension assembly and uptake lever.
- Thread the thread through the tension assembly and uptake lever to make sure proper tension and thread flow.
- Guide the thread through the needle-guiding hooks, which are a series of three hooks that guide the thread down toward the needle.
- Finally, thread the needle and you’re ready to start sewing.
Remember to make sure counterclockwise threading when preparing the bobbin casing and to securely snap the bobbin into the machine. After placing the bobbin in the machine, turn the hand wheel one full stitch to catch the thread. Hold the top thread and pull to guide the bobbin thread up. Once you have completed these steps, your Singer sewing machine is ready to use.
Thread Through Tension Assembly and Uptake Lever
Now, let’s pass through the tension assembly and uptake lever. This step is essential for managing the tension types and ensuring your thread path is seamless. Modify the tension spring based on the thread thickness, making a slight adjustment to the tension adjustment if necessary. This will maintain the neatness and uniformity of your stitches.
- Experience the control as you refine the tension.
- Perceive the smoothness of the thread passing through.
- Envision impeccable stitches forming under your direction.
- Embrace the expertise of your machine’s mechanics.
- Celebrate every successful adjustment as a step toward sewing excellence.
Guide Thread Through Needle-guiding Hooks
To guide the thread through the needle-guiding hooks, you’ll need to follow these steps:
- First, make sure you’re using the correct needle type for your fabric and thread compatibility.
- Adjust the tension to the appropriate setting for your project.
- Lubricate the needle-guiding hooks as needed, following the manufacturer’s recommended frequency.
- Store your sewing machine in a clean, dry place to prevent rust and dirt buildup.
- Once the thread is securely threaded through the front of the machine, you’re ready to thread the needle.
Thread the Needle
To thread the needle, you’ll need to carefully guide the thread through the needle’s eye. If you’re having trouble, try using a thinner needle or a needle threader.
Common problems include threading the needle the wrong way, which can cause issues, or replacing the needle incorrectly.
Maintenance tips include cleaning and polishing parts the thread touches, checking needle insertion, and replacing the needle if necessary.
For vintage machines, it’s critical to understand the specific threading techniques and needle types to guarantee a smooth sewing experience.
Bobbin Casing Preparation
Place the bobbin in the casing and thread it through the top area. Be sure to thread the bobbin in a counterclockwise direction.
Position Bobbin in Casing
To position the bobbin in the casing, follow these steps:
- Identify the Bobbin Casing: Locate the area on your sewing machine where the bobbin casing is located. This is typically a small, cylindrical area near the needle.
- Insert the Bobbin: Take your bobbin and gently insert it into the casing. Make sure the bobbin is facing the correct direction. Most bobbin casings are designed to only accept the bobbin in one orientation, so it should fit snugly and easily.
- Thread the Bobbin: Once the bobbin is in place, you’ll need to thread it. This involves winding the thread around the bobbin and securing it in place. Some machines have a special threading mechanism for this, while others may require you to thread the bobbin manually.
- Check the Threading Direction: Make sure that the thread is being wound in the correct direction. Most sewing machines require the thread to be wound counterclockwise around the bobbin.
- Secure the Bobbin: Once the thread is wound around the bobbin, you’ll need to make sure it’s in place. This may involve using a screw or other mechanism to lock the bobbin in place.
- Test the Threading: Before you start sewing, it’s a good idea to test the threading to make sure everything is working correctly. This may involve sewing a small test piece of fabric to check for any issues with the thread or tension.
Thread Through Top Area
To thread your Singer sewing machine, start by checking the bobbin. Make sure the bobbin thread is in the top area of the casing.
Next, weave the thread through the top hook.
Then, thread the needle and guide the thread through the needle-guiding hooks.
Finally, thread the needle and you’re ready to sew. Remember to always thread counterclockwise for proper tension.
Ensure Counterclockwise Threading
After threading the top area, it’s essential to make sure your bobbin thread goes counterclockwise. This isn’t just a minor task; it’s the key to getting the tension just right. Here’s why:
- Gets the bobbin casing lined up properly.
- Stops the thread from getting all twisted up.
- Makes sure the thread tension is even.
- Keeps your sewing from making you want to pull your hair out.
Bobbin Machine Placement
Next, insert the bobbin into the machine and securely snap it in place. Then, turn the hand wheel one full stitch to bring the bobbin thread up through the needle plate.
Insert Bobbin Into Machine
To insert the bobbin into your older Singer sewing machine, follow these steps:
- Make sure the bobbin is the correct type for your machine.
- Wind the bobbin with thread, following the manufacturer’s instructions.
- Place the bobbin in the bobbin case, making sure it’s facing the right way.
- Put the bobbin case into the machine, lining it up with the bobbin winder.
- Turn the hand wheel once to wind the bobbin thread up.
Securely Snap Bobbin in Place
To firmly secure the bobbin in place, follow these steps:
- After inserting the bobbin into the machine, turn the hand wheel one full stitch to guarantee proper bobbin alignment.
- Hold the top thread and pull it gently to guide the bobbin thread up through the tension assembly and uptake lever.
- Check that the bobbin is firmly placed in the bobbin casing and that the thread is winding around the bobbin in a clockwise direction.
- If necessary, adjust the thread tension by turning the tension dial to the desired setting.
- Once the bobbin is firmly in place and the thread tension is correct, you can begin sewing.
Remember to always follow the manufacturer’s instructions for your specific sewing machine model, as variations may exist in the placement and operation of the bobbin.
Turn Hand Wheel One Full Stitch
Now that you’ve securely snapped the bobbin in place, it’s time to turn the hand wheel one full stitch. This will help guide the bobbin thread up to the plate, ensuring that both threads are properly connected. Here’s how to do it:
- Turn the Hand Wheel: Locate the hand wheel on the side of your sewing machine. This wheel is used to wind the bobbin thread and connect it with the top thread.
- One Full Stitch: Turn the hand wheel one full stitch. This will wind the bobbin thread and pull it up to the plate, connecting it with the top thread.
- Guide the Bobbin Thread: Once you’ve turned the hand wheel, you’ll see the bobbin thread being pulled up to the plate. Guide the thread by hand if necessary, ensuring that it’s properly connected with the top thread.
- Check the Connection: After guiding the bobbin thread, make sure that both threads are properly connected and ready for sewing.
Sewing Readiness
Before you start sewing, be sure to check your machine thoroughly. Make certain all parts are in place and functioning properly so your project can get off to a great start.
Check for Any Issues Before Starting to Sew
Before starting to sew, it’s crucial to check for any issues that could affect the quality of your stitch. Begin by ensuring fabric compatibility, as some materials can be too thick or too thin for your machine.
Next, check the needle type and tension balance. Regularly lubricate your machine and follow a cleaning routine to keep it in top condition.
Ensure All Parts Are in Place and Functioning Properly
Before you embark on your sewing adventure, ensure everything’s in order. Pamper those parts with a little care and attention by lubricating them to prevent a raucous impasse.
If gears are grating, contemplate replacing them to maintain seamless operation.
Fine-tune the bobbin for a secure fit, remove any debris from the hooks, and scrutinize the needle—it’s the commander of your vessel!
Troubleshooting
If you encounter threading dilemmas, needle quandaries, tension tribulations, or feed dog dysfunctions, it’s time to rectify the situation.
Begin by verifying the threading and needle placement. Confirm that the thread navigates through the upper hook, tension mechanism, and uptake lever, and that the needle is correctly inserted.
If the problem lingers, cleanse and lubricate the machine, and scrutinize for any fractured components. Remember, lubrication is paramount for seamless operation.
If you’re uncertain, refer to your machine’s handbook or seek guidance from a qualified technician.
Frequently Asked Questions (FAQs)
How can I tell if my Singer sewing machine is ready to use after threading?
To know if your Singer is ready, turn the handwheel and pull up on the thread – the bobbin thread should rise up, indicating the machine is threaded and primed for sewing. Give it a test run on scrap fabric!
What should I do if my sewing machine is not advancing the fabric?
Hmm, sounds like your feed dogs aren’t working properly. First, check the stitch length and bobbin placement. If that’s not it, the feed dog assembly may be broken – time to call in an expert!
How do I adjust the tension on my Singer sewing machine?
Tension troubles got you in a tizzy, eh? Fear not, my friend! Adjust that dial like a virtuoso pianist – just a pinch here, a tweak there, and voila! Silky smooth stitches, ready to sew up a storm.
What are the common causes of thread breaking in a Singer sewing machine?
Thread breaking can stem from tension issues, improper threading, or dirty/worn parts. Check the top and bottom tensions, clean the machine, and replace the needle if needed. Troubleshoot step-by-step to get your Singer sewing smoothly again.
How often should I clean and oil my Singer sewing machine?
Regularly cleaning and oiling your Singer sewing machine is key – about every 8-12 hours of use. This keeps it humming along like a well-tuned engine, preventing pesky thread breaks. Stay on top of maintenance, and your machine will reward you with smooth stitches!
Conclusion
Undoubtedly, the process of threading an older Singer sewing machine may appear intimidating. However, with the right guidance, it’s an easy task.
By becoming acquainted with the machine’s components and adhering to the step-by-step instructions provided, you’ll be sewing like an expert in no time.
Bear in mind, practice fosters proficiency, so don’t be disheartened if it takes a few attempts to master threading that older Singer sewing machine.
Happy sewing!

