This site is supported by our readers. We may earn a commission, at no cost to you, if you purchase through links.
 Navigating the world of canvas crafting with a sewing awl is akin to mastering the art of sailing: both require precision, patience, and the right tools to navigate successfully.
This guide is your compass, leading you through the essential steps and tips for using a sewing awl on canvas. From preparing your awl and stitching basics to working with the robust nature of canvas, we’ll cover everything you need to ensure your projects are not just completed, but beautifully executed.
Whether you’re reinforcing a tent seam or crafting a custom canvas bag, mastering the sewing awl will unlock a world of DIY possibilities. It blends tradition with innovation for results that are both functional and aesthetically pleasing.
Yes, to use a sewing awl on canvas, start by threading the awl, then push the needle through the material, form a loop, and create a lock stitch by pulling the thread taut.
Table Of Contents
Key Takeaways
- Adjust the tension of the thread when working with canvas to accommodate its thickness.
- Pre-mark hole placement with an awl to ensure even stitching.
- Lubricate the thread to facilitate smoother stitching through heavy canvas material.
- After stitching, secure the final stitch with a knot and trim excess thread for a neat finish.
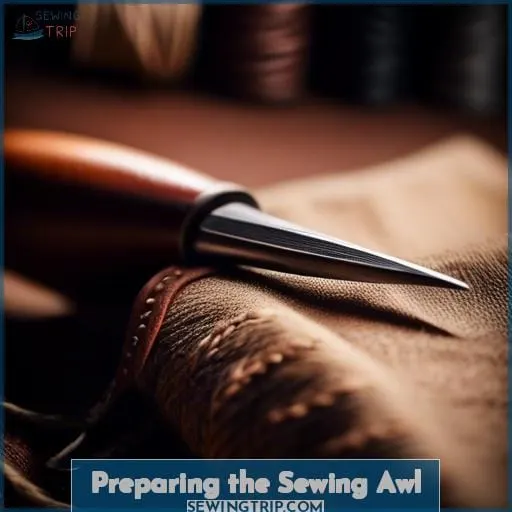
Preparing the Sewing Awl
Before you start working with a sewing awl on canvas, it’s crucial to get your tool ready for the job.
Loading the bobbin and attaching the needle correctly are foundational steps that ensure your sewing project goes smoothly.
You’ll want to make sure the bobbin is properly loaded with the thread and that the needle is securely attached and aligned with the thread’s path.
This preparation not only sets the stage for effective stitching but also prevents common issues like thread tangling or needle breakage.
Loading the Bobbin
To load the bobbin on your sewing awl, first ensure it matches the bobbin size and shape specific to your tool.
Select a thread weight and color suitable for your canvas project, considering the strength needed for the lock stitch.
Wind the thread onto the bobbin, maintaining even bobbin tension to prevent snags during sewing.
Once loaded, insert the bobbin into your sewing awl, threading it through the designated path and needle, ready for your canvas repair or creation.
Attaching the Needle
To attach the needle to your sewing awl, you’ll need to ensure it’s the right type for your canvas project.
- Select the appropriate needle for your material; for canvas, a heavy-duty needle is ideal.
- Secure the needle in the chuck of the speedy stitcher, ensuring it’s tight to prevent wobbling.
- If the needle isn’t sharp enough, use a sharpening stone or sandpaper to hone the point for easier piercing.
Stitching Basics
When tackling a canvas project with a sewing awl, starting with the basics is crucial.
First, making the initial stitch involves pushing the needle through the material, ensuring it’s through to the other side.
Next, forming the lock stitch requires careful manipulation of the thread to create a secure connection between stitches.
As you continue, maintaining a consistent stitch sequence is key to achieving a strong, durable finish on your canvas work.
This process, while straightforward, demands attention to detail and patience, especially for beginners.
Making the First Stitch
To start your first stitch with a sewing awl on canvas, you’ll need to carefully position the needle. Choose the right needle size for the material thickness you’re working with; for canvas, a larger needle is typically appropriate.
Ensure your thread tension isn’t too loose or too tight, as this can affect the quality of your stitches. Push the needle through the material, and as you pull the thread to the desired length, consider the stitch length you aim for.
This initial stitch sets the foundation for a strong, even seam.
Forming the Lock Stitch
After making your first stitch, it’s time to master the lock stitch, a crucial step for ensuring your canvas projects are both durable and professional-looking.
Here’s how: Push the needle through the next hole and slightly retract it to form a loop. Thread the tail through this loop. Now, the magic happens as you pull the needle out, tightening the stitch.
With practice, your lock stitches won’t only look impeccable but also withstand the test of time.
Continuing the Stitch Sequence
Once you’ve made your initial stitches, continue the sequence by pushing the needle up through the next hole and pulling the thread taut.
- Adjust stitch length based on tension.
- Keep hole spacing even by using an awl.
- Maintain needle sharpness for clean punctures.
- Consider material thickness when setting tension.
Working With Canvas
When working with canvas using a sewing awl, it’s crucial to adjust the tension to accommodate the material’s thickness.
Techniques for maintaining even stitch spacing will ensure a professional finish.
Taking steps to prevent thread tangles will make the process smoother.
Keep these points in mind to achieve strong, consistent stitches on your canvas projects.
Adjusting Tension for Thicker Materials
When working with canvas, a material known for its durability and thickness, adjusting your sewing awl’s tension is crucial for achieving the best results.
Canvas’s weight demands a careful balance in needle thickness and thread quality to ensure your stitches are both strong and even. For thicker materials like canvas, you might need to opt for a heavier needle and a high-quality thread that can withstand the material’s demands.
Tension adjustments become essential here; too tight, and your thread might break or your fabric could pucker.
Aim for a stitch length that complements the canvas weight, typically longer to accommodate the fabric’s thickness, ensuring each stitch is secure and consistent.
This balance of needle thickness, thread quality, tension adjustments, canvas weight, and appropriate stitch length is key to mastering sewing with a sewing awl on canvas, turning your projects from good to great.
Techniques for Even Stitch Spacing
After adjusting tension for thicker canvas, focus on even spacing to ensure a professional finish.
You’ll want to mark your hole placement precisely. Keep your thread taut and use a sharp needle to pierce the material cleanly.
A consistent practice method is key; consider using a stitching spacer or ruler to maintain uniform distances between stitches for a neat and durable result.
Preventing Thread Tangles
To prevent thread tangles when using a sewing awl on canvas, ensure you’re equipped with the right tools and techniques.
Begin by using pliers to maintain a firm, ergonomic grip on the needle, reducing slippage and misalignment that can cause tangles.
Apply thread lubrication to reduce friction; silicone-based lubricants are effective and leave no residue.
Regularly polish your needles to ensure smooth entry and exit through the material, which helps in preventing snags and knots.
Keep your awl storage tidy; a well-organized kit minimizes the risk of thread entanglement and ensures easy access to your tools.
Finishing Techniques
Once you’ve mastered the art of using a sewing awl on canvas, the final steps are crucial to ensure your project is finished professionally and lasts.
Securing the final stitch properly, trimming, and tying off the thread neatly are essential techniques that give your work a clean, durable finish.
Storing your awl safely after use will keep it in good condition for your next project, ensuring longevity and reliability.
Securing the Final Stitch
To secure the final stitch, grasp the loop and pull the thread through the hole. Cut the thread, leaving three lengths.
Ensure the thread is taut when tying the knot for a secure finish.
If the thread is too thick, consider using a thinner thread to prevent the knot from becoming bulky.
Trimming and Tying Off Thread
Once you’ve secured your final stitch, it’s time to neatly finish off your work. Here’s how to trim and tie off your thread, ensuring your project looks polished and professional:
- Grasp the Loop: After making your last stitch, pull the thread through the loop until you have enough length to work with.
- Tie a Knot: Cut the thread, leaving about three times the length needed to tie a knot. Securely tie the ends together at the backside of your project to ensure knot strength and prevent unraveling.
- Trim Excess Thread: Finally, trim any excess thread close to the knot. Be careful not to cut too close, as you want to maintain the integrity of your securing stitches.
Storing the Awl Safely
Once you’ve tied off and trimmed the thread, it’s time to focus on storing your awl.
For safety precautions, remove the needle by unscrewing the chuck lock and slide it into its designated slot. This needle removal step is crucial to prevent accidental injury. Ensure the slot location is free from debris before inserting the needle.
Wrapping up, re-secure the chuck lock to keep everything in place, safeguarding your awl until its next use.
Tips for Success
When tackling a canvas project with a sewing awl, your success hinges on a few key practices.
First, pre-puncturing holes with the awl can streamline your stitching process, ensuring smoother passage for the needle and thread.
Choosing the right needle and thread for the canvas material is crucial; the wrong selection can lead to poor stitch quality or even damage to the fabric.
Lastly, before embarking on your main project, practicing on scrap material can significantly boost your confidence and skill level, allowing you to refine your technique without the pressure of perfection.
Using an Awl to Pre-puncture Holes
When working with heavy materials like canvas, the awl’s importance can’t be overstated.
Before diving in, consider the hole size selection; too small and you’ll struggle, too large and the material may weaken. The angle of entry is crucial—aim for consistency to maintain the integrity of your stitch line.
Material considerations are key; denser fabrics require more force. Don’t underestimate the practice value; honing your technique on scraps can lead to mastery and innovation in your projects.
Selecting the Right Needle and Thread
After pre-puncturing holes in your canvas, selecting the right needle and thread becomes crucial. Needle types vary, so choose one that matches the material thickness you’re working with.
For canvas, a heavier needle ensures durability and ease of penetration. Thread sizes also matter; opt for a waxed nylon for its strength and smooth glide through materials.
Adjusting tension is key to stitch consistency, preventing thread tangles and ensuring each stitch is secure and even. Mastery in using a sewing awl comes from understanding these nuances, leading to innovation and a deeper understanding of your craft.
Practicing on Scrap Before the Main Project
When selecting the right needle and thread for your canvas project, it’s crucial to consider the material’s thickness and the desired durability of the stitch. After making your choice, it’s time to practice on scrap material before moving on to your main project.
This step is essential to ensure your technique is refined and to prevent any mishaps on your final piece.
- Test stitch spacing on scrap to achieve uniformity.
- Adjust thread tension to avoid puckering or loose stitches.
- Pre-puncture tough spots to ease needle passage.
- Familiarize yourself with the feel of the canvas and how it responds to stitching.
Frequently Asked Questions (FAQs)
How can I adjust the tension of the thread when using a sewing awl on canvas to prevent puckering or loose stitches?
To prevent puckering or loose stitches when using a sewing awl on canvas, ensure your thread tension is balanced.
Keep the thread taut as you stitch, adjusting as needed for even, tight stitches without over-tightening, which can cause puckering.
What are the best practices for cleaning and maintaining a sewing awl to ensure its longevity, especially after working with canvas?
To maintain your sewing awl, especially after canvas work, regularly clean and oil it.
Disassemble the awl, remove lint and debris with a soft brush. Apply sewing machine oil to moving parts.
Store the sewing awl in a dry place to prevent rust.
Can a sewing awl be used to create decorative stitches on canvas, and if so, what techniques are recommended?
Yes, a sewing awl can be used to create decorative stitches on canvas.
For best results, practice your technique on scrap material first. Use sharp needles and ensure your thread is taut for even stitches.
Experiment with different stitch lengths and patterns to add a unique touch to your canvas projects.
How do I choose the appropriate type and size of thread for different canvas projects when using a sewing awl?
Navigating the sea of threads for your canvas masterpiece with a sewing awl is like choosing the perfect arrow for your bow.
It’s not just about the sharpness but the strength and flexibility of the shaft. For canvas, which is both sturdy and demanding, you’ll want a thread that’s robust yet pliable.
Opt for a heavy-duty polyester or nylon thread, which offers the resilience needed to withstand the canvas’s weight and texture. The size of the thread should harmonize with your needle and project scale, typically a thicker gauge to ensure durability and ease of stitching.
What are some effective methods for repairing a sewing awl if it becomes damaged or malfunctions while working on canvas projects?
If your sewing awl malfunctions, tighten the chuck lock with pliers.
Bend the end cap wings for a snug fit.
Use a screwdriver to adjust the needle slot.
Conclusion
Rome wasn’t built in a day, and neither is mastery in using a sewing awl on canvas achieved overnight. But with the guidance provided, you’re well on your way to crafting durable, beautiful projects with confidence.
Keep experimenting with different techniques, and don’t shy away from challenges. Your sewing awl isn’t just a tool; it’s your partner in bringing creativity to life.
So, embrace the journey, and let your projects reflect the craftsmanship and care you’ve invested.

