This site is supported by our readers. We may earn a commission, at no cost to you, if you purchase through links.
First, raise your needle and place your fabric under the presser foot.
Thread your machine properly – this step trips up many beginners, but it’s essential for smooth operation.
Select your stitch type and adjust the length.
Gently press the foot pedal to start sewing, guiding your fabric with steady hands.
Don’t rush – speed comes with practice.
Lock your stitches at the beginning and end to prevent unraveling.
When finished, raise the needle and presser foot before removing your fabric.
Master these fundamentals and you’ll discover techniques that transform fabric scraps into professional-looking projects.
Table Of Contents
Key Takeaways
- Master the threading basics first – you’ll prevent 80% of sewing problems by learning proper spool placement, tension disc navigation, and needle threading techniques before attempting any projects.
- Start with gentle foot pedal control – treat it like a car’s gas pedal with light pressure for smooth starts, keeping your heel planted and using ankle movements for precise speed control.
- Position fabric correctly under the presser foot – place the bulk to your left, align edges with seam guides, and let the feed dogs move the fabric naturally without pulling or pushing.
- Clean and maintain your machine regularly – remove lint after every 2-3 bobbins, replace needles every 6-8 hours of sewing, and follow your manual’s oiling instructions to prevent costly repairs.
Sewing Machine Basics
Before you start sewing, you need to understand your machine’s basic parts and how they work together.
Setting up properly from the beginning will save you hours of frustration and help you create professional-looking projects.
Machine Components and Functions
Understanding sewing machine components transforms overwhelming mechanical mysteries into manageable mastery.
Every machine mystery becomes simple when you understand its purpose.
Your needle creates precise holes while the bobbin case delivers bottom thread for lockstitch formation.
Feed Dog Mechanics advance fabric systematically under presser feet pressure.
Tension Control maintains balanced thread flow throughout machine operation.
Mastering the thread tension control is essential for achieving professional sewing results.
Here are five essential sewing machine parts:
- Needle Alignment – Steel rod and clamp secure needle positioning for consistent stitching
- Machine Bedplate – Sturdy foundation housing internal sewing machine mechanisms
- Bobbin Case – Cylindrical chamber regulating lower thread tension and placement
- Feed Dog Mechanics – Serrated bars moving fabric forward with each stitch cycle
- Tension Control – Dial system balancing upper thread pressure for even sewing machine functions
These machine components work together seamlessly during sewing machine operation steps.
Setting Up The Sewing Machine
Proper sewing machine setup lays the groundwork for successful stitching. Your workspace matters as much as your technique.
Start with Power Activation on a stable surface. Position your machine on a sturdy table with good lighting. Keep cords clear of walkways for safety.
Machine Assembly begins with basic components:
- Bobbin Installation – Insert bobbin into case with correct thread direction
- Thread Tension – Check dial settings before starting your first project
- Needle Installation – Insert with flat side facing back and tighten securely
- Fabric Alignment – Position seam guides for consistent measurements
- Foot Pedal Placement – Set comfortably under your dominant foot.
Your sewing machine setup affects every stitch you’ll make. Take time with machine setup steps now to avoid headaches later. This sewing machine guide approach prevents most beginner problems.
Follow your sewing machine basics manual for threading paths. Each machine varies slightly but these fundamentals remain constant across brands.
Essential Parts and Accessories
Your sewing machine comes packed with essential sewing machine parts and sewing machine accessories that’ll make or break your projects.
The bobbin case holds your lower thread while the thread guide keeps everything flowing smoothly.
Different presser foot attachments handle specific techniques and the feed dogs move fabric along.
Your tension disk controls stitch quality.
Stock up on various needles for different fabrics and bobbin sizes that fit your machine parts perfectly.
Understanding machine parts is vital for effective sewing machine maintenance and operation.
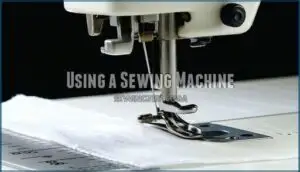
Using a Sewing Machine
Now you’re ready to put your hands to work. Start with scrap fabric to practice sewing speed control. Press the foot pedal gently like you’re learning to drive.
Keep sewing safety in mind by positioning fabric with bulk to the left. Let the feed dogs move fabric naturally while you guide it softly.
Fabric choice matters for beginners – cotton works best. Regular machine oil keeps everything running smoothly.
Focus on thread quality and tension settings for even stitches before advancing to complex projects. Understanding sewing machine basics is essential for a successful sewing experience.
Threading The Machine
Threading your machine correctly is the foundation of successful sewing and prevents most beginner frustrations.
Threading is your gateway to sewing success – get this right, and everything else follows.
You’ll need to follow a specific path from the spool to the needle to guarantee smooth stitching.
Placing The Spool on The Spool Pin
Now you’ll place your thread spool on the spool pin. Find the spool pin on your machine – it’s either vertical or horizontal.
Slide your thread spool onto the pin. Make sure the thread unwinds counterclockwise for proper spool alignment and thread tension.
Add the spool cap if your machine has one. This prevents bouncing during bobbin winding and keeps your sewing machine setup stable for threading.
Understanding the spool pin function is essential for maintaining proper thread tension and preventing tangles.
Guiding The Thread Through The Thread Guide
After the spool placement, thread tension becomes your next focus. Pull the thread from your spool toward the first thread guide near the machine’s top. This proper alignment prevents tangles and guarantees smooth flow.
Follow these steps for Guide Alignment:
- Spool Placement: Secure thread on the spool pin first
- Thread Tension: Loop through tension discs carefully
- Guide Path: Follow each thread guide in sequence
- Take-up Lever: Thread through this moving part properly
- Final Check: Verify alignment before Needle Threading
The threading path varies by machine model but follows similar patterns. Each guide serves a purpose in controlling thread flow and tension.
Threading The Needle
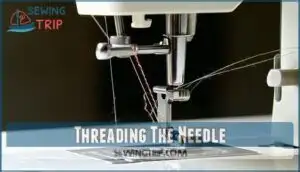
After passing through the thread guide, threading the needle requires steady hands and proper needle alignment. Raise your needle to its highest position using the handwheel. Lift the presser foot to release thread tension. Cut your thread at an angle for easier insertion. Thread from front to back through the needle eye, leaving about two inches extending behind.
To master this step, understanding needle threading techniques is essential for successful sewing machine operation.
| Challenge | Solution |
|---|---|
| Can’t see needle eye | Use bright lighting or magnifying glass |
| Thread keeps fraying | Cut fresh angled end, use quality thread |
| Missing the eye repeatedly | Make certain needle is at highest position |
Check that thread moves smoothly through all guides. This step determines successful stitch formation. Pull gently to test threading completion before continuing.
Ensuring The Thread is Smooth and Untangled
With your needle threaded, check that everything flows smoothly before you start sewing. Thread Quality matters more than you think. Pull the thread gently to test for resistance or catching points.
Thread Tension should feel balanced – not too tight or too loose. If it bunches up, you’ll face threading headaches later. Smooth Threading prevents most beginner frustrations.
Tangle Prevention tips:
- Check for Bobbin Management issues in the case below
- Clear lint from tension discs that grab thread
- Test thread flow through all guides
- Keep thread ends secured to prevent pull-back
Mastering Sewing Techniques
Now that you’ve threaded your machine, it’s time to put those skills to work. You’ll learn the fundamental techniques that turn fabric pieces into finished projects with clean, professional results.
Selecting The Straight Stitch Setting
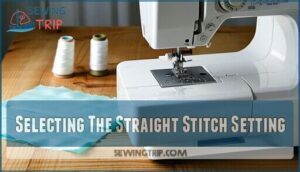
Now you control your machine’s stitch selection dial or digital display.
Look for the straight stitch symbol—usually a simple line or number "1." This becomes your go-to setting for most projects.
Modern sewing machine settings make stitch selection straightforward. Your sewing machine stitch guide shows various options, but mastering straight stitch gives you solid foundation for quality stitching.
Understanding the straight stitch techniques is essential for beginners to improve their sewing skills.
Adjusting The Stitch Length
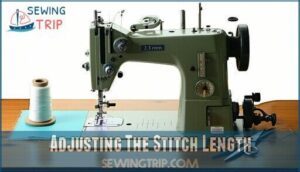
Dial in your stitch length between 2.5-3.0mm for most projects.
Your sewing machine settings control stitch quality and seam strength. Shorter stitches mean tighter seams and better stitch control.
Longer stitches work for basting or thick fabric thickness. Adjust your sewing machine stitch guide dial before starting.
Test on scrap fabric first.
Positioning The Fabric
Mastery begins with proper fabric positioning. Your sewing machine will deliver professional results when you handle fabric with confidence and precision.
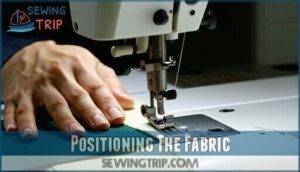
Start by placing your fabric under the presser foot with right sides together if creating a seam. The bulk of your material should flow to the left of the needle. This prevents bunching and keeps your workspace organized.
- Fabric Alignment: Line up your fabric edge with the seam guide markings on the throat plate. These markings show common seam allowances like 5/8 inch.
- Edge Control: Keep fabric edges straight and parallel to the presser foot. Uneven edges create wobbly seams that scream amateur work.
- Fabric Tension: Support the fabric weight gently with your hands. Never pull or push against the feed dogs. They know their job.
- Corner Pivot: Stop with needle down when turning corners. Lift the presser foot and rotate your fabric smoothly for sharp angles.
Your sewing machine settings work best when fabric positioning is deliberate and controlled.
Pressing The Foot Pedal
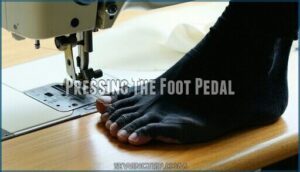
Now with your fabric positioned correctly, you’re ready to master foot pedal control. Think of the foot pedal like your car’s gas pedal. Light pressure gives you smooth starts. Heavy pressure creates jerky movements that can mess up your stitching.
Start with gentle pressure to maintain consistent speed. Keep your heel planted on the floor. Use your ankle for precise speed control. This pedal technique helps you develop a steady sewing rhythm.
Good foot pedal control prevents fabric tension problems. The presser foot works best when your sewing machine moves at steady speeds. Practice this pedal technique on scrap fabric first. Your threading and speed control will improve with consistent practice, leading to better sewing machine performance and steady speeds.
Securing The Start and End of Seams
When you start sewing, backstitching creates the foundation for seam security that prevents unraveling. Begin by stitching forward 2-3 stitches then engage your reverse lever. This thread locking technique reinforces your work.
- Start strong – Forward stitch then backstitch for stitch reinforcement
- Maintain fabric alignment – Keep your material steady during the process
- Use proper thread tension – Prevents loose or tight stitches
- Practice seam finishing – Clean edges look professional
- Master sewing machine stitches – Different fabrics need different approaches
Understanding sewing machine stitches is essential for achieving professional results.
Troubleshooting and Maintenance
Even experienced sewers encounter machine problems from time to time. Learning basic troubleshooting and maintenance keeps your machine running smoothly and prevents costly repairs.
What to Do When The Thread Breaks
When thread breaks during sewing, stop immediately and check your needle.
A damaged or wrong-sized needle causes most thread breaking issues.
Remove the broken thread completely and inspect your tension settings.
Improper tension adjustment creates stress that snaps thread.
Follow your rethreading steps carefully through each guide point.
Quality thread management prevents future breakage causes and keeps your thread repair simple.
How to Fix a Jammed Machine
If you just handled thread breaking, a sewing machine jammed is next on the troubleshooting list.
Turn off the power. Gently pull out stuck fabric. Use Thread Removal to clear tangles from the bobbin area.
Remove the bobbin for Bobbin Repair. Clean out lint for Jam Clearance.
Rethread everything. If the machine still acts up, professional Machine Reset or Tension Adjustment may be needed.
What to Do When The Needle Breaks
Needle breakage happens when you push your machine too hard or use incorrect settings. Sewing Safety starts with unplugging your machine before investigating.
Common Breakage Causes include:
- Hitting pins while stitching at high speed
- Using wrong needle selection for thick fabrics
- Loose needle installation during Needle Replacement
- Forcing fabric through without proper Needle Care
Check your sewing machine needle size matches your fabric weight. Replace bent needles immediately for proper sewing machine maintenance.
How to Clean The Sewing Machine
Regular cleaning prevents costly repairs and guarantees smooth operation.
Unplug your machine before starting any maintenance work.
| Cleaning Task | Frequency |
|---|---|
| Lint Removal | After every 2-3 bobbins |
| Dust Cleaning | Weekly with regular use |
| Machine Oil application | Every 3-4 bobbins (if required) |
| Bobbin Care cleaning | During each bobbin change |
| Needle Maintenance check | Every 6-8 hours of sewing |
Remove the needle and presser foot for complete access.
Use a soft brush to sweep lint from feed dogs and bobbin areas.
Wipe exterior surfaces with a damp cloth and mild soap.
Apply sewing machine oil only where your manual specifies – excess oil stains fabric.
The sewing machine needs regular maintenance checks to guarantee peak performance.
Common Mistakes to Avoid
Now you’ve got your machine sparkling clean. Let’s tackle the mistakes that can turn your sewing session into a frustrating nightmare.
Beginners often make simple errors that damage machines or ruin projects. Incorrect Threading tops the list because it causes 80% of machine problems. Thread your machine slowly and double-check each step against your manual.
Tension Issues create puckered or loose stitches. Adjust upper thread tension gradually rather than making dramatic changes. Bobbin Problems happen when you wind unevenly or insert incorrectly.
Fabric Handling mistakes include pulling or pushing against feed dogs. Let the machine do the work. Needle Errors occur when you mismatch needle size to fabric weight.
Here are five sewing machine common issues to watch for:
- Threading the machine backward or skipping tension discs
- Using old or bent needles that skip stitches
- Forcing thick fabric through without proper needle adjustments
- Ignoring unusual sounds that signal mechanical problems
- Sewing over pins instead of removing them first
Master these basics and you’ll avoid most sewing machine troubleshooting headaches.
Frequently Asked Questions (FAQs)
What is a sewing machine?
Think of your sewing machine as your personal textile robot that won’t rebel against you.
This mechanical marvel uses a needle, bobbin, and thread to create interlocking stitches, transforming fabric into finished projects with precision.
How to prepare the sewing machine for sewing?
Plug in your machine and turn it on.
Thread the spool through guides to the needle. Wind and insert the bobbin correctly.
Lower the presser foot before sewing to avoid tangles.
What are the main uses of a sewing machine?
Forget endless frustration with hand-stitching! You’ll use sewing machines for creating garments, mending clothes, hemming pants, crafting quilts, making home decor, and joining fabric pieces with professional speed and precision.
Why should you learn how a sewing machine works?
Understanding how your sewing machine works gives you control over troubleshooting problems, adjusting settings for different fabrics, and achieving professional results instead of fighting mysterious malfunctions.
Can I teach myself to use a sewing machine?
You can teach yourself to use a sewing machine with practice and patience. Start with threading and basic straight stitches on scrap fabric before tackling real projects.
How to sew step by step instructions?
Sewing becomes incredibly simple once you’ve mastered the basics.
Thread your machine, position fabric under the presser foot, select straight stitch, and gently press the pedal while guiding fabric steadily forward.
What are three important rules when using a sewing machine?
Always lower your presser foot before starting – this prevents 70% of thread tangles.
Keep fingers away from the moving needle.
Clean lint from the bobbin area regularly to avoid machine jams and maintain smooth operation.
Is it difficult to use a sewing machine?
Think it’s too intimidating to tackle?
Using a sewing machine isn’t difficult once you master basic setup and threading.
Most beginners struggle initially with threading and tension, but with practice, you’ll develop muscle memory for smooth operation.
What is the easiest thing to sew as a beginner?
Start with simple straight-line projects like cloth napkins or pillowcases. They’re forgiving and only need basic stitches. You’ll master your machine’s fundamentals while creating something useful for your home.
How do you sew on a machine for beginners?
Thread your machine from spool to needle following the threading guide.
Insert the bobbin into its case.
Place fabric under the presser foot and start sewing slowly with gentle foot pedal pressure.
Conclusion
Mastering how to use a sewing machine is like learning to ride a bike – it takes practice but becomes second nature.
You’ve learned the essential components, threading techniques, and basic stitching methods.
Remember to start slowly and focus on consistent fabric guidance.
Regular maintenance prevents most problems before they occur.
With these fundamentals mastered, you’re ready to tackle more advanced projects.
Keep practicing these techniques and soon you’ll create professional-quality items with confidence and precision.
- https://treasurie.com/
- https://www.youtube.com/treasurie
- https://sewmeyourstuff.wordpress.com/2012/08/18/intro-to-sewing-machines-the-basic-parts/
- https://ucanr.edu/sites/default/files/2016-03/235939.pdf
- https://www.vintagesingerparts.com/blogs/sew-central/the-complete-guide-to-identifying-and-replacing-sewing-machine-parts

