This site is supported by our readers. We may earn a commission, at no cost to you, if you purchase through links.
Your zigzag stitch width should sit between 2-4mm for finishing edges without fraying. Match your needle to your fabric – use 80/12 universal needles for everyday cotton, and 70/10 ballpoint needles for stretchy knits.
Cotton thread pairs best with natural fabrics, while polyester works great with synthetic materials. Test your settings on fabric scraps first – it’s like a dress rehearsal that saves your actual project from disasters.
The real magic happens when you understand why certain combinations work together, and getting these basics right is crucial for a successful project, making it a key concept to master for beginners.
Table Of Contents
- Key Takeaways
- Essential Sewing Machine Stitches for Beginners
- Stitch Length, Width, and Tension Basics
- Choosing The Right Needle and Thread
- Key Sewing Machine Features and Adjustments
- Troubleshooting Common Sewing Machine Issues
- Safety, Maintenance, and Best Practices
- Frequently Asked Questions (FAQs)
- Conclusion
Key Takeaways
- Start with basic settings: 2.5mm straight stitch length, medium tension (4-5), and 80/12 universal needles for most cotton fabrics to avoid common beginner frustrations
- Match your needle to fabric type: use ballpoint needles for knits to prevent snags, and always test your settings on fabric scraps before starting your actual project
- Master tension control first: proper thread tension prevents puckering and thread bunching, so adjust gradually and test until upper and lower threads meet perfectly in the fabric center
- Keep your machine maintained: clean after major projects, oil every three bobbin changes, and change needles every 8-10 hours of sewing to prevent skipped stitches and poor stitch quality
Essential Sewing Machine Stitches for Beginners
When you’re starting out, mastering just a few basic stitches will handle 90% of your sewing projects.
You’ll mainly use straight stitches for seams and hems, zigzag for stretchy fabrics, and buttonhole stitches for functional openings.
Straight and Zigzag Stitches
You’ll use straight stitch and zigzag stitch constantly throughout your sewing journey.
The straight stitch forms the backbone of most projects, while zigzag stitch prevents fabric edges from fraying and accommodates stretch.
Master these three essentials:
- Straight stitch – Use 2.5mm stitch length for medium-weight fabric types
- Zigzag stitch – Adjust stitch width between 2-4mm for edge finishing
- Tension control – Keep at 4-5 for balanced stitches
Perfect your sewing speed gradually to maintain control.
Stretch and Buttonhole Stitches
Tackling knit fabrics without stretch stitches is like trying to hold water in your hands—it just won’t work.
Learning to sew without understanding your machine is like driving blindfolded—you’ll crash before you reach your destination
Your sewing machine’s stretch stitch creates elastic seams that move with fabric stretch, preventing those annoying pops when you pull on sleeves.
For buttonhole settings, use the one-step function if available. Adjust stitch tension to prevent puckering, and remember—tension control is your best friend when working with stretchy materials and buttonhole stitches.
Understanding the best sewing options is essential for mastering various sewing techniques.
Decorative Stitches and Their Uses
Decorative stitches transform ordinary projects into stunning showpieces.
Your machine likely offers scallop stitch for elegant edges, satin stitch for smooth fills, and appliqué settings for fabric layering.
These embroidery-style options add personality to quilting, clothing, and home décor.
Start with simple patterns on practice fabric—decorative stitches can be finicky.
Once you’ve mastered basic sewing machine settings, these creative stitch types become your artistic playground for personalized touches.
Stitch Length, Width, and Tension Basics
Mastering your machine’s basic settings will transform your sewing from frustrating to fantastic in just a few adjustments.
You’ll learn when longer stitches work best for basting and shorter ones create stronger seams, plus how proper tension prevents that annoying fabric puckering that makes projects look homemade.
You’ll also understand how these adjustments can make a significant difference, with fantastic results in your sewing projects.
Adjusting Stitch Length for Projects
Two simple rules transform your sewing game: match stitch length to fabric thickness and project goals.
Standard 2.5mm works for most fabrics, but delicate silk needs shorter 1.5-2mm stitches for seam strength, while heavy denim handles longer 3-4mm settings.
Testing your sewing machine settings on scraps prevents disasters and guarantees perfect project outcomes every time.
When to Change Stitch Width
Stitch width settings dramatically change your sewing machine’s capabilities beyond basic straight lines.
You’ll adjust this dial whenever you’re working with different fabric types or want specific edge finishing results.
Here’s when to change your stitch width:
- Zigzag stitches – Increase width for stretchy fabrics or securing seam allowances
- Edge finishing – Use medium width to prevent fraying on woven materials
- Decorative work – Vary width for artistic effects and embellishment details
Master these sewing machine settings to improve stitch quality effortlessly.
Selecting The Right Tension Setting
Getting tension control right feels like finding your sewing sweet spot.
Start with your machine’s default setting—usually 4 or 5—then make small tension adjustments based on fabric stretch and weight.
Lightweight fabrics need lower thread tension (2-4), while heavy materials require higher settings (6-8).
Test stitch balance on scraps before starting your project to avoid needle tension headaches later.
How Tension Affects Stitch Quality
Now that you’ve got the right tension setting, watch how it transforms your stitch quality.
Proper tension control creates balanced stitches where upper and lower threads meet perfectly in the fabric’s center.
Too tight? Your fabric will pucker like a frown. Too loose? Threads bunch underneath, creating messy loops.
Perfect thread tension means your seams lie flat, stretch nicely with fabric movement, and look professional every time.
Understanding thread tension basics is essential for achieving consistent and high-quality stitches.
Choosing The Right Needle and Thread
Getting the right needle and thread combination can make the difference between professional-looking seams and frustrating tangles that’ll have you questioning your sanity.
You’ll discover that matching these essential components to your fabric isn’t rocket science—it just takes knowing a few simple rules that’ll save you from costly mistakes.
Needle Sizes and Number Meanings
Needle sizes aren’t rocket science, but they’ll make or break your projects.
The number system works like this: smaller numbers mean finer needles. A 60/8 needle is ultra-fine for delicate silk, while a 100/16 handles heavy denim.
The first number represents European sizing, the second shows American. Understanding needle selection helps you match the right tool to your fabric weight, preventing skipped stitches and ensuring quality results every time.
Choosing the correct sewing machine needles is essential for achieving professional-looking stitches and ensuring the best outcome for your projects, which is why correct needle choice is vital.
Matching Needle to Fabric Type
Successfully matching your needle to fabric type prevents frustrating issues like skipped stitches, puckering, and thread breakage.
Think of needles as specialized tools—each fabric density requires its perfect partner for smooth sewing results. Understanding the needle selection process is essential for achieving excellent results.
- Universal needles (80/12, 90/14) work best for standard cotton and woven fabrics, offering versatility for most beginner projects.
- Ballpoint needles (70/10, 80/12) slide between knit fibers without snagging, preventing runs in stretchy materials.
- Microtex needles (60/8, 70/10) pierce delicate silk and lightweight synthetics cleanly without creating visible holes.
- Denim needles (90/14, 100/16) power through heavy canvas and multiple fabric layers with their reinforced blade-like points.
Thread Types and Their Best Uses
Thread selection makes or breaks your sewing project.
Cotton threads work best with natural fabrics like cotton and linen.
Polyester threads offer durability for synthetic materials and everyday wear.
Silk threads create beautiful finishes on delicate fabrics.
Match your thread type to your fabric—cotton threads for cotton, synthetic fibers for stretchy materials, and specialty threads like nylon for heavy-duty projects.
| Thread Type | Best Uses |
|---|---|
| Cotton threads | Natural fabrics, quilting, lightweight projects |
| Polyester threads | Synthetic fabrics, heavy-duty sewing, everyday wear |
| Silk threads | Delicate fabrics, luxury items, invisible mending |
| Nylon threads | Heavy materials, outdoor gear, upholstery |
| Wool blends | Woolens, sweater knits, winter garments |
Quality matters more than price—cheap thread breaks easily and creates frustrating tangles.
Key Sewing Machine Features and Adjustments
Your machine’s built-in features can transform your sewing from stressful to satisfying with just a few simple adjustments.
Learning to use presser foot pressure, automatic threaders, and basic attachments will save you time and prevent those "oops" moments that make you want to throw fabric across the room, which can be very frustrating.
Presser Foot Pressure and Adjustments
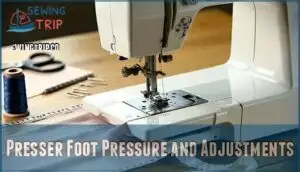
Right from the start, presser foot pressure controls how firmly your machine grips fabric during sewing.
Adjust it using the dial near your presser foot—lower pressure for delicate fabrics prevents puckering, while higher pressure keeps thick layers moving smoothly.
Proper foot adjustment guarantees even fabric feeding and prevents skipped stitches.
Test your pressure control on scraps first, watching for consistent stitch regulation and balanced tension throughout your seams.
Understanding the importance of presser foot pressure is vital for achieving professional-looking stitches and preventing common sewing issues, such as puckering and skipped stitches, by ensuring consistent stitch regulation and balanced tension.
Using Automatic Threader and Cutter
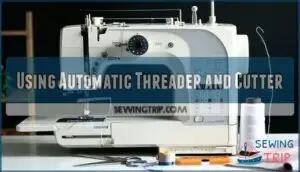
Like turning the key in your car’s ignition, your automatic threader makes Thread Management effortless with one simple button press.
Most machines thread themselves when you guide the thread through designated hooks. Auto Threading saves time and reduces eye strain, especially in dim lighting.
Check your Cutter Settings to verify clean thread cuts after each seam. The built-in Cutter Adjustment prevents fraying and maintains thread quality throughout your projects.
Special Attachments for Beginners
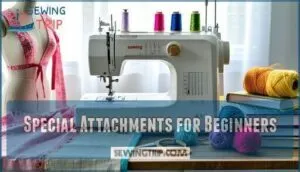
Attachments transform your machine into a specialized toolkit. Each foot serves a specific purpose, making challenging tasks surprisingly manageable when you know which tool to grab.
- Sewing Feet: Zipper attachments guide fabric smoothly around zippers, while quilting feet maintain consistent spacing
- Edge Guides: Keep seams perfectly straight and uniform throughout your project
- Ruffler Attachments: Create gorgeous pleats and gathers without hand-manipulation
- Interfacing Tools: Apply fusible materials evenly for professional-looking results
- Embroidery Hoops: Stabilize fabric for decorative stitching and monograms
These sewing machine attachments aren’t luxury items—they’re problem-solvers that’ll save you time and frustration. Understanding various sewing machine feet is essential for selecting the right tools for your projects.
Troubleshooting Common Sewing Machine Issues
Even the best sewing machines can act up, but don’t panic when yours starts misbehaving.
These common hiccups usually have simple fixes that’ll get you back to stitching smoothly in no time.
Preventing Fabric Puckering and Thread Bunching
When fabric puckering and thread bunching turn your sewing dreams into nightmares, tension control becomes your best friend.
Start by checking your thread tension settings—excessive tightness creates that dreaded gathering effect.
Lower both needle and bobbin tensions to minimal balanced levels, then test on fabric scraps.
Poor thread quality causes friction and bunching, so invest in good materials.
Verify proper fabric feeding by adjusting presser foot pressure for your material’s thickness.
Mismatched needle sizes create stitch imbalance and puckering.
Follow your machine’s threading diagram exactly—skipped guides spell disaster.
Clean lint from tension discs regularly, and replace needles after eight hours of use to maintain perfect stitch balance.
Understanding fabric puckering issues is vital to achieving professional-looking stitches.
Fixing Skipped Stitches and Seam Popping
Most skipped stitches stem from using the wrong needle for your fabric choice. When your machine skips stitches on knits, switch to a ballpoint needle—it slides between fibers instead of piercing them.
For seam popping, you’re likely using straight stitches on stretchy fabrics. Here’s the fix: use stretch stitches or narrow zigzag stitches instead.
Check your thread tension settings too—overly tight tension causes thread breakage and skipped stitches. Adjust your stitch length to 2.5-3mm for most fabrics.
If problems persist, rethread your machine completely. Sometimes the simplest stitch repair involves starting fresh with proper sewing machine settings. Regular machine maintenance checks can help prevent common issues like skipped stitches and thread breakage.
Safety, Maintenance, and Best Practices
Taking care of your sewing machine isn’t just about keeping it running—it’s about protecting your investment and ensuring safe, enjoyable sewing sessions.
You’ll find that a well-maintained machine with proper safety settings gives you the confidence to tackle any project without worry.
Using Safety Locks and Speed Controls
Your sewing machine’s safety features aren’t just fancy extras—they’re your best friends when you’re learning.
Start with the slowest speed setting and gradually increase as you gain confidence.
Most machines have safety lock mechanisms that prevent accidental starts, so familiarize yourself with these controls.
Use automatic shut-off features during breaks, and don’t skip those calibration checks—they keep everything running smoothly.
Regular Cleaning and Lubrication
Think of machine oil as your sewing buddy’s lifeline.
Clean your machine after every major project using a soft brush for dust removal around feed dogs and bobbin areas.
Apply dedicated sewing machine oil every three bobbin changes, wiping excess to prevent lint attraction.
Regular filter cleaning and following proper maintenance schedules keep your machine purring smoothly for years, ensuring it remains a reliable sewing buddy.
Following Maintenance Timers and Logs
Most modern machines include digital maintenance timers that’ll ping you every 20 hours of use—like your phone reminding you to stand up.
These maintenance schedules prevent 44% more breakdowns among beginners.
Check your machine’s timer settings and enable error logging if available.
Log tracking helps spot patterns before they become costly problems.
Regular calibration checks keep everything running smoothly, and using digital maintenance timers can significantly improve machine upkeep.
Tips for Confident and Stress-Free Sewing
Beyond following basic sewing machine guides, building real sewing confidence comes from smart preparation and community support.
Master these fundamentals for stress-free projects:
- Start with fabric preparation – Pre-wash and press materials before cutting
- Build machine familiarity – Practice stitch settings and tension adjustment on scraps first
- Focus on error prevention – Test all sewing machine settings for beginners before starting
- Join a sewing community – Connect with others who understand your learning journey
Frequently Asked Questions (FAQs)
How do you set up a sewing machine?
Like threading your grandmother’s needle with trembling hands, you’ll start by plugging in your machine and raising the presser foot.
Insert thread through guides, tension discs, and needle.
Wind bobbin, load it below, then select basic straight stitch settings.
What are the different types of Stitch settings on a sewing machine?
Your sewing machine offers three main stitch categories: straight stitches for basic seams, zigzag stitches for stretch fabrics and edge finishing, and decorative stitches for creative embellishment and specialized techniques.
How do I choose a sewing machine?
Finding your sewing partner is like finding the perfect dance mate.
Consider basic stitches first—straight, zigzag, and buttonhole cover most projects.
Look for intuitive controls, reliable brands like Brother or Singer, and mechanical machines over computerized for learning.
How do I prepare my sewing machine for a sewing project?
Start by threading your machine correctly and installing the right needle for your fabric. Test your stitch settings on scrap fabric first, then adjust tension and stitch length as needed.
How do I set up my first CNC machine?
CNC setup starts with checking power connections and safety switches. Make sure the correct cutting tools are in place, then clean the machine thoroughly and align your workpiece properly.
How do I prepare my sewing machine for stitching?
Before you begin your fabric adventure, you’ll want to prepare your trusty machine properly.
Thread your needle, check tension settings, select appropriate stitch length, and test on scrap fabric first—it’s like warming up before exercise, to ensure a smooth start, with proper preparation being key.
How to set up a sewing machine step by step?
Thread your machine, choose your fabric-appropriate needle, set basic straight stitch with medium tension, test on scrap fabric first, then you’re ready to sew your project successfully.
How do I set up my machine initially?
Plug in your machine and turn it on.
Check that the safety lock is disabled.
Set speed to level 2-3 for control.
Thread the needle and bobbin, then test on scrap fabric first.
What speed should I start sewing at?
Speed’s your friend when starting out—set your machine to 1 or 2 on that speed dial. You’ll thank yourself later when you’re not wrestling runaway fabric across the table.
How often should I change my needle?
You’ll want to change your needle every 8-10 hours of sewing or after finishing each project.
Dull needles cause skipped stitches, fabric snags, and thread breaks—basically your machine’s way of crying for help.
Conclusion
Picture yourself threading a needle with steady hands, no longer fumbling with mysterious dials and buttons.
You’ve discovered the secrets of machine settings for beginners, transforming your sewing from guesswork into confident craftsmanship.
Remember, every expert seamstress started exactly where you’re standing now – with basic stitches, proper tension, and matched needles.
Don’t rush the learning process; even the most intricate quilts begin with a single, perfectly adjusted straight stitch.
Keep practicing these fundamentals until they become second nature.
- https://nancysnotions.com/choosing-the-best-sewing-needle-for-each-project/
- https://www.thepatchworkshop.co.uk/blogs/news/which-size-needles-should-i-use-for-which-fabric
- https://corefabricstore.com/blogs/tips-and-resources/how-to-choose-the-perfect-machine-needle-for-your-next-sewing-project
- https://sewingcraft.brother.eu/en/blog/tutorials/2022/how-to-choose-the-right-needle
- https://support.spoonflower.com/hc/en-us/articles/208352886-Recommended-Needles-and-Threads

