This site is supported by our readers. We may earn a commission, at no cost to you, if you purchase through links.
You’ll love this technique on chiffon, silk, and cotton voile where bulky finishes would create unwanted ridges. The key is maintaining consistent fold width while preventing fraying—perfect for curved necklines, armholes, and delicate hem edges.
Start by pressing your fold carefully, then use matching thread with appropriate tension settings. The double-fold method works best for beginners, though single folds can work with proper seam finishing.
This technique transforms homemade garments into boutique-quality pieces that’ll have everyone asking where you shopped. Master the basics first, then tackle those tricky curves and bias edges, and you will achieve a professional-looking finish with precise stitching.
Table Of Contents
Key Takeaways
- You’ll get professional results on lightweight fabrics – Narrow hems work best on chiffon, silk, and cotton voile, where they create clean edges without adding bulk that would show through delicate materials.
- Master the double-fold technique first – Fold your fabric ⅛ to ¼ inch twice, maintaining a consistent width while using proper pressing and tension settings to prevent puckering on curves.
- Your machine settings make or break the finish – Use a 3mm stitch length, adjust tension for your fabric weight, and match the thread color perfectly to avoid visible stitches that scream amateur.
- Practice on scraps before tackling your project – Test your folding, pressing, and stitching techniques on leftover fabric to avoid costly mistakes and build the muscle memory needed for consistent results.
Narrow Hem Basics
When you sew a narrow hem, you’re creating a tiny, double-folded edge that keeps fabric from fraying while looking neat on both sides.
This method works especially well for lightweight and curved projects, like shirt tails or circle skirts, where bulky seams just won’t cut it, making it a great choice for projects that require a narrow hem.
Definition and Purpose
Starting with the basics, a narrow hem is a precise edge finishing technique that gives your fabric edge a clean, crisp look.
The main purpose served is to control fraying and maintain fabric flow, especially in lightweight garments.
This hem finish is a go-to in sewing techniques when you want a professional seam finish without adding bulk.
The rolled hem foot simplifies this process considerably, making it easier to achieve a clean look.
Suitable Fabrics and Projects
In the case of narrow hem seam finish, choose lightweight fabrics and sheer materials for best results.
You’ll find this technique shines in these projects:
- Flowy garments like circle skirts and camis.
- Home decor, such as napkins or tablecloths.
- Delicate blouses needing edge durability.
Stick to fabric types that press easily for crisp, professional edges.
Benefits of Narrow Hems
A narrow hem is your secret weapon for a clean fabric finish, especially on a tricky curved edge finish.
You’ll sidestep length discrepancies and keep lightweight garments flowing, not bulky.
This seam finish gives you a neat hem that lasts, resists fraying, and delivers professional results.
Think of it as the gold standard for a durable hem and crisp edge finish.
Common Applications
You’ve seen the benefits—now, let’s talk about where you’ll use a narrow hem.
It’s the secret weapon for:
- Curved Edge Hems on circle skirts or shirt tails.
- Lightweight Garments like blouses and camis.
- Sheer Fabric Hems, perfect for scarves and ruffles.
- Industrial Applications and Home Decor, from napkins to tablecloths—no more bulky seam finish or wobbly rolled hem!
Creating Narrow Hems
When you’re ready to create narrow hems, you’ll need to follow a few precise steps for a neat, professional finish.
You’ll use a serger, careful folding, the right stitch length, and steam pressing to keep your edges crisp—no magic wand required.
Serger Requirements
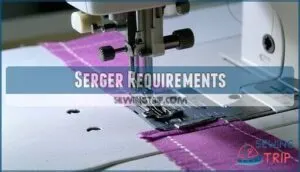
You’ve picked the perfect project and fabric—now, let’s talk serger requirements. For crisp narrow hems, use lightweight serger thread types, adjust differential feed settings to avoid puckering, and check serger foot compatibility for curved edge serging.
Many sewers find success using specialty serger threads for rolled hems. Keep blades sharp and don’t skip regular serger maintenance needs.
Here’s a quick guide:
| Serger Part | Why It Matters | Watch For |
|---|---|---|
| Thread Type | Controls bulk/finish | Fraying, snags |
| Differential Feed | Smooth edges | Lettuce edging |
| Cutting Blade | Clean seam finish | Dullness, jams |
This guide highlights the importance of differential feed and proper thread type for a clean finish, and reminds you to check for issues like dullness and fraying.
Folding and Pressing Techniques
After serging your curved edge, you’re ready to master the folding dance that creates a perfect narrow hem.
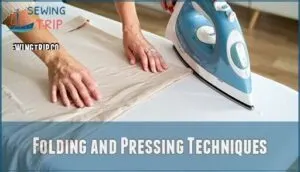
Press the fabric along the serged stitches using your iron at the right temperature for your material. Steam usage helps relax fibers for easier edge alignment.
Work in small sections, finger-pressing first before hitting it with heat. A specialized sewing tool can greatly simplify this process.
This fabric folding method prevents stretching while you seam finish each curve, ensuring a perfect narrow hem and allowing you to master the folding dance with ease.
Stitch Length and Tension
Achieving ideal length and tension prevents your narrow hem from looking amateur.
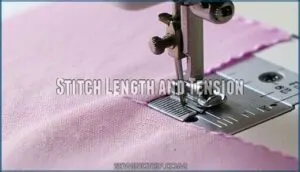
Set your stitch length to 3mm—this prevents puckering on curved hems and keeps fabric from flipping after washing.
Adjust stitch tension based on fabric type: lighter fabrics need gentler tension to avoid pulling.
Test your sewing machine settings on scraps first to avoid tension problems that create wavy edges, ensuring a professional finish with proper stitch length.
Steam Pressing for Shape Restoration
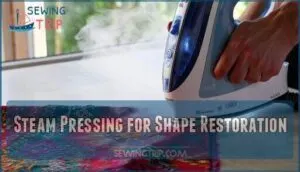
Steam pressing completes your narrow hem journey, transforming stretched fabric back to its original grace. This heat-and-moisture combo locks in your professional finish while smoothing out any distortion from stitching.
- Hold your iron 2-3 inches above the fabric, releasing controlled steam bursts
- Press lightly with the iron tip, avoiding heavy pressure that flattens delicate textures
- Work in sections, allowing each area to cool before moving to prevent fabric stretching
- Use a pressing cloth on silk or synthetic fabrics to prevent shine and heat damage
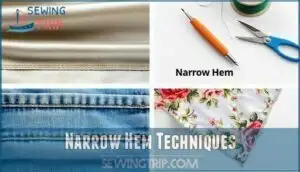
Narrow Hem Techniques
You’ll discover four essential narrow hem techniques that transform your sewing from basic to professional-quality finishing.
These methods handle everything from tricky curved edges to sharp corners, giving you the skills to create clean, durable hems on any project, using complete concepts and professional-quality finishing.
Double-Fold Method
The double fold narrow hem creates a clean finish by folding fabric twice, concealing raw edges completely.
Start with proper fabric consumption planning – you’ll need 5/8" seam allowance for this technique.
Work in small sections, finger-pressing each fold without heat initially, and your presser foot guides continuous sewing along the second fold, maintaining even stitch placement throughout the hemming tutorial process, which involves a clean finish.
Basting and Trimming
Basting creates your foundation for narrow hem success. You’ll baste with the longest straight stitch at 3/8" seam allowance, then fold fabric toward the wrong side along this basting line. Press with a hot iron for precise creases.
Here’s your basting accuracy roadmap:
- Baste first – Use longest stitch length at 3/8" seam allowance for guided folding
- Trim smart – Cut seam allowance close to second stitch line, avoiding main fabric
- Press between steps – Hot iron creates sharp creases that make folding easier
- Corner trimming – Snip at 45-degree angle for bulk reduction and clean edges
This sewing tutorial method prevents the "winging it" approach that creates uneven results. Skip basting and you’ll triple your ironing time while fighting wonky folds. The second stitch goes 1/8" from your basting line, creating the seam finish foundation for your final narrow hem fold.
Corner Handling and Bulk Reduction
Trimming corners prevents unsightly bulges that scream "homemade disaster."
Cut diagonal notches at each corner, removing small triangles of fabric within your seam allowance. This layer trimming technique reduces bulk by up to fifty percent.
For mitered corners, fold fabric at forty-five-degree angles before final stitching.
These corner flattening methods create professional-looking seam finishes that’ll make your narrow hem sing.
Pressing for Crisp Finish
After reducing bulk at corners, proper pressing transforms your narrow hem from adequate to exceptional.
The right iron temperature and steam usage create lasting creases that won’t shift during wear or washing.
- Set your iron to the fabric’s recommended temperature – too hot scorches delicate materials, too cool won’t set crisp edges
- Use steam strategically on the folded edge – direct steam helps fabric stability while avoiding water spots on finished surfaces
- Press with a pressing cloth for sheer fabrics – protects delicate materials while ensuring your neat hem maintains its professional appearance.
A tailor’s ham can help with curved areas.
Sewing Narrow Hems
You’ll need the right settings and techniques to achieve clean, professional narrow hems on your garments.
Proper thread selection, stitch adjustments, and finishing methods make the difference between amateur and expert-level results, which requires careful consideration of complete concepts.
Thread Selection and Visibility
Choose Thread Color that matches your fabric perfectly—visible stitches scream amateur hour.
Thread Weight matters more than you’d think; lighter weights create delicate narrow hems while heavier ones add structure.
Match Fiber Type to your fabric for best results.
Consider Sheen Level carefully—matte threads disappear into most fabrics, while shiny ones highlight every stitch.
Your sewing machine handles different threads differently, so test first.
Perfect Stitch Appearance starts with smart thread choices.
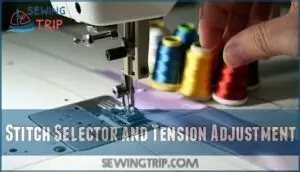
Stitch Selector and Tension Adjustment
When fine-tuning your sewing machine for narrow hems, adjust stitch width and stitch length to match your fabric weight.
Set bobbin tension properly to prevent puckering—the thread should pull smoothly without excessive resistance.
Test fabric feed on scraps first, ensuring even movement through the machine.
Match thread pairing with your fabric for best results, as uneven stitches often indicate tension problems.
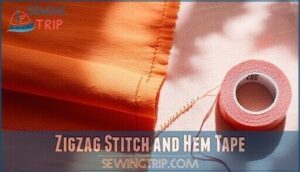
Zigzag Stitch and Hem Tape
Anyone can master zigzag stitch applications for professional hemming results.
Set your stitch width to 2.5-4.0mm for ideal seam finishing on lightweight fabrics.
Hem tape types include fusible and sew-in varieties, with tape durability lasting through multiple washes.
Consider the impact of stitch width for different fabric types.
Decorative zigzag stitches prevent fraying while maintaining fabric flexibility, making this combination perfect for curved hems requiring both security and movement.
Binding With Bias Tape
Bias tape transforms raw edges into polished, professional finishes that rival ready-to-wear garments.
This versatile seam finishing technique works brilliantly on curved edges where traditional hems might pucker or distort.
Here’s your bias tape binding roadmap:
- Select appropriate bias tape types – single-fold for lightweight fabrics, double-fold for medium weights
- Master mitered corners using the fold-and-stitch method for crisp intersections
- Navigate curved edges by easing the tape gently around bends without stretching
- Create decorative binding with contrasting colors or prints for visual interest
- Apply binding applications consistently – encase raw edge completely, stitch close to inner fold
This garment construction method excels in sewing tutorials for beginners because it forgives minor imperfections while delivering stunning results on everything from armholes to necklines.
Mastering Narrow Hems
You’ll transform from a hemming novice to a narrow hem expert with consistent practice and attention to detail.
Mastering this technique requires understanding common pitfalls like puckering on curves and knowing how to adjust your machine settings for different fabric weights, which is crucial for achieving professional results with consistent practice.
Practice and Precision
Like learning to ride a bike, mastering narrow hems requires consistent stitching and steady fabric handling.
Start with scrap material to perfect your seam allowance precision and pressing technique.
Professional finish demands corner perfection through practice—rolled hem and baby hem sewing techniques for beginners become second nature with repetition.
Each attempt builds muscle memory, transforming hesitant movements into confident sewing precision that rivals ready-to-wear garments.
Common Challenges and Solutions
Several common issues can derail your narrow hem project, but smart solutions keep you on track. Twisted seams and uneven stitching often plague beginners, while bulk management and thread tension adjustments separate novice from expert results. A rolled hem foot can greatly simplify the process.
- Uneven stitching on curved edges: Use stabilizer underneath thin fabrics and reduce presser foot pressure to prevent fabric stretching during sewing
- Twisted seams from poor feeding: Push fabric evenly as it feeds under the foot, avoiding pulling or tugging that creates diagonal distortion
- Bulk management at corners: Trim seam allowances close to stitching and press carefully between each fold to eliminate excess fabric thickness
- Thread tension problems: Adjust tension higher for lightweight fabrics and match stitch length to prevent puckering on bias-cut or curved baby hem applications
Tips for Curved and Bias Edges
Curved edges demand patience and precision when hemming curves.
Start by stabilizing bias edges with stay-stitching to prevent unwanted stretching.
Use a pressing ham for easing curves while steam-pressing helps shape the fabric naturally.
Pin perpendicular to the hemline every inch, maintaining consistent width.
For bias stabilizing, mist lightly before pressing.
Clip seam allowances on inside curves to prevent puckering, preventing ripples through careful tension control during stitching.
Achieving Professional Results
Professional narrow hems demand consistent stitching and accurate folding.
Master these sewing techniques for professionals by controlling thread tension and perfecting your pressing techniques. Corner perfection comes from practice—each shell hem teaches you something new about achieving that coveted clean finish.
- Feel the satisfaction of flawless hems that rival ready-to-wear garments
- Experience the confidence that comes from mastering advanced sewing finish methods
- Enjoy the pride of creating professional-quality results every single time
Frequently Asked Questions (FAQs)
What does "narrow hem" mean?
A narrow hem is a delicate finishing technique that creates an ultra-thin folded edge, typically 1/4 inch or less.
You’ll fold the fabric twice inward, creating a clean, professional finish that’s perfect for lightweight fabrics and curved edges.
How to make a 5 cm narrow hem?
Like threading a needle, creating a 5 cm narrow hem requires precision.
Fold fabric 5 cm to wrong side, press firmly.
Fold again, creating double thickness.
Stitch close to inner fold edge using straight stitch.
What is a hem-finished seam?
A hem-finished seam combines seaming and hemming in one step.
You’ll stitch the seam, then fold and press the seam allowances to create a finished edge that prevents fraying while adding structure.
Can narrow hems work on knit fabrics?
Knit fabrics can work with narrow hems, but they’re trickier than wovens. You’ll need to handle the stretch carefully to avoid wavy edges and use proper techniques to prevent rolling.
How do you fix puckered narrow hems?
Puckered hems plague 40% of home sewers, but you’ll conquer this with proper tension adjustment.
Reduce your upper thread tension, use a slightly longer stitch length, and press lightly while sewing to prevent fabric distortion, which will help you conquer puckered hems.
Whats the minimum seam allowance needed?
You’ll need a 5/8-inch seam allowance for narrow hems. This allowance gets consumed during the double-folding process, so don’t skimp on fabric when cutting your pieces initially.
Are there alternatives to serger finishing?
Surprisingly, you’ll find several alternatives that work just as well.
Try pinking shears for lightweight fabrics, zigzag stitching along raw edges, or applying narrow bias tape.
Each method prevents fraying effectively without requiring specialized equipment.
How do you remove narrow hems later?
Carefully remove stitching with a seam ripper, starting from the final hem fold.
Work slowly to avoid fabric damage.
Press out creases with steam.
You’ll need to refinish raw edges since narrow hems consume fabric permanently, which may require additional care to avoid further damage.
Conclusion
Perfect narrow hem seam finish sewing transforms delicate fabrics into professional-looking garments with clean, crisp edges.
You’ve learned the essential techniques—from proper pressing and fold widths to tension adjustments and thread selection.
Whether you’re working with flowing chiffon or structured cotton voile, these methods guarantee your hems won’t fray or create bulk.
With practice, you’ll tackle curved edges and bias cuts confidently, creating boutique-quality finishes that elevate every project you sew, resulting in a truly professional-looking garment.

