This site is supported by our readers. We may earn a commission, at no cost to you, if you purchase through links.
You’ll stab repeatedly through the wool, compacting and binding it without water or soap—just pure mechanical action.
This modern craft emerged in the 1980s when felting needles became widely available, revolutionizing traditional wet felting methods.
You can create everything from whimsical animals to intricate decorative pieces by layering different wool types and mastering various poking techniques.
The beauty lies in its simplicity: grab some roving, pick up a needle, and watch fluffy chaos become structured art through patience and strategic stabbing.
Table Of Contents
- Key Takeaways
- What is Needle Felting?
- Essential Supplies for Needle Felting
- Choosing The Best Wool for Needle Felting
- Basic Needle Felting Techniques
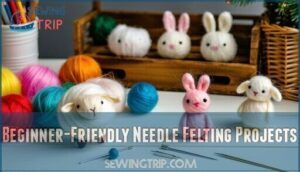
- Beginner-Friendly Needle Felting Projects
- Tips for Successful Needle Felting
- Displaying and Caring for Felted Creations
- Frequently Asked Questions (FAQs)
- Conclusion
Key Takeaways
- You’ll need just four essential supplies to start needle felting: wool roving, barbed felting needles, a protective foam mat, and finger guards to keep your hands safe while stabbing.
- Start with simple flat shapes using cookie cutters before attempting 3D sculptures – this builds your technique and confidence with consistent stabbing motions and proper needle control.
- Choose natural wool like Corriedale or Merino for best results, and avoid synthetic fibers or treated wools that won’t felt properly and can break your needles.
- Use coarse needles (36-gauge) for initial shaping and building structure, then switch to fine needles (38-40 gauge) for smooth finishing touches and detailed work.
What is Needle Felting?
Needle felting transforms fluffy wool into solid sculptures using a special barbed needle that tangles fibers together with each poke.
Transform loose wool into magic with just a needle and determination
You’ll create everything from cute animals to decorative ornaments by repeatedly stabbing wool until it becomes firm and holds its shape, which is the core of the needle felting process.
Definition and History
Needle felting transforms loose wool fibers into solid sculptures through a simple yet magical process.
This fiber art emerged from ancient felting origins, where early civilizations shaped wool using water and pressure.
Modern techniques developed in the 1980s when innovators experimented with barbed needles, revolutionizing wool crafts.
Today, needle felting enjoys global usage as artists worldwide create everything from whimsical creatures to intricate masterpieces using these evolved felting techniques.
How Needle Felting Works
Understanding how your needles work transforms wool into beautiful creations.
Every stab of your felting needle binds wool fibers tighter, building your masterpiece one poke at a time
Each felting needle features tiny barbs that catch wool fibers as you poke.
This needle action creates fiber tangles, gradually building wool density through the felting process.
The repetitive stabbing motion causes fiber matting, compressing loose roving into firm shapes.
Dry needle felting techniques rely on this mechanical tangling to achieve your desired results.
Mastering advanced felting techniques is essential for creating intricate and detailed designs with dry needle felting and understanding the importance of felting techniques.
Needle Felting Vs. Wet Felting
Two different paths lead to the same woolly destination.
While wet felting uses water, soap, and muscle power to create fabric, needle felting relies on dry techniques with specialized tools.
Here’s the key comparison:
- Process: Wet felting involves agitation with moisture, while needle felting uses barbed needles to tangle fibers
- Results: Wet felting creates smooth fabric sheets; needle felting produces sculptural three-dimensional forms
- Tools: Water and soap versus felting needles and foam mats for different crafting techniques
Essential Supplies for Needle Felting
Getting started with needle felting requires just a handful of key supplies that’ll have you creating woolly masterpieces in no time.
You’ll need quality wool roving, the right felting needles, a protective mat, and a few safety accessories to keep your fingers happy while you work.
This will have you creating woolly masterpieces in a short amount of time with the right materials.
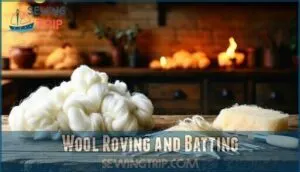
Wool Roving and Batting
Your wool roving serves as needle felting’s foundation material. This unspun fiber comes in two main forms: roving and batting.
Roving features aligned fibers that pull apart easily, while batting offers a looser, cloudier texture perfect for filling larger areas. Understanding the properties of wool roving materials is essential for selecting the right type for your project.
| Aspect | Wool Roving | Wool Batting |
|---|---|---|
| Fiber Structure | Aligned, combed fibers | Loose, carded fibers |
| Best Use | Surface details, colors | Core filling, bulk work |
| Texture | Smooth, rope-like | Fluffy, cloud-like |
| Felting Speed | Slower, precise | Faster, efficient |
| Cost | Higher quality price | Budget-friendly option |
Choose roving for detailed work and batting for your project’s inner structure.
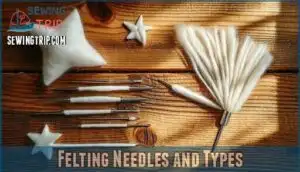
Felting Needles and Types
Felting needles transform loose wool into solid sculptures through their specialized design.
These barbed tools come in different shapes and sizes for specific tasks:
- Triangle needles (36-gauge) – Best for beginners and rough shaping work
- Star needles (38-40 gauge) – Create smoother finishes with faster fiber entanglement
- Reverse needles – Pull fibers outward for fuzzy textures
Choose coarse needles for initial sculpting, then switch to fine gauges for detail work.
Understanding proper felting needle selection is essential for achieving desired textures and shapes.
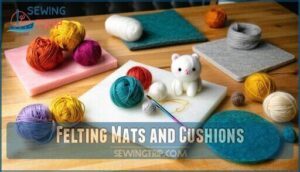
Felting Mats and Cushions
Your needle needs protection, and so does your work surface. A felting mat acts as your safety net, absorbing needle strikes while preventing damage to tables underneath.
| Felting Surface Type | Best For |
|---|---|
| Foam Cushions | Budget-friendly beginners |
| Wool Pads | Professional sculptors |
| Felting Blocks | Heavy-duty projects |
| Protective Mats | Portable crafting |
| Brush Mats | Detail work |
Think of your felting cushion as a shock absorber. Dense foam pads work great for flat projects, while wool felting surfaces give needles a softer landing for 3D work.
Your felting mat will develop holes over time—that’s normal wear showing you’re making progress on your wool journey. When selecting a felting mat, consider the quality of felting mat materials to guarantee durability and effectiveness.
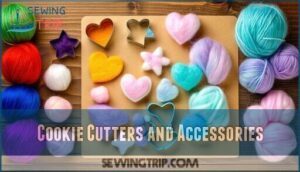
Cookie Cutters and Accessories
Cookie cutters serve as your template guides for creating uniform wool cutouts and decorative shapes.
These accessory tools transform ordinary felting sessions into structured craft adventures. Simply place cutters over your felting mats, fill with wool roving, and needle away.
Popular cookie shapes include hearts, stars, and seasonal designs. Many needle felting kits include basic cutters, while felting supplies stores offer specialized options.
Needle holders and other felting tools complement this systematic approach perfectly. Mastering sewing machine basics can also enhance your overall crafting experience with the use of felting tools and sewing machine basics.
Finger Protectors and Safety Tools
Since felting needles are incredibly sharp and you’ll be poking repeatedly, finger guards become your best friend for injury prevention.
These leather or rubber protectors slip over your fingertips, shielding them from accidental stabs while maintaining dexterity.
Many needle felting kits include basic finger protectors, but investing in quality hand protection guarantees safer crafting sessions and lets you focus on creating rather than dodging sharp points, which is essential for a enjoyable and safer crafting experience.
Choosing The Best Wool for Needle Felting
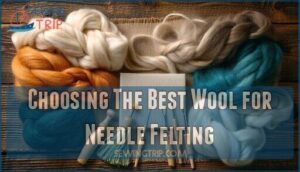
You’ll want to pick your wool carefully since not all types felt the same way.
The right wool makes your projects firm and smooth, while the wrong choice can leave you frustrated with loose, messy results.
Core Wool Vs. Top Coat Wool
Understanding wool selection starts with knowing the two main fiber types you’ll work with in needle felting projects.
Core wool serves as your foundation layer – it’s undyed, fast-felting wool that creates the bulk of your project. Think of it as the sturdy skeleton that holds everything together. Top coat wool is your finishing touch – dyed, smoother, and perfect for surface details and color blending.
Here’s what makes each type special:
- Core wool felts quickly and costs less, making it perfect for building project volume
- Top coat wool offers vibrant colors and smooth texture for professional-looking finishes
- Core wool creates firm structures that won’t fall apart during handling
- Top coat wool blends beautifully for realistic shading and detailed work
- Using both types together saves money while achieving high-quality results
This two-layer approach gives you the best of both worlds – structural integrity from core wool and visual appeal from top coat wool.
Recommended Wool Breeds
Several wool breeds excel in needle felting projects. Corriedale Fiber offers the perfect balance – it’s beginner-friendly with strong crimp that felts quickly. Merino Wool provides silky softness ideal for detail work. Romney Breeds deliver durability for structural pieces.
Consider Wool Blends for versatility. Quality Fiber Quality matters most – choose crimpy, minimally processed Felting Wool for best results in your Fiber Art adventures.
For ideal results, understanding felting wool types is essential to select the right materials for your projects.
Wool Preparation Tips
Before you start felting, proper wool preparation sets you up for success.
Gently tease apart your roving wool into manageable sections, removing any debris or tangles.
This fiber cleaning process prevents lumps in your finished project.
Pull wool fibers along their natural grain rather than against it.
Roving preparation involves creating consistent fiber layers that felt evenly and smoothly together.
Wool Types to Avoid
Steer clear of synthetic fibers like polyester blends and acrylic – they won’t felt properly and break your needles.
Skip anti-shrink wool and superwash varieties since chemical treatments prevent fiber bonding.
Avoid tight roving, worsted blends, and slippery yarns that resist needle penetration.
These wool types create frustrating, unstable results that fall apart easily, leading to unstable results.
Basic Needle Felting Techniques
Once you’ve mastered the basics of wool and needle selection, you’re ready to start creating your first felted pieces.
These fundamental techniques will help you transform loose wool fibers into beautiful flat shapes and three-dimensional sculptures using simple stabbing motions and proper needle control.
Making Flat Felt Shapes
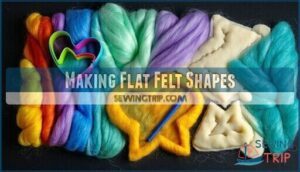
Two simple methods reveal flat felting success for beginners.
Cookie cutters create perfect outlines when placed over wool roving on your felting mat.
Poke straight down through the wool using triangle needles, keeping your motions consistent.
The 2D shapes firm up quickly as barbs catch fibers.
Start with basic felt design patterns before advancing to complex cutting techniques.
Creating 3D Sculptures
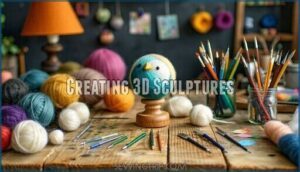
Once you’ve mastered flat shapes, three-dimensional needle felting opens up endless creative possibilities.
Building wool sculpture requires patience as you gradually compress fibers into solid forms. Start with simple shapes like spheres or cylinders before attempting complex creatures.
Advanced Sculpture Techniques demand different felting needles for various stages of your Dimensional Design process.
- Use coarse needles (32-36 gauge) for initial shaping and core wool placement
- Switch to fine needles (38-40 gauge) for surface smoothing and detail work
- Build armatures with pipe cleaners for larger 3D sculptures requiring internal support
- Work in sections, felting each part separately before joining pieces together
Adding Details and Embellishments
Fine details transform basic felt shapes into enchanting characters. You’ll use specialized felting needles to blend colors and create texture effects that bring your sculptures to life.
Mastering advanced felting techniques is essential for creating intricate designs and realistic textures. Mastering these techniques can be achieved by following tutorials on felting techniques.
| Embellishment Type | Technique | Needle Size | Result |
|---|---|---|---|
| Facial Details | Precise poking | 38-40 gauge | Clean features |
| Wool Blending | Gentle mixing | 36 gauge | Smooth transitions |
| Texture Effects | Reverse needling | Reverse barb | Raised surfaces |
| Pattern Making | Layered application | Star needle | Complex designs |
Color mixing opens endless possibilities for your wool sculpting projects. Layer different wool shades and work them together with your felting needles. This creates natural gradients that make eyes, cheeks, and markings look realistic.
Practice these needle felting basics on scraps first to achieve the best results and understand how to apply advanced techniques effectively.
Using Cookie Cutters for Shapes
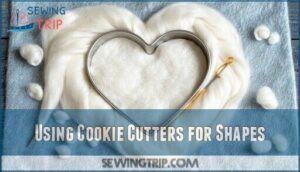
Cookie cutters transform needle felting into a precise art form, giving you perfect shape templates every time.
Place your cookie cutter on the felting mat and fill it with wool roving.
Use your felting needle to poke straight down through the wool, working systematically across the entire shape.
The cookie cutter acts as your guide, creating clean edges and consistent flat designs with professional results.
Beginner-Friendly Needle Felting Projects
Once you’ve mastered the basics, you’re ready to tackle your first needle felting projects that build confidence and skills.
Start with simple felt balls and ornaments before moving on to charming animal figures and decorative patches that make perfect gifts or home decor.
Felt Balls and Simple Ornaments
Once you’ve mastered basic techniques, felt balls make perfect starter projects for beginners.
These simple spheres teach you fundamental skills while creating beautiful decorations.
Here’s your felt ball roadmap:
- Start small – Begin with golf ball-sized projects using core wool
- Roll and poke – Shape wool into loose balls before needle felting
- Work in sections – Rotate frequently for even density
- Add color layers – Apply decorative wool over your base
- Finish smooth – Use fine felting needles for polished surfaces
Your felting tools and wool selection matter here.
Choose medium-coarse wool for easy felting.
These craft ideas work perfectly for ornament making and holiday decorations.
Animal Figures and Dolls
You’ll discover that creating felt pets and animal sculptures brings your wool to life with personality.
Start with simple miniature creatures like basic cats or dogs using core wool shapes. Build the body first, then add details like ears and tails.
Figure customization becomes easier as you practice needle felting techniques. Doll making follows similar principles but requires more planning for proportions.
These felted animals make perfect needle felted gifts for loved ones.
Flat Patches and Decorations
Creating flat patches opens up endless possibilities for decorating everyday items.
You’ll use cookie cutters to shape wool into perfect felt ornaments, badges, and decorative pins.
These flat designs make excellent wool embellishments for clothing, bags, or home decor.
Start with simple shapes like hearts or stars, then progress to intricate patch making projects that showcase your growing needle felting skills.
Tips for Successful Needle Felting
Master needle felting with these essential techniques that prevent frustration and create beautiful results. You’ll learn proper needle handling, achieve smooth finishes, and troubleshoot issues that commonly trip up beginners.
Preventing Common Mistakes
Avoiding felting mistakes starts with proper wool selection and project planning.
Don’t rush the process or use too much force when stabbing. Keep your needles straight to prevent needle breakage.
Work slowly to avoid fiber tangles that create lumpy surfaces. Plan your design before starting to prevent common felting errors that waste time and materials.
Needle Safety and Handling
While felting needles seem harmless, they’re sharp enough to puncture through tough wool and skin alike.
Smart needle handling prevents painful injuries that could sideline your creative projects for days.
- Grip felting needles near the top shaft to maintain control while keeping fingers away from barbed tips
- Use finger protectors or leather gloves when working on detailed areas where your hands are close to the needle
- Store felting needle sizes in protective tubes or cork blocks to prevent accidental pokes and needle damage
Achieving Firm and Smooth Results
With proper technique, you’ll transform loose wool into professional-quality sculptures that feel solid and smooth.
Focus on consistent needle angles and gradual fiber compression to achieve even texture throughout your felting projects.
| Technique | Result |
|---|---|
| Deep, perpendicular pokes | Firm fiber density |
| Light surface needling | Smooth finishing |
| Rotating work frequently | Even compression |
| Using finer needles last | Professional texture |
Master needle control by maintaining steady pressure and rhythm.
Quality wool selection directly impacts your final results – choose medium-coarse breeds for reliable felting.
Surface finishing requires patience, but switching to finer felting needles creates that coveted smooth appearance your wool felting deserves.
Handling Unexpected Results
When your project doesn’t match expectations, don’t panic—most felting mistakes become teachable moments.
Fiber breakage often signals worn needle damage, while wool shrinkage indicates excessive moisture. If felt distortion occurs, add core wool and re-felt slowly.
Fiber matting problems usually resolve with finer needles. Remember, even seasoned crafters encounter felting troubleshooting challenges, so embrace these felting techniques as part of your learning journey.
Understanding proper felting techniques is essential for achieving desired results and minimizing errors, making it a crucial part of the learning journey.
Displaying and Caring for Felted Creations
Once you’ve created your felted masterpiece, proper care guarantees it lasts for years while strategic display choices showcase your hard work.
Smart storage and simple maintenance techniques protect your projects from dust, pests, and damage while keeping them looking fresh and vibrant.
Aftercare and Maintenance
Your finished felted creations need proper care to maintain their beauty and shape over time.
Store your projects in dust-free containers or sealed bags to prevent fiber damage. Keep them away from moisture and direct sunlight which can cause fading or warping.
For cleaning, gently brush away surface dirt with a soft brush. Small tears can be repaired using felting techniques with matching wool and your felting tools to restore their original shape.
Creative Display Ideas
Your creations deserve thoughtful presentation that highlights their handmade charm.
Transform any space into a felting gallery with strategic placement that draws the eye and showcases your wool artistry.
- Shelf Displays: Group felting sculptures by size or color themes on floating shelves
- Wall Hangings: Mount felting decorations in shadow boxes or simple frames
- Table Arrangements: Create centerpieces with felting animals on wooden stands
- Glass Cases: Protect delicate felting gifts while keeping them visible
- Themed Collections: Display seasonal pieces together for maximum visual impact
Repairing and Storing Projects
Even masterpiece felting projects sometimes need damage control through proper felt repair techniques.
When holes appear or fibers loosen, use fine gauge needles with matching wool roving for seamless project restoration.
Store your felting projects in breathable cotton bags with silica gel packets for ideal preservation methods.
Keep pieces away from direct sunlight and use natural pest deterrents like lavender sachets for long-term felting storage success.
Frequently Asked Questions (FAQs)
What is needle felting & how does it work?
You’ll use a barbed needle to repeatedly stab wool fibers, tangling them together into dense, sculpted shapes.
The needle’s notches catch and interlock the fibers, creating everything from flat decorations to intricate 3D sculptures without glue or sewing, which involves dense sculpted shapes.
What is the difference between Needle felting and wet felting?
While wet felting soaks wool in soapy water then agitates it, you’ll poke dry wool repeatedly with barbed needles instead. This creates controlled, sculpted shapes versus wet felting’s unpredictable shrinkage.
Can You needle felt with a regular needle?
No, you can’t use a regular sewing needle for needle felting. Regular needles lack the special barbs that catch and tangle wool fibers together, making proper felting impossible.
Is needle felting difficult to learn?
Learning isn’t rocket science – you’ll pick up basic techniques quickly with practice.
The repetitive stabbing motions feel surprisingly relaxing, and beginners often create adorable (if slightly wonky) first projects within hours, which can be a very adorable experience.
What are the common mistakes of needle felting?
Like sailors traversing treacherous waters without a compass, you’ll face common pitfalls: using poor quality wool, stabbing too aggressively, neglecting proper needle angles, and rushing the firming process without patience.
What is the difference between felting and needle felting?
Traditional felting uses water and soap to mat wool fibers together through agitation.
You’ll rub, roll, and manipulate wet wool until it shrinks into dense fabric.
Needle felting stays completely dry, using barbed needles to repeatedly stab wool fibers, tangling them into your desired shape, which is a complete concept in felting.
Can I use any type of wool for needle felting?
Just as choosing the wrong key won’t open your front door, not all wool works for needle felting.
You can’t use any type – synthetic fibers and anti-shrink treated wool won’t felt properly.
Natural animal wools like merino work best, as they are the most suitable for this craft, making needle felting more effective.
How do I choose the right size and shape of felting needles?
Start with coarse needles (36-gauge triangle) for initial shaping, then switch to fine needles (38-40 gauge) for details. Triangle needles work best for beginners, while star needles add texture.
What are some common mistakes to avoid when needle felting?
Sharp needles break easily when you’re heavy-handed, so poke gently.
Don’t skip the felting pad—you’ll damage your surface and dull needles.
Avoid pulling wool apart roughly; tear it gently to maintain fiber integrity.
Can I mix different colors of wool roving together?
Yes, you can mix different wool roving colors together.
Blend them by gently pulling and twisting the fibers before felting, or layer different colors and needle them together for beautiful gradients and unique color combinations.
This allows for unique color combinations and creative freedom in felting projects.
Conclusion
Journey from wool novice to needle felting artisan starts with your first confident stab into fluffy roving.
You’ve learned essential techniques, gathered proper supplies, and discovered safety tips that’ll keep your fingers intact.
Now you’re ready to transform loose fibers into stunning creations.
Start small with felt balls, then progress to intricate sculptures.
Remember, every master feltmaker began exactly where you’re today, and your needle felting adventure awaits—grab those needles and start creating magic.

