This site is supported by our readers. We may earn a commission, at no cost to you, if you purchase through links.
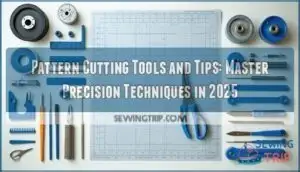
Start with essential gear: a Pattern Master with seam guides and angle lines, single and double tracing wheels for efficient marking, and French curves to smooth those tricky necklines.
Quality dot-and-cross tracing paper with pre-printed grids saves time, while sharp fabric scissors and accurate rulers prevent measurement disasters.
Don’t forget awls for precise holes and notchers for clean marks.
Remember, poor tools create wonky curves and frayed edges that’ll haunt your finished garments.
The secret to cutting like a pro involves more than just buying expensive equipment, it requires the right combination of tools and techniques to achieve accurate results and prevent measurement disasters.
Table Of Contents
- Key Takeaways
- Essential Pattern Cutting Tools for Beginners
- Why Accurate Tools Matter in Pattern Cutting
- Choosing The Best Fabric Cutter
- Must-Know Pattern Cutting Techniques
- Common Mistakes and How to Avoid Them
- Tips for Improving Pattern Cutting Skills
- Innovations and Advanced Tools in Pattern Cutting
- Frequently Asked Questions (FAQs)
- Conclusion
Key Takeaways
- Invest in quality precision tools – You’ll need sharp fabric scissors, accurate rulers, French curves, and Pattern Masters with built-in seam guides to achieve professional results instead of wonky cuts and frayed edges.
- Master essential techniques before cutting expensive fabric – Practice measuring, adding seam allowances correctly, and marking darts and grainlines on scrap fabric first to avoid costly mistakes.
- Maintain your tools religiously – Sharp blades make clean cuts, while dull ones create measurement disasters; so, regularly sharpen scissors and rotary cutters, clean off residue, and store tools properly.
- Choose the right cutter for your fabric type – Use rotary cutters for heavyweight materials like denim, serrated scissors for delicate fabrics like silk, and consider stretch when working with knits versus wovens.
Essential Pattern Cutting Tools for Beginners
You’ll need the right tools to transform your design ideas into perfectly fitting garments. Starting with essential pattern cutting tools sets the foundation for creating professional-quality patterns that actually work.
Pattern Master and Its Features
For precise pattern cutting, you’ll find the Pattern Master invaluable among pattern cutting tools.
This versatile curve ruler features multiple seam guides, including 0.5cm and 1cm allowances for pattern drafting.
Multiple seam guides built right in—pattern drafting precision made simple
Its curved edge contains ruler markings for measuring pattern curves, while built-in 45-degree and 90-degree lines guarantee accurate grainline checks.
Master tools like this streamline sewing pattern cutting techniques substantially, making it a crucial tool for achieving professional results with accurate grainline checks being essential.
Tracing Wheels and Their Uses
Beyond basic pattern cutting tools, tracing wheels revolutionize your pattern tracing techniques.
Single tracing wheels deliver precision for accurate pattern transfers, while double tracing wheels add seam allowances simultaneously—saving precious time.
These sewing pattern tracing tools work seamlessly with dot and cross tracing paper for consistent curve drawing and marking.
Master both wheel types to streamline your workflow and achieve accurate pattern transfers.
French Curves for Smooth Lines
Your French curve becomes your best friend when reshaping necklines and armholes with professional precision.
This drafting aid smooths awkward curves that rulers can’t handle, ensuring your pattern accuracy matches industry standards.
Line smoothing transforms amateur-looking patterns into polished templates.
Think of it as curve drawing insurance—you’ll wonder how you ever managed without this seam guidance tool in your pattern cutting arsenal.
Dot and Cross Tracing Paper
Dot and cross grid paper transforms pattern drafting into a precise art form.
These lightweight tracing aids feature pre-printed grids at 2.5cm or 5cm intervals, making angle marking and line drawing effortless.
- Quick angle reference – 45-degree and 90-degree lines are already marked for instant pattern drafting accuracy
- Time-saving grids – No need to measure and mark your own reference points on pattern paper
- Consistent spacing – Uniform intervals guarantee your tracing tools create perfectly aligned pattern pieces
- Lightweight design – Easy to handle and position under fabric without adding bulk
- Multiple interval options – Choose between 2.5cm or 5cm spacing based on your project’s scale requirements
Awls, Notchers, and Pattern Hooks
You’ll find awls perfect for punching precise holes at dart tips, making pattern markings crystal clear.
Pattern notchers create clean indents for notch identification, while sharp blades guarantee consistent results.
Pattern hooks and hangers transform storage chaos into organized systems, preventing creases that can ruin your hard work.
These sewing tools keep patterns flat and accessible for years.
Mastering basic stitches requires understanding of essential sewing tools, which is crucial for essential sewing tools and using sewing tools to create pattern markings.
Binder Clips and Clear Tape
Two simple pattern cutting tools can revolutionize your workflow.
Binder clips secure pattern pieces during multi-layer stacking, preventing shifts that cause cutting errors.
Clear tape offers reusable adhesive tips for quick pattern alterations—you can write on it, remove it cleanly, and reapply as needed.
These binding methods keep your sewing pattern cutting tools organized while providing reliable pattern storage solutions, which can be achieved with the use of clear tape.
Why Accurate Tools Matter in Pattern Cutting
Quality pattern cutting tools directly impact your garment’s final fit and appearance. When you invest in accurate tools, you’re setting yourself up for professional-looking results that rival store-bought clothing.
Tool precision affects every step of your sewing journey. Poor-quality rulers bend under pressure, creating measurement errors that compound throughout construction. Dull rotary cutters snag fabric fibers, leaving jagged edges that won’t align properly during assembly. Flimsy French curves flex while tracing, producing wobbly armholes and necklines.
Here’s what happens when you use quality tools:
- Sharp fabric scissors slice cleanly through multiple layers without shifting
- Accurate rulers maintain consistent seam allowances across entire pattern pieces
- Stable cutting mats provide smooth surfaces that prevent fabric distortion
- Precise marking tools create clear, removable guidelines for perfect alignment
Cutting accuracy determines whether your carefully drafted pattern translates into a well-fitting garment. Quality drafting techniques require reliable tools that won’t let you down mid-project. Your fabric handling improves dramatically when tools perform consistently, allowing you to focus on technique rather than fighting equipment malfunctions. To guarantee proper drape, you should always align fabric grain.
Choosing The Best Fabric Cutter
You’ll find that choosing the right fabric cutter can make or break your pattern cutting precision and speed.
Whether you’re working with delicate silks or heavy denim, the right tool transforms tedious cutting sessions into smooth, accurate work that sets up your entire garment for success.
Manual Vs. Electric Fabric Cutters
When choosing between manual cutters and electric cutters, consider your project scale and budget.
Manual cutters offer excellent cutting precision for detailed work and provide superior cutter portability for small studios.
Electric cutters excel at handling multiple fabric layers efficiently, delivering consistent results with better cutter ergonomics.
While manual options require frequent blade replacement, they’re perfect for custom pattern cutting tools projects requiring finesse.
To find the right tool, consider browsing a manual fabric cutter.
Digital options, like the Cricut Maker 3, offer a larger maximum cut size compared to manual die cutters.
Factors to Consider Before Buying
Before jumping into your fabric cutter purchase, consider these key factors that’ll make or break your pattern cutting success:
- Budget constraints – Quality scissors and cutting mats range from $20-200
- Project complexity – Simple skirts need basic shears; intricate garments require precision tools
- Fabric types – Heavy denims demand stronger blades than delicate silks
Your skill level matters too. Beginners benefit from forgiving tools, while experts need surgical precision.
Don’t forget storage space for bulky cutting mats and multiple pattern cutting tools. For smooth curves, consider using specialized curve tools.
Blade Quality and Maintenance
Sharp blades make all the difference in pattern cutting. High-carbon steel offers superior edge retention compared to stainless steel options.
Regular sharpening techniques like honing stones maintain precision cuts. Rust prevention through proper cleaning and safe storage extends blade life substantially.
Replace blades showing nicks or dullness – your cutting mat will thank you for maintaining prime sewing tool sharpness.
Matching Cutters to Fabric Types
Different fabric types need specific cutters for best results.
Rotary cutters work well for heavyweight materials like denim, while serrated scissors grip delicate fabrics such as silk.
For knits versus wovens, consider stretch: strip cutters prevent distortion in knits.
Blade sharpness matters – dull blades snag fibers.
Regular cutter maintenance keeps your fabric cutting techniques precise across all fabric types.
Must-Know Pattern Cutting Techniques
Mastering pattern cutting techniques transforms your designs from ideas into perfectly fitted garments. You’ll need precise measuring, proper seam allowances, and accurate marking to create professional results every time.
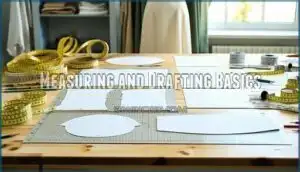
Measuring and Drafting Basics
Before you measure and draft your first pattern, remember that precision beats speed every time.
Even tiny measurement errors can derail your entire project, so take your time with these fundamentals.
- Body Measurements – Use a flexible tape measure and record bust, waist, and hip circumferences while wearing fitted undergarments
- Drafting Blocks – Create basic rectangular shapes using your measurements as the foundation for all pattern pieces
- Pattern Scaling – Double-check all dimensions against your original measurements before cutting any fabric
- Ruler Techniques – Keep your drafting tools perpendicular to pattern lines and use gridded surfaces for accuracy
Adding Seam Allowances Correctly
Once your measurements are accurate, you’ll need to add seam allowances to every edge of your pattern pieces.
Standard seam allowance ranges from 1cm to ½ inch, depending on your project needs.
Use a Pattern Master’s built-in seam allowance lines for consistent fabric margin around curves and straight edges.
Remember that fold lines don’t need seam allowances – they’re your anchor points for garment construction and sewing accuracy.
Marking Darts, Notches, and Grainlines
Once you’ve established seam allowances, accurate pattern markings become your roadmap to professional results.
Use an awl to pierce dart placement points precisely—these tiny holes transfer perfectly to fabric.
Mark notches with a pattern notcher for consistent seam guides that’ll match up every time.
Don’t forget grainline alignment arrows; they’re your fabric’s GPS system, preventing twisted seams and wonky fits that scream homemade disaster, which can be avoided by following these steps to ensure professional results.
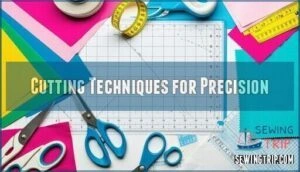
Cutting Techniques for Precision
Sharp cuts make the difference between amateur and professional results.
Use cutting mats to protect surfaces and maintain blade sharpness. Keep fabric taut while cutting—don’t rush through curves or corners.
Follow grainlines religiously, and cut in one continuous motion when possible. Your precision tools work best when you respect their capabilities and maintain steady movements throughout each cut.
Common Mistakes and How to Avoid Them
Even experienced sewers make simple mistakes that can ruin an entire project. You’ll learn the four most common pattern cutting errors and proven strategies to avoid them every time.
Skipping Seam Allowances
Forgetting seam allowances turns perfect patterns into tight-fitting disasters.
This common pattern cutting mistake creates Seam Allowance Errors that ruin garment construction before you even start sewing.
Always add 1cm or ½ inch around all edges except fold lines. Without proper seam allowances, your carefully measured pattern becomes unwearable, wasting fabric and time.
Double-check every edge before cutting.
Incorrect Measurements
Taking perfect measurements isn’t rocket science, but Measurement Errors can turn your dream garment into a nightmare.
Sizing Issues stem from rushing through this step, creating Fit Problems that no amount of seam allowances can fix.
Your Body Proportions deserve accurate measuring for proper Scale Factors.
- Double-check all measurements before pattern adjustments
- Use a flexible measuring tape, not a rigid ruler
- Have someone help with hard-to-reach areas like back measurements
- Record measurements immediately to prevent memory lapses
- Remeasure after significant weight changes or different undergarments
Sewing mistakes often start here, so slow down during measuring for accurate cutting results.
Using The Wrong Tools
Many sewers grab whatever scissors lie around, but poor tool selection causes cutting errors and fabric damage.
Dull household scissors crush fibers instead of slicing cleanly, leading to frayed edges and measurement mistakes.
Wrong tools create sewing delays when pieces don’t align properly.
Smart sewing tool selection prevents these issues – use fabric shears for cutting, embroidery scissors for details, and maintain sharp blades through proper sewing tool care and maintenance.
Understanding fabric cutting mistakes is essential to achieving professional results in sewing projects.
Cutting on Uneven Surfaces
Cutting on uneven surfaces will sabotage your precision every time. Your kitchen table might seem convenient, but those tiny wobbles translate into wonky cuts. Surface preparation matters more than you’d think – even professional seamstresses know this.
- Stabilize your workspace – Add cardboard under cutting mats to eliminate surface dips
- Check for level surfaces – Use a small level tool before starting major cutting projects
- Invest in proper cutting mats – Self-healing mats provide consistent, smooth cutting surfaces
- Adapt with portable solutions – Lightweight cutting boards work when traveling to sewing classes
Pattern cutting tools and rotary cutters demand stable foundations. Fabric cutting precision suffers when your surface moves or flexes. Uneven fabrics compound the problem, making stabilizing techniques absolutely necessary. Adaptive tools can help, but they can’t fix a fundamentally unstable workspace.
Tips for Improving Pattern Cutting Skills
Mastering pattern cutting takes practice, but smart strategies can accelerate your progress substantially. You’ll develop professional-level skills faster by focusing on consistent practice habits and maintaining your tools properly.
Practicing on Scrap Fabric
Before you commit your pattern cutting tools to expensive fabric, smart sewers know that scrap fabric serves as your safety net.
Test your pattern prototyping skills on leftover materials first—cotton scraps work perfectly for trial runs.
This fabric testing approach catches measurement errors and technique flaws before they become costly mistakes, leading to natural error reduction when you practice sewing techniques repeatedly on scraps.
Building muscle memory and confidence for your final project happens naturally through this process, allowing you to refine your skills without incurring significant costs.
Keeping Tools Sharp and Clean
Sharp tools deliver perfect cuts every time, just like practice builds your skills.
Dull blades create frayed edges and inaccurate patterns, turning your beautiful fabric into frustrating mistakes.
Keep your cutting tools in peak condition with these maintenance habits:
- Tool Sharpening: Sharpen scissors and rotary blades when they start tugging fabric instead of slicing cleanly
- Cleaning Methods: Wipe blades with alcohol after each project to remove adhesive residue and lint buildup
- Rust Prevention: Store tools in dry locations with silica gel packets for superior blade maintenance and longevity
Organizing Pattern Pieces
Proper pattern storage transforms chaos into control.
Use clear storage envelopes or binders for each project, labeling pieces with fabric requirements and cutting instructions.
Stack similar-sized patterns together, keeping frequently used pieces accessible.
A dedicated workspace optimization system with labeled drawers or hanging files prevents pattern damage while streamlining your sewing pattern management process efficiently, which is key to workspace optimization and maintaining control.
Using Tutorials and Guides
Beyond the trial-and-error approach, you’ll find structured learning accelerates your pattern cutting journey.
Online courses and video tutorials break down complex techniques into manageable steps, while beginner guides provide roadmaps for skill development.
Sewing blogs and pattern books offer diverse perspectives from experienced creators.
- YouTube tutorials transform intimidating techniques into "aha!" moments you can replay endlessly
- Pattern cutting resources from established designers feel like having a mentor guiding your scissors
- Sewing education platforms create communities where mistakes become stepping stones to mastery
Innovations and Advanced Tools in Pattern Cutting
The pattern cutting industry has transformed dramatically with digital CAD systems that let you design, scale, and modify patterns with surgical precision.
Today’s advanced materials and smart storage solutions mean you can create professional-grade patterns that last for years while keeping your workspace organized and efficient.
Digital Pattern Making and CAD
CAD software revolutionizes pattern making through digital drafting and 3D modeling capabilities.
You’ll reduce production time by 30-50% while improving accuracy with pattern simulation tools.
Virtual fitting features let you preview garments before cutting fabric.
Leading pattern making software like Gerber AccuMark and Lectra Modaris integrate with automatic cutting systems, streamlining your entire workflow from design to production.
The use of advanced CAD design tools enhances the overall efficiency of the pattern making process, utilizing automatic cutting systems.
High-Quality Materials for Reusable Patterns
Today’s pattern makers aren’t stuck with flimsy paper that tears after three uses.
High-quality materials transform your workflow, offering durability that withstands hundreds of pattern cutting sessions while maintaining precision.
- Mylar film provides dimensional accuracy within ±0.2mm and resists moisture damage
- Polyethylene sheets endure over 2,000 folds without tearing – 15X stronger than cardstock materials
- Tyvek paper maintains crisp edges through 100+ cut cycles for reliable stencil making
- Commercial-grade kraft board retains 92% structural integrity after 50 uses
- Laser-cut acrylic templates improve pattern consistency by 85% versus hand-cut alternatives
These reusable templates cut material waste by 70% while boosting fabric cutting efficiency.
Your pattern drafting tools deserve materials that match their precision.
Storage Solutions for Pattern Pieces
Pattern hooks and hangers can’t solve everything—you need smart storage systems too.
Pattern boxes keep large pieces flat while file folders organize smaller templates by size. Storage bins with clear labeling systems let you find patterns fast.
Archive cases protect delicate paper patterns from tears and moisture. These pattern storage tools boost sewing pattern organization, ensuring sewing pattern preservation and maintaining sewing pattern durability for consistent sewing pattern accuracy.
Effective sewing rooms utilize sewing notions storage to maximize space and efficiency.
Frequently Asked Questions (FAQs)
What are the best tools for pattern drafting?
Ninety percent of homesewers abandon projects due to poor pattern drafting—you’ll need quality rulers, French curves, Pattern Master tools, sharp scissors, tracing wheels, and cutting mats for professional results.
How to get better at pattern cutting?
Practice consistently on scrap fabric before cutting good material.
Start with simple shapes, master basic blocks, then progress to complex designs.
Sharp tools and accurate measurements are your foundation for success.
What are common pattern making mistakes?
Common mistakes include skipping measurements, forgetting seam allowances, ignoring grain lines, rushing pattern adjustments, and not testing with muslin first.
You’ll also trip up by mismatching notches or cutting wrong sizes.
What are the tools and principles commonly used in pattern making?
Essential pattern making tools balance precision with creativity—you’ll need rulers, French curves, Pattern Masters for measurements, tracing wheels for transfers, sharp scissors, and quality paper.
Master fit fundamentals before attempting complex designs.
How to grade patterns between sizes?
To grade patterns between sizes, you’ll increase or decrease measurements at specific points using grade rules.
Measure differences between consecutive sizes, then distribute changes proportionally across key areas like bust, waist, and hip lines using grading rulers or CAD software.
Whats the best pattern paper weight?
Sarah’s delicate silk patterns tore repeatedly with lightweight paper until she switched to medium-weight pattern paper.
You’ll want 40-60 GSM paper—it’s sturdy enough to handle multiple uses without tearing, yet flexible enough to trace curves smoothly and fold cleanly.
How to transfer patterns to different fabrics?
Use chalk, tracing wheels, or fabric markers to transfer pattern markings.
Pin patterns securely, trace around edges, then mark notches, darts, and grainlines.
Choose transfer methods based on your fabric’s color and texture, considering the best approach for complete concepts.
When should I use bias cuts?
Bias cuts shine when you’re crafting garments that need to drape gracefully around curves—think slip dresses, cowl necks, or flowing skirts that move with your body’s natural contours.
How to fix pattern fitting issues?
First, identify where your pattern doesn’t fit properly by trying it on or using a dress form.
Common issues include tight shoulders, loose waist, or short sleeves.
Make targeted adjustments using slash-and-spread techniques for width or pivot methods for curves.
Conclusion
Think of pattern cutting tools and tips as your sewing GPS—they’ll guide you from point A to perfectly crafted point B without detours through disaster.
Mastering these pattern cutting tools and tips transforms every project from guesswork into precision craftsmanship.
You’ll create garments that fit like they were custom-made because, well, they are.
Sharp tools, steady hands, and consistent practice will elevate your sewing game beyond recognition, making you a master of pattern cutting tools and allowing you to achieve precision in every stitch.
Your future self will thank you.
- https://www.youtube.com/watch?v=pR79dMNA9Sk&t=14s
- https://www.ylzq-tech.com/a-revolutionizing-production-the-advantages-of-using-an-industrial-fabric-cutting-machine.html
- https://www.quiltingboard.com/main-f1/has-anyone-used-electric-rotary-cutter-t321252.html
- https://vocal.media/journal/impact-of-electric-fabric-cutters-on-small-business-operations
- https://vinylcuttingmachines.net/comparisons/best-fabric-cutting-machines/


