This site is supported by our readers. We may earn a commission, at no cost to you, if you purchase through links.
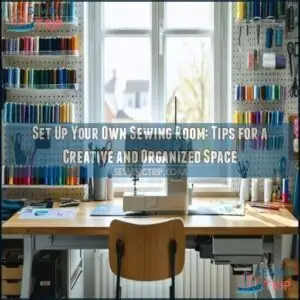 To set up your own sewing room, start with a dedicated space that has good lighting—natural light is your fabric’s best friend!
Position your sewing machine on a sturdy table at elbow height and make certain you’ve got a separate cutting surface (fold-out tables work wonders in tight spaces).
You’ll need accessible storage for fabrics, notions, and tools—pegboards are a game-changer for keeping scissors and rulers at your fingertips.
Don’t forget a comfortable chair; your back will thank you after those marathon hemming sessions.
The perfect sewing room isn’t about size—it’s about creating a space where creativity flows without hunting for that missing bobbin, and ultimately, making the space your own where you can enjoy your best friend, your sewing machine, in comfort.
Table Of Contents
Key Takeaways
- Choose a space with good lighting where you can focus—natural light is ideal, but task lighting works well for nighttime sewing sessions and detailed work.
- Design your layout around three essential workspaces: a sturdy table for your sewing machine at elbow height, a separate cutting surface, and an accessible ironing station.
- Organize your supplies using clear containers, labels, and vertical storage solutions to keep everything visible yet contained—this prevents frustrating searches for missing tools.
- Make your space comfortable with an ergonomic chair, proper table height, and personal touches that inspire your creativity while maintaining a clutter-free environment.
Choose Your Space

Choosing the right space for your sewing room is the first step to creating a spot that inspires and works for you.
Whether it’s a cozy corner or a spare room, think about lighting, noise, and finding a place where distractions won’t unravel your focus.
Assessing Room Size and Lighting
Think about your sewing room setup carefully.
Space constraints can make a small sewing room tricky, so measure everything twice.
Natural illumination is a game-changer—find a spot with big windows.
For nighttime, task lighting and warm artificial lighting are your best friends.
Remember, lighter walls bounce light beautifully, enhancing the space’s mood and making your sewing room layout feel bigger!
Evaluating Noise Level and Distractions
How can you stay focused in a noisy home? A comfortable sewing room requires smart distraction management.
Consider these tips:
- Use sound-dampening items like rugs, curtains, or fabric panels.
- Discuss family considerations to set boundaries during project time.
- Choose a quiet location away from the TV or busy areas to boost focus and productivity.
Considering Dual-Purpose Rooms
A dual-purpose space like a guest room, playroom, or home office can double as your sewing haven with some multipurpose design magic.
Opt for sewing room furniture that folds or tucks away when not in use. Use clever sewing room organization tricks, like vertical storage, to keep things tidy.
When selecting fabrics for curtains, consider light filtration needs to optimize the room’s ambiance. Combining hobbies with functionality makes sewing room ideas practical and stylish, with a focus on sewing room organization.
Discussing Space-Sharing With Family
Balancing family needs in a shared sewing room is doable with a bit of teamwork.
Start by discussing respectful usage and shared responsibilities to avoid noise management headaches. Kids? Incorporate a dual-purpose space with toy storage or a play area.
Schedule conflicts? Create clear traffic patterns and swap ideas for seamless flow.
- Collaborate: Discuss expectations and share responsibilities.
- Compromise: Add shelves for children’s books or toys.
- Plan: Manage schedules to reduce clashes.
Plan Your Layout
Think about how you’ll move between your sewing machine, cutting table, and ironing board—it’s like choreographing a little dance.
Keep paths clear and furniture arranged for comfort, so you’re not bumping into things mid-project, to ensure a smooth and efficient workflow with your sewing machine.
Creating a Vision for The Space
Start by imagining how you’ll use your sewing space.
Jot down every activity—sewing, pattern tracing, or fabric cutting—and assess the space you have.
Pull inspiration from Pinterest or other creative sources, and choose calming color schemes to enhance focus.
Take inventory of supplies to avoid clutter, and remember, a clear vision guarantees your sewing room design flows beautifully!
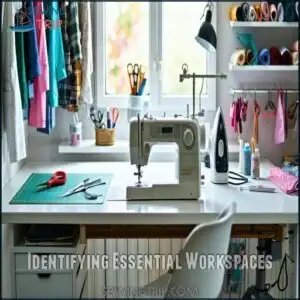
Identifying Essential Workspaces
When planning your sewing space design, focus on workspace essentials.
You’ll need areas for sewing, cutting, and ironing—think of it as your creative triangle.
Prioritize workflow efficiency by ensuring these zones are close together.
Add an ergonomic setup to stay comfy during long sessions.
Keep tool accessibility in mind; you don’t want to hunt for scissors mid-project!
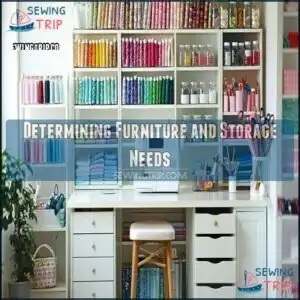
Determining Furniture and Storage Needs
Think about what you need—comfort and function matter when planning your sewing room layout.
Ergonomic furniture is a must for long sewing sessions. Vertical storage saves space and keeps supplies handy. Don’t overlook the charm of repurposed furniture or crafty DIY solutions—an old dresser can hold fabrics.
Here’s how to prioritize:
- Dedicated sewing tables.
- Adjustable shelves.
- Containers for tools, which are essential for function.
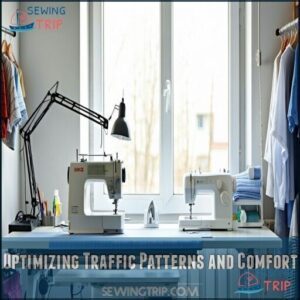
Optimizing Traffic Patterns and Comfort
Arranging furniture isn’t just puzzle-solving—it’s your key to a stress-free, ergonomic sewing space.
Keep workspace flow smooth by placing tools within arm’s reach.
Use the table below to guide your sewing room arrangement:
| Focus Area | Tip |
|---|---|
| Sewing Machine | Place near power outlets for ease. |
| Cutting Area | Provide ample space; add Posture Support. |
| Ironing Station | Keep close to cutting table. |
| Comfort Lighting | Use adjustable task lamps. |
| Accessibility Needs | Clear pathways; avoid clutter. |
Set Up Your Workspaces
Your workspaces are the heart of your sewing room, so it’s essential to set them up thoughtfully.
Keep your sewing, cutting, and ironing areas functional and within arm’s reach—your back (and future self) will thank you!
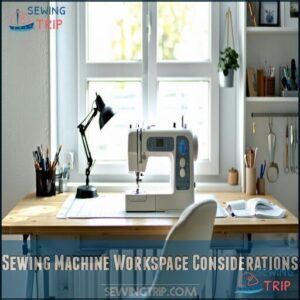
Sewing Machine Workspace Considerations
Your sewing machine workspace should be comfortable and efficient. Aim for ergonomic height—elbows at a 90-degree angle while working. Place the sewing machine toward the table’s center for proper support.
Achieve perfect flow with an ergonomic sewing setup—comfort and creativity merge when your workspace supports both body and imagination.
Keep lighting needs in mind with a desk lamp or natural light. Don’t forget power access! Align tools for your handedness.
Consider using a specific sewing surface for maximum stability. Smart sewing room design ideas promote creativity flows freely.
- Ergonomic height: Comfort prevents aches.
- Machine placement: Central and stable.
- Lighting: Add task lights; avoid glare.
- Power readiness: Easy-to-access outlets.
Cutting Space Options and Essentials
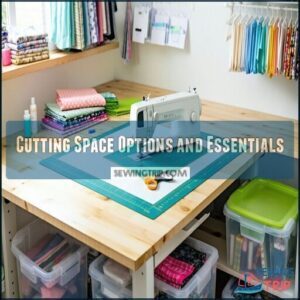
A good cutting table makes life easier. Aim for a 3-4-foot height to prevent backaches—your comfort matters!
Use durable cutting mats and keep rotary cutters sharp. For accurate cuts, consider that rotary cutter sets guarantee professional results.
Add fabric storage below the table for a tidy setup. Pattern weights? A game changer for smooth cuts. Invest in quality scissors and a stable cutting board to keep fabric steady and frustration-free!
Ironing Space Requirements and Solutions
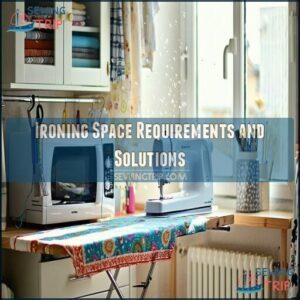
Every successful sewing room needs a dedicated ironing space, the third essential workspace alongside your sewing machine and cutting areas.
Your pressing station doesn’t need to hog precious square footage, though!
- Consider wall-mounted drop-leaf ironing boards that fold flat when not in use
- Create a DIY pressing surface using MDF, batting, and heat-resistant fabric
- Repurpose furniture like microwave cabinets for compact ironing stations
- Invest in portable options like tabletop ironing boards for tight spaces
For convenient ironing, consider a compact pressing solution.
Remember, even the smallest steam station needs proper ventilation and heat-resistant surfaces to prevent scorching your carefully organized work area!
Organizing Tools and Supplies
Now that your pressing station is set up, let’s tackle those wandering scissors and runaway bobbins!
Smart supply categorization turns chaos into calm.
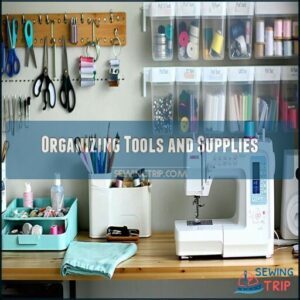
Keep frequently used sewing tools within arm’s reach using magnetic strips or desktop organizers.
Try clear containers with labeling systems for smaller notions.
Your upkeep routine should include a "put-it-back" rule after each use – your future self will thank you when you’re not hunting for that thimble at midnight, and this will help maintain a sense of calm and organization, making it easier to find what you need, thus promoting smart supply management.
Organize Your Supplies
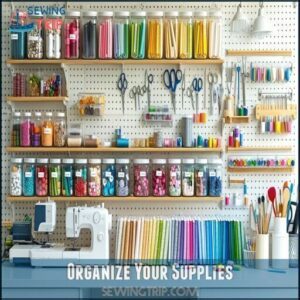
You’ll save countless hours searching for that missing seam ripper when you organize your supplies into clear categories with proper storage solutions and labels.
Even the most creative minds work better without the chaos of fabric avalanches and wandering scissors, so establishing systems that keep everything visible yet contained will transform your sewing experience from frustrating to fantastic.
Establishing proper storage solutions will transform your sewing experience from frustrating to fantastic.
Categorizing and Sorting Sewing Supplies
Chaos quickly turns to calm when you start categorizing your sewing supplies.
Begin by grouping similar items together: fabrics with fabrics, notions with notions.
Create subcategories that make sense for your workflow—organize threads by color, sort fabrics by type or project.
Regular decluttering frequency keeps your inventory manageable.
A thorough supply categorization system saves time and prevents duplicate purchases.
You’ll never again buy buttons you already own!
To maximize space, consider repurposing mason jars for smaller items, which helps in maintaining a clean and organized workspace.
Utilizing Storage Solutions and Containers
Now that you’ve sorted your supplies, it’s time to give them proper homes!
Clear containers are your best friends in the sewing room.
You’ll instantly spot that perfect fabric or those colorful embroidery flosses without rummaging through opaque boxes.
Try repurposing everyday items—ice cube trays work wonders for buttons while old suitcases can store bulkier supplies.
Consider various sewing organizers for ideal space usage.
Don’t forget to maximize vertical space with pegboards and shelving to keep your sewing room organized and efficient, making the most of clear containers.
Labeling and Signage for Easy Access
Now that your storage containers are in place, let’s make them truly work for you!
Clear labeling transforms mystery boxes into a treasure map for your supplies.
Try color-coding for fabric types or using bold, readable fonts for quick identification.
Stick DIY labels on bins or hang mini chalkboard signs on shelves.
Even a simple masking tape label beats the "what’s in this box again?" frustration every sewist knows too well!
Maintaining a Clutter-Free Space
Your sewing room’s serenity depends on consistent maintenance.
Schedule a quick 10-minute cleanup after each project to prevent clutter buildup. Regular purging of unused fabrics and supplies creates breathing room for new materials.
Develop decluttering habits like the "one in, one out" rule for notions. Consider quarterly donation strategies for items you haven’t used in a year.
Simple upkeep schedules transform workspace organization from overwhelming to manageable.
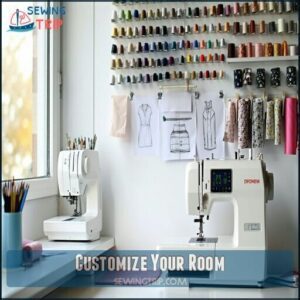
Customize Your Room
You’ll transform your functional sewing space into a personalized creative haven by adding meaningful touches that inspire your best work.
Arrange your favorite fabric swatches on a bulletin board, position your machine where natural light hits just right, or hang that quirky thimble collection you’ve been storing away—your sewing room should feel as unique as the projects you create in it, making it a true reflection of your best work and personal style, which is essential for a creative haven.
Adding Personal Touches and Decor
Now that your storage system is in place, it’s time to inject your personality into your sewing sanctuary.
Revisit your Pinterest inspiration board and select elements that spark joy. Display loved items like vintage spools or family heirlooms on shelves.
Hang inspiring artwork or sewing-themed wall art at eye level. Add calming scents with candles or diffusers, and create a playlist of favorite music that fuels your creativity.
Utilizing Natural Light and Visibility
Three key elements make natural light your best sewing ally.
Position your workstation near windows, but not directly facing them to avoid glare.
Light-colored walls increase light reflectivity, brightening your entire sewing room.
Don’t rely solely on sunshine though—supplement with task lighting to minimize shadows.
For intricate work, consider using magnifying lamps to enhance detail visibility.
A combination of overhead fixtures and adjustable lamps guarantees you’ll never miss those tiny stitches, even on cloudy days.
Incorporating Inspirational Elements and Ambiance
Your creative haven’s mood can inspire your best work.
A well-designed sewing space sparks creativity, turning simple stitches into masterpieces fueled by comfort, inspiration, and personalized charm.
Hang fabric swatches or finished projects as creative displays that double as motivation. Add personalized decor like vintage sewing patterns framed as artwork.
Incorporate sensory elements—a lavender diffuser or playlist of focus-friendly tunes. Consider themed ambiance with mood lighting that adjusts for different tasks.
Remember, your sewing room inspiration doesn’t need to break the bank!
Ensuring Ergonomic Comfort and Accessibility
While your inspirational elements breathe life into your space, your body needs love too!
Your sewing room ergonomics matter—adjust your table height to sit 10-degrees inclined, about 50-150mm above your elbow.
Keep frequently used tools reachable to prevent stretching, and position lighting from behind to eliminate shadows.
Take short breaks every hour, and consider anti-fatigue mats for standing comfort, as your back (and future self) will thank you for the love and care!
Frequently Asked Questions (FAQs)
What does every sewing room need?
Every sewing space needs a reliable machine, comfortable chair, good lighting, sturdy work surface, cutting tools, storage solutions, and an ironing station.
You’ll also want a pinboard for inspiration and easy-access notions organizers.
What is the best flooring for a sewing room?
Laminate or vinyl flooring works best for your sewing room.
You’ll appreciate how easy it’s to spot dropped pins and sweep up thread.
Unlike carpet, which hides needles, hard surfaces protect your feet and rolling chairs move smoothly, making it a practical choice for a room where you’ll be working with small objects like needles.
What not to do in a sewing room?
Like a sailor avoiding treacherous waters, don’t leave pins on the floor, create cluttered workspaces, or place your cutting table far from your machine.
You’ll regret ignoring proper lighting and ergonomic seating too.
What is the best color for a sewing room?
Light, calm colors like light blues and whites are ideal for sewing rooms.
They’ll make your space feel larger, enhance visibility for detailed work, and create a peaceful atmosphere where you can focus.
How to create a sewing room?
Turn your creative dreams into fabric reality!
Start with a dedicated space, organize essential tools within reach, create separate zones for cutting and sewing, make certain of good lighting, and personalize it with inspiring touches.
How to set up a sewing room?
Start by creating three key zones: sewing machine area, cutting table, and ironing space.
Add proper lighting, organize supplies within arm’s reach, and personalize with inspiring décor.
You’ll be stitching in style!
Is it necessary to have a sewing room?
The needle of necessity doesn’t always point to a dedicated space.
You don’t need a full sewing room—just enough space for your machine, cutting area, and essential supplies where you can comfortably work.
How do you set up a sewing space?
To set up a functional sewing space, choose a well-lit area with enough room for your essential zones: machine, cutting surface, and ironing station.
Keep frequently used items within arm’s reach for smoother workflow.
What are some tips for sewing in a dedicated room?
Zone your space for different activities, ensuring proper lighting with natural and task lighting.
Keep frequently used tools within arm’s reach and incorporate personal touches that inspire creativity.
You’ll love having dedicated cutting and ironing areas.
How big should a sewing room be?
You don’t need a mansion! A sewing room can be as small as 70 square feet.
A sewing room with 120+ square feet gives you ideal space for multiple work zones.
Even a corner works for basic projects!
Conclusion
Remember when sewing meant scattering supplies across the dining table?
Now that you know how to set up your own sewing room, you’ve created a sanctuary where creativity thrives and organization reigns.
Whether you’ve transformed a spare bedroom or carved out a nook in your living space, your personalized sewing haven will boost your productivity and enjoyment.
With everything in its place and comfort at the forefront, you’ll find yourself creating beautiful projects with newfound efficiency and passion.


