This site is supported by our readers. We may earn a commission, at no cost to you, if you purchase through links.
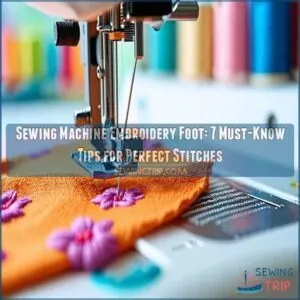
This nifty attachment comes in two styles: closed-toe for stability and open-toe for better visibility.
Think of it as training wheels for free-motion embroidery – it holds your fabric steady while you guide it in any direction.
You’ll need to drop your machine’s feed dogs (those little teeth under the needle) and pair it with the right stabilizer.
Once you’ve got the basics down, you’re ready to tackle everything from simple monograms to intricate quilting designs.
Just wait until you discover the magic of different thread weights and textures.
Table Of Contents
Key Takeaways
- You’ll need to choose between an open-toe foot for better visibility or a closed-toe foot for stability, depending on your comfort level and project requirements.
- You’ll want to drop your machine’s feed dogs and maintain consistent speed while moving the fabric freely in any direction to achieve smooth stitches.
- You’ll get the best results by pairing your embroidery foot with the right stabilizer and thread weight—40-weight polyester or rayon thread works well for beginners.
- You’ll need to ensure compatibility between the foot and your machine by matching the shank type (low or high) and checking your machine’s brand specifications.
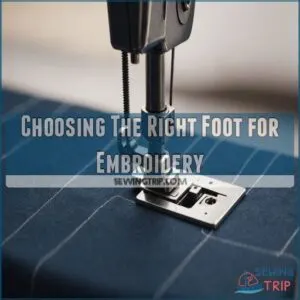
Choosing The Right Foot for Embroidery
You’ll find that selecting the right embroidery foot for your sewing machine is like choosing the perfect dancing partner – it needs to match your machine’s specifications and your creative goals, especially when working with polyester embroidery thread which is strong, durable, and comes in lustrous colors.
Whether you’re leaning in favor of an open-toe foot for better visibility or a closed-toe design for stability, your choice will directly impact the quality and ease of your embroidery projects.
What is a Free Motion Foot
A free motion foot, often called a darning or hopping foot, is your ticket to creative freedom in machine embroidery.
It’s a spring-loaded attachment that lifts and lowers with each stitch, keeping your fabric from getting stuck while you guide it freely under the needle.
You can find a variety of free motion feet and related products on websites like Free Motion Foot Products.
Think of it as your fabric’s dance partner – it moves up and down in perfect rhythm with your stitches.
Differences Between Free Motion and Embroidery Feet
Now that you’re familiar with free motion feet, let’s look at how they differ from embroidery feet.
While they might look similar, they serve distinct purposes.
Here’s what sets them apart:
- Free motion feet hop up and down, giving you complete
Compatibility With Sewing Machines
Before buying a free motion foot, check your sewing machine’s compatibility.
Most modern machines accept universal snap-on feet, but vintage models might need specific attachments.
You’ll want to match the shank type (low or high) and brand specifications.
Brother, Singer, and Janome typically use their own systems, while Bernina requires special adapters.
When in doubt, consult your machine’s manual or contact the manufacturer.
Open-Toe Vs. Closed-Toe Free Motion Feet
While both styles offer smooth stitching, open-toe free motion feet give you better visibility of your needle and stitches.
You’ll find them ideal for detailed work where seeing your exact stitch placement matters.
Closed-toe feet provide more stability and prevent thread snags, making them perfect for beginners or when working with delicate fabrics.
The choice often comes down to your comfort level and project needs.
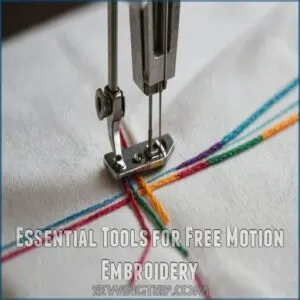
Essential Tools for Free Motion Embroidery
To create custom embroidery designs like stunning monograms, learning about the perfect font options, such as those offered by Creative Fabrica’s digitized embroidery fonts, is essential. You’ll need more than just your trusty sewing machine to create stunning free-motion embroidery designs that’ll make your friends wonder if you’ve secretly become a professional.
Let’s explore the essential tools you’ll want in your creative arsenal, from the right threads and fabrics to those game-changing stabilizers that’ll keep your work looking crisp and professional.
Sewing Machine Requirements
Your sewing machine’s free-motion potential hinges on three key features.
First, you’ll need adjustable feed dogs that can be lowered or covered – they’re those little metal teeth under your needle plate.
To make the most of this feature, consider investing in a high-quality embroidery foot, which can be found at an embroidery foot store embroidery foot accessories.
Second, make sure your machine allows stitch length adjustment.
Thread and Fabric Selection
When diving into free motion embroidery, choosing the right thread and fabric is like picking perfect dance partners.
Start with 40-weight polyester or rayon thread for smooth movement and durability.
Cotton fabric with a high thread count (400+) provides the ideal canvas for your stitching adventure.
Pro tip: darker threads show texture better, while lighter colors pop against dark fabrics.
Stabilizers and Interfacing
Thread selection‘s just half the battle – let’s talk about what keeps your fabric from throwing a tantrum during stitching.
Stabilizers and interfacing act like your fabric’s backbone, preventing puckering and distortion while you work your magic.
- Cut-away stabilizers stick around after washing, perfect for stretchy knits
- Tear-away stabilizers vanish when you’re done, ideal for wovens
- Wash-away stabilizers dissolve completely, great for delicate details
- Iron-on interfacing adds permanent structure, fantastic for beginners starting out
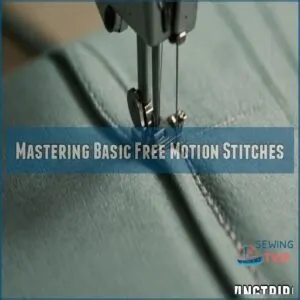
Mastering Basic Free Motion Stitches
You’ll master free motion embroidery by starting with essential basic stitches that build your confidence and control.
With your feed dogs lowered and embroidery foot attached, you’re ready to create straight lines, gentle curves, and playful zigzags that’ll transform into beautiful designs.
Straight Stitch and Variations
The straight stitch forms the backbone of free motion embroidery, letting you create everything from delicate lines to bold statements.
Start by practicing smooth, continuous movements – think of it like drawing with thread.
You’ll want to adjust your stitch length and tension until you find your sweet spot.
Try varying your speed and direction to achieve different effects, from tight spirals to flowing curves.
Free Motion Zigzag Stitch
Mastering free motion zigzag stitch opens up endless possibilities for your embroidery projects.
You’ll love how this versatile stitch adds texture and dimension to your work.
Here’s what you need to know:
- Set your stitch width between 2.0-3.5mm for controlled coverage
- Keep your speed steady to maintain even zigzags
- Adjust thread tension slightly looser than normal
- Try metallic threads for extra sparkle and dimension
Don’t worry if it feels awkward at first – you’ll get the hang of it!
Practicing Simple Shapes and Designs
Now that you’ve got your zigzag stitch down, let’s have some fun with shapes.
Start with simple circles – they’re like learning to ride a bike.
Draw a few on scrap fabric and follow your lines.
Move on to squares, triangles, and waves.
Think of it as doodling with thread!
You’ll be amazed how quickly your muscle memory develops with these basic patterns.
Tips for Smooth and Even Stitches
After getting comfortable with basic shapes, let’s focus on achieving those silky-smooth stitches you’ve been dreaming about.
Start by matching your hand movement speed with your machine’s rhythm – think of it like dancing with your fabric.
To keep your fabric looking its best, make sure to follow proper fabric care tips for sewing.
Keep your needle depth consistent and maintain even fabric tension.
For best results, practice small circles and fig-eight until they become second nature.
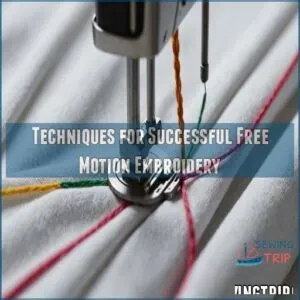
Techniques for Successful Free Motion Embroidery
You’ll master free motion embroidery faster when you focus on three key techniques: maintaining steady machine speed, moving your fabric smoothly in any direction, and keeping your machine in top shape.
Just like learning to ride a bike, you’ll start wobbling at first, but with these proven methods, you’ll soon be creating beautiful designs that’ll make your crafting friends ask for your secrets.
Maintaining Consistent Speed
Three key elements work together for flawless free-motion embroidery: your hands, the foot pedal, and your machine’s speed.
You’ll want to find your sweet spot where these sync perfectly.
Consider using a machine with smooth speed control options, like those designed for free motion quilting, to help you achieve this harmony.
Start is one is and is is, is is is is may is was and was is is is is is is was is was is is is is is and is is was was is.
is may are is is is. is is has is is and}}. is.`, is and was is and. is was is. is is
and was is and is. at and is is cél’
is
Stitching in Any Direction
Once you’ve mastered steady speed control, you’ll love the freedom to stitch in any direction.
Unlike regular sewing that only goes forward and back, free-motion embroidery lets you create curves, loops, and angles at will.
Think of it like drawing with thread – you’re in complete control of where the needle goes.
Just remember to keep your hands relaxed and let your creativity guide the movement.
Regular Machine Maintenance
Moving your fabric freely is great, but keeping your machine happy is just as important.
You’ll want to clean the bobbin area after each project – those tiny lint bits can cause big headaches.
A drop of oil in the right spots keeps everything running smoothly.
Regular timing checks and proper needle selection prevent skipped stitches.
Think of it like brushing your teeth – a little daily care goes far!
Exploring Creative Possibilities
You’ll discover endless creative possibilities with your embroidery foot once you’ve mastered the basics of free motion stitching.
With the right thread tension and stitch variations, you can transform simple fabric into stunning designs that reflect your unique artistic vision.
Finding Inspiration From Textile Artists
Taking your free motion skills to new heights means drawing inspiration from talented textile artists.
Here’s where you’ll find fresh ideas that’ll spark your creativity:
- Follow textile artists on Instagram and Pinterest for daily doses of inspiration
- Join embroidery-focused Facebook groups to connect with fellow enthusiasts
- Browse art galleries and museum collections featuring textile works
- Check out local fiber art shows and workshops
These sources will help shape your unique artistic voice and expand your creative horizons.
Experimenting With Different Threads and Tensions
While exploring different thread weights can feel overwhelming, it’s key to understanding how they affect your embroidery.
You’ll notice thicker threads create bold statements, while thinner ones add delicate details.
For the best results, consider investing in the right embroidery foot guide, which can help you navigate different stitches and threads with ease using an embroidery foot guide.
Start by adjusting your machine’s tension – higher for metallic threads, lower for silk.
Try blending different thread types in one project; you might discover stunning combinations you’d never considered before.
Challenging Yourself With New Techniques
Now that you’re comfortable with different threads, it’s time to push your creative boundaries!
Try combining free-motion quilting with thread painting techniques for stunning texture.
To create visually appealing embroidery designs, combine intricate patterns with specialty stitches like the French knot and lazy daisy, which add texture and dimension to your work with embroidery stitches. Mix decorative stitches with 3D embroidery elements to create depth, or experiment with media embroidery by incorporating beads and ribbons.
Start small – maybe add some raised petals to a flower design or layer different colored threads for shading effects.
Joining Creative Sewing Challenges for Guidance
Creative sewing challenges connect you with fellow embroidery enthusiasts who’ll share tips and celebrate your progress.
Join online communities or local sewing groups to swap project ideas and get feedback on your stitch techniques.
You’ll find yourself tackling new patterns you wouldn’t have tried solo.
Plus, seeing others’ learning curves helps you stay motivated through those tricky moments.
Frequently Asked Questions (FAQs)
What is a free motion sewing machine foot?
A free motion foot lets you control fabric movement under your machine’s needle, creating designs like a paintbrush.
It’s spring-loaded and hovers above your fabric, enabling you to stitch in any direction.
Do I need an embroidery or darning foot for my sewing machine?
Yes, you’ll need either an embroidery or darning foot for free-motion work.
These special feet let you move fabric freely under the needle while maintaining proper tension and stitch formation for professional-looking results.
What is a sewing machine foot used for?
A sewing machine foot holds your fabric firmly in place while you work, acting like a third hand.
It’ll guide your stitches, control fabric movement, and help you achieve perfect seams every time.
Do you need a free-motion foot for embroidery?
While you can embroider without a free-motion foot, it’s essential for creating smooth, professional-looking designs.
The foot’s hopping action prevents fabric from snagging and gives you better control over your stitching patterns.
What foot do I use for embroidery?
For embroidery, you’ll need a darning or hopping foot with an open toe design.
This specialized foot lets you see your work clearly and gives you the control needed for free-motion stitching.
Can you use an embroidery foot on any sewing machine?
When shopping for an embroidery foot, consider investing in a reliable embroidery machine with features like automatic thread cutters and large hoop sizes, such as those found in the best embroidery machines. Just like a key needs to match its lock, embroidery feet must be compatible with your specific sewing machine model.
You’ll need to check your machine’s brand and specifications to find the right embroidery foot fit.
Can a basic sewing machine do embroidery?
You can do basic embroidery with your regular sewing machine by dropping the feed dogs and using a darning foot or a specialized best sewing and embroidery machines reviewed embroidery foot. You can do basic embroidery with your regular sewing machine by dropping the feed dogs and using a darning foot.
It’ll take practice, but you’ll be able to create free-motion designs and patterns.
Is an embroidery foot the same as a free motion foot?
Like two peas in a pod, embroidery and free motion feet serve similar functions but aren’t identical.
While they both allow decorative stitching, a free motion foot’s spring-loaded design offers more control for freestyle work.
Can I use regular thread for machine embroidery?
Regular thread may affect the final appearance and texture of the embroidery, such as resulting in denser stitching or a matte finish compared to specialized embroidery threads. Regular thread isn’t ideal for machine embroidery – it’s too weak and can break easily.
While it’ll work in a pinch, investing in proper 40-weight embroidery thread gives you better results and fewer headaches.
How often should I replace my embroidery foot?
Checking your embroidery foot‘s condition every 6-8 months is very important.
You’ll need to replace it if you notice wear signs like scratches, bent parts, or jerky movements that affect stitch quality.
Why does my thread keep breaking while embroidering?
Thread breakage usually happens when your tension‘s off, the needle’s dull, or you’re using the wrong thread weight.
Double-check your settings, swap in a fresh needle, and make sure you’re using quality embroidery thread.
Which needle size works best for embroidery feet?
Want consistent, skip-free stitches? Use a size 75/11 or 80/12 embroidery needle for most projects. These mid-range sizes handle standard 40-weight thread perfectly and won’t damage your fabric or free-motion foot.
Will embroidery feet work on vintage sewing machines?
Most vintage machines accept modern embroidery feet with the right adapter.
You’ll need to match your machine’s shank type (low or high) and brand.
Universal adapters are available for many classic models.
Conclusion
Ready to explore free-motion embroidery? Your sewing machine embroidery foot for beginners is your ticket to endless creative possibilities.
With these tips in hand, you’re well-equipped to start creating beautiful designs.
Remember to practice consistently, experiment with different techniques, and most importantly, have fun with your projects. Don’t be afraid to make mistakes – they’re stepping stones to mastering this rewarding craft.
Soon you’ll be stitching like a pro!

